What are Faucet Aerators and Why You Should Install Them

What are Faucet Aerators and Why You Should Install Them

As a homeowner, you should constantly look for ways to improve your home functions. Home renovation helps you conserve water and energy, improve user experience and help you save money in the long run. One thing that often gets overlooked is faucet aerators. 

Faucet aerators reduce the pressure at which water comes out of a faucet by reducing the flow rate. This reduces the amount of water used per action and brings down your monthly water bill. The truth is that there are many reasons why installing an aerator can be beneficial to your home, regardless of whether you live alone or with family members. Keep reading.

What is a Faucet Aerator?

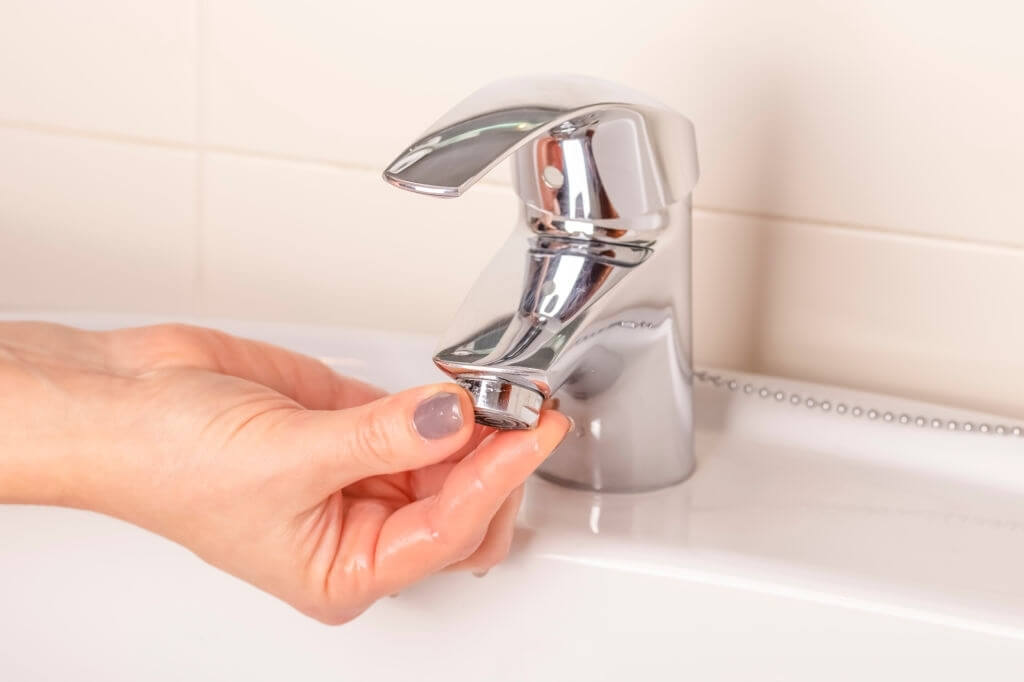
A faucet aerator is a round device installed on the ends of faucets that channel water into steady steam. But without a faucet aerator, your faucet will still deliver water, but the stream will splutter and splash. A faucet aerator helps to reduce splashing and spluttering because it uses a small channel to introduce water from the faucet into a larger channel, creating a steady stream.

The result is that your dishes and laundry will be cleaner, and you can also save water. In addition, an aerator is a small screen that breaks up the flow of water into multiple small streams, adding air in between. Today, a faucet aerator is very common in all kitchen and bathroom faucets.

By diluting the water stream with air, the aerator significantly reduces the volume of water flowing from your faucet. The aerator does this while maintaining the feeling of a high-pressure flow.  Aerators also reduce splashing in sinks.

Choosing Faucet Aerators

Daniel O’Brian, a technical specialist with SupplyHouse.com, says that different faucet aerators are designed to enforce different flow rates. Here are what you should consider before installing a faucet aerator

Consider the Flow Rate When Installing an Aerator

You might be tempted to choose an aerator with the lowest flow rate to maximize savings. You should also remember that you’ll rely on certain gallons per minute GPM minimums on activities such as washing the dishes. However, O’Brian suggests choosing an aerator with a flow rate between 1 and 1.5 gallons per minute GPM is a good compromise between conservation and practicality. 

To wrap it up, there’s no rule here, so your personal preference and use cases will dictate what GPM you should choose. For the most part, it’s considered to install an aerator with a flow rate of 1.5 gallons per minute GPM if you want to conserve water while maintaining functionality.

erators Come in Different Sizes

Apart from knowing how many GPMs you require, you should also know the size of the aerator you’ll need. Faucets come in different shapes and sizes, and aerators come in three different varieties. These varieties include standard, junior and Tom thumb.


Image credit: https://upgradedhome.com/

Other than the diameter, you also have to know if your faucet has a male or female spout. You’ll be able to identify this by locating the sprout’s threads, which are grooves found at the end of the spout. If the threads are outside, then it has a male spout and requires a female aerator. If the threads are inside, then it’s a female spout and requires a male aerator.

erators Provide Different Water Streams

You’ll also want to consider what kind of water stream you would like your aerator to provide. There are three different stream designs to choose from. These include the aerated stream, which is the most common in households.

In the aerated stream, the air is introduced to the water flow, causing the water to come out in even. There is also a laminar stream where the air isn’t mixed with water. The laminar stream also differs from the aerated stream by offering more gallons per minute GPM. The last one is spray stream, where faucets require very few GPMs.

Benefits of Faucet Aerators

Decreased Faucet Noise

Also, by installing a faucet aerator, you will end up having a decreased flow rate without actually needing to cut your water pressure. The water stream that comes out of the faucet is frizzy and mist-like. This makes it much quieter than the concentrated streams.
Decreased Faucet Noise
Image credit: https://kitcheneminence.com/

As mentioned above, water flow can be reduced by up to 35 percent. This is a great benefit as the faucet remains to deliver adequate water without causing any inconvenience or discomfort.

Lower Water Bills

As you save more water, your water bills will also get lowered. Though this might not be noticeable in the short term, it is great to note that the faucet aerator can help you lessen your water expenditure over time.

According to the Environmental Protection Agency, installing a faucet aerator is the single most effective water-saving plumbing change you can make. This is true because you’ll use less water when you use an aerator to accomplish the same task.

More Consistent Water Pressure

A mesh screen allows the water pressure to be more consistent. It also slows the flow of water, making it possible for you to use less water and still achieve the same task. Instead of experiencing pressure changes right away as they happen, the steam will stay steady due to water caught behind the aerator. 

Reduced Overall Water Use

Reducing the flow rate of water may cause some people to feel like they need to use more water to get the job done. However, experts say that using an aerator will not cause you to increase your overall water usage. 

They claim that it is possible for you to reduce your total amount of daily and total monthly water usage. Apart from reducing water consumption at home, installing an aerator means less water usage, thus, reducing your home’s impact on the local and global environment.

Increased Filtration

With a faucet aerator, drinking water is filtered as it comes out of the tap. By using a filter, you can ensure that water used for drinking is free from toxic chemicals and metals. This reduces the overall amount of money spent on bottled water which would have been required if no aerator was installed.

The small screens increase the particle filtration for an individual faucet. A high-quality aerator works with a filtration system to keep your water clean and clearer. Ensure that if you have dirt and debris problems, you deal with them by regularly cleaning your aerator to prevent buildup.

FAQs on Faucet Aerators

How do faucet aerators work?

Faucet aerators work by getting air mixed into the flow, reducing the amount of water passing through the tap.

Final Thought on Faucet Aerators

That’s all about faucet aerators! Make sure you clean your faucet regularly to keep it as clean as possible. Do not forget to use a filter if you need it to keep your water pure and clear.


The post What are Faucet Aerators and Why You Should Install Them appeared first on Kitchen Infinity.


12 Gorgeous Flower Garden Ideas To Add To Your Home

12 Gorgeous Flower Garden Ideas To Add To Your Home

Flower gardening is a fun and rewarding hobby, especially if you know how to do it right. You can use beautiful flower garden ideas to create an amazing backyard oasis that will impress everyone who sees it. These beautiful flowers help you express yourself in ways you never thought possible. All it takes is a little creativity to show your personality through these amazing flower garden ideas. Here are some ideas that can help you start this amazing hobby.

1. Consider Large Garden Areas

Many flower garden ideas are perfect for smaller spaces, but consider planting something other than flowers if you have a large backyard area. If you’re looking for an easy way to create an impressive look that’s also functional, go with ornamental grasses or evergreen trees. These plants are great year-round and require very little maintenance over time.


Image credit: https://www.gardeningknowhow.com/

Choose two contrasting colors and one color family, such as purple or pink. You can then add perennial flowering plants in groups of three to five, and you’ll have an eye-catching flower. Make sure you carry out regular weeding because today’s weed might be tomorrow’s weed patch.

2. Create an Edible Flower Garden

Create an Edible Flower Garden
Image credit: https://www.gardeningknowhow.com/

If your goal is to create a garden as an outdoor kitchen, consider making a dedicated flower bed for herbs and vegetables. If possible, flower gardens should be beautiful and delicious. Vegetables will get a huge boost in productivity with the flowers available when pollinators are drawn to nectar-rich planting beds.

Edible plants such as tomato, squash, and cucumber will blossom in such flower garden beds. In addition, the beneficial insects that rely on floral nectaries will help control vegetable pests, thus, reducing the use of pesticides.  You can get ideas on types of squash to grow here so you know which one can work for your flower garden.

3. Plant Flowering Plants on Trellis

Trellises and topiary create focal points in the garden, especially when consistent color and style. When creating an edible flower garden, place trellises along walkways and at the edges of beds to lead visitors through the garden and to help keep plants upright as they grow. Make sure you define borders against which to plant flowers of varying heights.

They provide support for climbing vines such as morning glory, cucumber, and sweet potato, and vertical growing flowers such as clematis. Trellises also provide structure for flowering vines that may not need support, like the passion vine. You may also trellis-filling vine in one season from seed with morning glory and moon vine.

The passion vine can climb up an arbor or trellis to create a lush canopy of green leaves. Passion flower blooms are attractive to bees, which adds to the benefit of an edible garden. Gloxinias, petunias, and their foliage can also bring beauty to your trellis.

4. Combination of Bogs and Rain Gardens

Brighten that soggy spot in your backyard with a rain garden or bog garden. And when planning a bog garden, consider plants that love both full sun and wet soil. Flowering plants that thrive in bog gardens include candelabra primrose, cardinal flower, and yellow iris and leopard plants.

You can also introduce fun and funky in your wet by including carnivorous pitcher plants. Make sure your garden rain never dries out. A natural bog garden will be replenished by rainfall, but a dry spell hits; ensure you help it out with a hose. 

If you see frogs, salamanders and turtles, know that a bog environment is present, so use it to plant some rain garden plants. If you don’t have a natural depression that collects water, create your own by sinking a plastic kiddie into the ground. You can use pond liner to create a bog garden as long as you disguise the edges with rocks and fill the bottom with peat moss and sand.

5. Consider Flower Garden Paths

When you think of your garden, do you see only the flowers that need to be planted? A flower garden is perfect for an area where you can walk through and view the various blooms. If your current yard doesn’t have one existing place, design a path with bricks or stones, so everyone has easy access.

Consider Flower Garden Paths
Image credit: https://www.thespruce.com/

But keep in mind that you’ll need to choose flowers that can handle foot traffic. A flower garden path should comfortably accommodate a wheelbarrow and a cart with room to turn around. Make sure you mulch your plant beds as much as possible to keep them flourishing.

6. Butterfly Flower Garden Ideas

The butterfly garden works especially well near a porch or patio area. Butterflies love water, so add a small pond, and you’ll be treated to the sight of not only butterflies but frogs and lizards as well. However, some beautiful flowers may fall flat when it comes to attracting butterflies. 

Butterfly Flower Garden Ideas
Image credit: https://www.loveyourlandscape.org/

Some butterflies are designed to extract nectar from particular flower shapes, meaning that some blooms sound like the dinner bell while others miss the mark. Even though butterflies love bright colors, it’s important to include flowers with rich nectar stores easily accessible in shallow flowers. 

Butterflies and other pollinators will stay in your garden throughout summer as long as you include seasonal blooms in your garden. This is because their food sources are usually most plentiful when the weather is hottest, and most plants bloom during springtime or summer.

Butterflies will truly thrive with a combination of butterfly-friendly flowers, annuals, and perennials, which they can land on for rest periods between nectar-feeding sessions.

7. Combining Tulips with Annuals and Perennials

Create a harmonious arrangement with this amazing flower garden idea. Extend your garden blooms with tulips, annuals, and perennials that will come back each year with less maintenance. Make sure you space out your flowers so that tulips stand taller than your shorter, low-growing annuals and perennials. 

When winters are cold, your tulips will return for several years but won’t survive when grown in warmer, moist climates. A flower garden bed with a blend of red and yellow tulips will make the whole bed look amazing. 

Create that festive effect in a mixed flower bed by planting clear, primary tulips. Daylily, catnap, salvia, and bells of Ireland are some of the great tulip companions, and once you should reconsider when recreating a gorgeous full flower garden bed.

8. Pallet Flower Garden Ideas

Flowers that provide color with the way you want the artwork to appear are a good start for any design. For example, mixed white and yellow flowers will provide interest for your garden whether you want a spring or summer look. The tulips will be particularly appealing in beds where most flowers are filled with one particular shade.

If you have a lot of flowers of the same style, plants with distinctive features will draw attention. Choose something really small tulip for this circumstance. Chives will certainly give you an option to create a variety of patterns by simply including or eliminating plants from your flower bed.

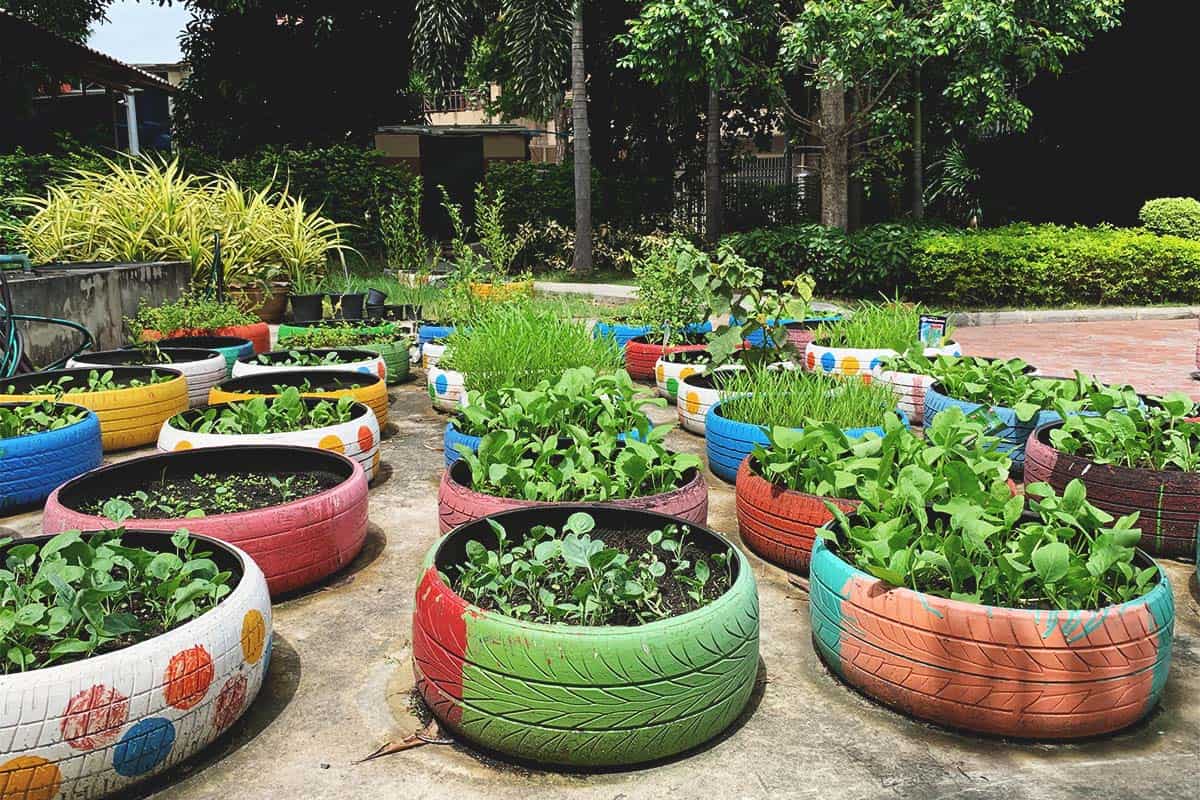
9. Recycled Rubber Tires Flower Garden Ideas

You can never go wrong with turning your old tires into a garden ornament. Rubber tires are tough and long-lasting, making them fantastic materials for your yard or business’s landscape design. This reclaimed rubber tire flower garden idea is a great way to recycle old tires while beautifying the area at the same moment.

Recycled Rubber Tires Flower Garden Ideas
Image credit: https://morningchores.com/

If you have an old bike lying around, make use of its tire as well. If you have some scrap tires lying around, turn them into a flower garden. This will not only make your lawn look good but will also help you avoid worrying about tires taking your space or disposing of them.

10. Potted Flower Garden Ideas

There’s nothing more pleasant than a stunning potted flower garden in the backyard. So take your time and plan it well so you can enjoy it for many years to come. When it comes to convenience, nothing beats flowers planted in clay pots and half buried in a bed of gravel.

Potted Flower Garden Ideas 
Image credit: https://nextluxury.com/

It doesn’t have to be complicated – using a simple pot will also do the trick. You can also bring in some hanging baskets if you have a nice outdoor space for them. To achieve a harmonious and colorful look, choose a different flower for each pot. Round your flower bed with pots.

A circle of purple, white, red, and white striped Bizzy lizzies spread out from the pine ringed by stonecrop, moss, and pots of pink and white Bizzy lizzies. And if you want to enjoy the view from your home or balcony, consider adding some cascading plants, vines, or grasses, which will make it look like an entry from fairy tales. Add in some wooden trellis and little lights too to complete the look.

11. Formal Flower Garden Ideas

Of course, the clean lines and tidy layout of a formal garden will provide a respite from the stresses of modernity. Adding some flowers on top of that grass and well-cut boxwood shrubs will be the finishing touch to the garden’s look. You can stick one or two flower varieties in the formal garden.

Lavender, roses, tulips, hydrangeas, and salvia are a few things that you can use in your formal garden. You can mass the flowers around a central fountain, use them to edge paths, and fill in geometric hedge plantings with blooms.

12. Flowering Cottage Flower Garden Ideas

You can turn your cottage garden into plant beds with the help of perennials, ornamental grasses, and flowering shrubs. Roses, lavender, cosmos flowers, lilies, snapdragons, and hydrangeas are among some of the plants that you might use to make up your cottage flower garden. 

Grasses like colorful ornamental rye can be used as a ground cover to fill in spaces between other flowering plants. Perennials like bleeding heart, lupines, black-eyed Susan, and daylilies are among the many types of flowering perennials that you could use for your cottage garden.

FAQs about Beautiful Flower Garden Ideas

How do you lay out a flower bed plant?

Arrange border plants with plants taller than 2 to 3 feet tall, then place them in the back with the mild-size plants from 10 inches to 2 to 3 feet tall in the middle. After that, layout shorter plants in the front of the bed. It’s also best to use groupings and drifts of plants for a natural feel.

How do you plant a flower garden for a beginner?

First, make sure you remove the weeds and amend the soil. If it’s a new bed, put down a layer of landscape fabric to block weeds and top with six inches or more garden soil and topsoil. If your area doesn’t receive much sun, you can consider growing shade-loving flowers as they blossom in such areas.

Final Thought on Beautiful Flower Garden Ideas

Build your corner of paradise by adding different types of flowers in your backyard. You can enjoy your backyard for gardening, spending time with your loved ones, or just relaxing.


The post 12 Gorgeous Flower Garden Ideas To Add To Your Home appeared first on Kitchen Infinity.

Types of Flat Roof Material Options

Types of Flat Roof Material Options

Flat roofs are the most economical type of roofing. They offer great protection to your home or commercial building against weather elements while keeping the building’s interior dry and warm. Although flat roofs provide you with a lot of benefits, they also have their disadvantages. 

Therefore, knowing what type of flat roofing material you’re going to use when building your own house is very important. This will help you make better decisions about maintenance and replacing an old flat roof system. It will also help you communicate and relate better to potential roofing contractors as you’re looking for the best roofing company for your project. 

Here are the most common types of flat roofs:

Build Up Roofs or BUR

Build-up roofs or BUR type of flat roofs consist of a series of layers applied over the substrate. These layers, usually asphalt and felts, are necessary for getting watertight protection from your roofing system. Like other types of roofs, these systems will last you a long time if you do regular maintenance on them and get rid of any moisture build-up.


Image credit: https://www.homeadvisor.com/

Bur flat roofs are often referred to as tar and gravel roofs. They’re made of layers of materials bonded together by asphalt tar and hot tar to a liquid state and then mixed with gravel to ensure the mixture maintains its strength and durability.

This flat roof material option has solved the low-pitch roof problem for ages, a challenge that asphalt shingles could never handle. If you’re also concerned about fire safety in your building, then built-up roofings can meet higher fire ratings.

Pros of Built-Up Roof

Safety Against Fire

Built up roofings are known to be more rugged than other flat roof material options. They provide greater protection against heavy snow loads and high winds. Since they can handle these weather conditions, you don’t need to worry about damages, leaks, or breakage.

Most of all, built-up roofs are very safe against fires because their layers are made of non-combustible materials. They won’t increase the risk of fire or suffocate it completely.

Longevity

Built up roofings last longer because of the thick layers and the waterproofing materials used. This means you will spend less on maintenance and repairs for your roof.

Multiple layers also prevent leaks and tears, thanks to their heavy-duty construction. It won’t turn into a major problem that requires replacement or extensive repairs when a leak arises since you can spot it easily.

Cons of Built-Up Roof

Weight

The main downside to a built-up roof is its weight. It’ll be difficult for you to install one yourself because it will require a lot of time and effort to lift all those layers, particularly if you need to reach high altitudes. The materials used are also heavy, such as the gravel that’s designed to protect against fire.

Modified Bitumen Roofs

Modified bitumen roofing looks similar to built-up roofing, only that they use a single layer of adhesive roofing material, making it feasible for DIY installations.

Modified Bitumen Roofs
Image credit: https://coxroofing.com/

Modified bitumen roofs are only made of two layers and piles. These include a base sheet and a cap sheet. Both base waterproofing layer and a surface layer bonds to a material that resembles regular asphalt shingles.

dvantages of Modified Bitumen Roof

esthetics

You can find a number of modified bitumen roofing designs that mimic the traditional asphalt shingle roofs. This means that you can easily select a variety of materials to match your building exterior, which may have parts covered by asphalt shingles.

Easy to Install

The installation process of modified bitumen roofing is relatively the same as traditional asphalt shingles. This also means you can easily find a contractor for this project.

Insulation and Energy Efficiency

Because of its dark color or black, modified bitumen roofings absorb heat from sunlight. This makes it more energy-efficient than traditional roofing materials such as metal roofs that reflect this heat to the environment.

Cons of Modified Bitumen Roofs

Torch Down Systems

The torch-down systems can be a fire hazard. That’s why it’s not recommendable to install torch-down modified bitumen roofs on occupied buildings.

Durability

Another downside of modified bitumen roofing is that it’s not as durable and resistant to foot traffic and blown debris as other flat roofing materials. They also last about 10 to 20 years before they need to be replaced.

Fragility

These flat roofing materials are very fragile compared to other roof types, which are more resistant to hail and falling branches. When installers try to walk on your roof to put it in, it’s more fragile to break down.

EPDM Rubber Roofing

EPDM rubber roofing is an affordable solution for flat roofs. It’s also designed to last many years without the need for repairs or replacement, but it can get damaged by severe weather conditions like strong winds and hail. EPDM is a very durable synthetic rubber roofing membrane.

Rubber roofs are easy to recognize and are installed in two basic ways: ballasted or weighted down with a smooth river stone and adhered or glued down. The adhered rubber roofs are easy to spot since they’re black and are stretched over an insulation board or fiberboard.

Pros of Rubber Membrane Roofs

Easy Maintenance

Leaks in the rubber membrane roof can be easily repaired at a very cheaper price. Finding these leaks is also easy and straightforward.

Easy Installation

The rubber membrane material comes in a large single-layer roll, making it easy for the roofing contractor to work with. Thanks to its elastic and flexible nature, you also don’t have to use blowtorches to seal the seams together.

Resistance to Elements

The rubber is elastic, meaning it will naturally expand in the summer and contract in the winter. It can also withstand extreme temperatures without wear. Plus, rubber is fire retardant and naturally impact resistant.

It’s Affordable

The average installation price per square foot is around $2.50, making it more affordable than flat roofing systems.

Cons of Rubber Membrane Roofs

Shrinkage

While expandable, the rubber does shrink through time. This may lead to insufficient sealing and leaks, which will cost you additional money for repairs and maintenance. If left untreated, it could also cause damage to your other roofing systems, such as the flashing and insulation. It’s also harder to patch up compared to other materials like TPO or PVC.

Thermoplastic Membranes PVC or TPO

A thermoplastic roofing membrane is a more durable roofing system compared to rubber membrane roofs. It will be white or grey, but it can also come in other colors. There are two types of thermoplastic membrane roofing. These include polyvinyl chloride PVC and thermoplastic olefin TPO.

Thermoplastic Membranes PVC or TPO
Image credit: https://www.chaffeeroofing.com/

PVC roofing is the third most-produced synthetic plastic polymer. It’s also easy to install, thanks to its flexibility. If you’re looking for the sturdiest membrane among the two, then PVC is the right choice. On the other hand, TPO roofing is considered a more eco-friendly variation of the thermoplastic membrane roof. It’s best at UV absorption and flame resistance.

Pros of TPO Roofing

Cost-Effective

Like PVC roofs, TPO roofs come in at a more budget-friendly installed cost of about$3.50 per square foot.

Energy Saving

White coatings can reflect heat and keep the surface temperature lower than that of a dark roof.

Easy Maintenance

You don’t have to pressure wash this roofing material because the single-ply roof membrane’s surface is laminated. It’s very difficult for algae and fungus to grip in.

Lightweight Material

With its single-ply nature, this lightweight material can perform well over low slopes. It weighs an average of half a pound per square foot, making it an excellent choice for older structures that cannot withstand the pressure and load of a built-up roof.

Cons of TPO Roofing

Takes Longer to Install

You will need to order new tools for this product, but don’t worry, it is still a far less expensive material to install than metal roofs.

Spray Polyurethane Foam Roof

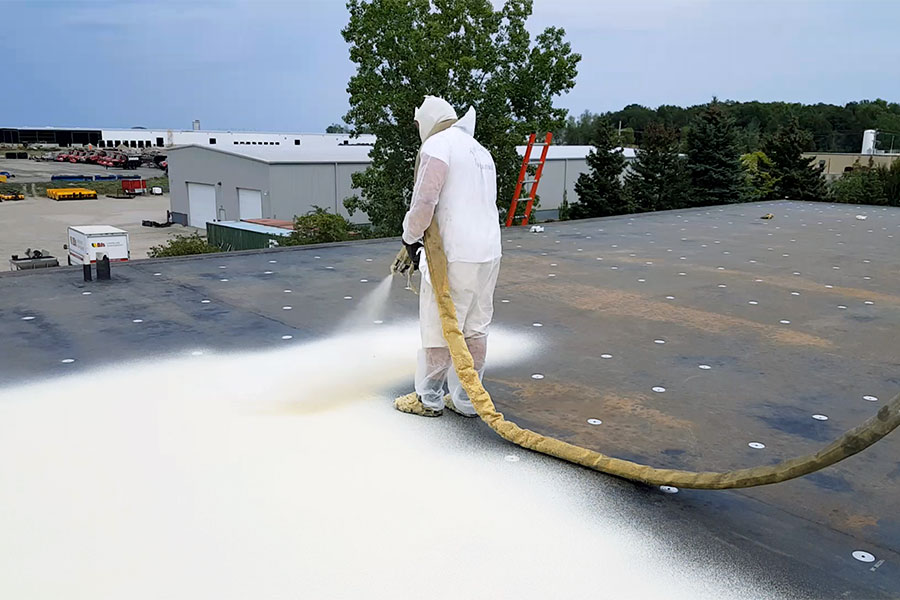
A spray foam roof begins with a layer of high-density polyurethane foam sprayed from a wand or sprayer. After that, the contractor will spray a layer of waterproof elastomeric topcoat. This roofing type will often have a grey or white finish.

Spray Polyurethane Foam Roof
Image credit: https://www.americanweatherstar.com/

Pros of Spray Polyurethane Foam Roof

Easy to Install

This type of roof is very easy to install. You can expect to pay about $1.15 per square foot for this type of foam roofing material without topcoats.

Cons of Spray Polyurethane Foam Roof

Expensive Top Coat

The downside to this type of roof is that it is the most expensive to install. Some homeowners have also reported having problems with bubbles after installation.

Metal Flat Roof

This type of roof is a great option if you want a long-lasting solution. The metal roofs come in many different colors and styles so that they can blend in with your home’s exterior design. Metal roofing thrives in dry, warm climates. 

Metal Flat Roof
Image credit: https://roof-experts.ca/

The most used material is always aluminum because of its malleability. You can also choose other metals such as tin, copper, steel, and zinc.

FAQs on Different Types of Flat Roof Material Options

What is the best material to use for flat roofs?

This will depend on your budget and style, but PVC roofing is considered the best flat roof material.

What type of roof is a flat roof?

A flat roof is a roof that is almost level with many types of sloped roofs.

Final Thought on Different Types of Flat Roof Material Option

As you can see, there are several types of flat roof material options available. These flat roofing offer a few perks that even commercial building owners can enjoy. Before making any purchase decision, make sure you consult with a reputable flat roofing contractor so you can make the best choice for your house.


The post Types of Flat Roof Material Options appeared first on Kitchen Infinity.

Did you miss our previous article…
https://chefbuano.com/?p=830

Feng Shui Tips for a Bed Aligned with the Door

Feng Shui Tips for a Bed Aligned with the Door

You’ve just moved into a new home, and you’re looking for some Feng Shui tips to help improve your health. The first thing you’re probably learning is how to feng shui your bedroom and the bed becomes the first priority in this. The bed is a very important piece of furniture in your home because it represents you. A bed aligned with the door is one of those bedroom Feng shui mistakes that can affect your energy flow.

This mistake may cause illness, bad luck, or even relationship problems. Therefore, your bed placement affects you in your conscious and unconscious states. This article will give you some tips on how to handle a bed aligned with the door based on good Feng Shui principles so that your bedroom would be a more peaceful and healthier place to stay in every day.

Commanding Position

In Feng Shui, you need to place the bed using the principle of commanding position. Your bed should be located where you can see the door to the bedroom when lying. Your bed shouldn’t be directly in line with the door. According to the command position principle, place your bed diagonal from the door.


Image credit: https://redlotusletter.com/

If you can’t be in the commanding position, don’t worry. You can correct the bed by using a mirror. Place the mirror in a place where you can see the reflection of the door when you’re in bed.

Place the Bed in Relationship to Doors and Windows

A door and a window facing each other in a bedroom can drain its energy. Avoid sleeping with your bed located between two doors or windows. If your room size is limited, make sure the windows are towards the side of the building rather than front or back, where you get more sun exposure, especially sunrise and sunset rays. The best position for your bed is facing the door.

Place the Bed in Relationship to Doors and Windows
Image credit: https://cf.ltkcdn.net/feng-shui

Avoid having your feet pointing straight out the door. This is known as coffin position. You can also call it the bed-facing door superstition. If the only place for your bed is in line with your door, that is the coffin position, you can still correct it. You can hang a faceted Feng Shui crystal ball halfway between the door and the bed.

Place Headboard Against a Solid Wall

Make sure the headboard of your bed is against a solid wall rather than an open space. This means that you should be supported from the back. Avoid placing your bed with the headboard in the middle of the room. Do not also let the whole bed float in the middle of the room. A headboard facing away from the main door can create a placement problem with different consequences of chi.

The wall behind you is very important because you’ll need it to support yourself. Additionally, avoid windows behind the head of the bed, especially if you’re on the ground floor or have eye issues. Make sure you have a solid bed behind you and not a window.

Consider Beams, Soffits and Sloped Ceilings

For the best bed placement, make sure your roof beams are above you or do not block them. If there are beams, they should be short and fluffy so as not to cause a problem. It is best if they’re just below the ceiling because it can still be a distraction when lying down.

The area above your bed should be free of beams, soffits, and sloped ceilings. These architectural features above your bed can create unnecessary pressure. If you can’t avoid these features, use the drape fabric to conceal the ceiling feature. If it is not a large beam and soffit, blend the feature into the ceiling by painting it the same color. This will make the dropped ceiling areas less oppressive.

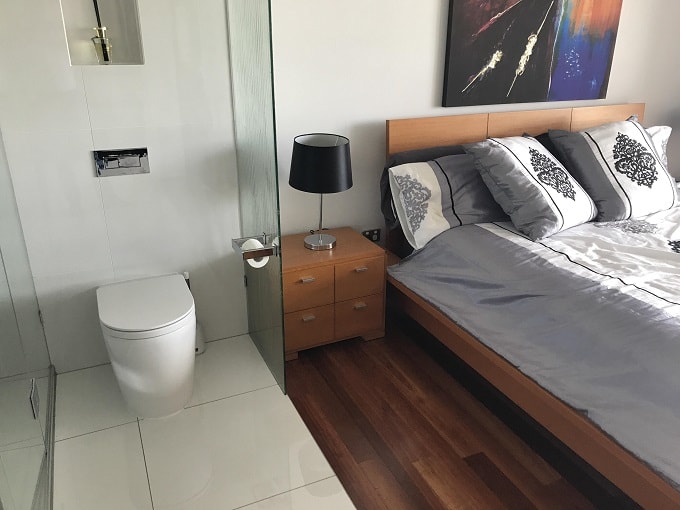
Locate Your Bed Away from the Toilet Wall

Toilet walls are not usually the best place to sit on your bed. The vibration and flow of chi energy are much too powerful. This can cause lots of problems with sleeping if you have your head against the toilet wall, so be sure to position your bed away from this area.

Locate Your Bed Away from the Toilet Wall
Image credit: https://fengshuinexus.com/

Consider the Space on Both Sides of the Bed

If it’s an adult bedroom, you should have open space on the left and right sides of the bed. A good chi recommends not to place your bed with one side up against the wall.

Bed and Bathroom Door Placement

The main bedroom door is a primary concern when placing your bed in the room but don’t overlook other doors. The placement of your bed and the location of your master bedroom’s bathroom door can create very uncomfortable chi problems. Generally, it is not good to place a bed in such a way that the headboard is next to or placed directly in front of the doorway unless you plan on doing some yoga stretching exercises every morning upon waking.

In Feng Shui, bathrooms are a place from which energy leaves the house. If your bed must face the bathroom door, make you close both the bathroom door and bedroom door. You can hang a mirror on the inside of the door facing the bathroom. The mirror will reflect any negative energy leaving the bathroom back into it.

void Electromagnetics in Your Bedroom

Avoid placing your bed next to any electrical sockets or cables, especially those connected directly to the wall. If you tend to watch television in bed, it is best not to have an electrical socket located behind the television. Also, keep electronic devices such as alarm clocks, wireless phones, and printers at least one foot away from where your head will lie every night.

If you must have that TV set in your room, cover it before you sleep. The same goes for laptops and phones. For you to have a good night’s sleep, these electronic devices should not emit radiation near your body.

The congested electrical wires all over the house is also another bad feng shui in the bedroom. Try to put them away or at least cover them up. You shouldn’t also have a desk in your bedroom to optimize the space for good chi.

Choose Restful Art

The artwork in your bedroom will speak a lot about your private life. If you’re looking to attract your partner and still keep things in line with your taste, the artwork you place in your room shouldn’t depict solo persons or objects.

When practicing Feng Shui with artwork in your room, there should be an element of a pair of pieces. Save family photos for other rooms and not your bedroom. Keep the artwork up at eye level. You can also take it higher to increase life force energy. Also, consider perfect colors that match your feng shui bedroom. You can choose the perfect feng shui front door color and make sure you don’t go wrong with anything.

Detoxify and Declutter Your Bedroom Feng Shui

Detoxifying your bedroom is very important because it will help get rid of chemicals and toxic elements from your bedroom and replace them with organic ones. A good start is to use green products and non-toxic cleaning products. Infusing your room with some sweet orange oil can bring good energy and make the room smell a little bit nicer.

Detoxify and Declutter Your Bedroom Feng Shui
Image credit: https://www.thespruce.com/

Start with the clutter under the bed because it may affect you while sleeping by causing subconscious blocks in your life. A good Feng Shui is to clear the space under the bed so that the energy can flow freely.

FAQs on Feng Shui Tips for Handling a Bed Aligned with the Door

How can you protect yourself if the bed faces the door?

If you find yourself sleeping directly opposite the bedroom door, you can use a floatboard. If you feel trapped by the floatboard, you can create a shield by placing your chest at the end of your bed filled with heavy blankets or a low screen between the bed and the door.

Which way should your bed face Feng Shui?

According to Feng Shui, you can position your bed in different positions and still enjoy it. Your bed can face East, South East, West, North West, and South West. If your bed faces west, you can create the best condition for a good night’s sleep.

Final Thought on Feng Shui Tips for Handling a Bed Aligned with the Door

As you can see, Feng Shui is an ancient practice designed to enhance your well-being and life based on the alignment of particular arrangements and objects around your house or workplace. Try to implement Feng Shui to manage your room’s energy and transform your well-being and life for the better.


The post Feng Shui Tips for a Bed Aligned with the Door appeared first on Kitchen Infinity.

Did you miss our previous article…
https://chefbuano.com/?p=793

14 Bad Cleaning Habits You Need to Break

14 Bad Cleaning Habits You Need to Break

Cleaning is a never-ending task. It’s something everyone has to do, and no one wants to do, especially when we think about the time it takes and how much effort it requires. We all have bad habits when it comes to cleaning our homes, but these mistakes can cause damage not only to your home but also to your health. 

You need proper tools and methods to get the job done right. With this guide, you will learn about bad cleaning habits to stop doing to live in a cleaner environment.

1. Using Dirty Cleaning Tools

When it comes to bad cleaning habits, cleaning tools are the first culprit. How can you expect the best results when using dirty cleaning tools to clean your home? If your washing machine has some odor from built-up bacteria from some detergent residue, it will make your clothes stink. 

If your vacuum bag is filled with dust, it won’t do a good job sucking up anymore. A dirty mop and a dirty sponge will push around more soil and bacteria. So, take your time to thoroughly clean tools by emptying completely and washing them in hot water after every use. Also, use enough disinfectant to kill the germs. Replacing new tools is also a good idea.

2. Leaving Wet Towels and Shower Curtains Bunched Up

If you’re tired of spending too much time in your laundry room scrubbing mold and mildew on your bathroom surfaces, don’t worry. You can easily break these bad habits and have more time to focus on other tasks. Avoid leaving wet shower curtains bunched up and wet tower curtains in a heap on the floor.


Image credit: https://www.enchantehome.com/

Always hang up your non-slip shower mat after each use. By hanging the shower curtain, it will dry more quickly and discourage mold and mildew growth. By hanging wet towels to dry, you’ll be able to re-use them without having to wash out the mildew smell.

3. Leaving Dirty Dishes on the Sink

Your dirty dishes are a breeding ground for bacteria and germs that you don’t want in your kitchen. Leaving dirty dishes in the sink is a jackpot for hungry insects. Rinse off your plates before stacking them in the sink. Load the dishwasher every time it’s full, so you won’t have to worry about leaving food scraps from last night’s dinner sitting out on the counter overnight. 

You can also break this bad cleaning habit by training everyone in your household to either put the dishes in the dishwasher or wash them immediately. After washing your dishes, wash out your sink with hot soapy water, spray with Vital Oxide, and let it dry.

4. Using Disinfectant Wipes

Don’t use disinfectant wipes on surfaces that food touches. This includes countertops and cutting boards. Wipes are less harsh, but they don’t do a great job of killing bacteria. 

Using Disinfectant Wipes
Image credit: https://www.lysol.com/

If you want to keep your kitchen clean with disinfecting wipes, it’s important to understand that you can’t swipe on everything and expect your home to be germ-free. Make sure you buy wipes that can kill viruses and bacteria. Also, ensure that you’re using these disinfectant wipes the right way; otherwise, you risk cross-contamination. For better hygiene learn how to make disinfectant wipes for home use.

5. Allowing Paper Clutter to Accumulate

Even with the emerging technology, including online billing and banking, there’s still a mountain of papers that ends up in our homes. These include magazines, newspapers, flyers, school papers, and projects. These papers tend to pile up. However, this is one of the easiest bad cleaning habits to break.

Instead of letting the paper pile up, designate a place in your kitchen for all this paper clutter. Also, keep a shredder and recycling bin nearby and sort it at least once a week. For children’s school papers and projects, opt for a designated storage bin, select a few to save space, frame a few, and hang them up. Learn how to declutter your room properly and you’ll never have trouble with cleaning.

6. Ignoring Product Directions

This is especially true for general cleaning supplies like dishwashing soap, general cleaners, and fabric softeners. Product directions are there for a reason. Ignoring it is a surefire way to make cleaning fail. Also, not following product directions might render the product useless if the solution is wrong. 

The manufacturers will have recommendations on using the product, how much you need, and where it should be used. Application methods are also different, so it’s always important to read the label. This also applies to cleaning tools; follow the manufacturer’s instructions to prevent injuries.

7. Wearing Outside Shoes in the House

This is especially important when you have wooden flooring because this can cause scratches on the surface. It’s highly recommended to remove your footwear before entering the house. This way, you can keep your floors looking new longer. 

If needed, apply an environmentally friendly wood polish to clean and protect the wood from damage caused by extreme weather elements. Whether your entryway is through the mudroom or the front door, make this cleaning habit simple by providing a bench and a chair for shoe removal. Get a shoe tray closed for wet or muddy shoes. Plus, provide a bin to collect each family member’s footwear.

8. Using Harsh Cleaners

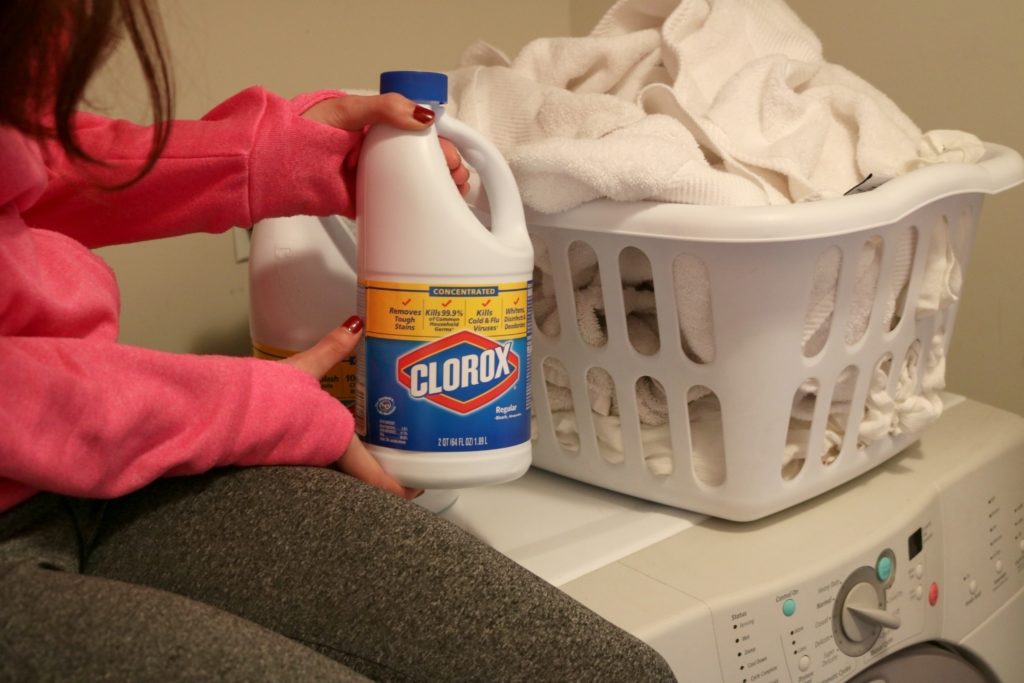
Using too much cleaner can be a bad cleaning habit; using a harsh cleaner can damage your floors. Using harsh chemicals can strip the finish of wood floors, leaving them dull looking and requiring you to refinish them. For example, chlorine bleach is good in disinfecting, but that doesn’t mean it’s good on all surfaces.

Using Harsh Cleaners
Image credit: https://4.bp.blogspot.com/

Chlorine bleach is not a good dirt and grime remover, and the fumes can be toxic. It’s important to use gentle cleaning products to produce the best results. One of the safest and widely used home cleaning products is cleaning vinegar

9. Not Completing Tasks

Yes, we all get distracted while cleaning, but always try to finish a task once you’ve started it. For example, if you’re dusting the living room, don’t stop for a social media break until you’ve dusted the entire room.

If you have a few minutes to clean, start by removing the clutter and putting items in their proper place. Then if you’re interrupted, you can come back later to do the deeper cleaning.

10. Waiting Until the Cleaning Task is Overwhelming

If you have a huge cleanup job ahead of you, don’t try to bite off more than you can chew. Break the task into small pieces that are easier to manage. Don’t wait for the task to become overwhelming. Putting off cleaning and waiting until the task becomes overwhelming is one of the worst cleaning habits to break.

But if you do a bit of cleaning each day, like load, empty the dishwasher before the dishes pile, vacuum one or two rooms, and complete your load of laundry, then cleaning the entire house will not be as overwhelming.

11. Relying too Much on Bleach

Of course, bleach has been a household staple long cleaning and disinfecting agent. But it turns out that bleach isn’t as good a cleaner as once thought. Bleach is intensely harsh and can irritate the eyes, lungs, and skin. 

Relying too Much on Bleach
Image credit: https://cominguprosestheblog.com/

The fumes are also toxic. A better alternative is baking soda or vinegar. If you still doubt how harmful bleach is, these reasons should motivate you to skip the bleach next time you begin your spring clean.

12. Leaving Your Bed Unmade

This might not be a big deal in the colder months when you’re bundling up under your covers and keeping your home well heated. But in the summertime, leaving bed linen unwashed can pose a real threat to your health. Experts recommend changing sheets every two weeks for best cleaning results.

Even if the rest of your bedroom looks neat and clean, the unmade bed can make it look messy. Making your bed each morning will keep the rest of the room and the entire house organized. You can as well make this task simple by selecting bedding that is easy to spread up neatly.

13. Storing Cleaning Products Incorrectly

Do you spend a lot of time trying to find your cleaners and tools? Well, this bad cleaning habit is quite easy to break. Gather all the cleaning supplies you’ll need for each area of your home and store them close to that area. Place them in a plastic carryall for bathroom cleaners and stash them on a shelf or under the sink. 

You can also create two baskets of supplies if you have upstairs and downstairs bathrooms. Keep your dusting and furniture cleaning products in the kitchen. And all your laundry products should be kept in the laundry room. Make it easy to get started, and this will likely lead you to clean more often.

14. Hoarding Food in the Refrigerator

It’s a common bad habit to keep too much food in the fridge. Resist this temptation as your refrigerator does not have an infinite capacity and cannot store half-empty containers of milk, cream cheese, cottage cheese, or yogurt that will not be used up within a few days.

Hoarding Food in the Refrigerator
Image credit: https://lh5.googleusercontent.com/

If you and your family hate leftovers, then don’t stash them in the refrigerator. Go ahead and toss it instead of storing it because improperly stored food promotes mold and bacteria growth, making cleaning the refrigerator daunting. 

FAQs on Bad Cleaning Habits You Need to Break

Can cleaning make you sick?

Yes and no. Cleaning will not make you sick, but it can make you sick if you use improper cleaning methods. Plus, using harsh chemicals that can cause mild irritation and affect your health negatively.

Is it ok to clean regularly?

If you maintain a cleaning routine, it will be easier to break these bad habits. Cleaning should not harm your health or make you feel worse.

Final Thought on Bad Cleaning Habits You Need to Break

Whether it’s the cleaning and our lives in general, we all have these bad habits. We like cutting corners when cleaning. Everyone wants to make their chores easier and get them done faster. However, taking these shortcuts can have a lot of negative impacts on your life. 

That’s why it’s important to break bad cleaning habits. They might be tolerable or even bring some benefits, but they shouldn’t be part of your life if you want to live a healthy and cleaner lifestyle.


The post 14 Bad Cleaning Habits You Need to Break appeared first on Kitchen Infinity.
Did you miss our previous article…
https://chefbuano.com/?p=787

17. Best Kids Playroom Ideas

17. Best Kids Playroom Ideas

Kids grow up way too fast. Before you know it, they’re teenagers and want nothing to do with the family room. But for now, there’s still plenty of time to make memories in your kid’s playroom. We all know that keeping kids entertained is important because if they are not engaged, their minds could be wandering elsewhere. And of all the rooms, the playroom is where all the activities happen.

And we also know that having a space where your children can play safely away from traffic is essential for families who live in small homes or apartments. With these ideas, you will create an environment that will keep your kids playing for hours without getting bored while giving them the freedom to explore and learn about the world around them through games and toys.

The best part? You’ll save money because many of these projects require supplies already found around the house. From arts & crafts to reading nooks, this list has something fun for your young ones. Here is the list of kids’ playroom ideas to consider.

1. Kids Basement Playroom

Playrooms aren’t just for the upper class. Here’s a way to make a play space in your basement where kids can have fun and play safely while you save money on rent with an unfinished room. The interior experts at Eisner Design, an architectural firm based in New York City transformed a dreary basement into a spectacular play space where kids can enjoy irrespective of their age. 

The combination of toys and board games brings out the joy of playtime with your kids. On top of the floor, there are soft, washable carpet tiles by Flor and the small table and chair set are adorable for the kids to enjoy.

2. A Colorful Kids Playroom Using Bright Colors

Color is the key when it comes to kids’ playroom ideas. Paint the walls with your kid’s favorite colors. Add bright accessories such as pillows, wall decals, and posters to increase the playfulness of your child’s bedroom. If you know how to decorate a bedroom then you can pull this out perfectly.

You can also paint the walls with an underwater theme and a hand-drawn design for an eye-catching accent wall.  If you’re looking for a modern playroom or you’re ready to take some plunge with bold colors, then go for neutral colors. You can also supplement with wow colors by adding some flair with a bright rug and some pillows.

3. Attic Room

The space under the roof is a little-known and underrated one, and you can convert it into your kid’s playroom. You can take advantage of that area under the roof to turn it into a comfy playtime pad. This type of multi-purpose room will also serve as a quiet reading nook for mom and dad during nap time.


Image credit: https://cdn.decoist.com/

4. Install Easy-to-Clean Flooring

Choosing wood floors or linoleum floors is a smart idea for playrooms because these flooring options are resistant to stains. And if you’re looking for playroom flooring that won’t break the bank and requires less renovation, try foam flooring. It’s easy to clean plus, it’s a fun way of adding color and comfort to your room.

5. Add Some Indoor Swing

What is a good look giving your kids that park feeling? Allow them to swing in their playroom whether it’s raining or there is sunshine. If you have space, adding indoor swing to your playroom will give a bit more personality and take it to the next level.

6. Create a Chalkboard Wall

Instead of investing in a new chalkboard, simply turn your kid’s blank wall into one. You can paint it or cover it with chalkboard contact paper to create an instant space for art and writing. With a playroom chalkboard wall, you won’t be worried about your kids coloring it.

Create a Chalkboard Wall
Image credit: https://i.pinimg.com/

Both kids and parents love this kid’s playroom organization because it allows your little ones to freely decorate the walls while giving parents the feeling that cleaning is easy and not permanent. Whether you choose chalkboard paint or peel and stick chalkboards, this idea will let your kid decorate their toy room.

7. Create a Nap Time-Space

A great playroom idea is to create a room where your kids can take naps. You don’t want them falling asleep on the couch, so it’s best to provide them with their own space. If you have an extra bedroom in your house, this might be the perfect fit for your child.

Creating a designated nap space in a playroom will recharge and make them jump right back into their day of fun. By placing twin beds and some fun decorating ideas such as cool sheets and large pillows, your kids will have a cozy space to relax after a long day of playtime.

8. Create an Art Space

There are so many amazing ways to display your child’s artwork. You can take their art supplies such as paintings, drawings, and any other creative piece that they’ve made and frame it for them invisibly. Of course, you don’t want to ruin the art by making it seem like it’s in a frame, but you can definitely make sure that when they’re older, that they have a great collection of their own artwork.

Create an Art Space
Image credit: https://st.hzcdn.com/

Whether you’re creating a playhouse out of paint or working with your child to paint a beautiful mural of your children’s favorite. Adding a bit of wall art is a great way to create a beautiful and kid-friendly space.

9. Invest in Affordable Storage Containers

Children’s toys will always creep up on you, but one of the best ways to keep them under control is by investing in affordable storage containers. There are so many different types of these available at most dollar stores that it can be hard to choose just one type to purchase.

Revamping your kid’s playroom doesn’t have to be an expensive overhaul. You can also use wicker baskets and art supplies and add a few picture ledges to show your kid’s favorite books.

10. Invest in Built-in Storage

If you’re looking to create a one-stop kid’s playroom, then consider investing in built-in storage. You can add several shelves and cubby holes that will help keep your child’s things organized and off the floor. There are a number of ways that you can do this yourself or you can always hire a contractor to get it done.

Invest in Built-in Storage
Image credit: https://cdn.onekindesign.com/

11. Integrate Furniture with Storage

Whether you have built-in storage or wicker baskets, make them fun and functional when picking your kid’s playroom furniture. When it comes to furniture, pick the ones like Ottomans with storage. You can also buy furniture with hollowed out-benches or benches with enough space underneath to keep your child’s toys or other belongings. 

Shelves are also a great way to keep the playroom organized. They come in all shapes, sizes, and designs so you would have plenty of options when it comes to adding them to your children’s playroom ideas.

12. Set Up Cabinets and Cupboards

A place for everything and everything in its place. That’s the rule to follow when picking your kid’s playroom furniture and furnishing. Cabinets and cupboards can be functional, but it is important to avoid having them installed so close together that they create a dark cave-like space for your child. Instead, use them as a way to separate one functional area from another, such as creating a crafting corner and dressing up corner.

13. Consider Under the Stairs

For children, nothing is as fun as having a secret clubhouse. Building a crawl space under the stairs is a kid-friendly retreat that your kids will love beyond your expectation. So, when designing a basement playroom with your spare room, an amp that space with custom kids indoor playhouse.

Consider Under the Stairs
Image credit: https://cdn.homedit.com/

14. Toss in a Ball Pit

One of the most creative ideas you can go with is a ball pit. Besides, your kids will love it if they have a place to play out their endless energy in a safe way. To build a ball pit for your kid’s room, amp around six to ten boxes of balls and let the kids dive right in.

15. Take Advantage of the Wall Space

Kids like to climb and they’ll really love the idea of climbing up a wall. So, maximize that space by adding wall-climbing holds or brightly colored walls with cartoon characters. Use them as background for your kid’s pieces of art and photos. Make a gallery wall and make each photo meaningful and personalized.

16. Create a Reading Nook

Reading nooks are not only for grown-ups. Kids like to read too. So, give them their own little space where they can spend time reading or let you read to them. Whichever thing they want to do in the reading nook, your kids will feel comfortable and intimate in their own room because it’s all theirs.

17. Decorate with Wall Decals

Make your kids discover new things as they grow older by sticking walls. If you want to create a cool space without committing to specific wall color and theme, then wall decals are the right choice. Temporary wallpaper also comes in many different colors and themes and can bring a lot of color to your kid’s play space.

FAQs on Best Kids Playroom Ideas

Can you set a kid’s playroom in the living room?

Yes, you can. If your living room is big enough to accommodate a kid’s playroom, then you might as well do it. Putting up a kid’s playroom in the living room will allow your children to have an area of their own for playing or reading while allowing them to be close to you at the same time if needed.

Can you paint kids’ playroom furniture?

Yes, you can paint kids’ playroom furniture, especially wooden ones. However, before getting it painted, make sure that the paint is of good quality and is safe for your child. You may like to get them painted in bright colors which will be very attractive for your children and help stimulate their imagination while playing.

Final Thought on Best Kids Playroom Ideas

It’s not necessary to stick to a certain theme when coming up with kids’ playroom ideas. You can let your children be as creative as they want. They can choose their own color or pattern to paint the walls. They can pick outplay items they want to display. Or, you can even let them rearrange their room every so often to keep things new and fresh all the time. Whether you have a room dedicated to toys or play, achieving a cool playroom is quite easy.


The post 17. Best Kids Playroom Ideas appeared first on Kitchen Infinity.

Did you miss our previous article…
https://chefbuano.com/?p=761

How to Unstick and Fix a Broken Zipper

How to Unstick and Fix a Broken Zipper

Zippers are great for keeping your clothes closed, but they can also break down over time. A broken zipper can be an annoying problem that makes it difficult to wear favorite clothing items. Luckily, there are several ways to fix a stuck zipper without replacing it or throwing out the item of clothing. 

With a few tools and some creativity, you can fix zipper problems ranging from a stuck zipper, broken zippers, stuck zippers, and any other problem related to the zipper.

What You’ll Need

Strong threadBar of soapWD-40 lubricantSmall needle-nosed pliersHand sewing needleScissorsGraphite PencilSmall flathead screwdriver

How to Fix a Stuck Zipper

Use Graphite to Lubricate the Zipper

Use a graphite pencil to lubricate the zipper. Graphite is a dry lubricant that can act as an alternative to liquid lubricants like WD-40. To use graphite, put some on a cotton ball or paper towel and wipe it along the troublesome part of the zipper. Work the zipper up and down. Before moving on, wipe away any excess graphite, so it doesn’t get transferred to other clothing items when the zipper is closed.


Image credit: https://i.pinimg.com/

pply Laundry Soap and Wax

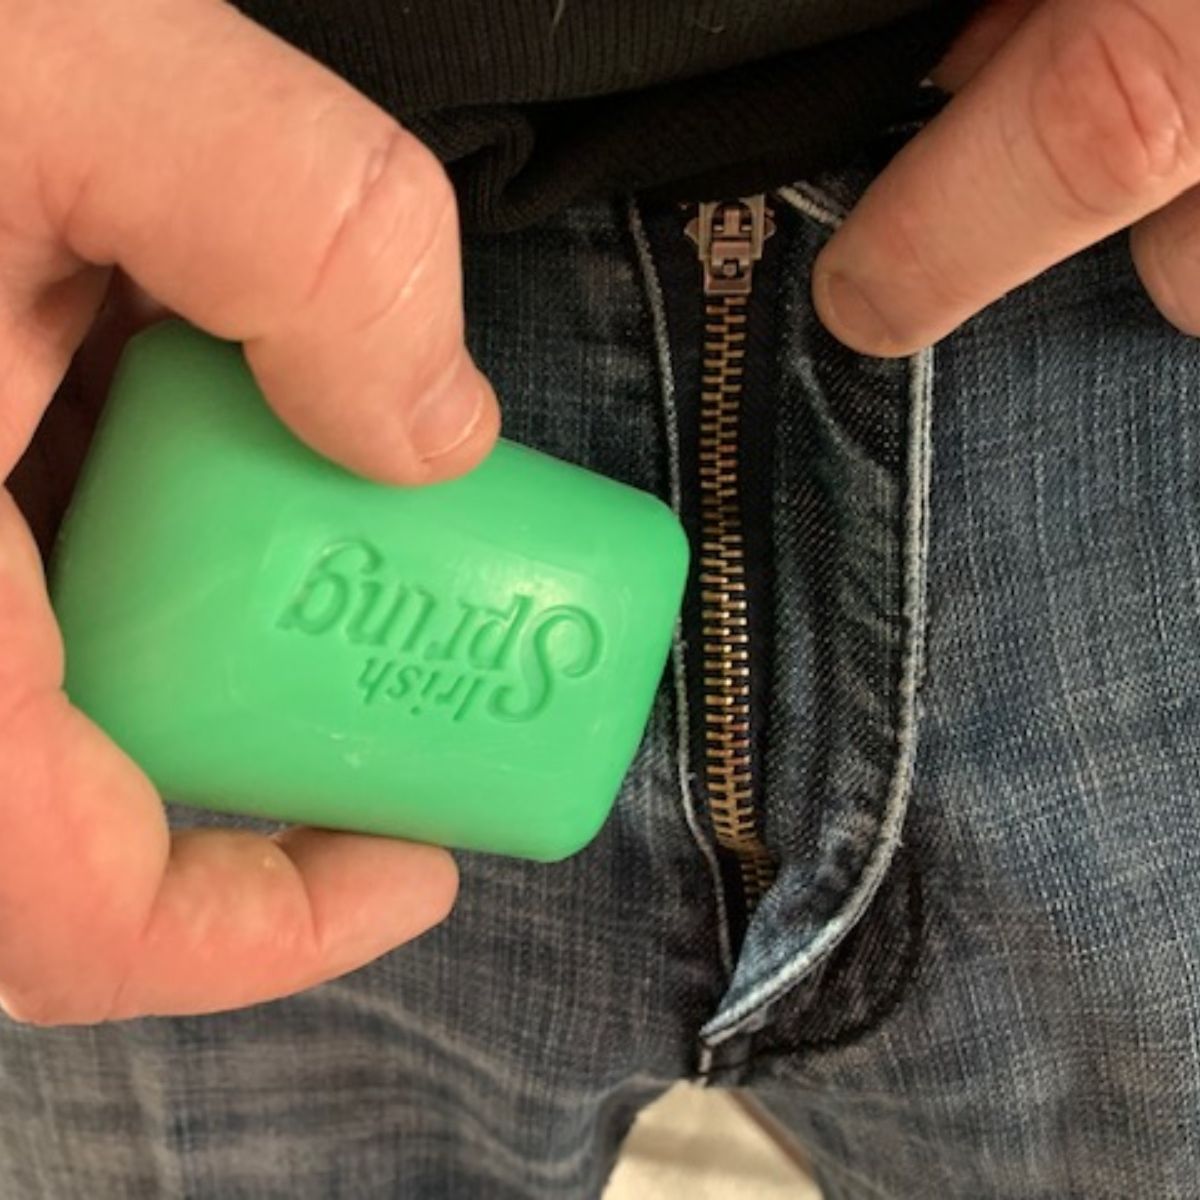
When the graphite pencil doesn’t work, don’t add more graphite; instead, add a dab of laundry soap to your stuck zipper. The soap will add an extra level of lubrication that will help unstick the zipper. 

Apply Laundry Soap and Wax
Image credit: https://www.shared.com/

You can also use lubricating substances such as chapstick and lip balm to fix your zipper. If you don’t have any on hand, try a little unscented block of paraffin wax from a candle instead. If you’re worried about these lubricants staining your fabric, you can turn to petroleum jelly. 

Add a fingertip’s worth of petroleum jelly to the teeth of the zipper and gently rub it in – but only on the side facing your clothing or fabric. This will add a little extra oomph to the graphite’s powers and make sure that your clothes stay stain-free.

Wash Your Item and Add More Lubricant

After the zipper seems to be moving more smoothly, you’ll probably want to clean your clothing or bag. Wash it as directed on the tag and add a little lubricant right after or while it’s still wet. This way, just like chapstick on a zipper, the petroleum jelly will transfer itself from the fabric itself to the zipper.

How to Fix a Broken Zipper

Remove the Zipper Stop

For you to get the slider back on track, you’ll need to remove the zipper’s stop at the top. You can gently pull it off with your fingers and put a new one on if necessary after you have fixed the slider. 

Remove the Zipper Stop
Image credit: https://i.ytimg.com/

On the other hand, you can use pliers to get a good grip by prying off the zipper’s bottom stop or the little band of metal or plastic at the bottom of the zipper teeth. Use the pliers to slightly stretch the openings of the metal stoppers and wiggle them free. You can also use a flathead screwdriver if you don’t have pliers.

Position the Zipper Pull

Before you try to fix a broken zipper, look at it from the front and determine which way it should move. The stoppers that hold the pull open should face away from each other when the slider is fully closed. You might have to loosen or remove clothing from one side of the zipper if you can’t see a difference between closed and half-closed.

Once you’ve removed the metal or plastic, stop, use the pull tab to move the zipper slider back and forth. If it doesn’t move easily, spray the zipper with a lubricant. Lubricants can make an old zipper function like new, but they won’t work if the teeth are worn out or bent.

djust the Slider and Rearrange the Teeth

Realign the zipper teeth so that they all mesh smoothly. If you can’t mesh them, mark the spot where there is a problem aligning the teeth. After that, reposition the zipper pull by moving the slider to that spot.

Thread the Sewing Needle

Using your sewing machine, thread the sewing needle with heavy-duty thread and tie a knot at the tail of the thread. If your zipper doesn’t have teeth on both sides, you’ll need to sew it with two separate needles.

To keep the stitches as small as possible, move slowly. Insert one threaded needle into each stitch along the length of the zipper. Remove the sewing from the machine, leaving about an inch of thread on each side.

Create a New Zipper Stop

Pull the thread up through the zipper, leaving the knot on the top surface. Add another zigzag stitch to secure the stop. You can make six or seven stitches across the bottom of the zipper where you’ve removed the old zipper stop to create a new zipper stop made out of the thread.

Zippers With Teeth on Both Sides

Replace the slider by repositioning it over both sides of the original tape. Using a sewing machine, move slowly and sew a few stitches along each side to create a new zipper stop between the teeth. Pinch the metal stop on the same side as the old slider with needle nose pliers or tweezers. 

Use one hand to hold it steady while pulling the slider off with your other hand. Slide the new replacement slider onto both sides of the tape before pinching and removing any excess tape. Make sure that each piece of tape is flush against its neighbor when you are done.

Take Off the Bottom Stop to Repair the Missing Teeth

To deal with the missing bottom teeth, you have to remove the old bottom stop. Hold your cloth firmly and pull the stops off. After that, remove the tack at the base of the zipper using a seam ripper. This is very important because you need to fix all the zipper’s teeth before your zipper works correctly.

Repair Above Damaged Teeth

You can also replace a zipper slider above one of the damaged teeth. This is perfect for when you cannot find replacement teeth at the same size as your other teeth or if it’s too much work to re-sew over the existing holes. Use this method only when there are no missing teeth below the location of the break.

Pinching the zipper tape on either side of the break with a pair of pliers will hold it in place while you work. Unzip your zipper all the way to expose the teeth. Thread the needle with about an inch of thread and tie a knot on each end of the thread.

 Sew each stitch between two teeth, removing any slack in your thread after each pull. Make sure you whipstitch the lower part of the zipper teeth to keep the zipper from gaping open.

Use Paper Clip

A paper clip can be used in lieu of a needle and thread. While it won’t look quite as nice, this method is easier and faster than the sewing method and will probably work in a pinch when you don’t have a needle and thread handy.

Use a Key Ring to Secure Slipping Pants Zipper Pull

Slipping pants zippers are one of the frustrating types of zipper problems. To create a temporary fix, salvage it by attaching a key ring onto your zipper pull. Feed one end of the key ring through the hole in the tab and attach it with another small key ring or paper clip.

How to Prevent Your Zipper from Breaking Again

Don’t Yank it

The best way to avoid breaking your zipper is to ensure you apply too much force to it as you use it. Instead, use steady and consistent pulls to guide the sliders up and down the teeth instead of using sharp, jerky movements.

Keep it Clean

Keeping your zipper clean will ensure that the slider doesn’t get stuck on grime or any strands of fabric that might accumulate in its teeth. If your zipper gets jammed up with gunk, you’re much more likely to yank at it and cause it to break.

Make Sure the Zip is Not Under Too Much Pressure

If you’re fastening a bag that’s overflowing or jeans that are too small, the entire zip will buckle when there is too much pressure pulling the teeth apart.

FAQs on How to Unstick and Fix a Broken Zipper

How do you lubricate a zipper?

Before you pull the zipper down, lightly lubricate it with a bit of wax or bar soap to make sure the slider moves smoothly. Another good idea is to zip up your jacket after applying some beeswax to it.

How do you fix a stuck tooth on a metal zipper?

To solve the problem with one broken tooth in a metal zipper, try remedying it with a pair of pliers and rocking the tooth back and forth while pulling on the zipper.

Final Thought on How to Unstick and Fix a Broken Zipper

As you can see, unsticking and fixing a broken zipper can be achieved in a number of ways, and you don’t need to take your jacket and pants to a store for expensive repairs. With the right tools and items, you can always go back to using them again with no hassles.


The post How to Unstick and Fix a Broken Zipper appeared first on Kitchen Infinity.

Did you miss our previous article…
https://chefbuano.com/?p=714

Four Easy Do-It-Yourself Soil Tests

Four Easy Do-It-Yourself Soil Tests

Soil is the foundation of your garden. Knowing what makes up your soil and how to amend it is an important part of successful gardening.  Unfortunately, many people don’t know how to test their soil’s pH or even begin. 

Well, if you’re like most gardeners, you don’t have the time or money to get a professional test done on your soil. So how can you be sure your plant selections are going to thrive in your yards? That’s where these simple DIY tests come into play. 

The following easy do-it-yourself tests will give you a good start on knowing your soil’s strengths and weaknesses. The results from the tests will give you an idea as to whether or not professionals should do more testing before any changes are made based on this information alone. Let’s get started!

The Squeeze Test

This test is based on the premise that soil with good texture will form a ball in your hand and fall apart when lightly squeezed. Be ready to get your hands when testing your soils using this method. In this soil test, soils are classified as clay soils, sandy soils, and loamy soils.


Image credit: https://bdn-ss-hh.s3.amazonaws.com/

Clay soil is nutrient-rich but slow draining, while sand is quick draining but has trouble retaining nutrients and moisture. Loam soil is considered the ideal soil because it retains moisture and nutrients while draining well. In the squeeze test, you’ll need a handful of moist soil from your garden or from near plants that are growing well. 

Be sure to use only a small amount from around the tops of plants. Avoid collecting soil from dry areas around plant roots, which could be hot and baked, as this can damage the organism living in the soil. In the squeeze test, the soil should form a lump that holds together well but can break apart easily by hand. This result shows it is loam soil, which is ideal for plant growth. 

Sandy soil will remain crumbly and may be difficult to squeeze together in your hand, while clay soil will form a hard lump and crumble when squeezed. For slow-draining clay, you can break up the soil with mulches and drainage aids like perlite and vermiculite. 

The Puddle Test

Drainage is another important aspect of your soil that you must consider because it allows water to pass quickly without pooling. If your soil has poor drainage, it can cause root rot to your plants. Culinary herbs are the main culprit of root rot due to their shallow root system. 

The Puddle Test
Image credit: https://greywateraction.org/

The puddle test is the best way to check soil drainage. Take a handful of moist soil and roll it into a ball in your hand. Then, drop the ball into a bucket filled with water. If your soil sinks, you have good drainage. If not, drill some holes in your garden beds at least 6 inches deep before planting your herbs. 

If the water takes more than four hours to drain, then you have poor drainage. Fortunately, you can amend this by mixing some organic matter, such as peat moss or compost, into the soil around your herb plants.

The Vinegar and Baking Soda Test

Soil acidity, alkalinity, and soil pH are very important elements to the soil. Some plants will thrive better in more basic soil or acidic soil. But soil that is too extreme can also be a problem. It can prevent them from getting nutrients. 

The Vinegar and Baking Soda Test
Image credit: https://www.theseedcollection.com.au/

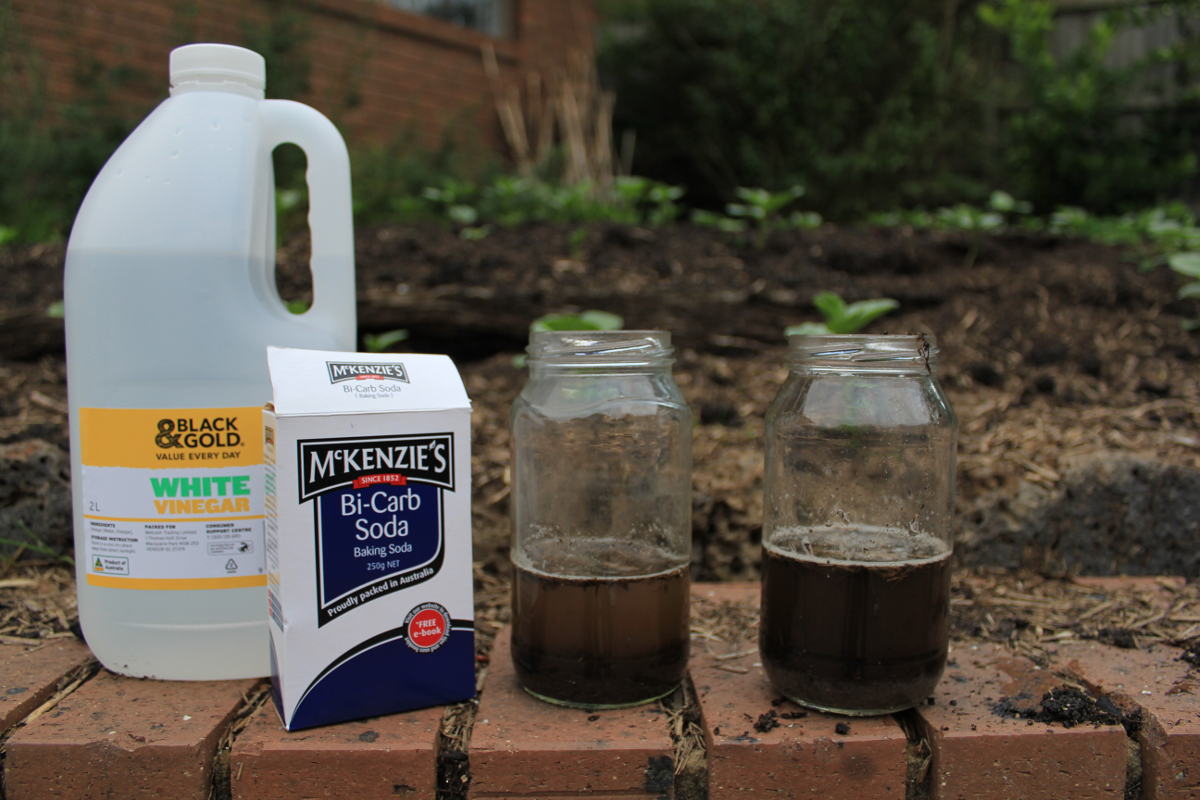
To find out the pH of your soil, put a teaspoonful of soil in a small glass jar and add half a teaspoon of distilled white vinegar. Put on the cap tightly and shake well for about one minute. Let it sit for another five minutes to see if there are any bubbles that appear on the surface.

If it fizzes, you have alkaline soil with higher pH, which you can remedy by using a fertilizer rich in sulfur and acidifying nitrogen. Some plants can tolerate alkaline soil, while others like parsnips and peanuts will do well in the sweet soil. If your soil doesn’t fizz after the vinegar test, add distilled water to another container with the same amount of soil and add half a teaspoon of salt.

Stir occasionally for 15 minutes and see if there are any noticeable changes. If you see the particles change, your soil has acidic properties, meaning that you have sodium chloride in your garden, which can be harmful to plants, so be sure to use compost with neutral pH to reduce the risk.

If your soil doesn’t change its properties, you have a neutral pH, meaning adding compost is beneficial for the plants. Learn how to make compost so you can add it to the soil. A pH of 7 means that the soil has an alkaline nature – there are more nutrients available to your plants, and they do not tend to die as often as those growing in acidic soils, so be sure to use only fertilizers with a pH of 5-7.

So, by doing this simple test, you will be able to quickly determine your soil’s pH, which is especially important if you plan on growing any plants that do not tolerate acidic or alkaline soils, such as most vegetables. You will also discover whether or not the soil has any organic matter in it. The more organic matter, the better because if there is none, you will need to take some time to break down any hard dirt clods before planting, which can be difficult for novices.

The Cabbage and Wire Test

Soil that is too compact will inhibit root growth, choke off available water, and prevent worms and other vital soil critters from moving freely. To test soil compaction, plug a wire flag vertically into the soil. Mark the depth at which the wire bends.

Make sure the wire bends where it cannot be pushed down straight. You can easily push the wire down a foot or more. Don’t let it bend because the more it bends, the more it becomes compacted. You remedy compaction by amending your soil organic material, aerating organic materials, and avoiding walking on the wet soil in your plots.

When it comes to the cabbage test, you can purchase a home testing kit or use a more advanced DIY test using red cabbage. Red cabbage contains a pigment known as flavin that dissolves in water and will turn red in acidic solution and greenish-yellow in basic solution. 

Allow one tablespoon of soil from your garden to dry on a white saucer, then bring one cup of distilled water to boil in a pot with a lid. Add two cups of chopped red cabbage into the boiling water. Cover and boil until the water turns dark purple. 

Make sure you wet the soil and sit for some minutes, then tip the saucer to allow water to run to the side. If the soil turns blue or green, it’s alkaline, and it turns red, then the soil is acidic.

The Peanut Butter Jar Soil Test for Sand, Silt, and Clay

This is a very easy test. Fill a jar halfway with soil, then fill the rest of the way with water. The amount of water needed will vary depending on your jar size, so it’s best to start empty and add water until the jar is two-thirds full. Put in one teaspoon of dish soap and shake vigorously for 30 seconds. 

The soap will suspend the particles to see how many there are and what kind they are. The jar should be enough to do about a cup of soil. If not, use another jar and combine the results. Calculate the percentage of silt, sand, and clay, which should add up to 100 percent. 

Healthy soil will consist of 20 percent clay, 40 percent silt, and 40 percent sand. If you have sandy soil, you can remedy this by adding humus, aged manure, peat moss, and sawdust with some extra nitrogen. For silt soil, add coarse sand, gravel, compost, and well-rotted horse manure. If you have clay soil, coarse sand, and not beach sand, plus compost and peat moss will work well.

FAQs on 4 Easy Do-It-Yourself Soil Test

re home soil test kits accurate?

Yes, but you have to follow the directions carefully and take several samples from different garden areas or lawns.

How much soil should I get for a soil test?

In general, take at least a cup of dry soil from each spot. However, if there is not enough soil in any one spot to fill a 1-cup measure, take a 1/2 cup from two different spots.

Is it expensive to get a soil test done professionally?

A local extension agent can perform a low-cost or free soil pH test for you, but you would have to go in person to their office and pick up the report. It may be worth your time, though.

Final Thought on Four Easy Do-It-Yourself Soil Tests

When considering what your soil needs for the plants to thrive, it’s good to consider a complete report from your cooperative extension. However, carrying this simple test can help you understand what your soil may be lacking. Then you can take the next step toward creating a healthy garden.


The post Four Easy Do-It-Yourself Soil Tests appeared first on Kitchen Infinity.

Did you miss our previous article…
https://chefbuano.com/?p=709

How to Grow and Care for Water Lilies and Lotus

How to Grow and Care for Water Lilies and Lotus

If you’re looking for a beautiful aquatic plant to add to your garden, then water lilies and lotus are a perfect choice. However, if you want these plants to survive, it’s important that they get the right amount of sun and nutrients. 

This article will teach you everything you need to know about growing water lilies and lotus in your garden. We’ll walk you through the steps required for growing these beautiful aquatic plants, from seedlings up to full-grown blooms. 

By following this guide, you’ll soon enjoy the beauty of a well-kept pond filled with healthy water lilies or lotus flowers. Keep reading!

Types of Water Lilies

There are only two categories of water lilies. Water lilies produce thick green leaves known as lily pads that float on the surface of the water. Water lily flowers vary depending on the species. 

Hardy Water Lilies

Hardy water lilies are those that can survive the environmental changes of a pond. They’ll be able to handle colder temperatures and fluctuating water levels as well as drought conditions. This is a key factor for those with an in-ground pond, as it’s almost impossible to keep standing water or a constant water level through hot summers. 

Hardy lilies won’t produce flowers in the winter, but they’ll keep producing new pads and flowers each spring as long as their tubers remain below the freezing mark. Hardy water lilies thrive in USDA hardiness zones 3-11 and they come in shades of yellows, reds, pinks, whites, and pastel orange.

Tropical Water Lilies

Tropical water lilies thrive in warmer climates and can produce showy blooms through fall, even when cared for correctly. Tropical water lilies differ from hardy water lilies in many ways. They come in day blooming varieties and night-blooming varieties, while hardy water lilies are only day blooming varieties. 


Image credit: https://ourfirstfloor.com/

Tropical water lily plants also have more fragrant and sumptuous blossoms than hardy water lilies. They also have longer stalks that hold the flower higher above the water surface, plus they tend to have larger lily pads than hardy water lily plants. Place them in the center of a container and the crown of the plant rest above the surface of the soil. 

Types of Lotus

Nelumbo Nucifera

The Sacred lotus is a water lily that belongs to the genus Nelumbo. It is also called Indian Lotus, Sacred Lotus, and Bean of India. This perennial plant native to Asia grows from thick rhizomes in muddy or sandy shallow water bodies. 

Nelumbo Nucifera
Image credit: https://upload.wikimedia.org/

The leaves are round to heart-shaped with pointed tips that grow up to 1 meter (3 feet) across. It has either pink or white flowers that sit atop long stalks.

Nelumbo lutea

The American lotus is an aquatic plant native to the Eastern United States that also grows in shallow water bodies like creeks, rivers, ponds, and marshes. It has large leaves and yellow flowers that bloom in midsummer.

Nelumbo lutea
Image credit: https://upload.wikimedia.org/

Caring for Water Lily and Lotus

Plant water lilies and lotus in a large plastic container or basket filled with garden soil and sand. This container must be large enough to accommodate the mature plant and provide room for roots and leaves to spread out. If possible, line baskets with burlap or landscape fabric to prevent soil from falling through the cracks.

Caring for Water Lily and Lotus
Image credit: https://www.thespruce.com/

Light

Water lilies and lotus plants tolerate a range of light conditions from full sun to partial shade. But make sure these plants get enough sunlight for at least four hours or six hours or more. Some lotuses won’t flower unless they get six hours of sunlight daily.

Water Lily and Lotus Watering

Both plants need plenty of water but still have good drainage. This allows the roots to absorb oxygen and the leaves to breathe without rotting or being attacked by fungus. 

The best way to water? Soak thoroughly until you see water coming out of the pot’s drainage holes. Let it sit for ten minutes or so before draining the excess water. Water them less frequently, but do not allow the plant to dry out completely, or it will go into shock.

Soil Care

For soil requirements, always use topsoil that is made especially for pond plants. Make sure you test the soil pH first. Avoid using potting soil or heavy soil. In addition, do not use garden soil or peat moss, plus too much organic matter because some of these materials may float in the water. Organic matter may also make your newly planted seeds and tubers rot.

Planting your aquatic plants too high can cause hardy plants to freeze in the winter, while planting too low will prevent young plants from getting enough sunlight. Water lilies should be planted not less than 4 inches or more than 18 inches below the water’s surface, and lotus should be between 6 and 18 inches below the surface.

Temperature and Humidity Requirement

Both plants will be hardy if their tuberous rhizomes do not freeze. Plant them in containers so that the soil line is below the freeze line in your pool. Lotus flowers will be late to emerge in the spring because they prefer warm weather and grow once the water temperature rises to 70 degrees Fahrenheit.

Over winter, you can store water lilies by lifting the plant from the container and storing the rhizome in a plastic bag full of damp sand. You can also mix damp sand with peat moss and store it in an airtight container.

Water Lily and Lotus Fertilization

Use a good aquatic plant fertilizer to fertilize your plants. Fertilize plants once a month. Do not fertilize directly into the water because you’ll change the pH of the water and harm both plants and fish. Before applying fertilizers to the plants, follow the planting instructions and warning labels carefully.

Pruning Water Lily and Lotus Plants

Each flower on the water lily lasts three to five days, and they’ll open during the day and close at night. The flower will sink into the water once it’s finished. Seed pods form, and the ripe seeds fall in the soil below. Seed production is very costly to the plant, so make sure you clip off any yellow leaves and spent flowers throughout the growing season. 

To ensure many blooms, cut the dying flowers below the surface and follow the stem down as it goes. You can cut it off or snap it with your finger. After that, clean off dead and dying leaves in the same manner. On the other hand, lotus dies at the end of the year, so cut them down to a few inches above the rhizome. If you’re growing lotus root as perennial, report it every three to four years with fresh soil.

Water Lily and Lotus Pests and Diseases Care

These aquatics have fine hairs, meaning insecticides with detergents and oils will harm and even kill them. Insects such as aphids, whiteflies, and spider mites cause problems and require insecticidal soap or other organic controls.

Slugs and snails are also an issue with these plants. You can remedy these insects by relocating plants away from the water’s edge.

Harvesting Water Lily and Lotus Plants

Wait until the flowers fade in the early fall and extract the seeds. Once the seed pods are dried, open them and remove the black or brown colored seeds. Store these seeds in a warm place until spring, when you plant them indoors for six to eight weeks before moving them outdoors once more.

How to Grow Water Lily and Lotus

Find a Sunny Location

Water lilies and lotus do best when they are placed in full sunlight. While placing these plants partially shaded can work, you’ll find that the flowers wilt quickly. Position your aquatic container in a bright location in your garden before planting water lilies.

Prepare Your Container

A wide and shallow container is best. When planting in a container, make sure you fill it with topsoil. Fill up to about an eighth of an inch from the top before adding water lilies or lotus seeds.

Clean Up Your Plants

Before planting your plants, check the tubes and remove the old leaves and thick, freshly old roots. This allows more of the plant’s energy to grow new roots, leaves, stems, and blooms. Also, take your time to learn how to clean your plants so you can apply it on some of your indoor and outdoor plants.

Plant Tubers

Plant the tuber against the side of the pot with the growing tip positioned upward and toward the center of the pot. Cover the base of the tuber with the topsoil and pea gravel to keep the soil in the container.

Submerge the Container

Submerge the container with your freshly planted water lily into the pond while leaving at least four inches of space between the top of the pot and the water’s surface. If the pond is deeper, pile rocks to elevate the container so that the top isn’t deeper than 18 inches beneath the surface of the water.

Water Lily and Lotus FAQs

re these aquatics edible?

Yes, not only the seeds of these plants are edible, but the leaves, flower buds, stalks, and roots are edible. They’re mostly used for decorative purposes and in lotions, sweet-scented perfumes.

How do you care for lotus in the winter season?

Take out the lotus container from the pond and place it in full sun during the spring season. Water the plant over the soil surface and return it to the pond in the early summer or fall season to prevent damage.

Final Thought on Growing and Caring for Water Lily and Lotus

As you can see, water lilies and lotus are easy to care for and grow with minimum effort. But it’s best not to keep them in submerged soil, instead keep the flowers floating on the water surface. Use a wide container of at least 16 inches for lotus and 18 inches or more for lily and enjoy your aquatic garden.


The post How to Grow and Care for Water Lilies and Lotus appeared first on Kitchen Infinity.

Did you miss our previous article…
https://chefbuano.com/?p=691

International Laundry Care Symbols

International Laundry Care Symbols

Laundry care symbols are used to help people understand how to wash their clothes.

Some symbols indicate the type of fabric, while others tell you how much water and detergent are needed for a specific kind of item. There are different ways that clothing labels provide this information as well, including by using words such as “Wool” or “Delicate.”

In this article, we’ll explore why it’s important to know the symbols and how you can find out which symbol your clothes have. Keep reading to find out more. 


Image Credit: http://ihateironing.com

What are laundry care symbols?

The symbols on your clothing labels or tags are called laundry care symbols. These can give you general washing instructions, like whether an item is dry-cleaned only, machine washable, or hand wash only, and/or more specific guidelines on how to care for the piece of clothing. 

By using the laundry care symbols, you can get closer to understanding how to take care of your clothes. Some symbols indicate the type of fabric, while others tell you how much water and detergent are needed for a specific kind of item. 

How do you decipher them?

Different countries use different laundry care symbols. Therefore it is important to note that there isn’t just one universal set of washing instructions on clothing labels around the world. 

The United States often uses basic graphics on their tags (including dots inside shapes) while other countries might include text like “Machine wash cold,” or “Do not bleach” in addition to or instead of symbols. It is great to know what the laundry care symbols are for your favorite clothing brands, but it can be even more helpful to learn how you can decipher them yourself.

Why is it important to know the symbols?

Knowing and understanding how to read your clothing labels can not only save you money in laundering fees and ensure that clothes last longer, but also help reduce the amount of water pollution you create.

Laundry care symbols can indicate whether a piece of clothing needs to be washed in cold or warm (or even hot) water, which often helps cut down on energy costs for heating wash water.

This can be especially helpful if you live in an apartment with communal laundry facilities where the machine already has hot water running through it before you start using it. Another great benefit is that by giving your clothes the proper care and attention they need, you will be able to maintain their appearance and make them last longer. 

How you can find out which symbol your clothes have

Since there isn’t just one universal set of washing instructions on clothing labels around the world, it’s best to look up how your favorite brands recommend caring for each piece of clothing. 

Many major companies with multiple locations across different countries provide information about laundry care symbols on their website or online help section. Additionally, if you know where a garment was purchased and plan on returning there again in the future you can ask an employee what type of symbols it has so that you can know what to expect when you care for it in the future.

For clothes from brands without a website, you might have to do some more investigating. With a small amount of research, you should be able to find out which laundry care symbols they use and how those correspond with general washing instructions around the world.

If you know the symbol, but don’t understand what it means, you can use an online translator or speak with someone who speaks both English and the language that matches up to your washing instructions. Most importantly, if you’re buying clothes for yourself or caring for clothes that were bought as a gift for someone else, make sure that they are washable before purchasing them.

Where else do you see these symbols?

When it comes to doing laundry, remember that laundry care symbols aren’t just found on laundry tags. They can be found on just about anything that you might wash in the washing machine. Most common are clothing care symbols, but you can also see them on your bed sheets, towels, curtains, and even tablecloths.

How to Wash Clothes | Laundry Tips and Tricks
Image Credit: http://tide.com

The next time you go to do a load of laundry or send something out for dry cleaning make sure to look up its symbols so that you know what kind of care it needs. This will help cut down on costs from using the incorrect amount of detergent or having your clothes accidentally bleached.  

International Laundry Care Symbols – FAQ

How did the international laundry care symbols come about?

The development of a common set of symbols was born out of necessity, in response to the great demand for standardized symbols within internationally operating textile companies. The need for easily recognizable symbols that are not language-dependent but are valid worldwide has been widely recognized over recent years by garment manufacturers, laundries, and consumers alike.

How do I clean my washer?

Cleaning a washer is more than just putting some clothes in and pressing a few buttons.

It takes some planning, preparation, and the proper use of cleaning products; it’s important to know how to do it properly.

There are many different types of washers – top-loaders and front loaders being the main types. This means that washing machine cleaning is a little different depending on the type you have. But there are a few general rules that clean all washers: don’t overload your washer, avoid using too much detergent or bleach, and always follow the instructions given by your manufacturer for safe usage.

Final thoughts on international laundry care symbols

In conclusion, there are a wide variety of symbols used in laundry care symbols. The main goal for these symbols is to make sure that clothes can be safely washed and cleaned. Even with the development of new cleaner ingredients, these symbols will still work effectively so it’s important to pay attention to them before washing your clothes.  

The post International Laundry Care Symbols appeared first on Kitchen Infinity.

Did you miss our previous article…
https://chefbuano.com/?p=650