How Types Of Air Conditioning Systems Work

How Types Of Air Conditioning Systems Work

What kind of AC unit should you get? What are your options, and how do they work?

With so many types of air conditioners on the market, it can be hard to decide which one is right for you.

This article will tell you everything about them so that you can decide which one is best for your needs. We’ll also give tips on how to maintain it efficiently and maximize its lifespan.

Keep reading to find out more. 

Types of Air Conditioners

Choosing a type of air conditioning system can be daunting because there are so many options. Here is a list of the four major types and their advantages and disadvantages. 

Window units

These units have an exterior compressor unit that mounts on the outside wall, with an interior split component that sits in the window opening.

dvantages

They are the least expensive type of AC unit and they can cool a single room very well.

Disadvantages

They don’t work well when the temperature outside is over 100 degrees and they can be quite loud.

Central air conditioning

Central AC units are installed in the attic or basement of your home and distribute cooled air through the air ducts you already have.

dvantages

They are very effective at cooling your entire home, so if you live in a large house or have multiple rooms that need AC, this is the way to go.

Disadvantages

Central AC units are the most expensive type of unit and require professional installation. Also, they can be a nuisance to install and may require additional ductwork.

Ductless mini-split

Mini-split systems consist of an outdoor compressor, a remote inside unit placed where you need it, and a series of small tubes that distribute the cooled air throughout your home.

dvantages

They don’t take up any floor space in your home, they are very efficient, and they cool individual rooms very well.

Disadvantages

They can be more expensive than other types of AC units, and they require professional installation.

Portable air conditioners

Portable AC units have an exterior compressor unit that sits on the ground outside your home and a hose that leads inside to the unit that sits on the floor.

dvantages

They are very affordable, they can be moved from room to room, and they are very efficient.

Disadvantages

They can be quite noisy, they require regular drainage, and they only cool a single room at a time.

How AC Units Work

Choosing thebest air conditioners is easier when you understand how they work. Air conditioners use a refrigerant to cool the air and a compressor to circulate it. The refrigerant is a fluid that changes state from liquid to gas as it absorbs heat. This change of state allows the refrigerant to absorb heat from the surrounding air and then release it outside, cooling the air in your home in the process.

Image Credit: http://servicechampions.net

The compressor is a pump that circulates the refrigerant through the system. It pressurizes the refrigerant and causes it to change state from gas to liquid, which allows it to absorb more heat. The compressor then sends the refrigerant to the condenser, which is a coil of metal tubing that releases the heat outside.

From the condenser, the refrigerant goes to the evaporator which absorbs the heat from the surrounding air and changes the refrigerant back to a liquid. This liquid is then circulated back to the compressor, where it starts the cycle all over again.

This process continues until the unit reaches the temperature you set on the thermostat. At that point, it turns off until the temperature rises or falls again, at which point it kicks back on and repeats the process.

How to Maintain Your AC Unit

Like any otherhome appliance, your AC unit needs regular maintenance to keep it running smoothly. Here are a few tips to keep your AC unit in good condition:

Clean the filters regularly.

This will help keep the air flowing freely and prevent the unit from overworking. Your filters should be cleaned every 1-3 months, depending on the type you have. Washing them with soap and water or vacuuming them is usually enough to keep them clean.

If you’re using electronic filters, it’s important to check them at least once a month to see if they need replacing. If your filter stops working properly, the unit will overwork itself trying to circulate air through the clogged filter.

This can cause major problems that require an expensive repair bill, so be sure to check your filters regularly.

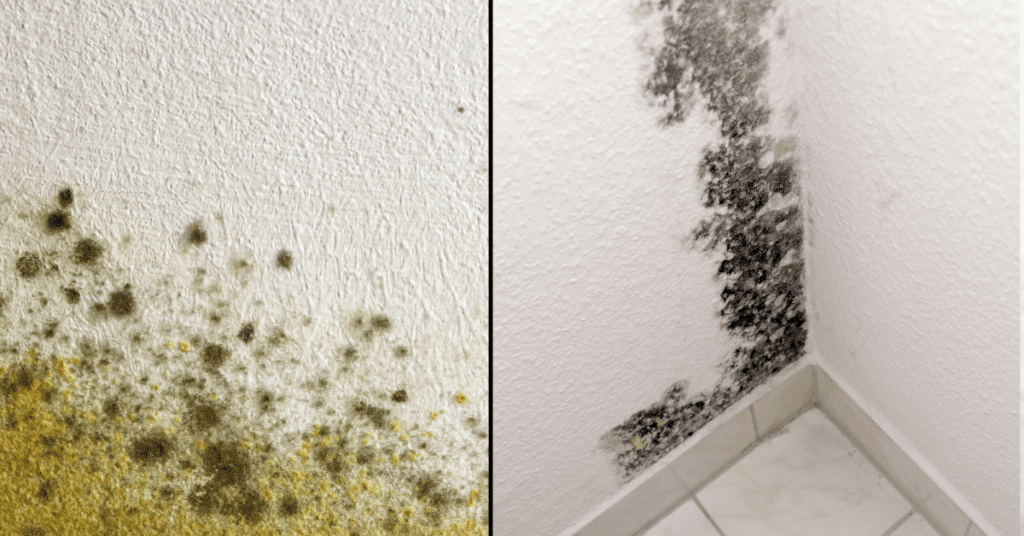
Keep vegetation away from the outdoor unit.

The evaporator coils inside your AC unit are very sensitive and often freeze up when exposed to excess humidity in the air. This can lead to costly repairs or even system failure if the coils are damaged.

To avoid this, be sure to keep all vegetation, debris, and other obstructions away from the outdoor unit. A few feet of clearance is usually enough, but check your owner’s manual for specific instructions.

Have the unit serviced at least once a year.

A professional technician can clean and lubricate the parts of your AC unit to help it run more efficiently. They can also troubleshoot any problems you may be having and suggest solutions.

It’s important to have your AC unit serviced at least once a year to keep it running smoothly and prevent expensive repairs down the road. Contact your local HVAC technician for more information.

Make sure the compressor is free of debris and dirt.

The compressor is the most important part of your AC unit, so it’s important to keep it in good condition.

If you see any debris or dirt build-up on the compressor, be sure to clean it off using a soft brush or vacuum cleaner. Do not use water or any other liquids, as this can damage the unit.

Check the refrigerant level regularly.

If the level is too low, the unit won’t be able to cool effectively. This can cause expensive problems down the road as the parts wear out faster.

If you remove your AC unit’s access panel, you should be able to see a copper or silver cylinder near the compressor. This is usually marked with a red line or dot that indicates when it needs to be recharged. Keep in mind that this may vary depending on your unit, so check your manual for specific instructions.

Have an approved repair company make any repairs necessary.

Hiring an AC repair company is the best way to maintain your AC unit and avoid extensive repairs in the future. Any licensed HVAC technician will have plenty of experience with cooling systems and will know exactly what they’re doing when it comes to fixing them.

5 Different Types of Air Conditioning Units

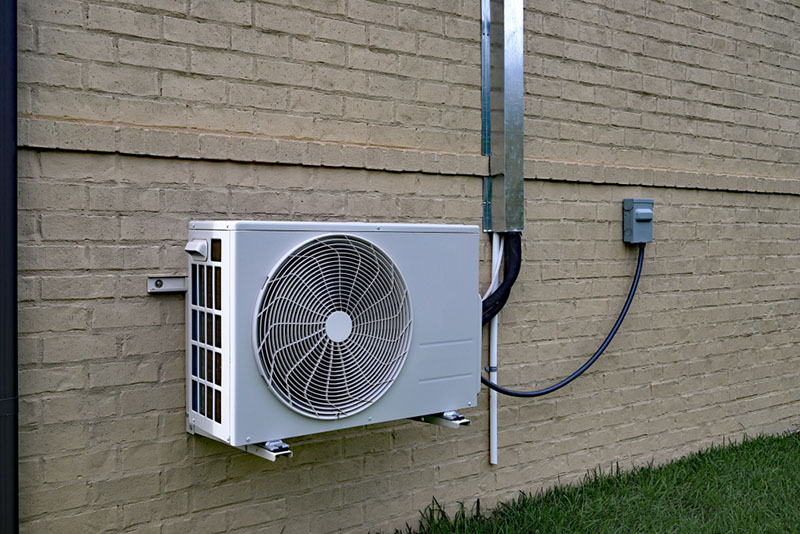
Image Credit: http://ductworksmn.com

An experienced technician will know how to keep your system running properly and what type of maintenance is needed to keep it in top shape. They’ll also be able to troubleshoot any problems you might have, which can prevent major repairs down the road.

How Types Of Air Conditioning Systems Work – FAQ

What are the most common types of air conditioning systems?

The most common types of air conditioning systems are the following:

1) Central air conditioning

2) Room air conditioning

3) Portable air conditioning

How do central air conditioning systems work?

Central air conditioning systems work by cooling and dehumidifying the air in a single room or an entire house. They do this by drawing in warm, moist air from outside, cooling it down, and then releasing it back into the environment. Central air conditioners also have filters that remove dust and other particles from the air, which helps to improve indoor air quality.

Final Thoughts On How Types Of Air Conditioning Systems Work

In conclusion, we can see that there are several different types of air conditioning systems, and each has its unique properties.

Understanding the various properties of each type is important to choose the right system for your home, and this article should help you make that decision.

Once you have an air conditing system in place, taking the time to do proper maintenance is important to ensure that your system is running at its best.

The post How Types Of Air Conditioning Systems Work appeared first on Kitchen Infinity.

Did you miss our previous article…
https://chefbuano.com/?p=1021

How To Remove Mold And Mildew

How To Remove Mold And Mildew

Mold and mildew can be a real problem for homeowners, especially if they’re not dealt with quickly.

Mold is notorious for growing in damp areas, such as bathrooms or basements that don’t have proper ventilation. Mildew grows where there is too much moisture present, such as on wet surfaces like windowsills or carpets.

In this article, we will discuss how to remove mold and mildew from your home.

What are mold and mildew?

The two types of mold and mildew work together to grow rapidly and cause health problems by releasing toxic spores into the air which can affect anyone who breathes them.

Image Credit: http://goldeagle.com

This combination can lead to symptoms such as coughing, sneezing, headaches, and difficulty breathing among other things. It’s important to take the issue seriously and eliminate it right away before it spreads any further.

If not, it can cause structural damage to the building and lead to costly repairs.

How do mold and mildew grow?

Mold needs three things to grow: darkness, food, and moisture. Mold spores are everywhere—inside your house or outside, in your plants or the soil. You might even have spores growing in areas of your home that you can’t see.

Mildew needs two of those things to grow: moisture and food. It feeds on a variety of organic materials, including plant sap, wood, paper, paint, and dust. Mildew can also grow on dirty fabrics.

How to clean mold and mildew

The best way to clean mold and mildew is by using a mixture of water and bleach. You can either use a spray bottle or a bucket.

Be sure to wear protective gear such as gloves and a mask while cleaning, especially if the area contains lead paint which can cause lead poisoning if not handled properly.

If the area is too large or the mold is too thick, you might want to consider hiring a professional to take care of it. Here are the steps involved when it comes togetting rid of mold

Clean off the mold or mildew with a solution of water and bleach

You can use a brush, cloth, or sponge soaked in the mixture and gently scrub away at the area.

It’s best to avoid using any chemicals that contain ammonia as this could increase your risk of breathing in harmful spores. Once you’ve finished cleaning, let it dry thoroughly before allowing anyone inside the area again.

Fill up the affected area with hydrogen peroxide then let it sit for 10 minutes before scrubbing it away You can fill up a bucket or spray bottle with hydrogen peroxide and apply it directly on top of the affected areas. Then leave everything alone for about ten minutes until you come back and scrub the surface clean. Use a fan to dry out the area after you clean it to prevent future growths

Now that the area is free of both mold and mildew, simply dry it thoroughly by sweeping or using a vacuum cleaner. Open up all doors and windows inside your home so that there is good ventilation throughout the house.

You can also use a fan for faster drying time if you don’t want to leave anything open overnight.

Be sure to wear gloves when cleaning anything that could contain lead paint, which can cause lead poisoning if not handled properly

Lead poisoning can be very serious depending on how much one has inhaled over an extended period. Make sure you’re wearing protective gear when cleaning any surfaces that might contain such paint.

Inspect the area for any signs of future growth and take steps to prevent it

Mold and mildew can grow back quickly if you’re not careful. Be sure to inspect the area regularly for any new growth and take measures to prevent it from happening again.

Mildew vs Mold – What's the difference? | Woodard

Image Credit: http://woodard247.com

This could include fixing any leaks in your home, increasing ventilation, or keeping surfaces clean and dry.

Other surfaces where mold and mildew might need to be removed

Mold and mildew can grow on a variety of surfaces both inside and outside your home. Here are some other areas where you might need to take action:

Basements: Basements are often damp and dark, making them the perfect place for mold and mildew to grow. Be sure to clean any spills or leaks as soon as they happen and increase ventilation by using a fan or opening up windows.Bathrooms: Mold and mildew can form on shower curtains, tile grout, caulking, and even the bathtub itself. Be sure to clean these areas regularly and keep them dry at all times.Sinks: Sink drains are a common place for mold and mildew to grow. Be sure to clean out your drain at least once every two weeks to keep it free of any buildup.Windows: Mold can form on window sills if they’re not cleaned regularly. Be sure to wipe down these areas with a bleach solution whenever you notice the growth of mold or mildew.Cooking surfaces: You might want to avoid using any wooden chopping boards, sponges, or brushes to prevent the growth of mold and mildew whenever you cook.Flooring: Many types of flooring can be affected by mold and mildew including linoleum, wood, and laminates.Vehicles: If left unattended for long periods, mold can grow underneath car seats which may lead to breathing problems.Clothes: Mold and mildew can form on clothing if they’re left to sit for too long without being laundered. Machine washable clothes should be washed after every few uses while non-washables should be cleaned with a solution of water and bleach then hung out in the sun to dry.Stucco: If you notice any areas of your stucco walls that are peeling or bubbling, then there’s a good chance they’re infected with mold. Be sure to scrape off the affected areas then apply an anti-fungal paint or primer directly onto the surface to prevent further growths.Cleaning stucco is a technical process and you should contact a professional if you aren’t sure how to handle it.– Wood: Both the inside and outside of your home’s wood walls need to be properly maintained for them to avoid any serious damage from mold growths. Be sure to inspect these areas regularly and treat them with a protective coating of paint or primer whenever they start showing signs of wear.

Removing mold and mildew from your home can be a bit of a daunting task, but it’s important to take action as soon as possible to prevent any long-term health problems.

Final thoughts on how to remove mold and mildew

In conclusion, removing the mold and mildew from inside your home is a necessary step to take if you want to keep yourself and others safe. Remember, mold and mildew can grow back quickly, so make sure to inspect the affected areas regularly for any new growths.

The post How To Remove Mold And Mildew appeared first on Kitchen Infinity.

6 Best Dumpster Rental Companies

6 Best Dumpster Rental Companies

You know that a clean home is the key to happiness. However, you also know that cleaning your home can be quite difficult as there are so many things to do. It doesn’t matter if you have just moved into a new apartment or are looking forward to hosting a party in your house, it’s always good and important to keep everything nice and clean.

There are also times that a standard trash removal routine can’t leave your compound sparkling clean. This is where dumpster rental services come in. Dumpster rental services provide waste containers for rent in different sizes and shapes. You only need to identify the size of the dumpster that can accommodate the volume of waste you have and contact a dumpster rental company. So, what are the best dumpster rental companies? Keep reading!

Factors to Consider When Looking for a Dumpster Rental Company

When looking for the best dumpster rental service, it is important to factor in certain things. Here are some of them:

Consider the cost of service: Different companies charge differently depending on factors like location and duration of renting their services among other things so do not be afraid to compare prices before selecting one provider over another one.The level of expertise that a company has in waste management: This is an important consideration because you want to make sure that the waste you produce is disposed of in the most environmentally responsible way possible. Some companies are better equipped than others to handle this kind of responsibility so it is important to ask about their capabilities before signing on.

Here are some of the best dumpster rental companies to consider.

1. Waste Management

Waste Management is the overall best dumpster rental founded in 1968 Texas. It operates hundreds of waste transfer stations, recycling plants, landfills and offers residential waste and recycling pickups to many homes in the United States. For its roll-off dumpster rentals, bin sizes range from 20 to 40 yards long.


Image credit: https://live.staticflickr.com/

In addition to residential trash and recycling pickup, Waste Management customers can rent dumpsters for construction debris, trash, furniture, and flooring. The cost of these rentals depends on location, dumpster size, waste type, and the length of the rental. Their prospective customers can use the WM website to quote and reserve a rental.

In addition to dumpsters, Waste Management also offers Bagster bags for projects that are too big for normal trash pickup but don’t warrant a dumpster. The company is also committed to handling waste responsibly by using only certified waste disposal facilities and getting several awards for its environmental responsibility. This makes the customers rest easy from their booking time to the time the trash is hauled away.

Pros of Waste Management

Offers roll off residential construction and commercial dumpstersOffers 24/7 online management to customersBagster bags offer a more manageable solution to small projects

Cons of Waste Management

They’re a bit expensive than their counterparts

2. Republic Services

As of 1981, Republic Services is the second-largest waste management company in the world. As one of the best dumpster rental companies, they have a large selection of dumpsters for all types of construction projects as well as customized solutions to meet specific customer needs. They serve both business and residential customers.

Republic Services
Image credit: http://giecdn.azureedge.net/

For dumpster rentals, Republic offers immediate, transparent pricing by using three factors to determine the cost of the job. These factors include the size of the dumpster, the weight of the material you plan to dispose of, and the distance between the dumpster location and the nearest waste disposal facility. They offer customers full-service yard debris haul-away services to further simplify your next landscaping project.

The prices vary based on location, dumpster size, and materials. So, before booking ensure the bin size is right for your project. As of May 2021, the rental cost of a 10  or 20-yard dumpster in Orlando starts at about $588 and goes up to roughly $592 for a 30-yard dumpster. The quotes include up to nine business days.

Customers also pay around $9 per additional day and $58 per additional tone five tons. Apart from renting Republic’s dumpsters for yard waste, you can also hire its team to haul away grass clippings, leaves, tree branches, and other yard debris after a storm. The company also offers sharps disposal, appliance recycling, household hazardous waste, and electronic recycling.

Pros of Republic Services

Quotes and reservations can be made onlineTheir pricing is transparent and rental periods can be customizedThey also offer yard debris haul-away services

Cons of Republic Services

The available dumpster sizes may vary in location

3. Junk King

Junk King offers a range of junk removal and dumpster rental services. The company works with non-hazardous items, such as household items, furniture, and appliances, but does not take hazardous waste or demolition materials. Similar to Waste Management, Junk King offers several container sizes that can be customized depending on your needs.

While many of the companies listed here offer residential services, Junk King stands out because of the company’s 12-yard MINI dumpsters. Rentals are available for three, five, and seven-day periods and Junk King picks up the dumpster when the rental cycle is complete.

Additional days start at a price of roughly $30 per day for three days. Renters may also encounter extra fees if they exceed 2,000 pounds. That’s if the bedload exceeds four cubic yards and if they dispose of items such as tires and mattresses. Apart from offering convenience and transparent pricing to its clients, Junk removal is also known for its sustainable practices.

Pros of Junk King

Customers only pay for the space they use and not the entire dumpsterOffers junk hauling services, including furniture removal and e-waste recyclingIts eco-friendly mission is dedicated to increasing recycling and reducing waste

Cons of Junk King

Only offers one dumpster size that may be small for large projects

4. Dumpsters. Com

If you’re looking for a cost-effective dumpster rental service, then Dumpsters.com may be a good option for you. The company offers small to large dumpster sizes that come in different dimensions as well as affordability to suit your budget needs.

Operating across the entire US, the company provides its clients with transparent pricing and no hidden fees. In addition, it also has an online calculator which makes it easy to estimate the cost of your rental. Dumpsters.com connects individuals and business owners with dumpster rentals.

In addition to assisting customers with standard residential and commercial dumpster rentals, the company also specializes in waste management for events. They can accommodate all event sizes, including single events, multiple events, and recurring events.

It also offers permanent dumpster rentals for businesses and organizations planning to hold multiple events in the same location. Customers can get the best price range through the Dumpsters.Com website, though you’ll have to call for a quote that’s tailored to your needs.

Pros of Dumpsters.com

Permanent dumpster rentals available for recurring eventsOffers rentals for a single event, bi-monthly and weekly eventsTheir website provides insights into the size dumpster you’ll need for various events

Cons of Dumpsters.com

Only local prices ranges are available online

5. Bin There Dump That

Bin There Dump That offers dumpster rentals to residential customers and businesses in the United States. It boasts of having dumpsters that are available the same day, though additional fees will apply for this service. Costs differ based on your location.

While it’s a national chain, each outlet is locally owned and operated. It’s more committed to homes than businesses which allow it to focus on respecting the needs of neighbors and homeowners associations. Bin There Dump That also builds speed into its business model.

It carries extra inventory specifically for last-minute orders, so once you request a dumpster, it can be delivered within 24 hours. And if you’re not sure of the size, you can request a call and the experts will walk you through booking the right service according to your needs.

If you’re looking for a hassle-free dumpster rental experience that won’t break the bank, Bin There Dump That is a great option. With its focus on customer service and quick turnaround times, you can be sure your project will be off to a smooth start. Plus, with a wide range of dumpster sizes to choose from, you’re sure to find the perfect option for your needs.

Pros of Bin There Dump That

Offers local, national, and international servicesAble to provide same-day dumpster rental servicesConsidered one of the most affordable dumpster rental companies

Cons of Bin There Dump That

Only offers a limited number of dumpster sizes

6. Redbox+

As the only dumpster rental with a built-in toilet, this dumpster stands out for construction and demolition projects. It specializes in combining portable toilets and dumpster roll-off containers. Securing this dumpster combination is as easy as a phone call.

All you need to do is to tell its team the size you’re looking for, when you need the dumpster delivered and where to drop it off. It will offer a quote immediately and the delivery was done within 24 hours. The company can also service your restroom and dumpster separately as needed, especially if you require their facilities for a long duration.

Redbox+ also consolidates two common needs on many construction sites, making it a great choice for home builders, contractors, and anyone looking to take on a major project.

Pros of Redbox+

Offers standard dumpsters and combination portable toilets and roll-off dumpsters10-yard mini dumpsters are perfect for smaller residential projectsWorks for residential waste, construction and demolition debris, roofing materials, yard waste, and commercial waste

Cons of Redbox+

Limited location, unlike other providers

FAQs about Best Dumpster Rental Companies

What is a dumpster rental company?

This is a company offering temporary waste disposal containers, usually in the form of a dumpster, for rent.

What is the average cost of a dumpster rental?

Prices vary depending on the size and type of container you require, as well as the length of time you need it for.

Who should use a rental dumpster?

Any homeowner carrying out home remodeling projects, cleaning large areas such as the garage and basement, and engaging in large-scale tree trimming and landscaping work should rent a dumpster.

Final Thought about best Dumpster Rental Companies

With many dumpster rentals available, it can be hard to narrow your choice and choose one. But, whatever you do you should do with a clear conscience, knowing the dumpster rental company has taken care of your trash responsibly and has taken all necessary safety measures when handling it. After all, it’s not just garbage-it’s someone else’s livelihood.


The post 6 Best Dumpster Rental Companies appeared first on Kitchen Infinity.

Did you miss our previous article…
https://chefbuano.com/?p=978

How to Whiten Yellowed Clothes

How to Whiten Yellowed Clothes

White clothing has always been a symbol of purity and cleanliness; however, it becomes dirty quickly due to various reasons such as sweat stains or food spills on the fabric. This makes it look dull and unattractive. You might want to throw away these tainted garments thinking there’s no hope for their recovery but wait.

A few simple tricks can bring back the shine in your favorite whites without much effort from your end. Here are a few home remedies to make your white clothes look bright and new. 

Use Oxygen Bleach

The gentlest method to whiten white clothes is to mix warm water with oxygen-based bleach. Make sure to follow the package recommendations when it comes to the amount of oxygen bleach to use. Add the bleach to the water and submerge the white clothes in the mixture. Let them soak for at least eight hours or overnight.


Image credit: https://i5.walmartimages.com/

Patience is very important. After that, launder as usual using the hottest water recommended for the fabric, then add half a cup of distilled white vinegar to the rinse water. This method is safe for polyester clothes, synthetic fabrics, and natural fibers like cotton and linen.

Use Bluing Liquid

If the yellowed clothes are white, you can use a bluing agent to help restore their color. Add 1/2 cup of the bluing liquid to the rinse cycle and let it run its course. This is an old-fashioned laundry product that can be added to the wash cycle to make white clothes appear brighter.

Use Bluing Liquid
Image credit: https://www.thespruce.com/

All you need to do is mix your bluing agent with cold water, following the instructions on the bottle. You’ll only need a 1/4 to 1/8 teaspoon, depending on what type of wash cycle you’re using. This liquid adds the slightest hint of blue, offsetting that yellowish hue that t-shirts, socks, and sheets can take on.

Use Baking Soda

Sodium bicarbonate or baking soda is an excellent cleaning product that you’ll find in every kitchen. To make your t-shirts whiter, make a baking soda paste with water and some salt. Apply the paste on the stains before tossing it into the washing machine. The t-shirt will come out clean and white as snow. 

There are two methods of whitening your clothes with baking soda. Add 1/2 a cup of baking soda along with your regular liquid laundry detergent at the start of the laundry cycle. You can also create a baking soda soak for your clothes to soak in before washing. If you choose to soak your clothes, allow them to soak for at least an hour and then wash as normal.

If you’re using powder detergent, add sodium bicarbonate during the rinse cycle. Baking soda is chemically similar to washing soda. It’s also a mild antiseptic so that it will protect your washing machine and clothes from bacterial growth.

Wash Your Yellowed Clothes Using White Vinegar

White vinegar is an excellent choice for cleaning clothes naturally because it’s a mild acid which makes it great for cutting through dirt and grease. There are two methods you can use to whiten your clothes with using white vinegar. The first method involves adding one cup of vinegar and your regular laundry detergent at the start of the wash cycle.

Wash Your Yellowed Clothes Using White Vinegar
Image credit: https://img.wonderhowto.com/

Distilled white vinegar is an excellent fabric softener and deodorizer that not only whitens clothes but can be used in stinky laundry. Add 1 cup of the washer’s last rinse cycle to also eliminate soap residue. For extra brightening, mix it with a ¼ cup of lemon juice.

Give Your Clothes a Citrus Soak

Another way to whiten clothes is by giving them a citrus soak. Fill a basin or sink with hot water and add lemon juice to give your white clothes a new glow. Soak the clothes for about 30 minutes, then rinse and wash as usual.

Give Your Clothes a Citrus Soak
Image credit: https://wl-brightside.cf.tsp.li/

The citric acid in the lemon, lime, or orange juice helps break down the yellowing and lighten the fabric. You can also use orange peels as a natural bleach. Wet the peels and rub them on the stained areas of your clothes. Let the juice sit for about an hour before rinsing and washing as usual. 

Lemon juice can also be used to remove stains from your clothing. Apply lemon juice on the rust stain and sprinkle some cream of tartar over the juice. Rub the solution over the stain and let it sit for about 30 minutes. The stain should go away. Wash normally after this if you know how to do laundry

Use Natural Laundry Detergents

Using laundry detergents that aren’t made with chemicals can help you maintain your clothes’ vibrancy. These natural detergents are made up of plant-based enzymes and natural minerals that can clean effectively like their synthetic counterparts.

These detergents are not as harsh on fabric as synthetic detergents, making them suitable for prolonging the life of your favorite clothes. They’re also biodegradable and non-polluting, unlike normal detergents. You can also learn how to make DIY laundry detergent if you want a much safer solution.

Use Bleach

Most bleaches such as chlorine, oxygen, and hydrogen peroxide break up stains through a chemical reaction called oxidation. Detergents remove stains while bleaches turn stains colorless by chemically altering their molecules. When using bleach, only go for whites and bleachable colors.

Check items for non-bleach only before using. To use bleach, start your washer, add 3/4 cup chlorine bleach to the wash water with your regular detergent, and add your laundry load. Note that chlorine bleach can produce dangerous fumes combined with vinegar, ammonia products, and other household chemicals. So, never combine them, as the combination can be hazardous to your respiratory system.

Non chlorine bleaches such as oxygen bleach and hydrogen peroxide are good in whitening. So, if you have any of these around, substitute them for the chlorine bleach in the recipe. They’re gentler and less toxic than chlorine bleach, making them safe for most fabrics and dyes. Hydrogen peroxide brightens whites and removes stains without harsh chemicals. Add 1 cup of hydrogen peroxide or oxygen bleach to your regular detergent when washing whites.

Use Sunshine as a Whitener

Wash your cotton, linen clothes, tablecloths, and other white laundry items. After that, allow them to dry in direct sunlight. Hang them on a clothesline or lay them on the lawn to let the sunshine whiten them. The sun’s UV rays can leave you with whitening whites in just a few hours.

Consider Sodium Borate

Borax is a naturally occurring mineral that helps remove stains. It also deodorizes and brightens clothes. Borax also breaks down the minerals in the water that can yellow clothes over time. Add 1/2 cup of Borax to your regular detergent when washing dingy whites.

Use Sodium Carbonate

Also known as washing soda, sodium carbonate has a higher alkaline level, making it a powerful cleaning agent. Add 1/2 cup to your laundry as a detergent booster. This cleaning can cause skin irritation, so rinse the area thoroughly if your skin comes in contact.

Baking Soda and Peroxide

Combine equal parts of baking soda, peroxide, and water in a small container, then using a toothbrush, rub the paste on the clothing that needs to be bleached. Allow it to sit for several minutes before rinsing with cool water.

FAQs about Whitening Yellowed Clothes

Why do white clothes become yellowed?

White clothes become yellowed for a number of reasons. These include:

When they’re exposed to a chemical and react with a substance in their environment, for example, the sweat stains the white fabricCooking with greasy oils frequently can also cause yellowing in clothes.Clothes will also yellow in storage because they react with substances in the storage container, especially wooden shelves, and cardboard boxes.Nicotine from cigarette smoke can also cause whites to be yellow

Final Thought on How to Whiten Yellowed Clothes

As you can see, there are so many methods of whitening yellowed clothes. It all depends on what is causing the yellowing and how severe it is. In general, the harsher the whitening method, the more likely it is to cause damage to the clothes.

So always test a small hidden area of the fabric before applying any bleaching agents to the entire garment. With these simple tips, you can now learn to whiten yellowed clothes.


The post How to Whiten Yellowed Clothes appeared first on Kitchen Infinity.

Did you miss our previous article…
https://chefbuano.com/?p=972

How to Propose: Marriage Proposal Dos and Donts

How to Propose: Marriage Proposal Dos and Donts

If you’re like most people, the thought of proposing marriage to your partner can be pretty scary. Will they say yes? What if I mess up? How do I even propose? The truth is that wedding proposals can be one of the most exciting things in life and one of the scariest. There are a few things you’ll have to avoid to make it work.

If you’ve been thinking about popping the question, make sure you follow these dos and don’ts for a special proposal experience. This guide covers everything from what kind of ring to buy, where you should go on a proposal trip, and how much money you should spend on an engagement ring. Let’s get started!

Dos of Marriage Proposal

Make Sure You’re on the Same Page

Before you pop the question, make sure you and your partner are on the same page about getting married. Marriage is a big commitment, and it’s important to be sure that both of you are ready for it. Talk to your partner about the future and let them know that you’d like to get married one day and ask if they see marriage in the future.

If you feel nervous about making this conversation look like a proposal, try to keep [it broad by discussing your best friend’s recent engagement. Yes, it’s a hard discussion, but hopefully, you’ll come out of it with an idea of what your partner will say when you open the ring box.

Buy the Bauble

There is no need to go overboard when picking out an engagement ring. Keep in mind your partner’s taste and stick with a style that you know they’ll love. Diamonds are always a safe bet, but if your partner isn’t into bling, there are plenty of other gems to choose from.


Image credit: https://static01.nyt.com/

The engagement ring is a piece of jewelry that your fiancé to be will wear every day for the rest of their lives. So, snap photos of the jewelry they wear daily. You can take a peek at their Pinterest Boards, ask a family friend or a family member to help you narrow it down.

After that, find the ring size and if possible, go ahead and ask. If you’re going the surprise route, make sure you check your partner’s jewelry.

Store Your Engagement Ring

Nothing ruins spontaneity faster than your partner seeing the bulge of a ring box from your pocket. In that case, keep the ring box safe and concealed up until the big moment by choosing pants and jackets with deep pockets with no holes.

Engagement Ring
Image credit: https://www.diamondwish.com/

Propose for Your Partner and Not to Him or Her

The traditional phrase is to propose to your significant other. However, if you think of it more as proposing for them, you’re more likely to plan a true dream proposal. Think of your love’s favorite and incorporate those in your proposal.

Plan for a Celebration

No matter how your partner says yes, you’re going to want to celebrate. Whether that means booking a table at your favorite restaurant or planning a weekend away, make sure you have something special lined up to mark the occasion. You don’t need to plan a full-on engagement party but ensure the two of you will celebrate the best moment.

Plan for a Celebration
Image credit: https://upload.wikimedia.org/

Get Personal

Now that you have a ring plan for the proposal. Think about the type of proposal your partner will love, whether it’s a grand gesture, an intimate moment, or a surprise surrounded by family and friends. Make sure you find a cool place that will easily glamorize the set mood. If it’s your cozy living room, deck it out with tons of candles to change the feel of the space. Learn how to decorate a room as you prepare for the big moment.

Chat with Their Parents

If your partner’s parents are still alive, notify them of your intentions before popping the question. You don’t need their approval, but it’s a respectful thing to do and can make for an even more special moment when they’re present to witness the marriage proposal.

Have a Backup Plan

If your partner says no, you don’t want the evening to be a total bust. Have a plan B ready to go that will still make for an unforgettable night. As you brainstorm for your backup plan, choose a few indoor spaces like her favorite museum or the place where you had your first date and in your back pocket should Mother Nature prove uncooperative. In addition, know what to do in case of traffic or if she arrives later or earlier than expected.

Do Make it Meaningful

This is the time you need to get sentimental. Think about the noteworthy moments in your relationship. Take your sweetheart to where you first met, kissed, and said I love you. You can share your favorite restaurant, view, stroll, book, and movie. Be creative with these details to make a special day even more so.

Donts of Marriage Proposal

Don’t Propose When Your Partner is Preoccupied

Proposing marriage is a big deal and should not be done when your partner is preoccupied with something else. If she’s in the middle of a work crisis, for example, propose after the situation has been resolved. Even if you’re eager to get down on one knee, you can’t do it if your partner isn’t in high spirits.

Don’t Tell Everyone

It’s okay to tell your family and friends but not everyone, but it shouldn’t be announced on social media. Avoid giving away the surprise by telling everyone you are planning a big day out with her. Your wedding proposal should remain a surprise. Hold off on sharing the news with absolutely everyone.

Don’t Do Without a Ring

You don’t have to spend a fortune on an engagement ring, but it should be something special. A wedding proposal without an engagement is a huge no. It might seem silly, but without a ring, the engagement might not feel real.

Don’t Rush

Make sure you’re ready to get married before you propose, or there will be regrets later on. You don’t want to regret taking that step, either because her answer wasn’t what you hoped for or it was too fast, and you weren’t ready yet. If you’re not ready and still on the fence, wait a little longer before getting down on one knee.

Don’t Propose in Front of an Audience

A private proposal is better unless she’s someone who doesn’t mind being the center of attention. If you’re planning on getting down on one knee in front of her family or friends, make sure everyone is invited.

Don't Propose in Front of an Audience
Image credit: https://thetempest.co/

Don’t be a Copycat

You can make your long-awaited run as smoothly as possible, but that doesn’t mean you have to copy your proposal planner, that’s not the best idea. Try to personalize your marriage proposal and plan it with your partner in mind. Don’t model to match someone else’s great idea.

Don’t Be Too Much of a Daredevil

Don’t do anything that might put you or the person you are proposing to in harm’s way. Proposals at a baseball game or theme park are cute ideas but take into account where you’ll be and what could happen if things go wrong. When choosing a place for your marriage proposal, stick to dry land and try not to do it on a blustery day, so your bling stays firmly in its box.

Don’t Wing it

While you don’t have to know exactly what you’ll say when you pop the question, make sure you have a plan. Do a little drafting to make sure you’re confident when the time comes. This will make you deliver a romantic speech.

Final Thought about Marriage Proposal Dos and Donts

There you go, marriage proposals dos and don’ts. Make yours memorable by doing something you know your partner will love. Don’t do anything too extravagant or unconventional, but make it yours and not a carbon copy of any other proposal she’s ever seen. The most important thing is to take a deep breath and go for it.


The post How to Propose: Marriage Proposal Dos and Donts appeared first on Kitchen Infinity.

Did you miss our previous article…
https://chefbuano.com/?p=967

DIY Washer Repair Guide

DIY Washer Repair Guide

You are doing laundry, and suddenly your washing machine starts leaking water. Washing machines are a necessity, but when they break down, it can be incredibly frustrating. They can cause a huge mess and damage to other appliances around them.

The cost of repairs for your washing machine can be expensive and time-consuming. If you have the skills to repair washers yourself, you could save money on the cost of repairs. You can fix this problem in no time at all with some simple tools that you probably already have lying around the house.

Here are seven tips on how to fix your washing machine with common household items that most people already own. These DIY tips can help you save the expenses of a repair call and eliminate some issues, so the problem is easier for the technician to solve. Read on!

Washer Won’t Spin

The lid switch detects the position of the lid and prevents the washer from spinning into the lid. A broken lid will keep the washer from spinning even if the lid is closed. Before you call in the repairman, check to see if the belt is your problem. Your plugs can get bumped loose by animals and fallen objects. 

You can do this by removing the broken lid switch. But first, use a continuity tester to test the switch and if you suspect that it’s broken, replace it with a new switch before spending money on professional help.

Check the Breaker Box

Once you’ve properly plugged your washer into the electrical outlet and still won’t run, check your central home electrical box to see if your fuse has blown and the circuit breaker has tripped. Replace the fuse and turn the breaker back on. If the problem persists, call an electrician immediately.


Image credit: https://howtofixit.net/

If the washer is plugged in, the breakers are okay, but it’s still not working; you may need a lid switch to engage for the washer to work. Today’s washer, both front, and top load models require this lid switch to work. 

These switches can break and need to be replaced. They also get gunked up with lint and detergent residue. Use a cotton swab and a little bit of rubbing alcohol to clean the contact areas.

No Fill or Slow Fill

With front load washers, it will fill up to the water level you choose. The fill valve could be restricted over time because of lint and debris, so turn off the unit, unplug it and remove the hoses. After establishing electrical power, the next thing you’ll need is water.

If there’s no water entering the washing machine, ensure the water valves are open. Make sure you have two valves, a hot and a cold. They should be marked by a red and blue knob or switch. Even if you wash in cold water, some washers won’t operate unless you open both valves.

And if your machine is getting, but it fills very slowly, you may need to open the valve more. If the water valves are open and still the washer won’t fill, you may have a clog in the filter screen. In this case, unplug the machine and turn off the water valves. Use a bucket to catch the remaining water in the hoses.

There are many things that can go wrong with your washer hoses both inside and outside the cabinet. And transferring a small wire clip from the old switch to the new switch can be a real challenge.  Use a screwdriver to unscrew the hose from your machine and check if there’s a clog in the filter. Clean the hoses of any water mineral build-up to reduce clogs and improve washer performance. 

You can also remove the back panel of your washer to access the additional water lines inside the washer that lead to and from the pump and the drain. Use vinegar and hot water for cleaning your washer and clear your clogged and dirty hoses. Any clogs you run into along the way, apply vinegar and hot water and watch the build-up melt away. Make sure you switch the water back on when you’re done with hoses.

Level the Washer to Prevent Noises

Terrible noises happen when you incorrectly load your washer or even your laundry has shifted during the cycle. For standard top load washers, never load clothing on one side of the central agitator; make sure you distribute it evenly around the washer’s tub. 

Level the Washer to Prevent Noises
Image credit: https://www.thespruce.com/

For high-efficiency top load washers without a central agitator, the problem could be overloading while in front load models, the noise can come if your machine is underloaded. If the thumping occurs during a cycle, stop the machine and redistribute the wet clothing.

For weird noises such as humming, clicking, and gurgling, the noise can be caught by objects caught in the washer’s drum and internal mechanism. Clicking and gurgling signals an object caught in the water pump and drain line. Make sure you check the pockets before loading clothes.

If your washer is making screeching and squealing noises, then it’s mechanically challenged and requires a service call. For uneven legs, use a bubble level and a wrench to twist the feet to retract and extend them until the washer is level on top.

Washer Leaks

If you are experiencing water leaks, the first step is to determine if it’s a supply hose leak or a water valve leak. Check your washer’s hose connections to the hot and cold water valves. You can use a dry hand and a paper towel to run down the length of each hose.

Washer Leaks
Image credit: https://applianceexpresstx.com/

If you find any dampness, tighten immediately and if the hose has small splits, replace it immediately. A burst water hose is a huge mess and damages the walls and floors. Make sure you check and replace your washers regularly to prevent this mess.

Pay close attention to where the puddle is located, whether in front of the washer or at the back of the washer. The location will tell you what to do next. If you have a front loading machine, make sure you’re using a high-efficiency detergent to remove soapy puddles on the floor. 

High-efficiency detergent is formulated to be low-sudsing and to be used in the lower levels of water in a front-loading washer. Front-loading machines have a small overflow system on the back of the machine, and if you have too many suds, then they’re escaping from there.

Clothes are Too Wet After Final Cycle

If you perfectly know how to do laundry but your clothes still come out of the washing machine still wet, it might be because the washer is not draining correctly. To test this, pour a cup of water into the washer and start a cycle. If the water doesn’t drain out, then you’ll need to clear the drain.

Your water pump may be clogged with lint or a small object. If the pump isn’t allowed to work freely and properly, it drains out too slowly, leaving your clothes wet. You can remedy this by simple cleaning.

If that’s not the case, your drain hose could be clogged with lint and hair. You can easily clean this with a thin, long-handled brush. You’ll get the brushes at pet shops to clean the aquarium tubes if you can’t find one at a hardware store.

Go Through the Manual

If you have no clue what’s wrong with your washer, your first stop should be the washer’s manual. It will provide you with diagrams and troubleshooting tips. And if you don’t have the manual, visit the manufacturer’s website or download a manual from one of these sites. This will be time-consuming but much less expensive than a repair call.

FAQs about DIY Washer Repairs

Is it worth fixing an old washer?

Yes, especially if the repair cost doesn’t exceed 50% of the cost of a new washer.

Do washers have fuses?

Yes, they have fuses that protect them from power surges. Washing machines require a lot of power to run.

Final Thought about DIY Washer Repairs

lIf you love to fix things DIY, then appliance repair at home is a great option. Don’t be scared of appliance repair with the help of this article, and go ahead and fix your washing machine without any professional help. But if you think the problem may be beyond your knowledge, don’t hesitate to call a professional.


The post DIY Washer Repair Guide appeared first on Kitchen Infinity.

Did you miss our previous article…
https://chefbuano.com/?p=962

Is Cypress Mulch Good or Bad?

Is Cypress Mulch Good or Bad?

When you’re shopping for mulch, there are a lot of options you’ll come across. Some mulches are made from wood chips, some recycled paper, and others from ground-up corn cobs or pine needles. You may have heard that cypress is one of the best kinds of mulch to use in your garden because it’s free of chemicals and will help improve the soil over time. But other people say that using cypress mulch can be bad for your plants and may even affect the quality of your soil. 

This article will lay out all sides to this debate so you can make an informed choice about whether or not you want to use this type of mulch in your yard. Read on!.

What is Cypress Mulch?

Cypress mulch is made from the shredded wood of the cypress trees, bald cypress trees, and pond cypress trees. Home improvement stores and garden centers sell either 100 percent cypress mulch or a cypress mulch blend containing other types of woods. 


Image credit: https://www.pahls.com/

Cypress mulch comes mainly from Central Florida and Louisiana, where it was a by-product of lumbering. The increasing demand for cypress mulch has put it under attack by the cypress mulch industry. All cypress mulch 

Cypress mulch is often cheaper than hardwood mulch, but it’s not environmentally and sustainable mulch. So, consider the pros and cons of using cypress mulch in your garden before you start using it.

Benefits of Cypress Mulch

Deterrents

Cypress mulch shares other benefits of cypress wood mulch. It prevents weed growth because weed seeds need light to germinate, and mulch keeps them in the dark. This mulch is an organic material used in landscaping and gardening and is a great mulch in deterring weeds. All organic mulches help the soil retain moisture, keep the soil cool and insulate plant roots during freezing temperatures. This mulch doesn’t only deter weeds, it also deters insects and reptiles.

Deterrents
Image credit: https://www.thespruce.com/

Chips and Shredded

This mulch is made from pond cypress trees and bald cypress trees. Both the back and wood of the tree are ground up to make cypress mulch, and the mulch is available in either chips or shredded cypress. The shredded is the better choice than chips because it stays in place longer and composts faster. Shredded cypress mulch is also cost-effective, making the cypress mulch less expensive than other organic mulches.

Nutrients and Microbes

Cypress mulch decomposes to add nutrients to the soil, while some mulches such as shredded newspaper do not. Most plants benefit from these added nutrients from cypress mulch. Some organic mulches such as pine needles and pine bark change the soil pH as they decompose, thus adding acid to the soil and lowering the soil’s pH. On the other hand, cypress mulch is neutral and doesn’t change the soil’s pH as it decomposes.

ppearance

Cypress mulch is an attractive ground cover than other wood mulches such as pine bark, cedar bark, and shredded hardwood mulch. It also has a fresh, pleasant smell when it’s fresh. Cypress mulch weathers to a soft, gray color, a property that is often considered a valuable attribute. While other mulches might blow away, cypress mulch, especially pine bark mulch, tends to float away after heavy rains. Therefore, it will not need to be reapplied, unlike other mulches.

Why Cypress Mulch is Bad

While cypress mulch has a lot of benefits, it’s also a bad choice of mulching material due to the environmental impact of harvesting cypress trees and the detrimental effect this mulch can have in your yard.

Why Cypress Mulch is Bad
Image credit: https://www.gardeningknowhow.com/

Unsustainable

The demand for this cypress has caused these trees to be harvested faster than they can grow. The continued harvesting of cypress trees for mulch is unsustainable and may decimate old-growth cypress forests.

Properties

One of the purposes of mulch is to help the ground retain moisture. This relieves you from watering your garden bed and protects the plants from the effects of drought. However, cypress isn’t a good conveyor of water and moisture because it’s very fibrous.

The mulch has a high capacity for holding water, preventing the available water from seeping below the mulch. When the cypress becomes dry, it repels water instead of absorbing it. This prevents water from reaching the ground below the mulch and the roots of the plants.

Stability

Cypress mulch tends to wash away more easily than other mulches. This makes it a bad choice in areas subject to heavy and frequent rains. When it’s also saturated with water, it becomes heavy and does a better job staying in a place, making you replace it more frequently than other mulches.

esthetics and Acidity

Cypress mulch is also known for its unpleasant odor. Some people find it offensive, and others say it smells like rotting flesh. Cypress mulch is also very acidic. This can harm or even kill plants that are sensitive to acidity.

lternatives to Cypress Mulch

There are several sustainable alternatives to cypress mulch. If you’re looking for a long-lasting mulch, opt for a tree-based mulch such as pine trees, mixed hardwood mulch, and eucalyptus mulch. Like cypress mulch, these alternatives come from trees in the south and central Florida.

Alternatives to Cypress Mulch
Image credit: https://www.truevalue.com/

Eucalyptus is grown specifically for mulch, and the trees grow much quicker than other cypresses. Fortunately, the best mulch for your garden will depend on various factors, such as the needs of your green space, your visual preferences, and how much work you want to have in maintaining it.

FAQs about Cypress Mulch

Is cypress mulch better than regular mulch?

Cypress mulch is better because it’s less expensive than many other organic mulches, and it adds a lot of benefits to the soil. Also, all old-growth cypress groves have been clear cut and what is left is under attack by the cypress mulch industry.

Final Thought about Cypress Mulch

As you can see, cypress mulch isn’t always better. It’s sometimes worse, but it is what some gardeners prefer. If you are looking to care for your plants by protecting them from certain insects or weed growth, cypress mulch may be the way to go, but if you want something more sustainable, look for other types. 


The post Is Cypress Mulch Good or Bad? appeared first on Kitchen Infinity.

Did you miss our previous article…
https://chefbuano.com/?p=952

Best English Cottage Designs

Best English Cottage Designs

The English Cottage style is a popular home design that many people love. This is because the cozy English cottage design style will make your home feel rustic and closer to nature than ever before. However, it can be difficult to find the right one for you. There are so many different types of English cottage house plans, and they all have unique features. 

It’s hard to know which ones will work best for your needs. We’ve done some research on this topic and put together a list of the most common types of English cottage house plans below. You’ll learn what makes each type special and how you can incorporate them into your home design project.

What is English Cottage Design?

English cottage design blends antique and architecture to recreate the look and feel of a quaint home in the English countryside. English country homes are warm, comfortable, and inviting. The English cottage house plans are characterized by extensive gardens, thatched roofs, and rustic interiors full of wood and character-filled antique furniture.


Image credit: https://www.thespruce.com/

Characteristics of Cottages

Though there are some differences depending on the region of origin, English cottage house plans have a number of things in common. These include:

False-Thatched Roofing

This is the perfect alternative to the traditional thatched roof. False-Thatch is an insulated, fire retardant roofing material with a natural appearance of thatch. False-Thatched Roofing is made in many styles and colors to suit all properties.

False-Thatched Roofing
Image credit: https://images.squarespace-cdn.com/

It didn’t take long for people to realize that False-Thatch was indistinguishable from thatch in appearance, durability and that it could cost up to 40% less. It is made of modern materials such as steamed wood shingles, and composition roofing is rolled around eaves, resembling thatch.

English Country Garden

This English cottage house plans to have a romantic garden and a great atmosphere. The style of the English Country Garden is a long-standing tradition that dates back to the 18th century when they were created for practical reasons in an age when time was precious and labor was expensive. This tradition has continued into the 21st century, albeit with many modern twists.

English Country Garden
Image credit: https://www.britain-magazine.com/

This cottage-like home is like stepping into earlier times in England. Since the English Country Garden style uses natural materials, the look has a rustic feel. This home is perfect for anyone who loves to garden or prefers to eat homegrown vegetables and fruits. The charm of this cottage lies in its simplicity and use of natural resources, which allows it to be low-cost yet very functional.

Older-Looking English Cottage

If you have French antiques and furnishings, English country decorating might cause the room to look cluttered and crowded. The English country style is less formal than other types of interior design and would best fit a bedroom decorated in ornate Victorian antiques, like this one.

Although there is simplicity in the cottage style, it doesn’t mean that you should avoid color. In fact, you can add architectural elements and furnishings to give a newish home character and lots of personal touches.

Bibury Cottage

If you want to stay in the cottage style with English country decor but add more color, go for it. There is no reason why this room has to be painted white. This bedroom with dark wood paneling and bed frame with blue Peacock fabric looks striking with its gold accents. The tall mirror adds height, which is always great in a room.

Colorful patterns are another way to add more color without having to change the overall color scheme. Here, English country decorating styles clash with modern furniture creams and reds, but it is still fun to look at. Also, note the characteristics of front-facing gables and steeply pitched roofs.

dd Cottage Door Windows

Cottage doors are charming. They help create that English countryside looks and feel, such as the door here -with its blue floral design almost like wallpaper. If you don’t want to go with a fully-fledged country style for your cottage bedroom, keep the doors but do something interesting with them. 

The geometric pattern on the left-hand side of this door is both striking and scrumptious. Add a contrasting color for the doors, such as the pastel green, to complete your design. A favorite choice is French windows that are inset into the wall rather than being freestanding in front of it. You can use wooden shutters to close these during the day and then open them at night, perhaps with a candle placed on top of one.

Use Every Nook and Cranny

If your home features angular, tight spaces, don’t be afraid to put them into cozy nooks. Features that are difficult to navigate are easily given purpose with English cottage house plans. English cottage style is known for its cozy, small living spaces used for as many creative purposes as possible. You can highlight your style by using every nook and cranny in the house to create a homemade, rustic feel.

Wiltshire English Cottage House

This cottage is located in a tiny rural village in Wiltshire, England. It has a false thatched roof, leaded, casement windows, and stacked chimneys. This English cottage style is made of stone and timber with red brick. There is a small portico on the front of the home with black supporting columns, giving it a rustic feel. 

This house has mainly all wood interior, including floor plans, staircase, walls, wainscoting, doors, and baseboards. It also has decorative plasterwork throughout the house. This house is about 7,000 square feet. It includes two bedrooms, four bathrooms, and three fireplaces. This cottage-style home has an open plan kitchen with breakfast area that leads to a family room with a stone fireplace.

There are reclaimed beams throughout this home, giving it the rustic feel that the owner was trying to achieve. The dining room is open to the kitchen with an island. The living room has a stone fireplace.

FAQs about English Cottage House Plans

How do you make an English cottage look?

Create an English cottage look by planting lush greenery. Plant bushes, trees, and other greenery native to your area, and creeping plants such as ivy will make your home look like it’s emerging from nature.

Final Thought about English Cottage House Plans

English cottage house plans are very popular home plans because they offer so many different layouts. When building your own house, you can choose one-story English cottages or two-story versions, but be sure to consider the number of bedrooms and bathrooms you must have for your family size. Be sure that you include plenty of storage to keep all of your belongings neat and tidy.


The post Best English Cottage Designs appeared first on Kitchen Infinity.

Did you miss our previous article…
https://chefbuano.com/?p=894

18 Scandinavian Bedroom Decoration Ideas

18 Scandinavian Bedroom Decoration Ideas

When it comes to interior design, a bedroom isn’t always for an amateur interior designer. Ranging from the bed, choosing the nightstand, and thinking about storage for your clothes and belongings, there’s so much you have to consider.

You want to create an all-white Nordic style or hotel room but don’t know-how. If you’re looking for clean lines, simplicity, light, and airy while still maintaining a sense of calmness and relaxation in your bedroom, then Scandinavian bedroom decor is perfect for your home.

Along with a common culture and language, the Scandinavian countries of Norway, Sweden, and Denmark share this decorating style that is light, airy, simple, and clean. Let’s take a look at the different ways you can create this relaxing space in your own home.

1. Peaceful Scandinavian Style

Scandinavian bedroom decorating style borrows from the country’s history and sensibility. Since many residents of Scandinavian countries reside in small apartments, they have to find ways to maximize space and light. That’s why this Scandi style is popular worldwide, not just in the chilly north. The peaceful bedroom captures the serenity of real Scandinavian decor.


Image credit: https://www.thespruce.com/

2. Lighting is Key in Scandinavian Interiors

Scandinavian bedrooms might be some of the best-decorated rooms in the house. One reason for this is because of the lighting needs of Scandinavian residents; they need to maximize natural light and add simple lighting fixtures such as bedside lamps or overhead chandeliers. This helps to create a restful atmosphere, which is what Scandinavian designs are all about. 

So, when thinking about your Scandinavian interior, make sure you provide several types of natural lighting. This will not only create a restful atmosphere but will also help with mood-building purposes.

3. Color it White

Many Scandinavian bedrooms start with the color white. White is a reflection of light and also works very well with other colors. If you choose to paint your bedroom walls white, it is best to leave at least one wall in a different color; this will add depth and interest to your room while maintaining an overall feeling of simplicity and relaxation. 

Color it White
Image credit: https://st.hzcdn.com/

The leaning wall ladder is a popular decoration in Scandinavian bedroom design, so when painting your walls, paint the leaning ladder in white color. The ladder can be used in different ways in your bedroom, including storing your robe, a throw blanket, a faux fur rug, and other fabric items.

4. Mid Century Furniture

A great feature of Scandinavian bedroom decorating ideas is Mid-century furniture. This style features clean lines, simplicity, and minimalism. Mid-century furniture can be tricky to pair with other designs or concepts.

Mid Century Furniture
Image credit: https://www.thespruce.com/

The best way to introduce the concept into your home would be by choosing a specific room like your bedroom, where you can easily incorporate this type of furniture without worrying about clashing with other styles.

The sleek look of this furniture can work well with the minimal aesthetics of Scandinavian homes. You can also buy a mid-century nightstand, a mid-century bed, and a mid-century dresser to achieve this look in the bedroom.

5. Canopy Bed in a Scandi Bedroom

A modern canopy bed with a dark wood finish is the perfect piece to use to introduce this design concept into your bedroom. The monochromatic colors of the room and simplicity of the design of the bed will create an interesting contrast and fit right in with Scandinavian bedrooms.

6. Black Walls

A bold design choice like a black bedroom wall can work well in a Scandinavian style bedroom. Since Scandi style appreciates neutral colors such as black, brown, white, and beige, this high-contrast interior is great for the bedroom. 

Black Walls
Image credit: http://cdn.home-designing.com/

Also, people like it as dark as possible when they sleep at night, and the black-painted walls can help you achieve this ideal sleeping situation. Make sure your bed and walls are lighter colors like beige and white to prevent creating an ugly black box.

7. Muted Colors

The ceiling, the floor, and the furniture should be in lighter colors than black if you want to create a Scandinavian bedroom. Most Scandinavian bedrooms are created using muted colors like dark purple, pale pink, and faded blue. There’s also a Scandinavian blue, which is very popular in Scandinavian kitchens.

8. Bring in Natural Light with Large Windows

Bring in natural light with large windows to create a more spacious feel. This is what Scandinavians are known for, their love of nature and the outdoors. Make your bedroom full of life by bringing in natural sunlight. 

Bring in Natural Light with Large Windows
Image credit: https://media.designcafe.com/

To complement this, ditch heavy curtains and use adjustable window treatments such as blinds and shutters instead. If your windows are not large, try to enlarge them with sheer curtains.

9. Consider a Fireplace in the Bedroom

Most Scandinavian bedrooms have a fireplace as it was originally intended as a room for firewood. In this age of gas and electricity, the fireplace is more for aesthetics, with some models even holding candles.

10. Scandinavian Cottage Bedroom

While the Scandinavian decor is generally pared down and minimalist in feel, it doesn’t mean that there’s no room for personality, warmth, and touches of other decorating themes. The Scandinavian bedroom has a cottage vibe while maintaining the limited palette, clean lines, and airiness typical to Scandi style.

Scandinavian Cottage Bedroom
Image credit: https://st.hzcdn.com/

11. Neutral Wood Beds and Headboards

Scandinavian bedrooms often have beds with headboards made of wood. However, other materials can be used for the headboard, including metal or wicker, but wood is most common. But both neutral wood bed and headboard are great Scandinavian bedroom design choices.

It will warm up the bedroom while keeping in line with a minimalist aesthetic. There are no fancy elements with this bed. It’s functional and simple, with two nightstands on either side of the bed that blend well with white walls behind them.

12. Go All Out with Textures

A blend of cozy textures is essential for creating the ultimate Scandinavian bedroom. The room must be warm, inviting, and comfortable so that you can relax better at night. By adding soft cushions and pillows to the bed, you get a cozy reading nook where you can curl up with a book or watch television in comfort after a stressful day at work.

13. Abstract Wall Art

Many Scandinavian interiors feature black and white artwork. There are no representational works in Scandinavian homes. So, stick to abstract shapes and minimalist forms when placing art on your wall. You can opt for drawings, paintings, and sculptures; be sure to keep it minimal and abstract.

While you’ll often find a gallery wall of smaller black and white artwork, it’s always good to big with one large artwork. The larger pieces will add a zing of excitement, while the muted color will keep the overall vibe soothing.

14. Create a Cozy Reading Corner

A beautiful Scandinavian bedroom is often one where you can curl up and read your favorite book while enjoying the comfort of soft pillows, sheepskin throw, fur, cozy blankets, and a steaming cup of homemade tea. This kind of space allows you to get lost in your books while cozying up with loved ones or friends.

15. Go Slightly Bolder with a Colorful Scandi Bedroom Scheme

Now, this doesn’t mean painting the walls bright red or yellow. A Scandinavian bedroom usually sports muted colors like light blue or grey. You can still achieve that light and airy feel of a modern Scandinavian design while adding a playful touch to your decor with traditional folksy prints and rich tones such as mustard and burnt orange.

16. Maintain Open and Airy Spaces

The typical Scandinavian room leaves plenty of open space between pieces of furniture. This gives the room an airy, fresh vibe and prevents any cramped and cluttered feel during the dark winter days.

17. Small Scandinavian Bedrooms

When you’re working with a small space, it’s best to go with simple modern furniture. Twin beds and small side tables can be a great addition when working with a small bedroom design.

18. Add Rustic Touch to Your Modern Bedroom

Love the country charm of large, wooden slatted beds? Pair it with a sleek modern dresser and bedside tables for styling contrast. Choose a stand-out piece of vintage furniture to make your bedroom look more rustic and modern.

FAQs about Scandinavian Bedroom Decorating Ideas

What is a Scandinavian bedroom?

Scandinavian ideas originated from countries such as Sweden, Denmark, and Norway. A Scandinavian bedroom design has many different vibes, depending on the design route you choose.

What makes a Scandinavian bedroom?

Scandinavian bedrooms, just like the rest of their interiors, have a minimal amount of color. These bedrooms feature all dark walls, a dark wall, and richly colored textiles about comfort, coziness, and textures.

Final Thought about Scandinavian Bedroom Decorating Ideas

As you can see, Scandinavian bedroom decorating ideas are very popular not only in the chilly north but worldwide. This decorating style is easy to implement, and the results are very appealing. So, if you’re just learning how to decorate your bedroom, consider the Scandinavian decor and you’ll love it.


The post 18 Scandinavian Bedroom Decoration Ideas appeared first on Kitchen Infinity.

Did you miss our previous article…
https://chefbuano.com/?p=882

12 Inspirational Kitchen Wallpaper Ideas

12 Inspirational Kitchen Wallpaper Ideas

If you are looking for ways to make your kitchen look unique, then try out kitchen wallpaper. Decorating your kitchen is not an easy task. You need to consider the design, colors, and patterns of the wallpapers before you start decorating your kitchen walls. Wallpaper can be used in any room of the house for a stylish look with minimal effort.

Kitchen wallpaper is one such type that adds elegance to any home décor. It can transform an ordinary space into something extraordinary and unique. These days, there are many options available when it comes to choosing from different designs of wallpaper for kitchens.

If you want a creative way to makeover your kitchen wall, try out these new ideas on how you can use wallpaper on your walls instead of paint, tiles, and marble pieces.

1. Pantry Makeover

Adding wallpaper in the kitchen pantry will instantly hide any stains on your walls. However, you must choose the right color that will complement the design of your cabinets. Consider a small pantry that uses uplifting, colorful floral wallpaper as a backdrop for shelving and storage.


Image credit: https://www.classyclutter.net/

Taking risks in this small risk space is a great way of experimenting without huge investment and commitment. Dressing up the utilitarian corners of your home in bright colors and patterns is a small life-affirming act of care for your room.

2. Backsplash

Instead of using a tile backsplash, consider vinyl wallpaper that is easy to clean and replace. If you think that tile might be too permanent, you can try samples of stone-look textured wallpaper attached only temporarily onto the wall with double-sided tape or light adhesive.

Backsplash
Image credit: https://www.thespruce.com/

This way, if your taste changes or you decide to change your kitchen layout,, you can quickly use wallpaper remover to remove it and restore your kitchen to its original look. Vinyl wallpaper will also save you a lot of money in the long run.

3. Feature Wall

Feature walls are a great way to make your kitchen look one of a kind. While everyone else uses subway tiles or standard white tiles, you can stand out from the crowd by putting up wallpaper. You might think this idea sounds too bold, but remember that you can always use accent colors and patterns and be as daring as you want.

Feature Wall
Image credit: https://www.thespruce.com/

Install an accent wall of wallpaper in any pattern that strikes your fancy. Don’t worry about coordinating colors and styles if you want to keep the rest of the space neutral. Feel free to go bold by dressing your contemporary cookie kitchen.

4. Get Inspired by Art Deco

From the late 1890s through the early 1940s, art deco was all about bold colors and geometric patterns. This trend has made something of a comeback over the past few years in interior design, so you can even find wallpapers that look like they came straight from an art deco painting.

Get Inspired by Art Deco
Image credit: https://s3-us-west-1.amazonaws.com/

These art deco prints will never get old despite their age. So, get a huge range of art deco-inspired patterned wallpapers. Make sure you line them up well due to their intricate pattern.

5. Add a Geo Backsplash for a Special Pop

To add a special touch to the kitchen, you can use this glazed Geo backsplash tile. These handmade tiles come in all kinds of colors and shapes. You can choose the right combination for your wall and decorating palette with different colors and patterns. The silky smooth surface of these handmade tiles makes them easy to clean.

However, to keep them in top shape, you need to wipe them with a damp cloth at least once daily. If the bright color doesn’t look appealing, opt for black and white wallpaper in a neat geometric design. Geo patterns can go well with any kitchen color scheme.

6. Consider Shades of Green in the Kitchen

Choosing a green color for your kitchen wallpaper is a great idea. It will add an organic touch to the room without making it look dull and grey. If you want something more striking, use bright lime or grass green shades in your wallpaper design. The dark background makes these colors stand out beautifully to give the room a bright look.

An otherwise simple white kitchen is the perfect blank canvas for a bold usage of pretty graphic wallpaper. Green is also a great color for bringing plants into the kitchen. Grasses, ivies, and ferns will look stunning when paired with these colors. If you aren’t comfortable with grasses and plants inside your home, use different shaped plants like bottles of ferns to give the same effect.

7. Consider Tie in Statement Colors with Existing Wallpaper

When designing your kitchen, you can go bold by using striking wallpaper for the whole room or around one wall. If you want to have an interesting statement wall in your kitchen, try creating a beautiful pattern with various shades of green.

The blue and white wallpaper print makes the teal shiplap and marble countertops look like a match made in home decor heaven. Blue and white is a classic kitchen colorway that always feels fresh.

8. Bring in Dark Floral Prints for a Hint of Dramatic Flair

A pretty floral print on wallpaper can turn your kitchen from dull to fab in one simple stroke. To keep the look from being overwhelming, use it as an accent wall. In this smart and stylish kitchen, there is no room for boring or bland, so they have used their statement wallpaper to beautiful effect.

Bring in Dark Floral Prints for a Hint of Dramatic Flair
Image credit: https://www.thespruce.com/

Green patterned wallpaper is used on the kitchen ceiling, which is unusual, but it adds an interesting feature to this contemporary kitchen. If you are looking for a bold statement and a stylish focal point, go for a dark geometric pattern. The black dots are also echoed in the tiling on the wall behind the cooker unit and the hob.

9. Bring the Texture

The texture is a very important addition to any room, kitchen included. The right wallpaper not only adds visual interest to your wall but can also bring elements of texture to your entire kitchen.

10. Add a Black Kitchen Backsplash

To create a sleek and modern kitchen, you can combine black kitchen cabinets with black countertops, backsplashes, and flooring. It looks very stylish even when it is done in contrast to other colors. Black-and-white geometric tiles give you the opportunity to put your stamp on the kitchen design project. This is an inexpensive alternative to tile and gives you a perfect kitchen backsplash

11. Corner Booth

Wallpaper is a great way to add personality to any room, including the kitchen. One of the underappreciated aspects of this idea is using wallpaper in an unexpected place. When you are tired of plain tile or give up on painting cabinets, consider covering them with wallpaper instead.

Corner Booth
Image credit: https://loyalistforest.com/

12A booth can be used as both a decoration and a functional space, including a dining area where you can have family dinners and late-night drinks once the kids are in bed.

12. Go French Countryside with a Muted Floral Themed Design

You can even buy cloth wallpaper that looks just like the real thing. The best part of this idea is you will have a unique kitchen unlike anyone else’s in your neighborhood. 

Thanks to the paned windows and muted floral wallpaper print, a charming kitchen will feel like a traditional chateau off the French countryside. The sage-colored cabinets, marble countertops, and minimal conces add a modern twist that helps the kitchen feel more current and upscale.

FAQs about Kitchen Wallpaper Ideas

Is peel and stick wallpaper good for kitchens?

Yes, peel and stick wallpaper lets you add fun and color patterns to your kitchen without the permanence and expense of traditional wallpaper.

Is kitchen wallpaper a good idea?

Designers say wallpaper is a secret ingredient for creating a unique, whimsical kitchen. Whether you keep it in your backsplash, bar, breakfast nook, or cover every wall, wallpaper can instantly transform your kitchen.

Final Thought on Kitchen Wallpaper Ideas

As you can see, kitchen wallpaper ideas can be easily customized to your specific tastes and requirements. Today, we have seen how an elegant and stylish kitchen can be made just by changing the wallpaper, and this makes it easy for you to go ahead with the same idea to get that stunning kitchen you always wanted.

If you love fun and adventurous styles, then there are innumerable options available at your disposal. So what are you waiting for? Go ahead and give your kitchen a touch of elegance by changing the way it looks.


The post 12 Inspirational Kitchen Wallpaper Ideas appeared first on Kitchen Infinity.

Did you miss our previous article…
https://chefbuano.com/?p=865