What is the KonMari Method?

What is the KonMari Method?

Many people live in cluttered homes which end up complicating their life as well. It’s not that they don’t know how to declutter your room but the process itself is very complicated. 

Well, if you could focus on the things in your home that give you joy, then everything else would fall into place. Marie Kondo has developed a method that makes this easy and simple, so you can get rid of clutter fast without having to sort through every item in your house one by one. It’s called the KonMari Method because she says we should only keep items that spark joy.

Here’s everything you need to know about the KonMari method.

What is the Konmari Method?

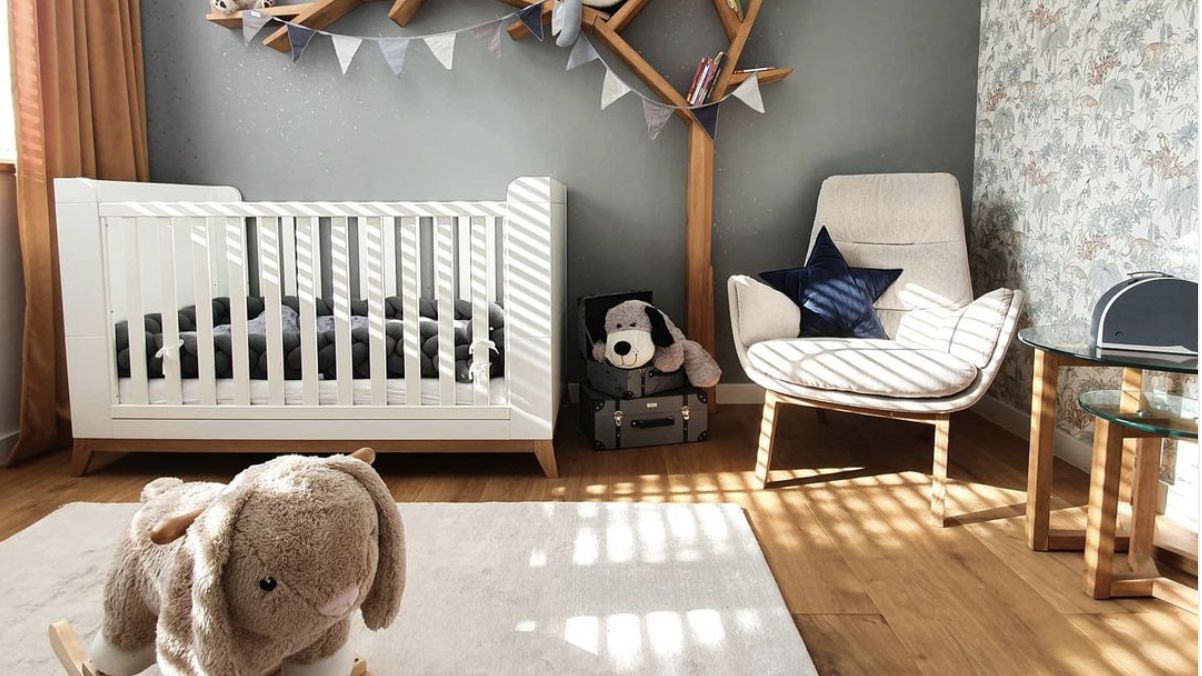
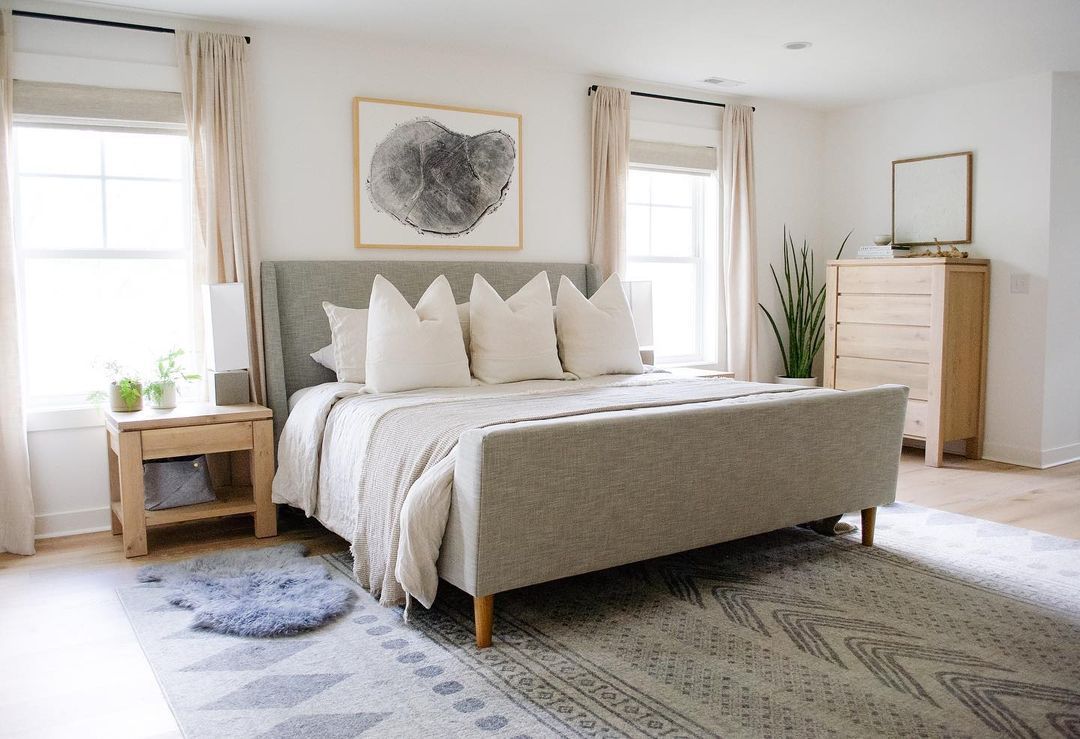
KonMari, also known as KonMarie or Marie Kondo, is a tidying expert in Japan. She has written several bestselling books on the process she uses to transform individuals and families. Created by Marie Kondo, professional home organizer and author of the bestselling book, The Life-Changing Magic of Tidying Up, the Konmari method emphasizes removing clutter from your home and surrounding yourself with things that spark joy.


Image credit: https://tidycasa.com/

In other words, the konmari method is a simple but effective tidying method that ensures you’ll never relapse to clutter again. It uses unique selection criteria by choosing what sparks joy. Through this tidying process, you can reset your life and spend the rest of your life surrounded by the people and things you love most.

After the release of the Netflix TV show Tidying Up with Marie Kondo in 2019, many people globally have been using Marie Kondo’s tips to declutter their homes and stay organized.

How Does the KonMari Method Work?

KonMari has six basic rules that can help you declutter, get organized and create a home filled with items that make you happy. Here’s how the KonMari method rules work:

Commit Yourself to Tidy Up

The KonMari method is not a quick fix for a messy room. Instead, it’s a chance to reset your entire life, but only if you commit to following its principles. The first rule of tidying is setting your intention to seriously tidy up and resolving to put in the time and effort required. 

When approaching your tidying festival with a clear vision and a can-do attitude, you’ll find the energy and motivation you need to tidy all your belongings in one go. The effort will be worth it in the end, and you’ll not only experience the joy of living with objects that you love, but you’ll also be on the path of establishing your ideal lifestyle.

Marie Kondo’s theory is the more you can get rid of, the easier it will be to tidy up and remain organized. So, don’t get discouraged if the process takes longer than a day.

Imagine Your Ideal Lifestyle

Before you start, imagine your ideal lifestyle and identify the objects that make it a reality. If this is your first time tidying up, you might not be able to picture what your perfect life looks like. But it’s never too late to change and improve after all.

Marie Kondo’s tidying process isn’t about decluttering your house or making it look neat on the spur of the moment for visitors. It’s all about tidying up in a way that will spark joy in your life and change it forever. 

Consider what kind of a house you want to live in and how you want to live in it. Make sure you describe your ideal lifestyle. You can draw and sketch out what it looks like if you like. You can also describe in a notebook or cut out photos from magazines.

When you imagine your ideal lifestyle, you’re clarifying why you want to tidy and envision your best life. The tidying process represents a turning point, so make sure you consider the ideal lifestyle you inspire.

Finish Discarding First

Once you know what your ideal lifestyle is, you’ll be able to decide which items have value in your home and fill a purpose for that lifestyle. Considering each item and sorting them to keep and discard piles allows you to create more space for the organization and storage solutions that come later in the Konmari method.

Discarding items is not the point of the Konmari method, but it’s important because it provides the opportunity to determine the items that will help you live your life as you envision it as well as those items that no longer fit into your lifestyle. After you’ve discarded, you can turn your full energy and attention to what sparks joy.

Sort by Category, Not Location

The Konmari method advises sorting by category rather than the room. This allows you to work on one type of item at a time and ensures that each category is treated with equal importance. In other words, you’ll have a hard time getting motivated to finish if all of your clothes are in one room and the books are in another.

If you’re cleaning your home room by room, you’re most likely rearranging items and tossing out only a few things since it doesn’t feel like a ton of clutter for that room. Tidy by categories such as clothes, books, papers, miscellaneous items and sentimental items. 

This way, you’ll be on the right track to success. If you find yourself doing this, try to give each category its own dedicated space and do your best not to keep related items together. The Konmari method prefers that you spread out categories throughout your entire home.

Follow the Right Order of Tidy

This is probably the most important aspect of Konmari. You want to tidy up in the correct order to meet your tidying needs by starting with what’s most necessary first.

The right order for this method includes clothes, books, papers (all documents and manuals), miscellaneous items like small electronics and accessories, and mementoes.

sk Yourself if it Sparks Joy

Deciding if something sparks joy is the criteria for keeping and discarding items when decluttering. In the Konmari method, your feelings are the standard for decision making, especially knowing what sparks joy. To determine this when tidying, you need to pick up each object at a time and ask yourself quietly if it does spark joy.

Pay attention to how your body responds. Joy is personal, so that everyone will experience it differently. By selecting only those things that inspire joy, you can precisely identify what you love and what you need.

How to Use The Konmari Method at Home

Clothes

The first category you need to tackle for a tidy house is clothing. While you might be used to cleaning out clothes in your closet and then your drawers, the Konmari method suggests gathering clothes and accessories from all over your home, including your bedroom closets, coat closets, drawers and under the bed and put them all in one pile.

This will allow you how much you have and help you realize how much you don’t wear. If an item sparks joy, keep it and if not, give it to gratitude and donate your clothing. You can then learn how to iron the clothes remaining ones correctly and arrange them the right way.
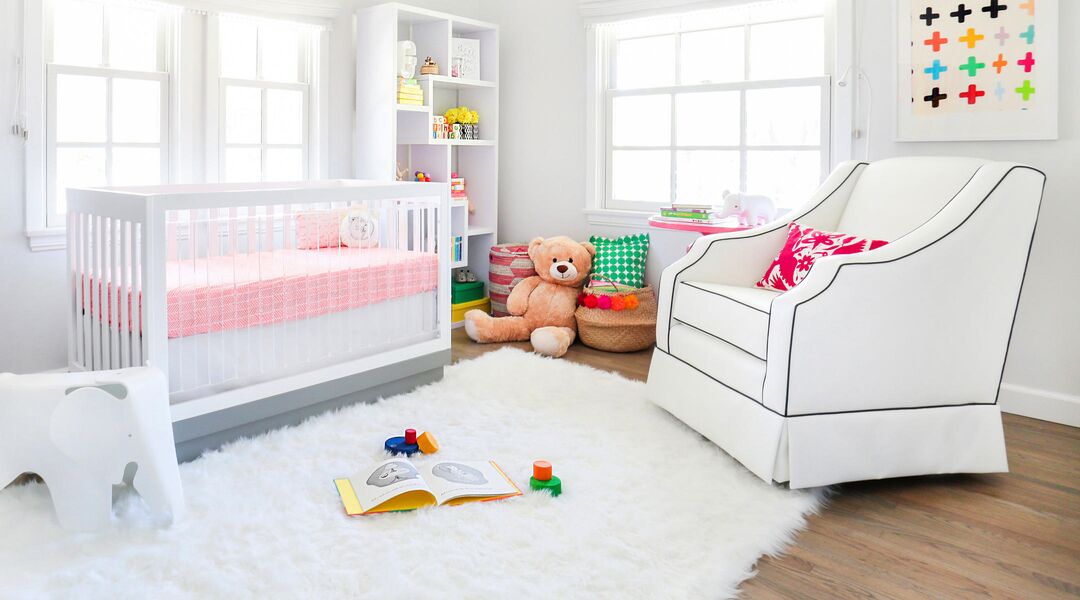
Books

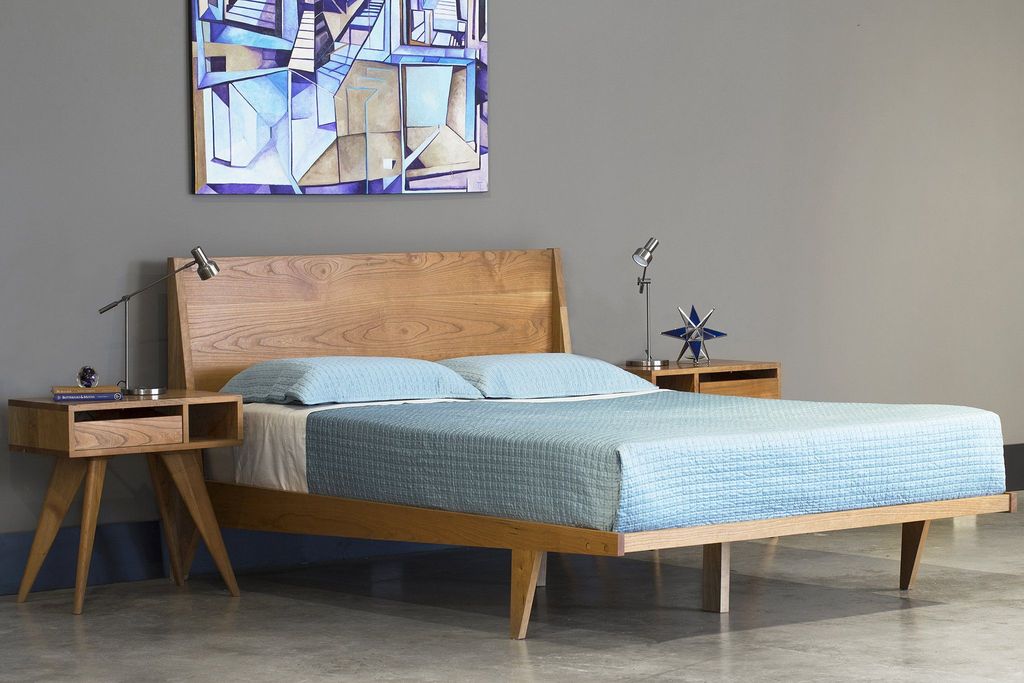
After clothes, the next category on the Konmari method checklist books, gather every book in your home and put them in a pile to decide which ones spark joy and which ones don’t. If your ideal lifestyle means that your space is filled with books, keep them.

Books
Image credit: https://www.shortform.com/

Papers

Every paper in your home, including documents, letters, bills and receipts, should be sorted using the Konmari method. Keep only what you need or use daily, plus one copy of everything else.
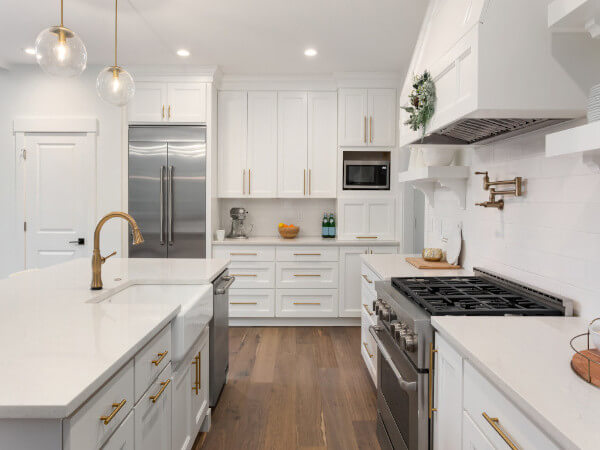
Miscellaneous Items

Any other items that don’t fit into the above categories should be put in a pile to determine what sparks joy and what doesn’t. Sort through everything carefully. Create groups like electronics, beauty supplies, home decor, canned goods and writing utensils.

Miscellaneous Items
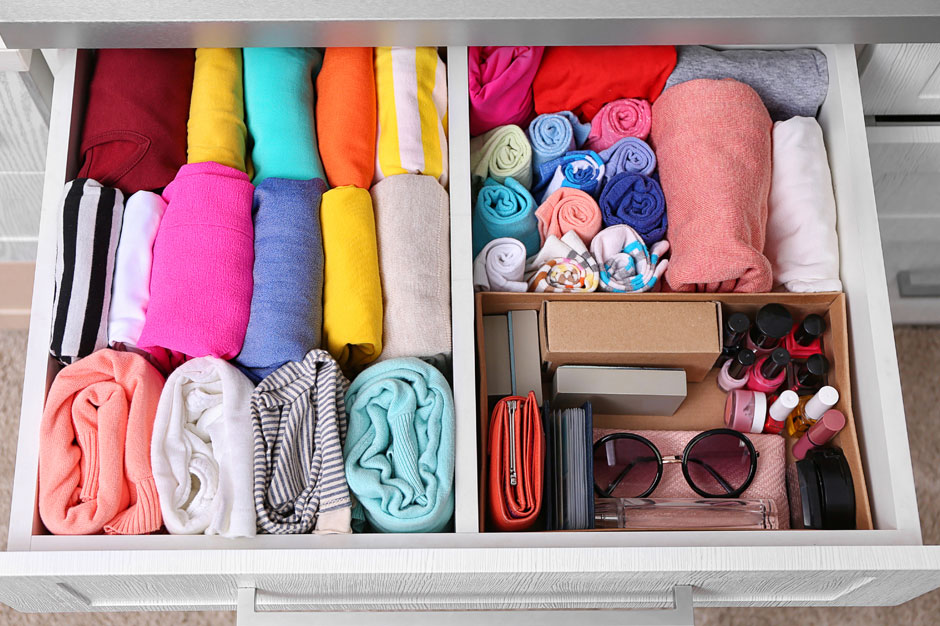
Image credit: https://storage.googleapis.com/

It might be tempting to go room by room for an extensive category; make sure you gather items from all over your home and put them in one pile. That way, you’ll be able to store similar items together to easily find them and not have anything to spread out.
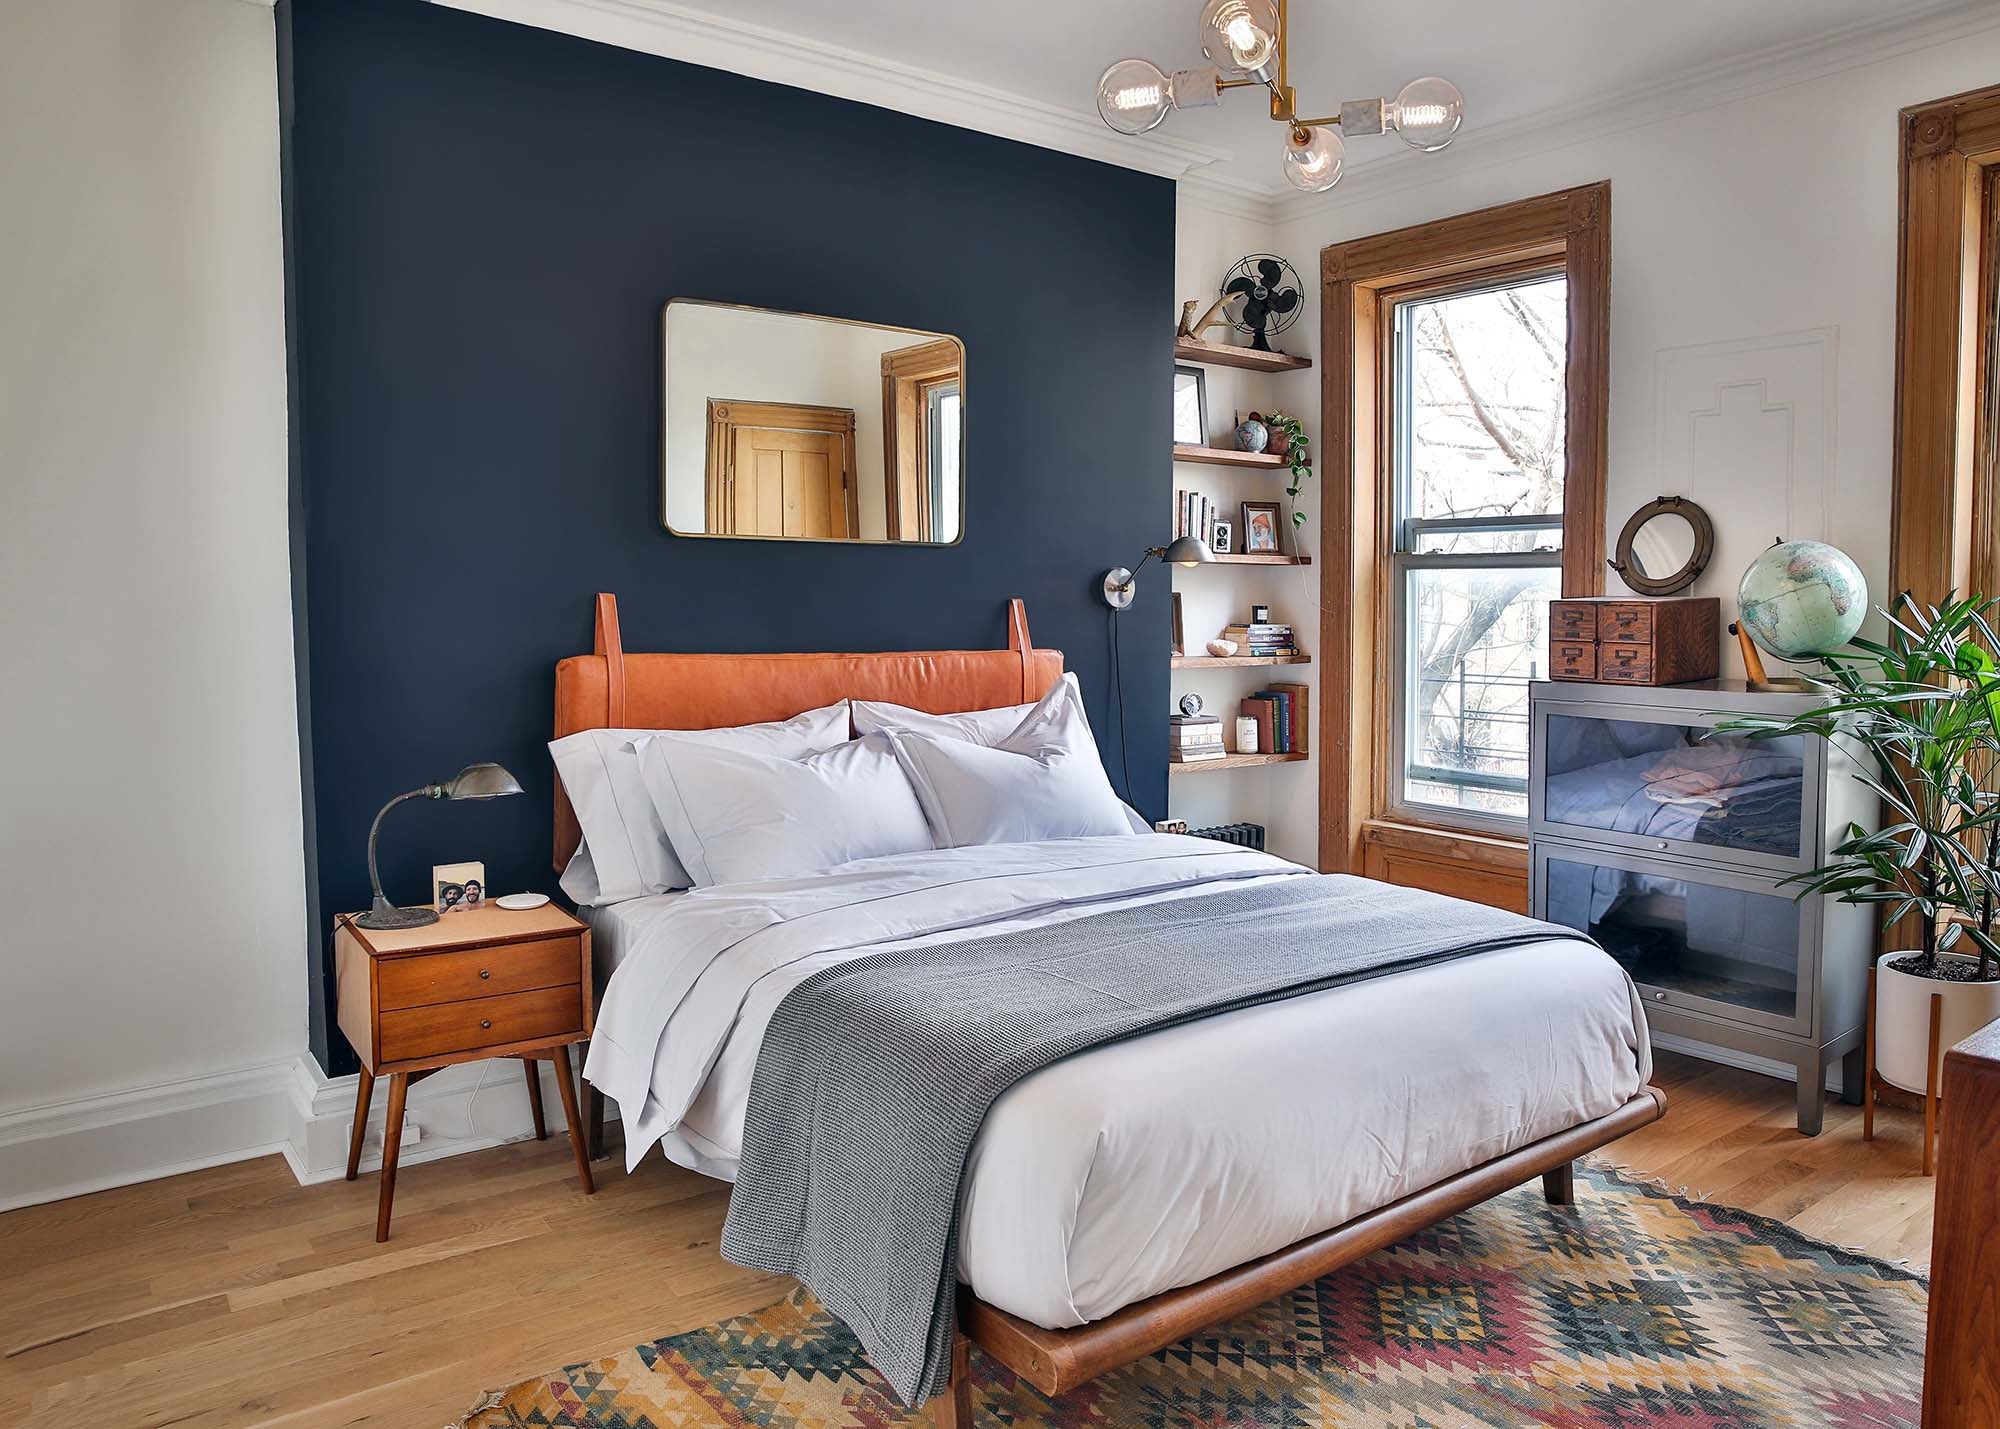
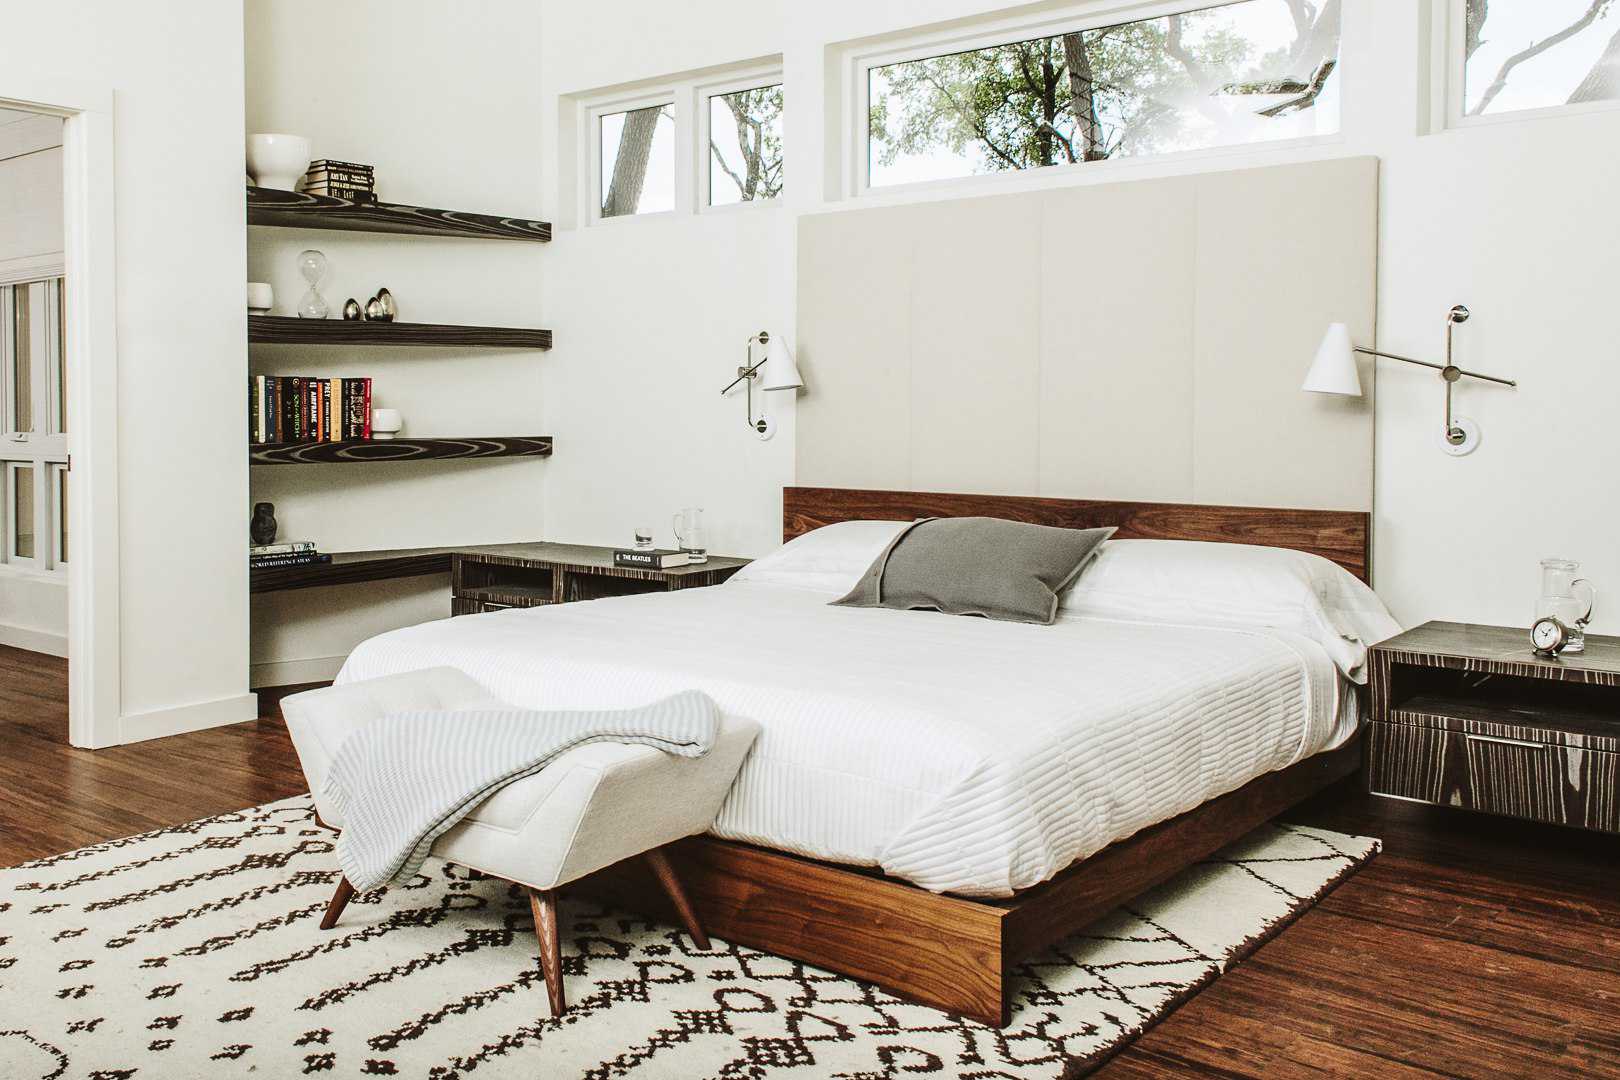
Sentimental Items

Sentimental items hold deep meaning and can be tough to part with. If you’ve ever seen the episode of ‘Hoarders’ where the woman won’t get rid of her deceased mother’s old suitcase, this method isn’t for you.

Sentimental Items
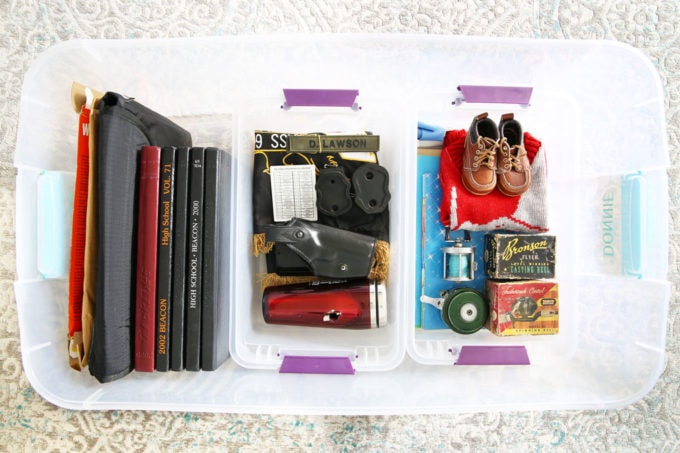
Image credit: https://justagirlandherblog.com/

Keep only those sentimental objects that truly bring you joy and store them in a designated area. That way, you’ll have them but won’t be reminded of them at every turn.

How to Store Items that Spark Joy

After deciding what to keep in your home, good storage solutions will help you keep everything organized. Here are some of the best Konmari organization and storage tips:

Try Konmari Folding

The Konmari folding method is perfect for organizing your clothes. Marie Kondo didn’t only create her method of decluttering and organizing, but she has also shared a unique folding technique for clothes and linens. The Konmari method of folding helps keep drawers, baskets and bins neat and tidy.

Use Boxes in Drawers

Don’t toss them out if you have gift boxes, shoe boxes, and jewelry boxes. These are great DIY home storage solutions for keeping small things like jewelry, beauty supplies, phone chargers and other miscellaneous things organized in drawers and cabinets.

Store Papers in File Organizers

The paper file organizer is perfect for storing mails, bills and other papers. It protects your documents from getting lost in the clutter of the drawer.

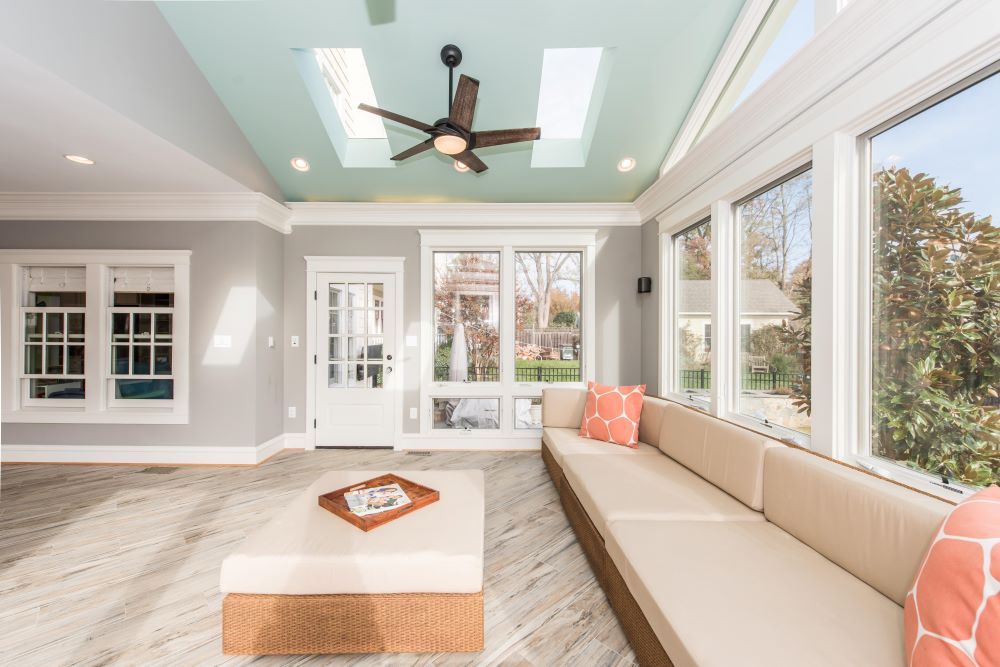
Invest in Wicker Baskets

Wicker baskets are great for keeping your cupboard free from clutter. Use them to store foodstuffs, dry fruits, snacks and other kitchen essentials.

FAQs on What is the KonMari Method

Is the Konmari method effective?

The Konmari method is a highly efficient and effective organizing strategy that has helped many people declutter their homes. The beauty of this method is that it doesn’t follow any specific order in tidying up – you can start from anywhere and go on to the next activity.

What are the benefits of the Konmari method?

The Konmari method advises people to get rid of useless, unnecessary belongings. If applied correctly, this will help you find more relaxation and peace in your life. It also teaches you not to keep hold of things that do not bring joy into your life.

Final Thought on What is the Konmari Method

Do you have items that spark joy that you can’t fit in your home? Well, get organized with these temporary storage solutions with extra space storage to keep items that fit your ideal lifestyle, even if you don’t have room for them now.


The post What is the KonMari Method? appeared first on Kitchen Infinity.

Did you miss our previous article…
https://chefbuano.com/?p=1299

Why Window Air Conditioners Freeze-Up

Why Window Air Conditioners Freeze-Up

Window air conditioners are not designed to be in super cold climates, which means that if you live in a climate that gets below freezing, your window AC will freeze up. This can happen when the unit is running or not being used correctly – it’s just part of how they work.

In this article, we’ll explain how to prevent your window AC from freezing up, as well as give you some tips on how to keep your energy bills down. Keep reading to find out more. 

Solutions To Try When Your Window Air Conditioners Freeze-Up

To keep this from happening, you should either turn off the unit when it’s not being used or install an insulation kit to help protect it from the cold. If you do have any problems with frozen windows, it’s best to call in a professional to help you out. 

Insulation kits are fairly inexpensive and easy to install, so this is a great solution for anyone who wants to make sure their window AC stays functional all winter long. For more information about the kits, contact your HVAC contractor for advice. They’ll be able to help you find a good insulation kit that will keep your room as cold as possible without having to worry about it freezing up.

Another solution is to shut off the AC entirely when it’s not being used. You can do this by removing the front grille and locating the switch, then moving it into the off position. This will stop it from recirculating warm air back into your room, which should help prevent freezing up while also saving energy costs.

Image Credit: http://storables.com

Even if your window AC does freeze over, you shouldn’t let that stop you from using it – just remove some of the ice before turning on the power again (never use hot water or open flames like hair dryers for this). You should be safe to run it normally again, but keep an eye on the ice levels to make sure they don’t get too high.

Other Solutions To Try

While there are manytypes of air conditioning systems, all with their own ways of working, the following solutions might also be worthwhile trying if the above tips do not work.

If you’re not comfortable installing an insulation kit or turning your AC completely off when it’s not in use, there are a few other things you can do to try and prevent freezing.

One is to keep your windows open while the AC is running; this will help to circulate the cold air and keep it from building up. You can also try using a space heater to keep the room warm while the AC is on, as this will help to prevent the unit from freezing over. While it may not be the best idea to use a space heater if you have small children or pets, it can help a great deal.

Most importantly, it’s a good idea to make sure that any air bubbles in the window seal are eliminated before turning on your window AC. These can build up from condensation and cause issues, so poke each one with a long needle until you don’t see them leaking out anymore. If they’re blown out completely, there will be no pressure buildup to cause ice problems – just make sure your windows are as tight as possible before using the unit again.

Window AC’s should not be left running while unattended for safety concerns and also since doing this could prevent the unit from working properly due to over freezing. Shutting the window AC unit off when not in use is a good way to prevent this. The insulation kit is also an easy and effective solution to try. If these solutions do not work, then freezing may be unavoidable in colder climates. 

In this case, just monitor the ice levels and remove any ice before turning the unit back on. Following these instructions should keep your room cool all winter long without having to worry about your window AC freezing up.

The Importance Of Not Having Dirty Filters

Make sure that you’re cleaning the filter regularly. This will help improve airflow and stop the unit from working harder than it needs to, which can also lead to freezing.

When the filter becomes clogged with dust, debris, and pet dander, it is not able to do its job properly. This can cause your window AC unit to work much harder than it needs to by making it run longer for the room to become cool again after shutting it off (this is known as short-cycling).

If you notice that your filters are dirty or clogged up regularly then you will want to replace them more frequently if possible.

Why Window Air Conditioners Freeze Up – FAQ

Can an AC electronic board be responsible for freezing units?

When window air conditioners freeze up, many people wonder if they need to replace the entire unit. In some cases, the electronic board may be at fault and need to be replaced. However, several other factors can cause an air conditioner to freeze up as well.

How do I know if the electronic board is bad?

The best way to determine if the electronic board is bad is to have it tested by a professional. If you are experienced in electrical work, you may be able to test the board yourself. The most common symptom of a bad electronic board is that the AC will not turn on at all. 

You can usually test the board by checking for power at the connector. There should be power at all of the connectors, each connector should have 12 volts. The voltage may not be exact depending on your model, so you may need to check the manual for the correct reading.

How do I test an electronic board?

You can test an electronic board by removing it from the unit and testing it with a multimeter for a continuity test. If you are not comfortable removing wiring or working with electricity, then you should take your AC to a licensed repair shop to have this done for you. If there is no power at any of the connections when attempting to start up the window air conditioner, then the board is likely bad.

What causes my AC to freeze up during use?

A window air conditioner freezes up for a variety of reasons. The most common reason is a temperature that the unit can’t deal with. However, there are several other possible causes. One common cause is a dirty filter. When the filter is clogged with dirt and dust, it can prevent air from flowing through the unit properly. 

Another common cause is a blockage in the condenser coil. If the coil becomes clogged with debris or lint, it will prevent the unit from cooling properly and can cause it to freeze up. Finally, if the refrigerant levels become too low, it can also cause the AC to freeze up.

How do I fix my window air conditioner that has frozen?

There are several other possible causes, so it is important to determine the root of the problem before attempting to fix it. If the filter is dirty, you can clean or replace it. If the coil is clogged, you can clean it with a vacuum cleaner. If the refrigerant levels are low, you can add more refrigerants. However, if none of these solutions work, then you may need to replace the entire unit.

Final Thoughts On Why Window Air Conditioners Freeze-Up

4 Reasons Your Air Conditioner Is Frozen & How to Fix It | Blair's Air

Image Credit: http://blairsair.com

In conclusion, there are several reasons why a window air conditioner may freeze up. By knowing the most common causes, you can usually fix the issue yourself. If you are not comfortable working with electricity, then it may be wise to seek professional help if your AC freezes up.

Finally, if you want to know what the best air conditioners are, ones that function correctly in different types of weather, you can check out our best air conditioners buying guide


The post Why Window Air Conditioners Freeze-Up appeared first on Kitchen Infinity.

Did you miss our previous article…
https://chefbuano.com/?p=1295

Sewage Ejector Pump

Sewage Ejector Pump

Sewage ejector pumps are an essential and often overlooked part of a septic system. If your sewage ejector pump is not working properly it can lead to major issues that could cost thousands of dollars in repairs or replacement.

In this article, we will discuss what a sewage ejector pump is, when you should replace it, how to install a new one, and how to maintain and troubleshoot your current pump. We will also answer some of the most common questions about sewage ejector pumps. Keep reading to find out more. 

What is a sewage ejector pump?

A sewage ejector pump is a centrifugal pump that is generally used in septic systems but can also be found in household waste disposals.

Image Credit: http://rooterman.com

It works by drawing water out of the septic tank and forcing it through the building drain system where it eventually leaves your home. Because of this, these pipes are usually located near or in the basement.

There are two main types of sewage ejector pumps – rotary vane pumps and diaphragm pumps. Rotary vane pumps are more common, but diaphragm pumps are quieter and can handle more solids.

When should you replace your sewage ejector pump?

The general rule of thumb is that you should replace your sewage ejector pump every 5-7 years. However, this may vary depending on the type of pump you have, how often it is used, and the condition of the septic system.

If you are not sure whether or not it is time for a replacement, there are a few telltale signs that can help you decide:

If the pump is making strange noises, vibrating, or leakingIf the pump smells bad or is creating an excessive amount of noiseIf the pump is not working properly or is constantly clogging

If you are experiencing any of these problems, it is time for a replacement. All of these issues can cause extensive damage to your septic system and can be very costly to repair.

How to install a new sewage ejector pump

Replacing a sewage ejector pump is not a difficult task, but you must take your time and follow the proper steps.

The first step is to shut off the power to the pump. You can do this by flipping the breaker switch or by unplugging the pump.

Next, remove the cover plate from the pump and disconnect any hoses or wires that are attached.

Then, use a screwdriver or wrench to loosen the bolts that hold the pump in place. Be careful not to damage them as they will need to be reused later.

After you have loosened the bolts, lift the pump out of its cradle and attach it to your new sewage ejector pump. Make sure that the wires are also facing the correct way before you tighten any nuts or bolts.

Once everything is secure, reattach all hoses and wires and replace your cover plate.

Finally, turn on your power supply and test out your new sewage ejector pump. If everything works properly, then you’re done. If not, don’t worry- there are plenty of troubleshooting tips for this later in the article. 

You can also check out this article onhow to install sump pumps if you’d like to know more about similar installation processes.

Sump Pump Cost: Average Prices, Installation – Forbes Advisor

Image Credit: http://forbes.com

How to maintain and troubleshoot a sewage ejector pump

While replacing an old sewage ejector pump can be relatively simple, maintaining it over its lifetime can be a bit more difficult.

There are a few things that you can do to help keep your pump running smoothly:

Clean the pump regularly and remove any debris or build-up that may have accumulated.Make sure that the seals and gaskets are in good condition and properly lubricated.Check the hoses for leaks or damage and replace them if necessary.If the pump starts to vibrate excessively, try adding additional insulation or baffles to quiet it down.

Troubleshooting tips 

If you are having problems with your sewage ejector pump, there are a few troubleshooting tips that you can try:

If the pump won’t turn on at all make sure that you have turned off and unplugged the pump and then check your circuit breaker.If the breaker is fine, try turning it on for 5-10 seconds before turning it back off again. Plug in the pump and see if it works properly.If this doesn’t work, there may be an issue with one of your wires or hoses. Check them out to make sure that they are connected properly or replace them accordingly. If they seem to be working fine, then there may be a problem with your electrical connections. Try tightening any loose wires/connections before calling a professional for help. If water is leaking from the pump check to see if the bolts are tight on the base of the pump. If they are, then there may be a problem with one of your hoses or wires.If these don’t seem to be the issue, try applying Teflon tape or pipe dopes to any threaded connections on your hoses and pipes. This will help seal any leaks that may have developed over time. If you can hear bubbles in your tank but you’re not getting any water out, the first thing that you should do is make sure that both valves are completely closed. Once this has been done, check for cracks or holes in any hoses or pumps leading into/out of the area around the tank.If everything seems to be in order, you may need to add more water to your tank. You can do this by opening up the valve and letting the water run until it is at the desired level. If this still doesn’t work, then you may have a blockage in your line and will need to call a professional for help. 

Hopefully, these tips will help you keep your sewage ejector pump running smoothly for years to come.

Sewage Ejector Pump – FAQ

What is a sewage ejector pump?

A sewage ejector pump is a pump used to remove wastewater from a building. The wastewater is typically removed from the lowest level of the building, such as a basement or crawlspace.

What are the benefits of using a sewage ejector pump?

The main benefit of using a sewage ejector pump is that it can help to prevent flooding. A sewage ejector pump can help to keep the wastewater in the building’splumbing system and out of the basement or crawlspace.

How do I know if I need a sewage ejector pump?

The best way to determine if you need a sewage ejector pump is to contact a professional plumber. They will be able to assess your building and determine if a sewage ejector pump is necessary.

How much does a sewage ejector pump cost?

The cost of a sewage ejector pump will vary depending on the size and type of pump you need. You can expect to pay anywhere from several hundred dollars to several thousand dollars for a quality sewage ejector pump.

How do I install a sewage ejector pump?

Installing a sewage ejector pump typically requires the help of a professional plumber. They will be able to help you install the pump and ensure that it is working properly.

Final thoughts on a sewage ejector pump

In conclusion, sewage ejector pumps are found in many different types of commercial and residential appliances. Though they may vary in size, the pump itself is relatively easy to maintain and repair when needed. 

These devices tend to last a very long time so you will probably not have to worry about replacing one for quite some time. If problems do arise, sewage ejector pump replacement can be done by most people with little technical experience.

The post Sewage Ejector Pump appeared first on Kitchen Infinity.

Did you miss our previous article…
https://chefbuano.com/?p=1291

Brown Patch Lawn Disease

Brown Patch Lawn Disease

Brown patch lawn disease is a common problem that affects many gardens.

Brown patches on your grass are not always caused by the same type of fungus or bacteria, so it’s important to have a professional identify the problem before you try to fix it yourself.

In this article,  we will discuss what brown patch lawn disease is, the signs of brown patch lawn disease, how to prevent and treat brown patch lawn disease, and where you can find more information about diagnosing and treating brown spot diseases in your yard. Keep reading to find out more. 

What Is Brown Patch Lawn Disease?

Brown patch lawn disease is a fungus that affects grasses. It can cause patches of your lawn to turn brown, and in severe cases, it can kill the grass. The fungus thrives in hot, humid weather, and so the best way to prevent brown patch lawn disease is to make sure your lawn is healthy and well-maintained.

Image Credit: http://scotts.com

By watering your lawn properly and mowing it regularly, you can help to keep the grass healthy and reduce the chances of brown patch lawn disease. If you do notice signs of brown patch lawn disease, it’s important to take action right away to prevent the fungus from spreading.

Alternatively, you can also treat brown patch lawn disease with fungicides. There are many different types of fungicides available, so it’s important to talk to a professional about which one is best for your situation.

Signs Of Brown Patch Lawn Disease

The most common sign of brown patch lawn disease is a large, circular patch of brown grass. The edges of the patch will be well-defined, and the centre will be relatively dry. In some cases, you may also see small patches of pink or purple fungus growing on the edge of the brown patch. If you see any of these signs, particularly if you live in an area where the fungus is common, it’s important to have your grass tested.

Another common sign of brown patch lawn disease is the appearance of lesions on the leaves of the grass. These lesions will be dark green or brown, and they will often have a yellow halo around them. If you see any lesions on your grass, it’s important to contact a professional right away.

How To Prevent And Treat Brown Patch Lawn Disease

Brown patch lawn disease is difficult to eliminate, but there are some things you can do to ensure that it doesn’t spread or get worse. The best way to prevent brown patches is to keep your grass healthy by regularly mowing, fertilizing, watering, and aerating it. If you have prolonged periods of hot weather every year, consider installing shade trees so that your yard is cooler. If possible, choose two different kinds of grasses for your yard so they don’t all die at once if one type gets sick.

Moreover, you can also treat brown patch lawn disease with fungicides. There are many different types of fungicides available, so it’s important to talk to a professional about which one is best for your situation.

If you do see signs of a brown patch, it’s important to take action right away to prevent the fungus from spreading. You can treat the fungus with fungicides, or you can try to remove the affected areas of grass and replace them with new sod. It’s important to remember that brown patch lawn disease can be difficult to get rid of, so you may need to take these steps more than once to get rid of the fungus completely. Speaking of fungus, here’show to get rid of mold

Finally, it’s important to remember that not all patches of brown grass are caused by brown patch lawn disease. Many other things can cause your grass to turn brown, such as drought, pests, and poor soil quality. If you’re not sure what’s causing the problem, it’s best to contact a professional so they can diagnose the issue and recommend a course of treatment.

Other Important Considerations

If you hire a company to diagnose and treat your lawn, make sure that they use environmentally-friendly fungicides. Some types of fungicide can be harmful to the environment and even pets and children. It’s also important to water your lawn after treating it with fungicide because too much moisture will encourage the fungus to grow again.

You should also remember that brown patch disease is more likely to attack the cool-season grasses in your yard. Tall fescue, Kentucky bluegrass, and ryegrass are all very susceptible to brown patch disease. This means that some parts of your yard may die while other parts thrive depending on what type of grass grows there naturally.

Bermuda grass is less susceptible to brown patches, so if you have this type of grass in your yard, you’re less likely to see signs of fungus.

In short, brown patch lawn disease is a difficult fungus to get rid of, but there are some things you can do to prevent it from spreading or getting worse. If you see any signs of the disease, contact a professional right away so they can recommend a course of treatment. 

Remember that not all patches of brown grass are caused by brown patches, so it’s important to diagnose the problem before taking any action.

The weather conditions

Humid weather combined with cloddy soils can cause a fungal brown patch. The fungus that causes the disease proliferates in moist conditions. To prevent brown patch lawn disease, strive to keep your grass as dry as possible. Watergrass deeply and infrequently to encourage deep root growth.

How to Identify, Control and Prevent Brown Patch - Lawnstarter

Image Credit: http://lawnstarter.com

Brown patch lawn disease – FAQ

When does brown patch lawn disease show up?

Brown patch lawn disease often appears in late summer or early fall.

What are the symptoms of brown patch lawn disease?

The most common symptoms of brown patch lawn disease are circular patches of dead, brown grass. These patches can often be several feet across and can spread rapidly.

What causes brown patch lawn disease?

Brown patch lawn disease is caused by a fungus that thrives in moist conditions. The fungus feeds on the grass’s leaves, causing them to die and turn brown.

How can I treat brown patch lawn disease?

There is no cure for brown patch lawn disease, but you can take steps to prevent it from spreading. You can start by mowing your lawn at the proper height and removing dead or dying patches of grass as soon as you notice them. 

Finally, try to keep your lawn as dry as possible; don’t let water stand on it for long periods, and make sure that you’re not over-watering your lawn.

What do dark rings around the patches mean?

If you see dark rings around the patches of brown grass, it means that the fungus is also attacking the roots of the grass. This can kill the grass and cause it to turn black.

What should I do if my lawn is severely affected by brown patch disease?

If your lawn is severely affected by brown patch disease, you may need to replace it with new grass. You can start by removing all of the dead or dying grass and then tilling the soil to loosen it up. Next, spread a layer of topsoil over the soil and then sow the new grass seeds. Finally, water the area well and keep it moist until the seeds germinate.

Final thoughts on brown patch lawn disease

In conclusion, brown patch lawn disease is a serious problem that can cause a lot of damage to your lawn. Early detection and treatment are essential for preventing any long-term damage. Be sure to keep an eye on your lawn and contact a professional if you suspect that your garden may have this disease.

For further reading, check out this post onhow to test soil ph. This will ensure that your soil isn’t too acidic and won’t end up having trouble absorbing the right nutrients.

The post Brown Patch Lawn Disease appeared first on Kitchen Infinity.

Did you miss our previous article…
https://chefbuano.com/?p=1287

20 DIY Couch Cover Ideas

20 DIY Couch Cover Ideas

You have a couch that’s past its prime time, and you’re on a tight budget. There are plenty of ways to update your couch, but most of them require spending money or taking up too much time. When you turn to these DIY couch cover ideas, then you won’t have to buy new furniture for your house.

Whether you want a new couch and chair or you want to redo your bedroom, there’s always a slipcover for your headboard. These slipcovers are easy to do and will instantly transform your home. Plus, you can give your old couch and chair a new look by spending only a fraction of what it would cost to replace them. 

Here are DIY couch cover ideas for making your custom slipcovers in no time at all.

DIY Sofa Slipcover

This sofa slipcover is perfect for those who want to update their furniture on a budget. You’ll need some basic supplies, including a sewing machine and fabric. You’ll also have individual covers for the frame and cushions. This way, you won’t have to worry about constantly adjusting your cover every time someone sits on it.

DIY Drop Cloth Slipcovers

Repurpose old drop cloths to make your slipcovers. Depending on the look you want to achieve, you can make them patchwork-style or one solid piece. If you plan on painting your walls, this style is great because you can remove it at any time without damaging the underlying fabric.


Image credit: https://i.pinimg.com/

You can find drop cloths at almost any departmental or home improvement store at a relatively low cost. The covers will extend the life of your couch by a number of years and give your home a look you’ve always wanted.

Easy Sectional Cover

Do you have a sectional sofa but no cover for it? This easy DIY project is perfect for you. All you need is a piece of fabric that’s at least two feet wider and four feet longer than your sectionals. 

Easy Sectional Cover
Image credit: https://m.media-amazon.com/

This is a great way of covering your sectionals and ensuring you get the slipcover that fits perfectly. You can get a brand new look and create any pattern and design you like. These DIY slipcovers are very important.

Patio Furniture Covers

If you have patio furniture, it’s important to keep it covered when not in use. Not only will this protect the furniture from the elements, but it will also help to keep it looking new for years to come. 

Patio Furniture Covers
Image credit: https://www.patioproductions.com/

A simple patio furniture cover can be made out of a fabric that’s at least six feet wide and ten feet long. These DIY outdoor cushion covers can help transform your outdoor space.

No Sew Bench Cushion

If you have an old bench that could use a little bit of TLC, why not try this no-sew bench cushion? This project is easy and only takes a few supplies. You’ll need some batting, fabric, scissors, and a needle and thread but no sewing machine. Bench seats always make any area feel cozy and relaxing. So, you can DIY your bench cushion and customize it to your liking. 

Easy Sofa Slipcover

If your sofa looks a little worse for wear, don’t worry. With this easy DIY slipcover, you can easily give it a new lease on life. This project will take you just a few hours to complete and only requires a few supplies.

All you need is some fabric, scissors, and a sewing machine if you have sewing skills. This simple and quick fix is a great-looking temporary fix that will transform your couch from a drab to fab.

IKEA Couch Makeover

Don’t worry if you have an old IKEA couch that you’re not quite sure what to do with. With this easy DIY makeover, you can easily give it a new lease on life. This project will take you just a few hours to complete and only requires a few supplies.

All you need is some fabric, scissors, and a sewing machine. You’ll sew through the buttons and add extra stuffing to your couch cushions. This DIY slipcover is budget-friendly, and the results will look amazing.

Dyed Sofa Slipcover

This is a great way to renew your old furniture in your living room. All you’ll need for this project is fabric dye and rubber gloves. You can also use a stencil if you prefer the look of that instead. The results will not only look fantastic but will cost you next to nothing.

If you’re looking to give your living room a bold new look, you’re going to want to take a look at this project. Plus, dying your couch cover can help cover up any old stains and signs of wear.

DIY Outdoor Cushion Covers

If you’re like most people, you probably spend a lot of time on your deck or patio during the summer. One way to make these spaces even more comfortable is to add some new cushions. But, buying new cushions can be expensive. Instead, why not try making your own? 

This project is easy and can be completed in a few hours. Plus, the results will be fantastic. You’ll need cushion covers, Paint or fabric dye, Paintbrush or sponge, Masking tape, and Scissors.

DIY Tufted Cushions

Tufted cushions are chic, but they’re also very expensive. Luckily, you can make them yourself without spending too much money or time. For this project, you’ll need cushion covers, Scissors, Measuring tape or ruler, a Pencil or pen, and Thread. 

This easy-to-follow tutorial will allow you to transform a budget-friendly sofa into a stylish anchor piece for your living room. In just 20 minutes, you can transform this couch’s entire look.

DIY Slipcovers with Piping

Piping can add a nice touch to any home décor project, and these slipcovers are no exception. For this lovely design, you’ll need cushion covers (fabric or foam), Scissors, Pencil/Pen, Measuring tape or ruler, and a Piping foot if your sewing machine doesn’t come with one already.

Whether you make your piping or purchase it at the store, this DIY couch cover keeps costs low without compromising on looks.

DIY Armchair Slipcover

Why not include your favorite armchair for fun as you’re making over your living room or sitting area? Here, learn how to make a DIY slipcover for an armchair.

This project is a little more complicated than others, but it’s still doable for almost anyone with basic sewing skills. To make it even cheaper, use drop cloths because they’re cheap, but that doesn’t mean they’re uncomfortable.

Couch Pet Protector DIY

Simplicity is key when working with slipcovers, and this DIY couch cover follows that rule. Use an old blanket or even a foam cushion to create a removable accent for your sofa that looks great but provides the perfect place for pets to snuggle up too. 

These pets can cause havoc on couches, especially if they have sharp nails. They love to climb all over sofas, causing some serious damage. Thankfully, this DIY tutorial can provide you with a durable couch cover that will run along the back and arm of your sofa to protect it from pets.

Easy DIY Ruffled Sofa Slipcover

This easy DIY sofa slipcover doesn’t require much sewing, and it’s the perfect way to refresh your room without spending a lot of time or money. Plus, this is a great option for those who don’t have the necessary sewing skills to pull off something more complicated. 

This idea couldn’t be simpler: measure your couch and head to the fabric store to pick up some coordinating fabric. You’ll also need a few basic supplies, like a sewing machine, needle, thread, pins, and scissors. The ruffles give your sofa and chair a comfortable and welcoming look.

This makes it go along with your DIY farmhouse furniture. These are much easier to make than they look, and you can cover your entire living with ruffles in just a couple of days.

DIY Ottoman Slipcover

You can cover those ottomans and make them look new again. If you’re making slipcovers from your couch and chairs, why not make one for your ottomans, so your entire living room set looks new? This DIY slipcover is easy to make, and you don’t even have to sew it. 

You can also opt for one with pom-poms that can be easily removed so you can wash the DIY slipcover. If you don’t like poms, you can add a pleated skirt to your ottoman slipcover instead.

DIY Sheet Sofa Slipcover

You don’t have to buy expensive slipcovers from department stores to get that new furniture look. Instead, try to repurpose old sheets and make your DIY slipcover. 

DIY Sheet Sofa Slipcover
Image credit: https://photos.demandstudios.com/

You can buy inexpensive sheets if you don’t have a set that you can use, and they’ll look like a real thing. You can use them to cover the entire sofa, even the cushions. You can also remove and wash them regularly.

DIY Reclining Couch Slipcovers

Are you looking to give your old couch a new look? You can always use a slipcover to cover it. You have to buy the slipcovers that fit your reclining couches, and they should perfectly match your sofas’ size and shape.

After that, make modifications to your regular couch slipcover to make it fit over the reclining sections and cover those sections so that they stay put when the couch is reclined.

Striped Slipcover for Kid’s Sofa

If you have kids, they might want to have a couch of their own. You can surely buy them one, but it’s also possible to upcycle an old sofa into something that both adults and kids can use. Just remove the back cushions and cut out pockets for toy storage.

Striped Slipcover for Kid’s Sofa
Image credit: https://cdn.decoratorist.com/

Then you can remove the seat cushions and sew some thick fabric or batting onto the bottom to make it a bit more comfortable. Finally, add a striped slipcover for an extra touch of fun.

Slipcover for Sofas with Attached Cushions

If your couch has attached cushions, you can still add a slipcover by measuring the width of the couch and adding an inch or two for seam allowances. Cut out a piece of fabric that’s at least two inches longer than the width of the couch, and sew the edges together. 

Whether your cushions are attached to the back or the arms, you can customize a slipcover pattern to fit perfectly. Make sure your measurements are accurate and leave enough room to tuck the slipcover around your cushions when you put it on.

DIY Settee Slipcover

Measure the width and depth of your settee. Draw these measurements on paper, adding about two inches at each end for seam allowances. Cut out the pattern you’ve drawn and use it to cut a piece of fabric that’s wider than the settee but not so wide that it will hang over onto the floor. The settee tutorial will instantly brighten up any room, and it’s so simple to make.

FAQs about DIY Couch Cover Ideas

re slipcovers worth it?

Yes, they’re worth it because they can change up the look of your house in minutes. Plus, they’re easy to wash and can protect your furniture from spills and dirt.

Do I need a pattern?

No, you don’t need a pattern. You can measure the width and depth of your couch and then cut out a piece of fabric that’s the right size.

Final Thought about DIY Couch Cover Ideas

As you can see, these couch cover ideas are super easy to make. Just pick the one that you like best and get started. These DIY couch cover ideas can instantly change the look of your home.


The post 20 DIY Couch Cover Ideas appeared first on Kitchen Infinity.

Did you miss our previous article…
https://chefbuano.com/?p=1248

How to Design a Nursery

How to Design a Nursery

Are you looking for ways to design a nursery for your newborn baby? Well, there are so many beautiful baby items out there you can use to create a lovely place for your little one. You want to create a beautiful nursery for your newborn baby, but you don’t know where to start. 

We’ve created this guide with all the tips and tricks you need in order to design a lovely place for your little one. Let’s get started!

Plant a Seed

Naomi Alon Coe who is an interior designer of Little Con Interiors, specializing in nursery and child design, says that many clients come to her with a single item that inspires the overall design. It can be a wallpaper pattern or just a crib or another piece of furniture they fall in love with.

Decorate the Walls with Decals

Your baby’s nursery is one of the most important rooms you will design. It contains everything your child needs for napping, feeding, and playing. Take some time to think carefully about how you want it to look.

Wall decals are inexpensive, easy to install yourself, and can be removed without causing damage if you change your mind about the decoration you want. You can find a wide range of shapes and colors in the local shops near you or online.

dd Relevant Furniture to Your Baby Nursery

When it comes time to start furnishing your nursery, you’ll likely spend lots of time looking at different cribs, dressers, and changing tables. It can be difficult to know what to buy when your child is still very small, and their needs may change rapidly. One piece of furniture that will come in handy is a rocking chair.


Image credit: https://momlovesbest.com/

Not only does it provide a comfortable place for you to rock your baby to sleep, but it can also be used as a feeding chair. If you’re looking for a dresser to match your nursery decor, make sure you select one that has storage for diapers and other baby items. Every nursery also needs a glider to get the baby back to sleep and for late-night feedings.

Doing so will allow you to keep everything neatly organized in one place. Storkcraft Portofino 4 in 1 convertible crib or changing table will convert from a crib to a toddler bed then a full-sized bed. It also features plenty of shelving and drawer space. The changing table also detaches to act as a nightstand when your baby is past the diaper stage.

Maximize Your Small Space

According to interior designers and decorators, if your baby’s nursery is small, you’ll want to consider the feature wall color. You can easily and inexpensively paint the room a light color to make it look bigger.

Maximize Your Small Space
Image credit: https://www.thespruce.com/

Also, add a mirror to open up the appearance of the room. In addition, consider buying a baby a rounded crib as opposed to a traditional one. The round crib isn’t always cheap, but it’s a gorgeous family heirloom that you can pass down from generation to generation.

Round cribs can go into different areas of the room more than rectangular ones. You can also put a round crib center of the room if needed.

Consider Upholstered Nailhead Double Chaise

If you have a little more space, consider adding an accent chair to the room. The chair can be used as a place for your child to sit or nap, or it can simply serve as decoration. You could even put this beautiful West Elm upholstered chaise in the room.

From there, furnish the rest of the room with a mix of storage and display pieces. Look for pieces that will grow with your child. A changing table that can later be used as a desk or a low dresser that can function as a bookshelf are great options.

Don’t Go Overboard with a Theme

It can be tempting to settle on a theme for the nursery right away, but it’s best to wait until your baby’s arrival. Some babies are born with dark hair and olive complexions, while others are born blonde and fair-skinned. Babies also come out looking like either their mom or dad, meaning that they might already look like they fit into a certain theme.

If you’re not sure what theme to choose, it’s best to go with a gender-neutral design that can grow with your child. For example, interior designer Cathie Hong of Cathie Hong interiors cautions against overdoing the modern trend of having a nursery theme.

Even if your nursery has a specific theme, try to keep the color palette soft and minimal to create a calm and non-stimulating environment for both the mom and the baby.

Design a Room the Will Grow with Your Baby

While you might want to create a beautiful room for your baby’s arrival, it’s important to keep in mind that the room will have to grow with your baby.

An interior designer called Bean recommends choosing elements in draperies, wall coverings, and lighting so that with a few changes in furnishings, art, and accessories, the room can still work for tweens and teens.

Consider the Lighting

When lighting your nursery, use dimmer switches because they create a calming atmosphere. You’ll also want to have plenty of task lighting so that you can see what you’re doing when you’re caring for your baby at night.

Also, consider a ceiling fan or overhead light combo because they’re an excellent accessory in a nursery to keep it cool, comfortable, and ventilated. After some diaper changes, you’ll be thankful for having a well-ventilated room. 

Test your bulbs for overheating and ensure you’re using the appropriate bulb wattage for your lamp, especially table lamps. Avoid floor lamps; even if they look nice next to a reading chair or a dim corner, they’re not the best choice ever for a nursery.

Make a Nursing Nest

A nursing nest is a great addition to your nursery if you’re planning to breastfeed. It’s a comfortable place for you and your baby to relax together and can be helpful in getting your newborn to latch on correctly. You can make your own nursing nest out of a soft blanket or buy one that’s already made. You can also keep a small end table with drawers or shelving for cubbies next to your cozy nursing chair for your stuff.

You can stock a few things, including baby food, nursing pads, burp cloths, extra blankets for spit-up incidents, and wipes. You can also store a water bottle, maybe a good book or magazine, and a feeding log if you’re early in the game.

Changing Area

You’re going to want a changing area in your nursery. This can be as simple as a changing pad on top of your vintage dresser, a changing tray, or an actual changing table. If you have the space, go for the changing table – it’ll make diaper changes easier. You’ll want to have plenty of stores nearby for diapers, wipes, ointments, powder, and other essentials. 

Keep a good stock of diapers in the nursery to make late-night changes easier on you and your baby. If you have a big enough budget, it might be worth getting a pack n’ play bassinet to keep in the room for speedy diaper changes during the first few months.

Install Black Out Shades or Drapes

Your baby will likely sleep best in a dark room. Install blackout shades or drapes to ensure the room is as dark as possible when your little one is trying to get some shut-eye. This will not only help your baby sleep better but will also keep the room cooler in the summertime. It’s great for comfort but, most importantly, for safety.

Get Organized

No one likes a messy room. Learn how to declutter your room to clear off surfaces. Make sure to put away any loose or potentially dangerous items before your baby arrives. If you store everything in the closet, you’ll have easy access to all clothes for middle-of-the-night changes. You can use cubbies, baskets and toy boxes to throw stuff in and locate it easily later on.

Get Organized
Image credit: https://media.front.xoedge.com/

At least one wall should be reserved for changing diapers, dressing, bathing, and so on. You’ll want to have easy access to a sink, toilet, and storage for diapers, wipes, and other necessities. When choosing nursery furniture, it’s important to think about both form and function. 

You’ll need a place for your little one to sleep, play, and store all of their necessities. Few of us can afford to buy a changing table, so you’ll want to look for items that can double as both a play area and diaper station. A dresser with ample storage space and a mirror provides room for clothes, toys, diapers, and other baby essentials.

Keep Colors in Nursery Simple and Practical

When it comes to color, it’s best to keep things simple in the nursery. Bright colors can be stimulating and overstimulating for a newborn baby. Stick to neutrals like grays, greens, and blues, or go with soft pastels. Knowing your child’s gender ahead of time is also essential as it can help you determine the color palette.

For example, if your kid is a baby girl, you can paint walls in lavender and white, with a carpet in the same colors. For your son’s nursery, consider other neutral colors that are colors of boys. Make sure you redesign and tweak the room to reflect your child’s personal tastes.

These colors will be soothing for your little one and won’t clash with their eventual room décor. If you’re looking for more helpful tips on nursery design, check out the Pinterest board.

FAQs on How to Design a Nursery

What are the most important factors to consider when designing a nursery?

The most important factors to consider when designing a nursery include the qualification of the staff, getting ready for school, and health and safety.

When should you prepare a nursery?

It’s best to put together a nursery before your baby is on the way so you won’t feel rushed when the time comes.

What color should I paint my baby’s room?

While it’s tempting to go bold, painting your little one’s bedroom in bright colors could restrict their vision and sense of security. Stick to neutrals like yellow, blue, and white.

What should I put on the walls?

Artwork can be a great decoration for your little angel’s room. It helps them express their personality while teaching them about shapes, patterns, and color recognition. Don’t forget to include pictures of your family members too.

Final Thought on How to Design a Nursery

As you can see, answering how to design a nursery is not as difficult as it seems. Just keep in mind your child’s needs and wants, and make sure to have a lot of fun with the process. 


The post How to Design a Nursery appeared first on Kitchen Infinity.

Did you miss our previous article…
https://chefbuano.com/?p=1244

How High Should Grass Be Cut?

How High Should Grass Be Cut?

Keeping your grass healthy and at the right height is important if you want to enjoy it. If you don’t know how high the grass should be cut, you will have difficulty keeping your landscape looking great. This can lead to many problems down the road that are very difficult to solve.

There are different factors that decide how high grass should be cut. So, you need to do some research before deciding how much of an adjustment needs to be made with regard to cutting the lawn.

Our guide below can help answer this question for you and teach you more about cutting lawns in general.

The Rule of Thumb

How high should you cut the grass when you mow? The general rule of thumb for determining how high the grass should be cut is only to cut off no more than one-third of the height of your lawn. Each mowing should only remove about the top third of the grass blade.

It’s recommended that you stick to this rule of thumb and a lesser degree in spring. If you can’t remember the measurements in summer, consider mowing at a greater height. It’s also a good idea to choose one of the higher settings of your lawnmower wheels when the weather is hot or dry and mow at that height until you approach the fall season and the weather starts to cool off a bit.

Factors to Consider on the Rule of Thumb

Types of Grass

The first thing that you will have to think about is the type of grass lawn you have. Some people don’t realize it, but there are different types of grass, and they all grow at different speeds and heights. Every grass type has its mowing height.

Keeping the Weeds Away

The next factor to think about is weed control. Weeds love growing in tall grass, and it’s important that you keep theirs under control. If you leave your grass too long, the weeds will take hold and ruin your lawn and use up a lot of water and nutrients from the soil.

Keep the Bugs Away

That’s not the only reason to keep your grass short. Bugs also like heat, and just like humans, they spend their time in shadier, cooler places. If you have a very tall lawn, it will grow over these areas and make them hotter because there won’t be any shade for the bugs to escape the heat.

In addition, too long grass is difficult to mow, and long grass clippings have to be removed and cannot be left on the lawn.

Laziness Doesn’t Pay

Keeping your grass cut short is also better for you. It’s far easier to maintain a shorter lawn because it requires less mowing, meaning that you can advance the cutting height more often. The mowing frequency depends on your grass type, its optimal height, and the grass growth speed, depending on the weather conditions.

For instance, cool grass such as Kentucky bluegrass and fine fescue grows faster during the cool spring and fall weather. While the exact heights vary depending on the grass type, the range of cool-season turf is between 1 and 5 inches.

Different Grasses Require Different Mowing Heights

All lawns are not the same. For instance, cut the grass too short, it becomes stressed, thin and you’ll be left with a shallower root system. Cutting the grass crowns will also make the turf vulnerable to weed pressure and require pesticide applications to prevent weeds and discourage pests.

Warm season grasses such as zoysia grass and Bermuda will tolerate a shorter, tighter cut, while cool season grasses like fescue and bluegrass need to be mowed taller to help shade the root system and keep heat stress away.

Mowing Too Low Damages Grass

Mowing your lawn too low will have a detrimental effect on your grass. When you cut the grass too low, it causes damage to the plant’s crown and results in a weaker root system, making your lawn more vulnerable to weeds, disease, and pests.

Mowing Too Low Damages Grass

Mowing too low reduces the density of the grass, making the lawn susceptible to invasive summer weed pressures. By mowing your grass too low, you may unknowingly be promoting crabgrass to grow because shade provided by higher cut grass blades shields the crabgrass seeds from much-needed sunlight.

Mowing too low also makes the turf vulnerable to summer heat. Without taller grass blades to shade the summer sun, low mowing can lead to stress damage quickly during long periods of summer drought.

How Short To Cut Grass in Spring?

At a minimum, it is best to cut turf no shorter than 3 inches during the early spring. If you have been postponing trimming your lawn because there was snow on the ground and cold weather, do not be tempted to mow just yet. Wait until grass blades begin hardening off on their own as summer approaches.

Mow cool season grass to a height of 3 inches tall and cut warm season grasses as low as half an inch up to 1.5 inches.

What Height Should Grass be Cut in Summer?

As temperature rises, your lawn height also goes up in summer. So, as the summer arrives, raise your mower height for cool season grasses and keep it closer to four inches. A taller plant shades the soil and keeps the root zone cooler during high heat periods. If you allow your lawn to grow too tall, it can result in broader leaf blades, lower plant density, and more susceptibility to turf diseases.

The Best Height to Cut Grass in the Fall

When inching into the fall, mid-length grass is the preference. Tall grass can get matted and become diseased in winter, but lawn roots can get exposed to extremely damagingly cold temperatures when you cut too short. So, focus on striking a balance in fall to prepare your lawn for winter.

Cut your cool season grass to about 2.5 inches before the first frost in winter and mow warm season grasses to two inches in fall.

How Often Should You Mow Your Grass?

Having a routine mowing schedule for your lawn is key. Grass will grow at different rates depending on fertilization, season, and weather conditions. Grass that is too long will not only make your lawn look shaggy, but it can also lead to problems with the health of your grass.


Image credit: https://www.arbor-nomics.com/

Long grass can prevent water, sunlight, and nutrients from getting to the soil, which can cause your grass to turn yellow or brown. It can also increase weed growth and create an environment where insects and diseases can thrive.

What is the One-Third Rule?

Regardless of your grass species, you shouldn’t remove more than one third of the grass height when mowing. This is important because the grass is a living plant, and they all undergo some stress when cut.

What is the One-Third Rule?
Image credit: https://res.cloudinary.com/

FAQs on How High Should Grass be Cut

Can you mow your lawn when it’s wet?

No, avoid mowing your lawn when it’s wet because other than jamming the lawn mower blades and clogging the discharge chute, wet grass can also leave clumps of grass on the lawn. Grass collecting on the mower blades also aids in tearing the grass much like a dull blade. Keeping your lawn mower blade sharp shouldn’t be overstated.

How often should the mower blade get sharpened?

Keep your mower blade sharpened as a cleaner cutting blade results in less stress on the turf. A dull mower blade rips and shreds the grass leaf, making the plant susceptible to disease. A good rule of thumb is to sharpen your blade every ten mower hours.

Final Thought on How High Should Grass be Cut

As you can see, keeping your lawn about two and a half inches tall and leaving the grass slightly taller about three inches in the shady areas will maintain a healthy lawn. It is also important to keep your mower blade sharpened and collect the grass clippings. Follow these tips, and you will be on your way to a lush, green lawn.


The post How High Should Grass Be Cut? appeared first on Kitchen Infinity.

Did you miss our previous article…
https://chefbuano.com/?p=1236

How to Kill Crabgrass

How to Kill Crabgrass

Crabgrass is an invasive weed that can ruin your lawn. If you do not fight back, it will become a serious problem for you and may even lower your home’s value. 

The first step in fighting crabgrass is knowing about its behavior and lifestyle. By understanding how this weed behaves, you will have an easier time finding ways to kill it and defend your turf from this invasive plant.

Many products out there claim they can help you get rid of crabgrass once and for all, but only a few works as advertised. In fact, some may cause more harm than good if used incorrectly because they contain harmful chemicals or toxins that can damage the grass when applied incorrectly or too often. 

To make sure you choose the right product for killing crabgrass, check out our guide on how to kill crabgrass below.

How to Kill Crabgrass Naturally

If crabgrass is a problem in your yard, you have more than one way of getting rid of this weed. The most natural way is to cultivate a healthy lawn and outcompete the pesky weed. Other natural ways include pulling the weed in the spring, providing your lawn with the proper nutrients, and reseeding where necessary.


Image credit: https://peppershomeandgarden.com/

For tenacious crabgrass infestation, you can learn how to kill crabgrass with post emergent herbicides that kill grass well after germination. Post emergent herbicides work by killing the crabgrass plant.

On the other hand, pre eminent herbicides kill crabgrass before the seeds emerge. This makes it easier to get the job done and allowing you time in the season to cultivate a lawn where there once were weeds.

When to Kill Crabgrass

It’s important to familiarize yourself with the plant’s life cycle to effectively eradicate crabgrass. When spring soil temperatures reach 55 to 60 degrees Fahrenheit, crabgrass seeds germinate. From mid summer through fall, the plant produces more seeds to increase its numbers. Once the first frost arrives, the plants themselves are killed, not the seeds.

When using an organic method, wait until the seedlings are big enough to hand pull the roots and all. While crabgrass doesn’t spread via roots, removing the whole plant in early spring before amending the soil and reseeding is essential.

Pre-emergent herbicide, also known as crabgrass preventer, comes in either a granular or liquid form and kills crabgrass seedlings right as they germinate.

How to Kill Crabgrass Step by Step

Tools and Materials

Post emergent herbicidePre emergent herbicideNon selective herbicideWork glovesOrganic compostPitchfork or weeding toolGrass seedPump sprayerGarden rakeSpadeSafety glasses

Pull Out the Crabgrass by Hand or Using a Tool

Before you start, you should gear up. Wear eye protection, gloves and old clothing that you don’t mind getting dirty. Also, the soil will be wet, so make sure your shoes aren’t worn out. Before hand pulling the young crabgrass, water the problem area with a sprinkler or garden hose and wait about 30 minutes for the water to soak in.

Pull Out the Crabgrass by Hand or Using a Tool
Image credit: https://ae01.alicdn.com/

This method is very important because even if you use herbicide to kill crabgrass weed, you’ll still have to dig it out to completely get rid of it. Try this method before using chemicals because chemicals have detrimental effects on the surrounding lawn grasses. Removing crabgrass naturally by digging up is a great way of eliminating the weeds without killing lawn grass.

pply a Crabgrass Killer Herbicide

Different types of crabgrass killer herbicides are available, but you need to make sure the one you choose is for your type of lawn. For instance, a homeowner with a St. Augustine grass lawn should not use a product designed for a Bermuda grass lawn because it will kill St. Augustine and the weed.

Apply a Crabgrass Killer Herbicide
Image credit: https://www.thespruce.com/

For buffalo grass, centipede grass, fine fescue, Kentucky bluegrass and perennial ryegrass, use herbicide with mesotrione as an active ingredient. It’s also important to read and follow the herbicide label instructions carefully. Improper use of these products can not only kill crabgrass but also other plants in your lawn.

Use a quality broadleaf weed killer to kill the crabgrass plants that remain after the seeding process. It will take several weeks to work, but it should eventually kill off any remaining crabgrass plants. Raking up all dead grass will make it easier for homeowners to keep the area free of crabgrass seeds.

dd Compost

Use a fertilizer with crabgrass fertilizer added to it to save time. Apply the fertilizer just before it rains to work the fertilizer and the herbicide into the soil. This will help thicken the turf. Thicker turf helps to squeeze out crabgrass plants missed by the herbicide. You can also learn how to make compost to use instead of artificial fertilizer.

pply Grass Seed

If you have large bare patches in your lawn, reseed these areas with a good quality grass seed mix. A mix that contains perennial ryegrass, Kentucky bluegrass and tall fescue is a good choice. These grasses are all cool-season grasses that will germinate and grow quickly, helping to fill in the bare spots.

pply Corn Gluten Meal

Corn gluten meal is a by-product of the corn milling process. It is a natural, organic herbicide that helps to suppress crabgrass growth. Apply it in the spring, before crabgrass germinates, at the rate of 10 pounds per 1,000 square feet. 

Water the area well after application. Corn gluten also works as a lawn fertilizer due to its high nitrogen content. It works by inhibiting crabgrass seeds from forming roots after germination. Corn gluten meal can be put down as pre-emergent to prevent crabgrass and other weeds that germinate in the spring.

However, corn gluten doesn’t prevent the germination of crabgrass. Instead, it only controls it by feeding lawn grass with sufficient nitrogen, making lawn grass grow faster, choking out crabgrass.

Fight Crabgrass with Healthy Lawns

Fight those pesky crabgrass infestations by first building a healthy lawn. Black Medic, tall fescue and hybrid Bermuda grass varieties are all known for their ability to handle stress and drought and do not encourage the spread of crabgrass. A thick lawn provides a dark canopy of grass blades over the seeds to sprout.

Thoroughly water your lawn once a week to encourage the grass’s root system to go deeper, making the whole lawn hardier and heat tolerant. Avoid short, frequent watering as the sips will promote a shallow, weaker root system in your lawn. Also, don’t mow wet grass if you want to encourage healthy growth.

pply a Double Dose of Herbicide to Crabgrass Hotspots

Limit crabgrass growth in areas like driveways, sidewalks and curbs or on south-facing banks by doing a targeted double treatment when necessary. This is because these areas absorb a lot of heat during the summer months, making them more susceptible to crabgrass.

Once you’ve treated your entire lawn, go back and make another pass about six to eight feet wide, along with hotspot areas. This will help keep crabgrass from taking hold.

Burn Weeds Off With a Blow Torch

When you’ve got an area where there is no grass at all, or you want to kill the weeds and not take out the entire lawn, try this trick. The target weeds absorb so much heat that they will pop when hit with flame. Some varieties of quack grass, for example, will burst into flames with just a couple of seconds of direct exposure to the torch flame.

However, be careful when using this method, as you can also damage nearby plants if you’re not careful. Make sure that you keep the flame moving and don’t hold it in one spot for too long. Also, avoid burning the lawn if it’s still wet from dew or rain. 

This method is effective for killing weeds growing underneath the base of a tree, as the flame will effectively kill everything within about 3 to 4 inches of where it meets the ground.

Mow the New Grass

Crabgrass has a tough triangular stem to slice with a weed eating blade. However, if you take your mower and raise the blades as high as they will go, you can effectively cut the grass at its base. While this may not kill it immediately, it will prevent it from growing back for a period of time while the new grass takes hold.

If you have a lot of crabgrass, it’s best to start with the highest blade height and then work your way down as the new grass grows in. This will allow the lawn grass to protect its turf, depriving crabgrass seeds of the light they need to germinate.

Use Vinegar to Kill Crabgrass Organically

Vinegar is a natural herbicide that can be used to kill crabgrass. It’s important to use white distilled vinegar, as other types of vinegar may not be effective. To use vinegar to kill crabgrass, mix one part vinegar with three parts water in a spray bottle. 

Spray the mixture on the crabgrass and weeds, and then wait for the weeds to die. Be sure to avoid spraying vinegar on any plants you want to keep, as it will kill them.

Use Baking Soda to Kill Crabgrass Naturally

Baking soda can be used to kill crabgrass. When making the mixture, it’s very important that no additional ingredients are included. To use baking soda for killing crabgrass, mix one tablespoon of baking soda with one cup of water.

Add baking soda slowly, so the solution doesn’t bubble over when mixed. Pour this mixture on the crabgrass that you want to kill. 

FAQs on How to Kill Crabgrass

What kills crabgrass and not the lawn?

Post emergent herbicides such as all in one weed killer or image herbicide kill crabgrass plus other lawn weeds and leave the lawn healthy.

Is there an organic way to kill crabgrass?

Yes, you can use baking soda as an organic way to kill crabgrass. Baking soda is a natural herbicide and will not harm the green lawn or surrounding areas.

What causes crabgrass?

Crabgrass is a summer annual weed that thrives in hot summer weather conditions and does best in soil with a neutral to acidic pH level, typically between 6 and 7.5. It becomes dormant during the winter months and will remain until springtime when the soil warms up. 

Crabgrass is typically seed produced; however, it can also reproduce via its roots or stolons in the same season in which it germinated.

Final Thought on How to Kill Crabgrass

As you can see, crabgrass is an unsightly weed that can wreak havoc on your lawn. It is important to get rid of crabgrass at the first sign of its germination to keep it from spreading. The most effective way to get rid of crabgrass is through preventative measures, such as applying pre-emergent herbicides in early springtime when the soil is still cool.

If you cannot get to your lawn early in the season, you should apply a post-emergent herbicide to kill the crabgrass. These methods, when used together, will give you good results in keeping these weeds under control so they won’t wreak havoc on your lawn. 


The post How to Kill Crabgrass appeared first on Kitchen Infinity.

Did you miss our previous article…
https://chefbuano.com/?p=1231

Midcentury Modern Bedroom Ideas

Midcentury Modern Bedroom Ideas

One of the best things about mid century modern bedrooms is that there are many different options to choose from. Whether you want your room to be simple and elegant or bold and in-your-face, there’s something out there for everyone. The trick is finding it. 

In this article, we will discuss some of the most popular mid century modern bedroom designs that people use when they want to make their bedrooms look stylish and luxurious without breaking the bank.

dd a Mid Century Modern Nightstand

One of the easiest ways to add a touch of mid century modern style to your bedroom is by adding a nightstand. Nightstands are a great way to add extra storage space to your bedroom, and they can also be used to add extra visual interest to the room.

If you’re looking for a simple, elegant nightstand that will help you create a midcentury design, then try this one-piece mid century modern furniture to give your bedroom a shot of style. Nightstands are easy to find, and many of them are inexpensive.

Splash of Boho with Midcentury Modern Bedding

If you’d like to add a touch of bohemian style but don’t have the budget for new bedding, you can always choose to change out your duvet cover. This will help transform your room’s look while also being an economical option that doesn’t require extra money on accessories or furniture. 

Incorporate Mid Century Modern Lighting

One of the easiest and most effective ways to add a touch of mid century modern style to your bedroom is by incorporating some mid century modern lighting into the design. Pendant light, for example, is a perfect way to introduce this look and can be found in a variety of price points. 

If you’re looking for a sophisticated bedroom, then mid century modern decor pendant lights in matching finishes and some classic molded plastic chairs would be ideal.

Use Natural Materials

Instead of using modern materials, opt for natural wood and natural finishes. This will reduce the coldness found in many mid century modern designs. When using natural materials, consider combining wooden furniture as this will combine lots of sunlight and some plants to round out the colors.


Image credit: https://blog.modsy.com/

Focus on Earth Tones and Colors

For a classic mid century modern style, you’ll want to focus on color palettes such as neutrals and earth tones. Try to play with different shades of brown, rust, mustard, yellow, and green with a touch of gray and white. If you’re using a dark wall color, make sure you have enough natural light coming in so your room doesn’t look too gloomy. You can also learn other ways to brighten a dark room and make it livelier. 

Skip the Classic Color Scheme

If you’re looking for something a little more unique, then you can try playing with different color schemes. If you also love clean lines, geometric shapes, and the overall clean feel of the mid century modern style but you’re not thrilled about the muted tones, then keep the style and ditch the colors.

Look for Tapered Legs

The mid century modern style is typically associated with furniture pieces with tapered legs, which gives the table, the dresser, and a bed frame a distinct look. If you choose between two otherwise identical tables, one of them has tapered legs, and the other doesn’t go for the more interesting design. Their sleek, round frames make for a roomier and more spacious look.

Look for Tapered Legs
Image credit: https://blog.modsy.com/

Consider Bold Accent Wall

Do you want to give a simple mid century modern bedroom a powerful shot of style? Well, create a boldly patterned accent wall. A busy wallpaper with a strong geometric pattern or a solid color in a deep hue can make a big impact. It will also draw the eye and create a focal point in the room.

Consider Bold Accent Wall
Image credit: https://cdn.shopify.com/

Keep it Neutral

When decorating a mid century modern bedroom, you’ll want to stick to neutral colors as much as possible. That doesn’t mean you have to go for a beige or gray overall color palette, though. Use a soft white in the walls, with off-white trim and accessories. For dark brown furniture, consider painting it a lighter shade of tan instead.

Keep it Neutral
Image credit: https://www.mydomaine.com/

Go With Eames Chair

When it comes to furniture, the key is simplicity and functionality. A great way to achieve this look is with an Eames chair. These iconic chairs come in a variety of colors and styles so that you can find the perfect one for your room. Plus, they’re comfortable and stylish, making them perfect for mid century modern design.

Look for Natural Wood Furniture

Mid century rooms are all about natural materials, so feel free to go a little more rustic with your furniture choices. Look for pieces made from natural wood, such as maple, walnut, or oak. Also, consider clean lines and muted tones to bring mid century modern into your bedroom. These woods will add a warm and cozy feeling to your room while keeping with the mid century modern aesthetic.

Change Things Up with a Platform Bed

Don’t hesitate to change your bed frame for a more glamorous platform bed. The straight lines of a platform bed work well with mid century decor. So, opt for a nice platform bed, and then stack it with books and throw pillows to give your room extra personality.

Change Things Up with a Platform Bed
Image credit: https://cdn.shopify.com/

Create a Gallery Wall to Act as a Focal Point

A gallery wall is a great idea for a mid century modern bedroom because it can be a focal point for the room. Choose a few of your favorite pieces of art and hang them up on one wall. This will add some interest to the room and help pull the design together.

Use Geometric Patterns

Geometric patterns are a huge part of mid century modern bedrooms, so use them in your room. Bring in a nightstand, a dresser, organic shapes of lamps, and clean, straight lines of furniture in the room. Choose clean and modern patterns to work well with your decor.

Incorporate Colorful, Fun Mid Century Modern Bedroom Furniture

One great way to add some fun to your bedroom is incorporating colorful furniture. This can be done with a bed frame, dresser, or even just with accent pieces. Add a pop of color with a bright pillow or blanket, and you’ll have a stylish and fun mid century modern bedroom.

Bright Accents in the Mid Century Modern Bedroom

If you prefer to keep your bedroom decor simple, then the use of bright colors is a great way to liven your space. You can incorporate these with wall art, patterned textiles, or even just with small pieces of decor placed on top of furniture. Adding a few shots of accent color will help liven up neutral bedroom space.

Glamorous Mid Century Modern Style

If you are looking to add a touch of glamor to your mid century modern bedroom, there are a few things you can do. You can start by adding metallic finishes to your furniture or accessories. You can also add plush fabrics such as velvet, faux fur, or silk since they also make the best ideas for those looking for how to decorate the bedroom

This will give the room a more luxurious feel. As demonstrated beautifully in this bedroom by an interior designer, the use of bold abstract paintings, luxurious fur throw, mustard armchair, and elegant furniture adds to a sophisticated and glamorous bedroom.

Built-In Bookcases in the Mid Century Modern Bedroom

If you are looking to build-in storage into your mid century modern bedroom, the best option is to install built-in bookshelves. This gives the room a more polished feel, but at the same time, it is functional. Shelves do not clutter up space and can be decorated with ornamental bookends or vases of flowers.

White Mid Century Modern Bedroom

A room with a white tone is always modern and chic. This bedroom oozes elegance and luxury through white silk curtains and plush white carpeting. The bed follows the line of symmetry and leaves plenty of space for the window. The bedside lamps give a warm glow that sets the mood for romance.

White Mid Century Modern Bedroom
Image credit: https://www.thespruce.com/

FAQs on Mid Century Modern Bedroom Ideas

What is a mid-century bedroom?

Mid-century modern refers to the decorating style that rose to popularity in the 1950s and 1960s.

What are modern bedrooms?

Today, a modern bedroom is typically one that is minimalist in design, with clean lines and little ornamentation.

What is the difference between mid-century and contemporary?

Mid-century refers to the period around the 1950s, while contemporary usually means designs from the past 10 to 15 years.

Final Thought on Mid Century Modern Bedroom Ideas

Well, there you have it. You don’t have to be overwhelmed by all these modern bedroom ideas. Start with one thing at a time and move on from there while keeping in mind the key elements of mid-century design, including functionality, simplicity, and modernity.  


The post Midcentury Modern Bedroom Ideas appeared first on Kitchen Infinity.

Did you miss our previous article…
https://chefbuano.com/?p=1223

Sunroom Additions vs. Full-Room Additions

Sunroom Additions vs. Full-Room Additions

Are you looking to add some additional space and versatility to your home? Well, consider hiring a contractor to build a room addition or full room addition. A home addition has a lot of benefits such as increased home value and square footage, cozy outdoor seating areas, and more private spaces like offices and home gyms.

Both sunrooms and full room additions often use frameless glass walls and doors to increase natural light and seamlessly integrate indoor and outdoor spaces. However, when choosing between sunroom addition and full room addition, there are a few things you need to consider.

This guide talks about the difference between a sunroom and full room extensions to help you decide which one fits you best.

Sunroom Addition

If you’re looking for a cost-effective way to create additional space in your home and a welcoming area with more natural light, then sunroom additions are a great option. Sunrooms are typically less expensive to build than full room additions, and they can be used for a variety of purposes, such as a home office, family room, or even a bedroom.


Image credit: https://livingspacesunrooms.com/

Sunrooms are often referred to as screen rooms or solariums, and they are glass room additions that integrate indoor and outdoor spaces. The additions are built on concrete slabs with a light aluminum frame, and about 80 percent of the wall space is glass. 

They can be equipped with stacking glass walls that lead to your patio or yard, and they can be fully enclosed and only accessible from the inside of the house. Sunrooms are a cheaper alternative to traditional room additions because they don’t require as many building materials, labor costs, insulation, and HVAC system.

Sunrooms come in two categories. These include prefab vs. custom-built sunrooms. Sunrooms can be custom-built by a local contractor who will design and build sunrooms to your specifications. Such sunrooms have traditional studs and truss framing, and shingle roofs, but the walls are predominantly glass formed by patio doors or full-length windows.

Three season sunrooms are not heated or cooled by an HVAC unit. They’re not well insulated as full room additions, so their temperatures fluctuate greatly depending on the outdoor conditions. In contrast, four season sunrooms are better insulated and boast central heat and air.

Despite being more costly than three season sunrooms, four season sunrooms are great for homeowners living in a cold climate for year-round addition. But today, sunrooms are constructed from prefabricated kits that come with framework pieces of steel, aluminum, and fiberglass, and glass panels for the walls.

Prefab sunrooms are assembled in a puzzle-like fashion by technicians. A prefab sunroom is designed and fabricated off-site then shipped in pieces to your home packed in flat cartons. Assembly can be done by a homeowner or a contractor affiliated with the prefab kit manufacturer.

Pros of Sunrooms

Lower construction cost per square foot than regular room additions.Increased natural lighting for reading, growing plants, and hosting a spaEfficient construction timeAdditional space

Sunroom Cons

May not include electrical wiring or HVAC systemLimited privacyLack of insulation makes them unusable during the winter weatherLimited to the side, front, and back of the house

Stick Built Addition

If you’re restricted by space or have a tight budget, sunroom addition is the way to go. A stick build addition is a better option if you want to add space and recent updates such as wide-open interiors with an open floor plan. Stick built is a shorthand term for any structure built from scratch.

Stick Built Addition
Image credit: https://www.theprojectplanshop.com/

In this case, it refers to house additions, room additions, and other bump-outs constructed from traditional building materials such as wood, concrete, glass, house sheathing, and shingles. These additions are great for mudrooms, kitchen extensions, home offices, and extra bedrooms.

Unlike sunroom additions, a traditional room addition is not limited to existing structures, meaning they can be built on any area of your home to increase square footage and overall property value. Room additions usually come equipped with a foundation, doors, windows, finishes, HVAC, and insulation, making them a more complicated version, although it benefits year-round usability. 

They’re accessed through an interior door or archway rather than an exterior door. According to the International Energy Conservation Code, any conditioned living space cannot have more than 40 percent of the wall space given to glass windows.

Full Room Addition Pros

You can add them to any area of the houseIncreased square footage and property valueInsulation and HVAC for year-round usageIdeal for private areas

Cons of Full Room Addition

Less natural lighting and window spaceExtensive construction processExpensive materials and labor costPossible increase in property taxes and insurance

How Much Does a Full Room Addition Cost?

The cost of full room additions is similar to the cost of sunrooms, with parts and labor, plus a building permit and the frequency of use all factoring into the overall price. The increased materials used will also drive the cost up, and since room additions take more time to build than sunrooms, the labor hours will also increase the price.

Unlike sunrooms, which homeowners opt to use in part of the year, a full room addition needs insulation and to be fitted with electrical and best air conditioner connections to make it usable all year round. The use of full room addition may also help offset the overall price.

For example, if you use it only occasionally, maybe as a guest bedroom, the infrequent use may help you save money when it comes to household costs. But a frequently used entertainment or living room, complete with additional electronics, may increase your household costs.

Uses of Sunroom vs. Full Room Addition

It’s important to establish your new room’s primary use before deciding whether to opt for sunroom or full room addition. Sunrooms consisting more of glass walls don’t offer much privacy, so they’re best reserved for areas that don’t require it.

Uses of Sunroom vs. Full Room Addition
Image credit: https://idealconstructionva.com/

Family rooms, playrooms, second living rooms, and hobby rooms are popular options for sunroom use, allowing a comfortable place with natural light in which to relax. On the other hand, full room additions are best if you intend to use the additional space for something personal like a bedroom or home office.

A living room and an entertainment room can also be a great full room addition. However, most homes already have one enclosed living or entertainment, making a sunroom a better and more unusual option for communal areas. 

FAQs on Sunroom Additions vs. Full Room Addition

re sunrooms worth it?

This is a great question, and it depends on what you intend to use the space for. But other than adding value to your home, a sunroom is an upgrade that can improve the quality of your life all year round.

Which side of the house is best for a sunroom?

If you want your sunroom, you catch as much sun as possible, then build on the south-facing section of the house. If you like watching the sun come up, then an east-facing position is best, while west-facing allows you to enjoy the late afternoon sun and sunset.

Final Thought on Sunroom Additions vs. Full Room Additions

Whether you’re looking to create a cozy place to relax, a private home office free from distractions, or a bright playroom for kids, a sunroom is a great addition. If you’ve always wanted more space and fresh air, then consider adding on a sunroom to enjoy all four seasons. 

A full room addition provides those nice things and new square footage that can feel like an entirely new part of your home. You’ll gain functional floor space and perhaps even some needed storage. If you decide to add a sunroom or full room addition, be sure to work with a professional contractor that can help you determine your best option. 


The post Sunroom Additions vs. Full-Room Additions appeared first on Kitchen Infinity.

Did you miss our previous article…
https://chefbuano.com/?p=1195