Soil is the foundation of your garden. Knowing what makes up your soil and how to amend it is an important part of successful gardening. Unfortunately, many people don’t know how to test their soil’s pH or even begin.
Well, if you’re like most gardeners, you don’t have the time or money to get a professional test done on your soil. So how can you be sure your plant selections are going to thrive in your yards? That’s where these simple DIY tests come into play.
The following easy do-it-yourself tests will give you a good start on knowing your soil’s strengths and weaknesses. The results from the tests will give you an idea as to whether or not professionals should do more testing before any changes are made based on this information alone. Let’s get started!
The Squeeze Test
This test is based on the premise that soil with good texture will form a ball in your hand and fall apart when lightly squeezed. Be ready to get your hands when testing your soils using this method. In this soil test, soils are classified as clay soils, sandy soils, and loamy soils.

Image credit: https://bdn-ss-hh.s3.amazonaws.com/
Clay soil is nutrient-rich but slow draining, while sand is quick draining but has trouble retaining nutrients and moisture. Loam soil is considered the ideal soil because it retains moisture and nutrients while draining well. In the squeeze test, you’ll need a handful of moist soil from your garden or from near plants that are growing well.
Be sure to use only a small amount from around the tops of plants. Avoid collecting soil from dry areas around plant roots, which could be hot and baked, as this can damage the organism living in the soil. In the squeeze test, the soil should form a lump that holds together well but can break apart easily by hand. This result shows it is loam soil, which is ideal for plant growth.
Sandy soil will remain crumbly and may be difficult to squeeze together in your hand, while clay soil will form a hard lump and crumble when squeezed. For slow-draining clay, you can break up the soil with mulches and drainage aids like perlite and vermiculite.
The Puddle Test
Drainage is another important aspect of your soil that you must consider because it allows water to pass quickly without pooling. If your soil has poor drainage, it can cause root rot to your plants. Culinary herbs are the main culprit of root rot due to their shallow root system.
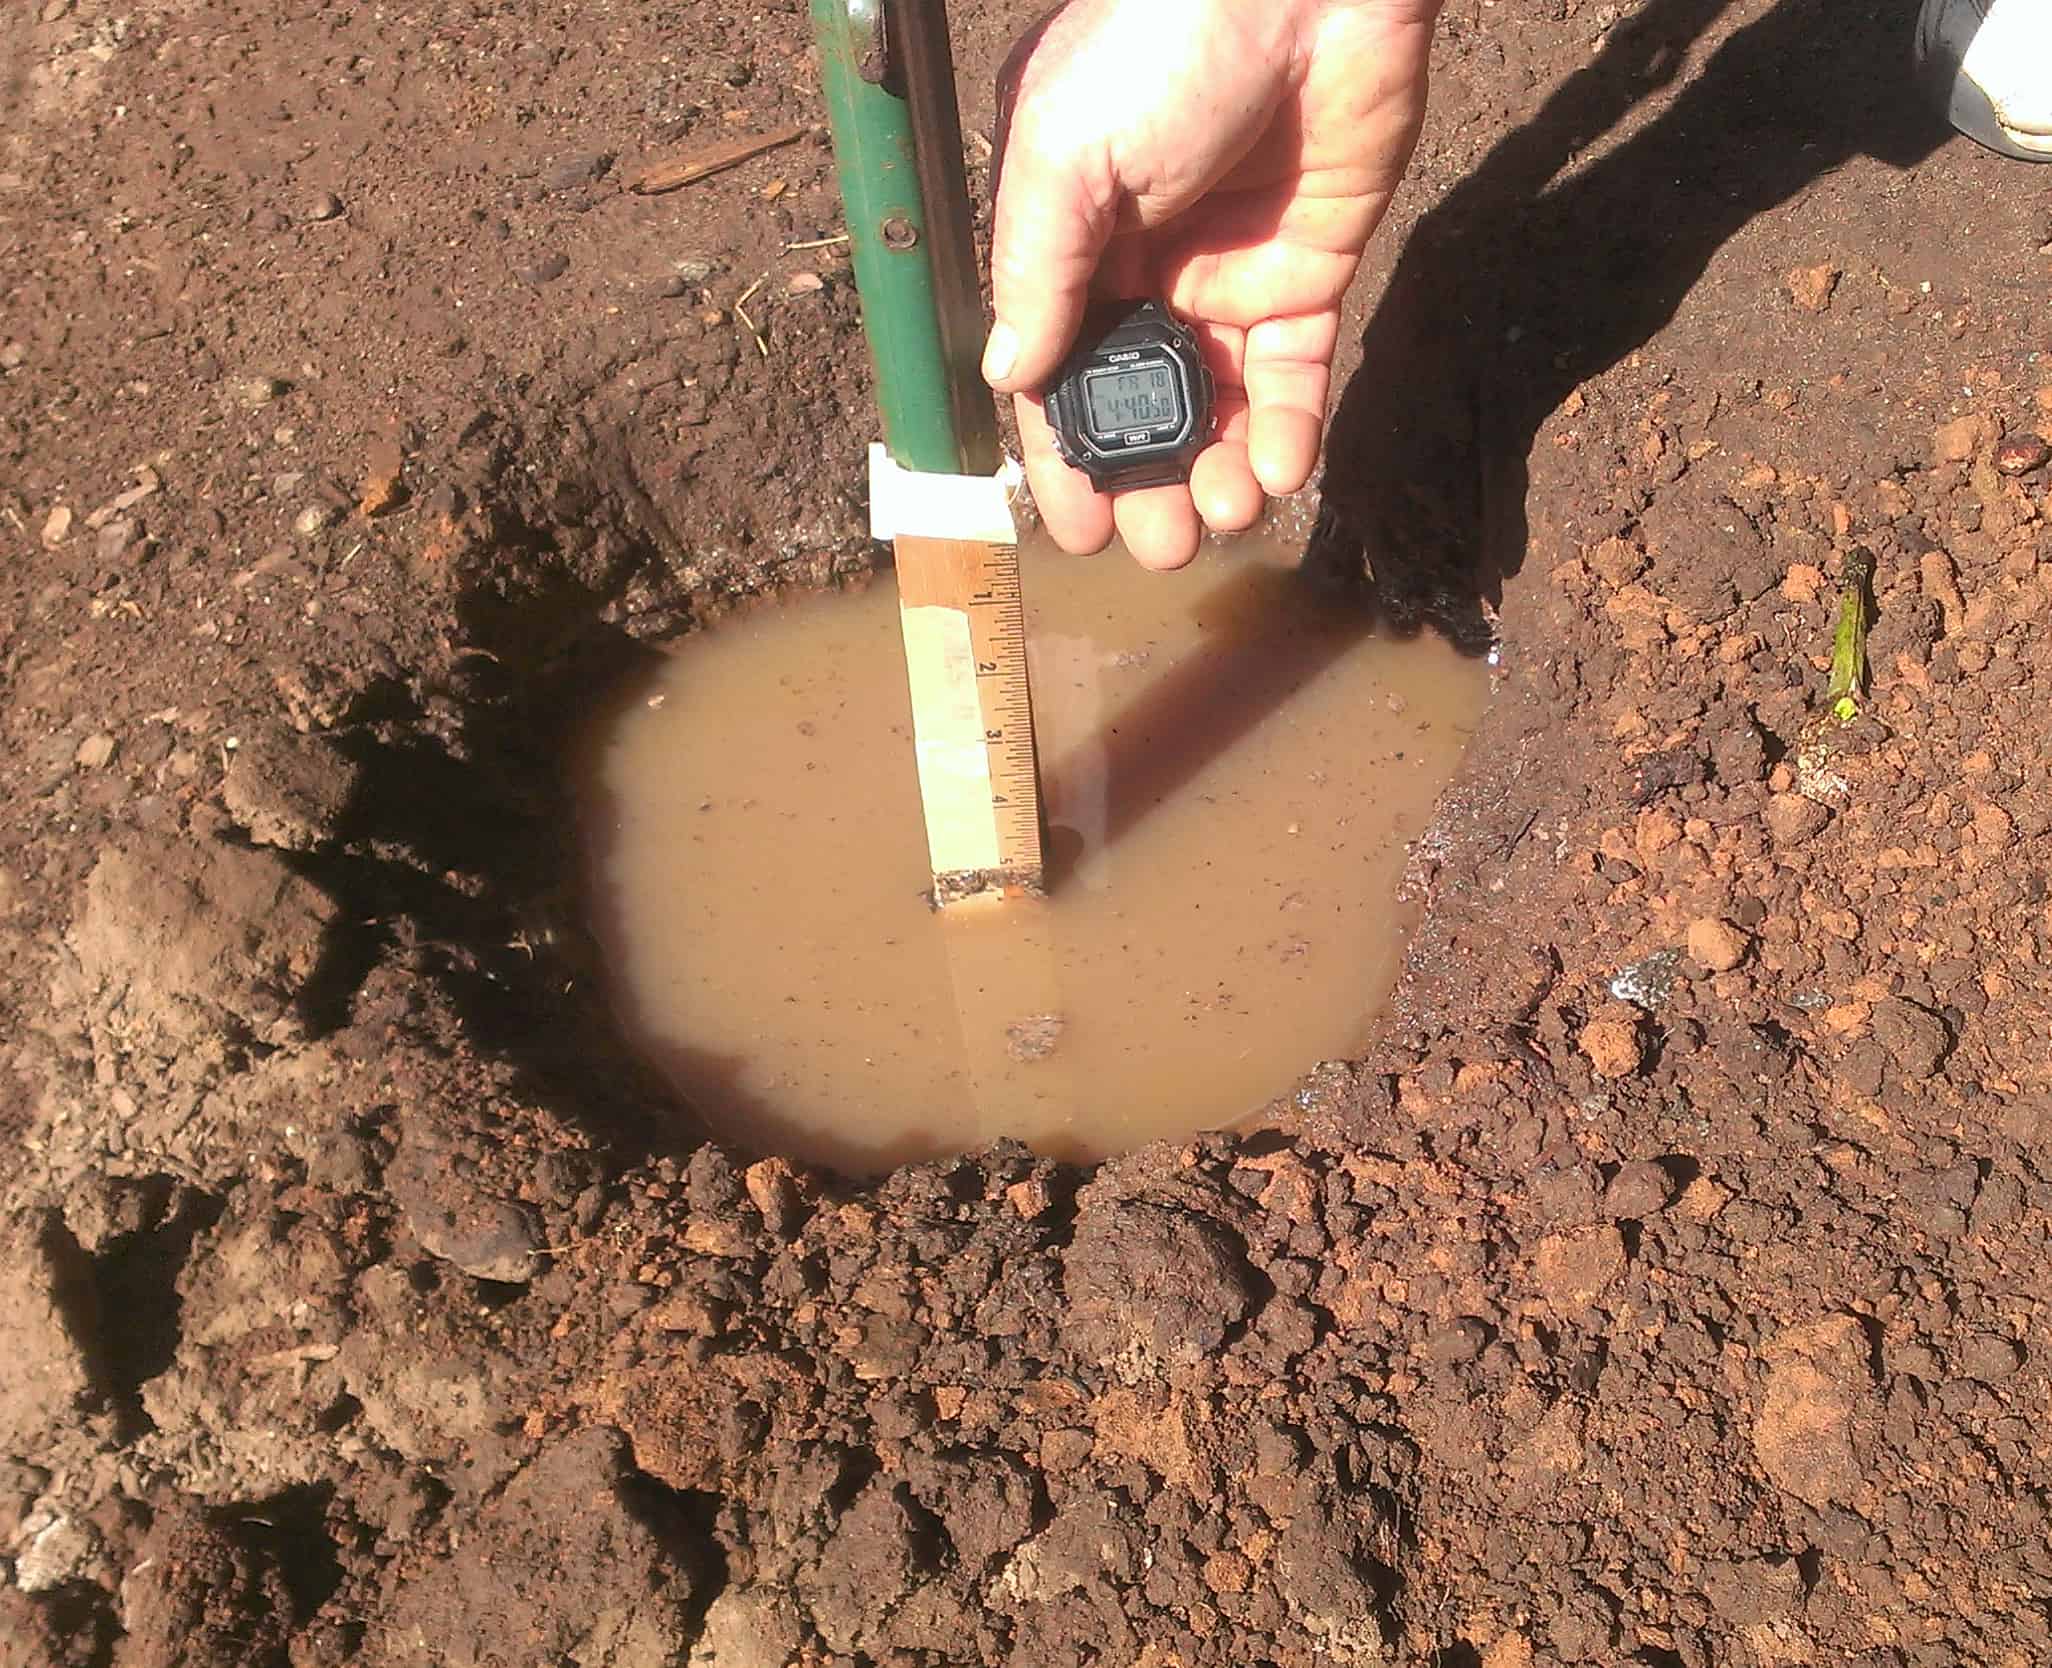
Image credit: https://greywateraction.org/
The puddle test is the best way to check soil drainage. Take a handful of moist soil and roll it into a ball in your hand. Then, drop the ball into a bucket filled with water. If your soil sinks, you have good drainage. If not, drill some holes in your garden beds at least 6 inches deep before planting your herbs.
If the water takes more than four hours to drain, then you have poor drainage. Fortunately, you can amend this by mixing some organic matter, such as peat moss or compost, into the soil around your herb plants.
The Vinegar and Baking Soda Test
Soil acidity, alkalinity, and soil pH are very important elements to the soil. Some plants will thrive better in more basic soil or acidic soil. But soil that is too extreme can also be a problem. It can prevent them from getting nutrients.
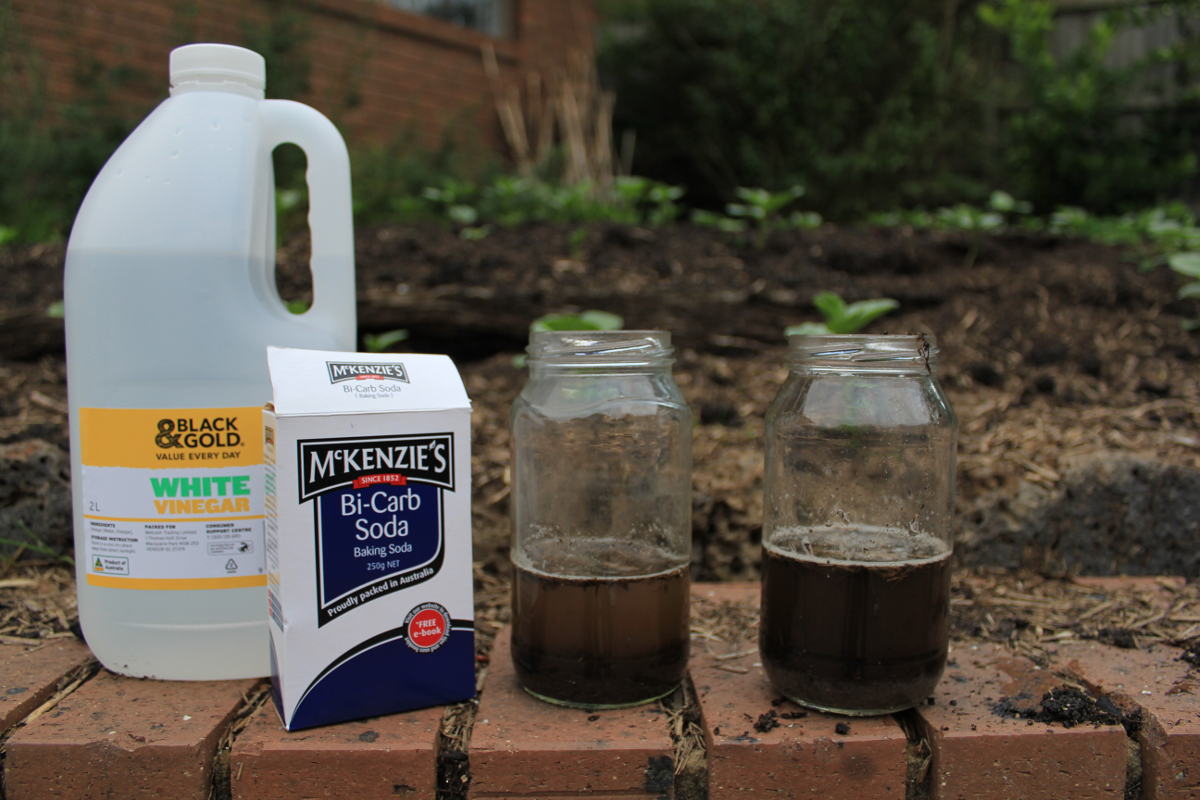
Image credit: https://www.theseedcollection.com.au/
To find out the pH of your soil, put a teaspoonful of soil in a small glass jar and add half a teaspoon of distilled white vinegar. Put on the cap tightly and shake well for about one minute. Let it sit for another five minutes to see if there are any bubbles that appear on the surface.
If it fizzes, you have alkaline soil with higher pH, which you can remedy by using a fertilizer rich in sulfur and acidifying nitrogen. Some plants can tolerate alkaline soil, while others like parsnips and peanuts will do well in the sweet soil. If your soil doesn’t fizz after the vinegar test, add distilled water to another container with the same amount of soil and add half a teaspoon of salt.
Stir occasionally for 15 minutes and see if there are any noticeable changes. If you see the particles change, your soil has acidic properties, meaning that you have sodium chloride in your garden, which can be harmful to plants, so be sure to use compost with neutral pH to reduce the risk.
If your soil doesn’t change its properties, you have a neutral pH, meaning adding compost is beneficial for the plants. Learn how to make compost so you can add it to the soil. A pH of 7 means that the soil has an alkaline nature – there are more nutrients available to your plants, and they do not tend to die as often as those growing in acidic soils, so be sure to use only fertilizers with a pH of 5-7.
So, by doing this simple test, you will be able to quickly determine your soil’s pH, which is especially important if you plan on growing any plants that do not tolerate acidic or alkaline soils, such as most vegetables. You will also discover whether or not the soil has any organic matter in it. The more organic matter, the better because if there is none, you will need to take some time to break down any hard dirt clods before planting, which can be difficult for novices.
The Cabbage and Wire Test
Soil that is too compact will inhibit root growth, choke off available water, and prevent worms and other vital soil critters from moving freely. To test soil compaction, plug a wire flag vertically into the soil. Mark the depth at which the wire bends.
Make sure the wire bends where it cannot be pushed down straight. You can easily push the wire down a foot or more. Don’t let it bend because the more it bends, the more it becomes compacted. You remedy compaction by amending your soil organic material, aerating organic materials, and avoiding walking on the wet soil in your plots.
When it comes to the cabbage test, you can purchase a home testing kit or use a more advanced DIY test using red cabbage. Red cabbage contains a pigment known as flavin that dissolves in water and will turn red in acidic solution and greenish-yellow in basic solution.
Allow one tablespoon of soil from your garden to dry on a white saucer, then bring one cup of distilled water to boil in a pot with a lid. Add two cups of chopped red cabbage into the boiling water. Cover and boil until the water turns dark purple.
Make sure you wet the soil and sit for some minutes, then tip the saucer to allow water to run to the side. If the soil turns blue or green, it’s alkaline, and it turns red, then the soil is acidic.
The Peanut Butter Jar Soil Test for Sand, Silt, and Clay
This is a very easy test. Fill a jar halfway with soil, then fill the rest of the way with water. The amount of water needed will vary depending on your jar size, so it’s best to start empty and add water until the jar is two-thirds full. Put in one teaspoon of dish soap and shake vigorously for 30 seconds.
The soap will suspend the particles to see how many there are and what kind they are. The jar should be enough to do about a cup of soil. If not, use another jar and combine the results. Calculate the percentage of silt, sand, and clay, which should add up to 100 percent.
Healthy soil will consist of 20 percent clay, 40 percent silt, and 40 percent sand. If you have sandy soil, you can remedy this by adding humus, aged manure, peat moss, and sawdust with some extra nitrogen. For silt soil, add coarse sand, gravel, compost, and well-rotted horse manure. If you have clay soil, coarse sand, and not beach sand, plus compost and peat moss will work well.
FAQs on 4 Easy Do-It-Yourself Soil Test
re home soil test kits accurate?
Yes, but you have to follow the directions carefully and take several samples from different garden areas or lawns.
How much soil should I get for a soil test?
In general, take at least a cup of dry soil from each spot. However, if there is not enough soil in any one spot to fill a 1-cup measure, take a 1/2 cup from two different spots.
Is it expensive to get a soil test done professionally?
A local extension agent can perform a low-cost or free soil pH test for you, but you would have to go in person to their office and pick up the report. It may be worth your time, though.
Final Thought on Four Easy Do-It-Yourself Soil Tests
When considering what your soil needs for the plants to thrive, it’s good to consider a complete report from your cooperative extension. However, carrying this simple test can help you understand what your soil may be lacking. Then you can take the next step toward creating a healthy garden.
The post Four Easy Do-It-Yourself Soil Tests appeared first on Kitchen Infinity.
Did you miss our previous article…
https://chefbuano.com/?p=709