Easy Color Schemes From A Color Wheel

Easy Color Schemes From A Color Wheel

A color wheel is a perfect tool for deciding on a paint job or designing your next room.

Knowledge of what colors are opposite each other can be used to create entire palettes, and some schemes are more appropriate than others depending on where you plan to put them to use.

In this article, we’ll show you the most important things to know about color schemes and offer some advice on how they can be used in your home.

Let’s dive deep into this topic. 

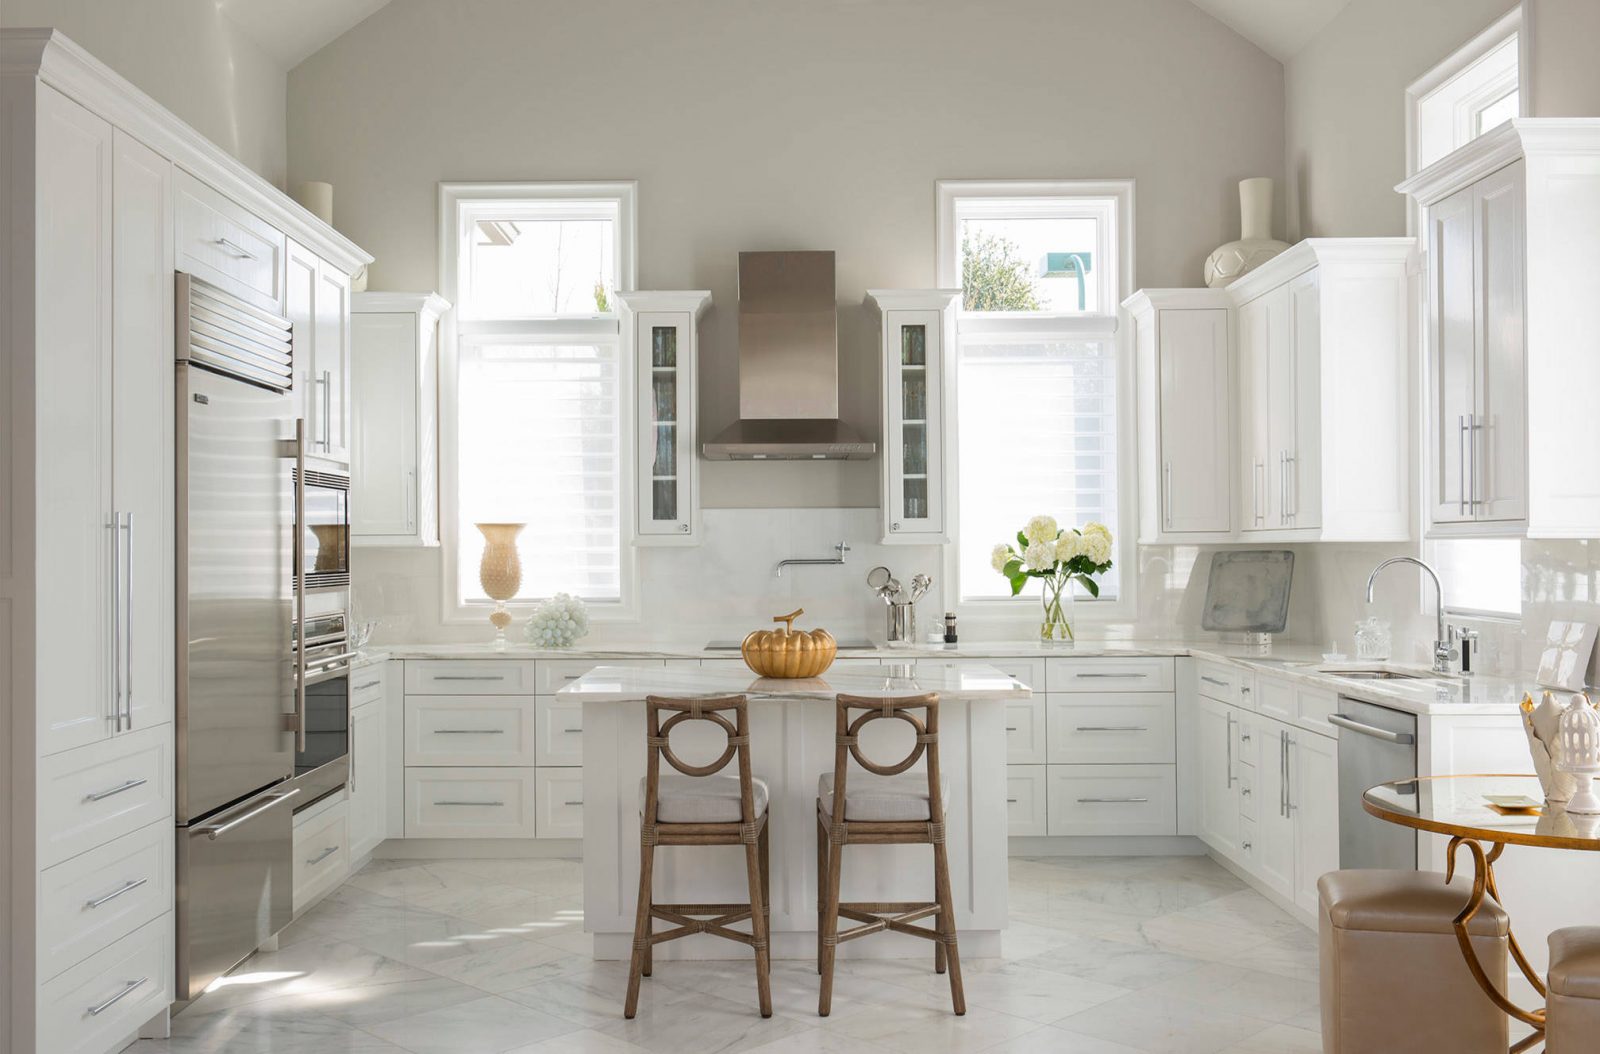
The color wheel is a great way to get inspiration for your next paint job.

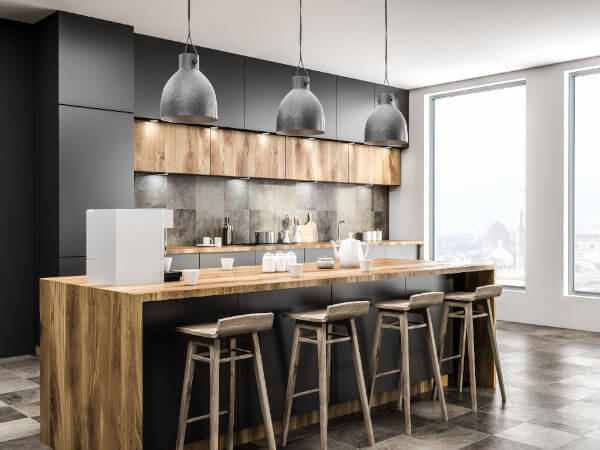
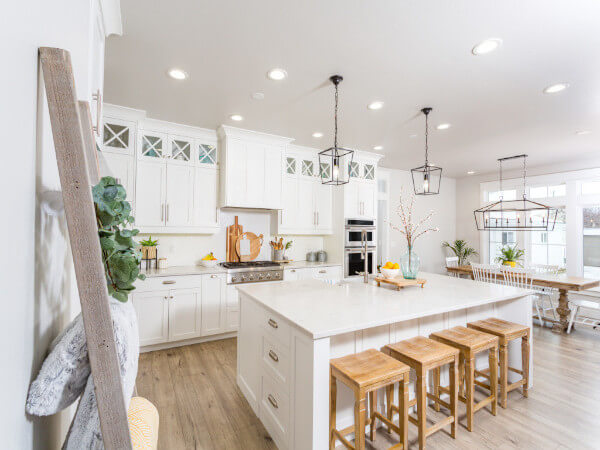
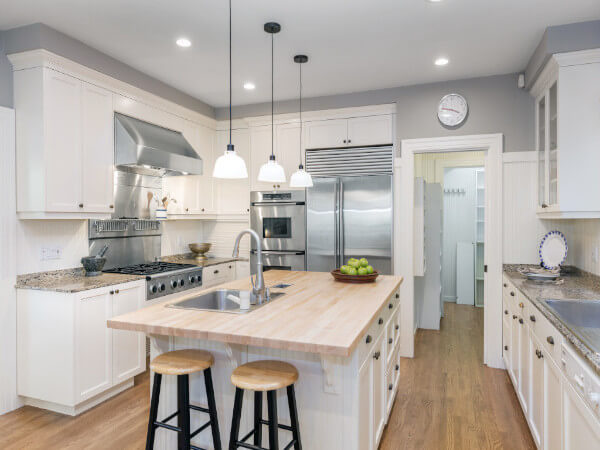
Whether you’re looking for kitchen paint colors when you have white cabinets or need to find the right bedroom colors, a color wheel is a great tool. The same goes for exterior house painting. Each color you see has similarities and differences to other colors on the wheel based on their level of intensity and brightness (or dullness). You can use these findings to determine what color would work best in your home.


Image Credit: http://blog.closetomyheart.com


Choose colors that are opposite one another on the wheel

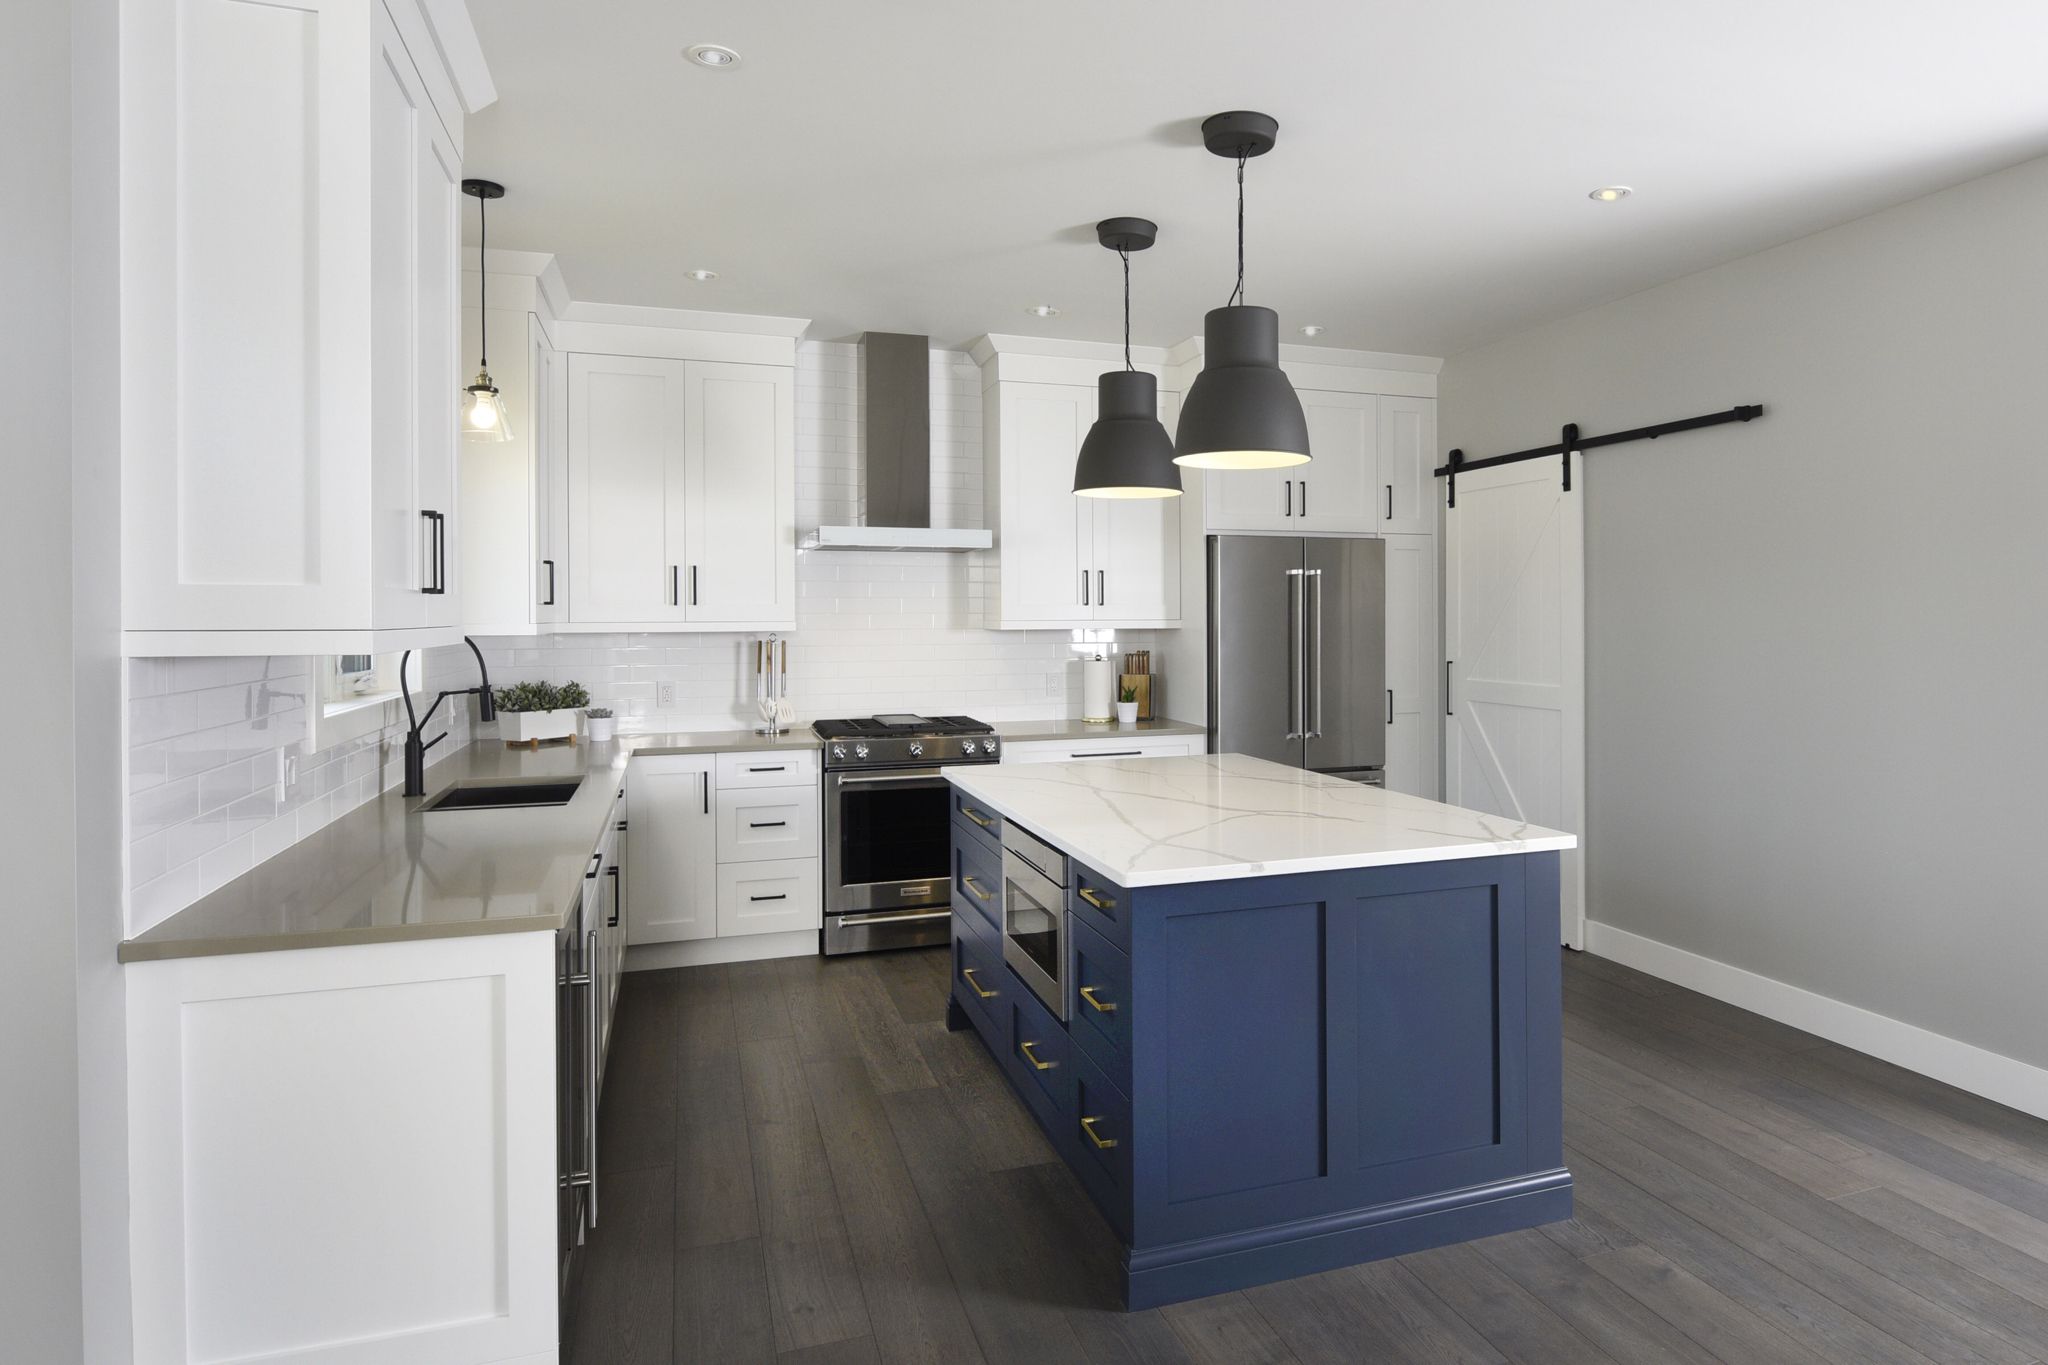
The complementary scheme is when two opposite colors – typically one warm and one cool – are paired together in a room. For instance, you can paint your walls in an intense yellow hue, then pair it with a strong navy or cobalt blue color for accent pieces. This particular pairing is one of the most visually appealing color schemes around.

The triadic scheme is when three colors are evenly spaced on the wheel. This particular scheme can be very versatile because it offers a wide array of options for harmonizing your room. For instance, warm neutrals make great compliments to this plan, as do earthy or muted hues.

Don’t limit yourself to just two or three colors either – try adding a complementary or contrasting color for some visual interest and appeal. It’s also important not to overdo it – sometimes less is more when it comes to planning out your perfect palette.

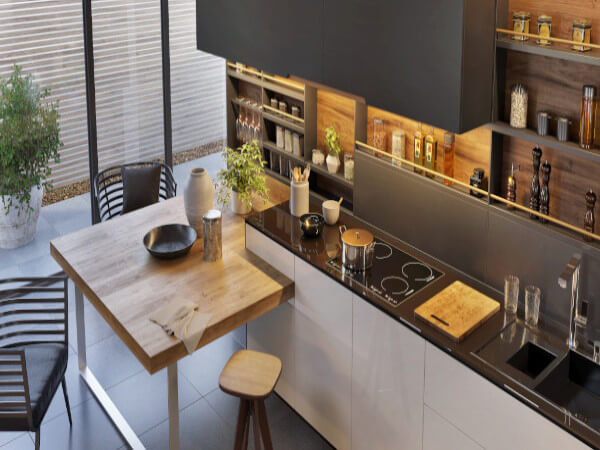
Sometimes color inspiration can come from the most unexpected places. If you’re trying to figure out what color of yellow would look best on your kitchen or bathroom walls, then taking a peek at the color wheel may help you get inspired.

When looking at paint for your walls it’s important to note that some colors are better than others depending on where they are placed in your room (obviously paint with super high VOCs should not be used near windows). Note how pink looks amazing against lighter shades of blue and gray but clashes with too much orange. Similarly, green pops when paired with light neutrals like yellows and grays but will clash if placed next to purples or reds (unless that is its complementary scheme).

There are many color schemes out there

To avoid clashing, you’ll need to know a little bit more about complementary and contrasting colors. Complementary schemes are when two colors directly opposite each other on the color wheel are paired together. This pairing creates a vibrant look but also one that may be too overwhelming depending on how dark or light the hues are.

That’s why it’s important to pair your complementary colors with those from either side of their analogous group (this is where our third scheme comes in). The split complementary scheme pairs a color from its analogous group with two colors from either side of its complementary group.

The triadic scheme is another way to harmonize your room using three different colors – typically one warm, one cool, and one either neutral or vivid. You can also try new things like tints, tans, and shades which are color hues that have been altered with black, white, gray, etc.

There are endless color schemes to choose from but it’s important to remember that too many contrasting colors won’t look great together unless you’re going for a bolder look. Experimenting is one of the best ways to find out what works for your home so don’t be afraid to try something new.

Steps to choose the right paint colors

Follow these steps to learn how to choose the right paint colors

Step 1: Find Your Color Scheme

Choosing colors for your walls is an important part of decorating, but it can feel overwhelming. There are thousands to choose from between paint, fabric swatches, and accessories so it’s important to narrow down the best place to start your search.

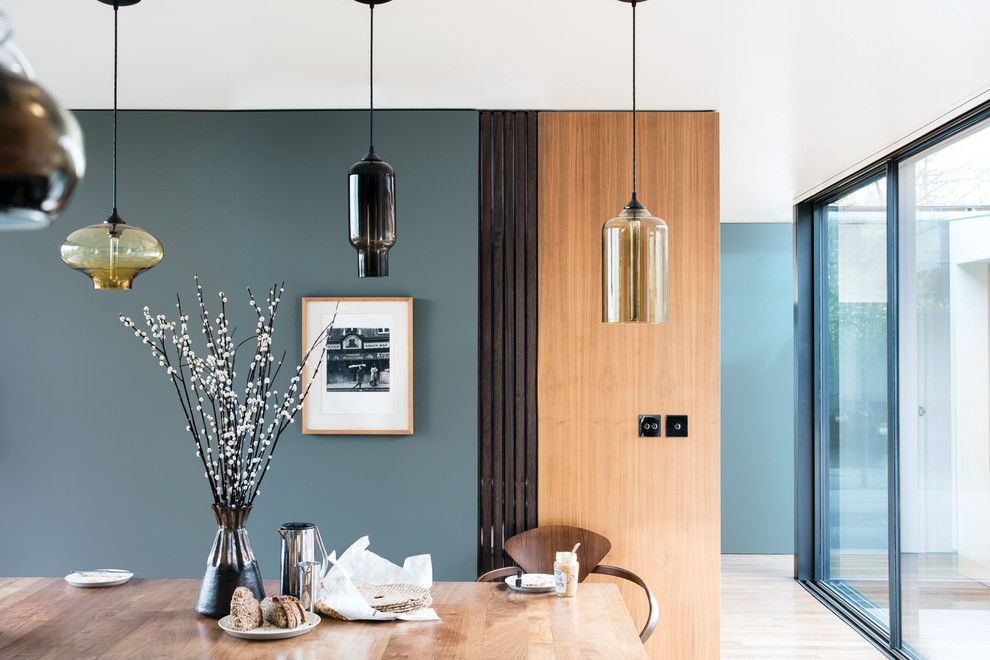
Color schemes are found all over home design so you can take inspiration from anywhere – whether it’s a trendy interior blog or your favorite nature scene on a postcard – and translate that feeling into color palettes for any room in your house including living rooms, kitchens, bedrooms and children’s rooms.

Color schemes work well on their own but they also pair well with one another so if you find a scheme you love, try playing around with different combinations to see what you like best.

As you’re choosing your colors, it’s important to keep in mind that some areas of your home receive more light than others so dark shades will show the most wear and tear. 

Step 2: Choose Your Wall Color

This is where things can get exciting – play around with different accent walls or use all four ideas to bring out the best of any space in your house. Paint swatches are available at every hardware store but if painting isn’t an option, consider using vinyl wallpaper instead. It has become incredibly popular over the last few years because it’s quick and easy to install, removable, and comes in so many different colors. It also looks great against darker accent wall hues since lighter shades can be overwhelming.

If you prefer the look of fabric wallpaper but don’t want to put too much work into finding the right color palettes, consider using paint chips instead. They’re available at every hardware store and are an inexpensive alternative to paint that easily allows you to play around with various ideas until you find that perfect hue for your walls.

Step 3: Curate Your Accessories

Now that your floor plan is done and you have all four room color schemes ready to go, it’s time to pick out accessories. This is all about personal style – you might like to decorate with modern art or vintage pieces, black and white photography, or colorful botanicals. Find what you love and make it the focus of your room.

Step 4: Decide on the paint colors

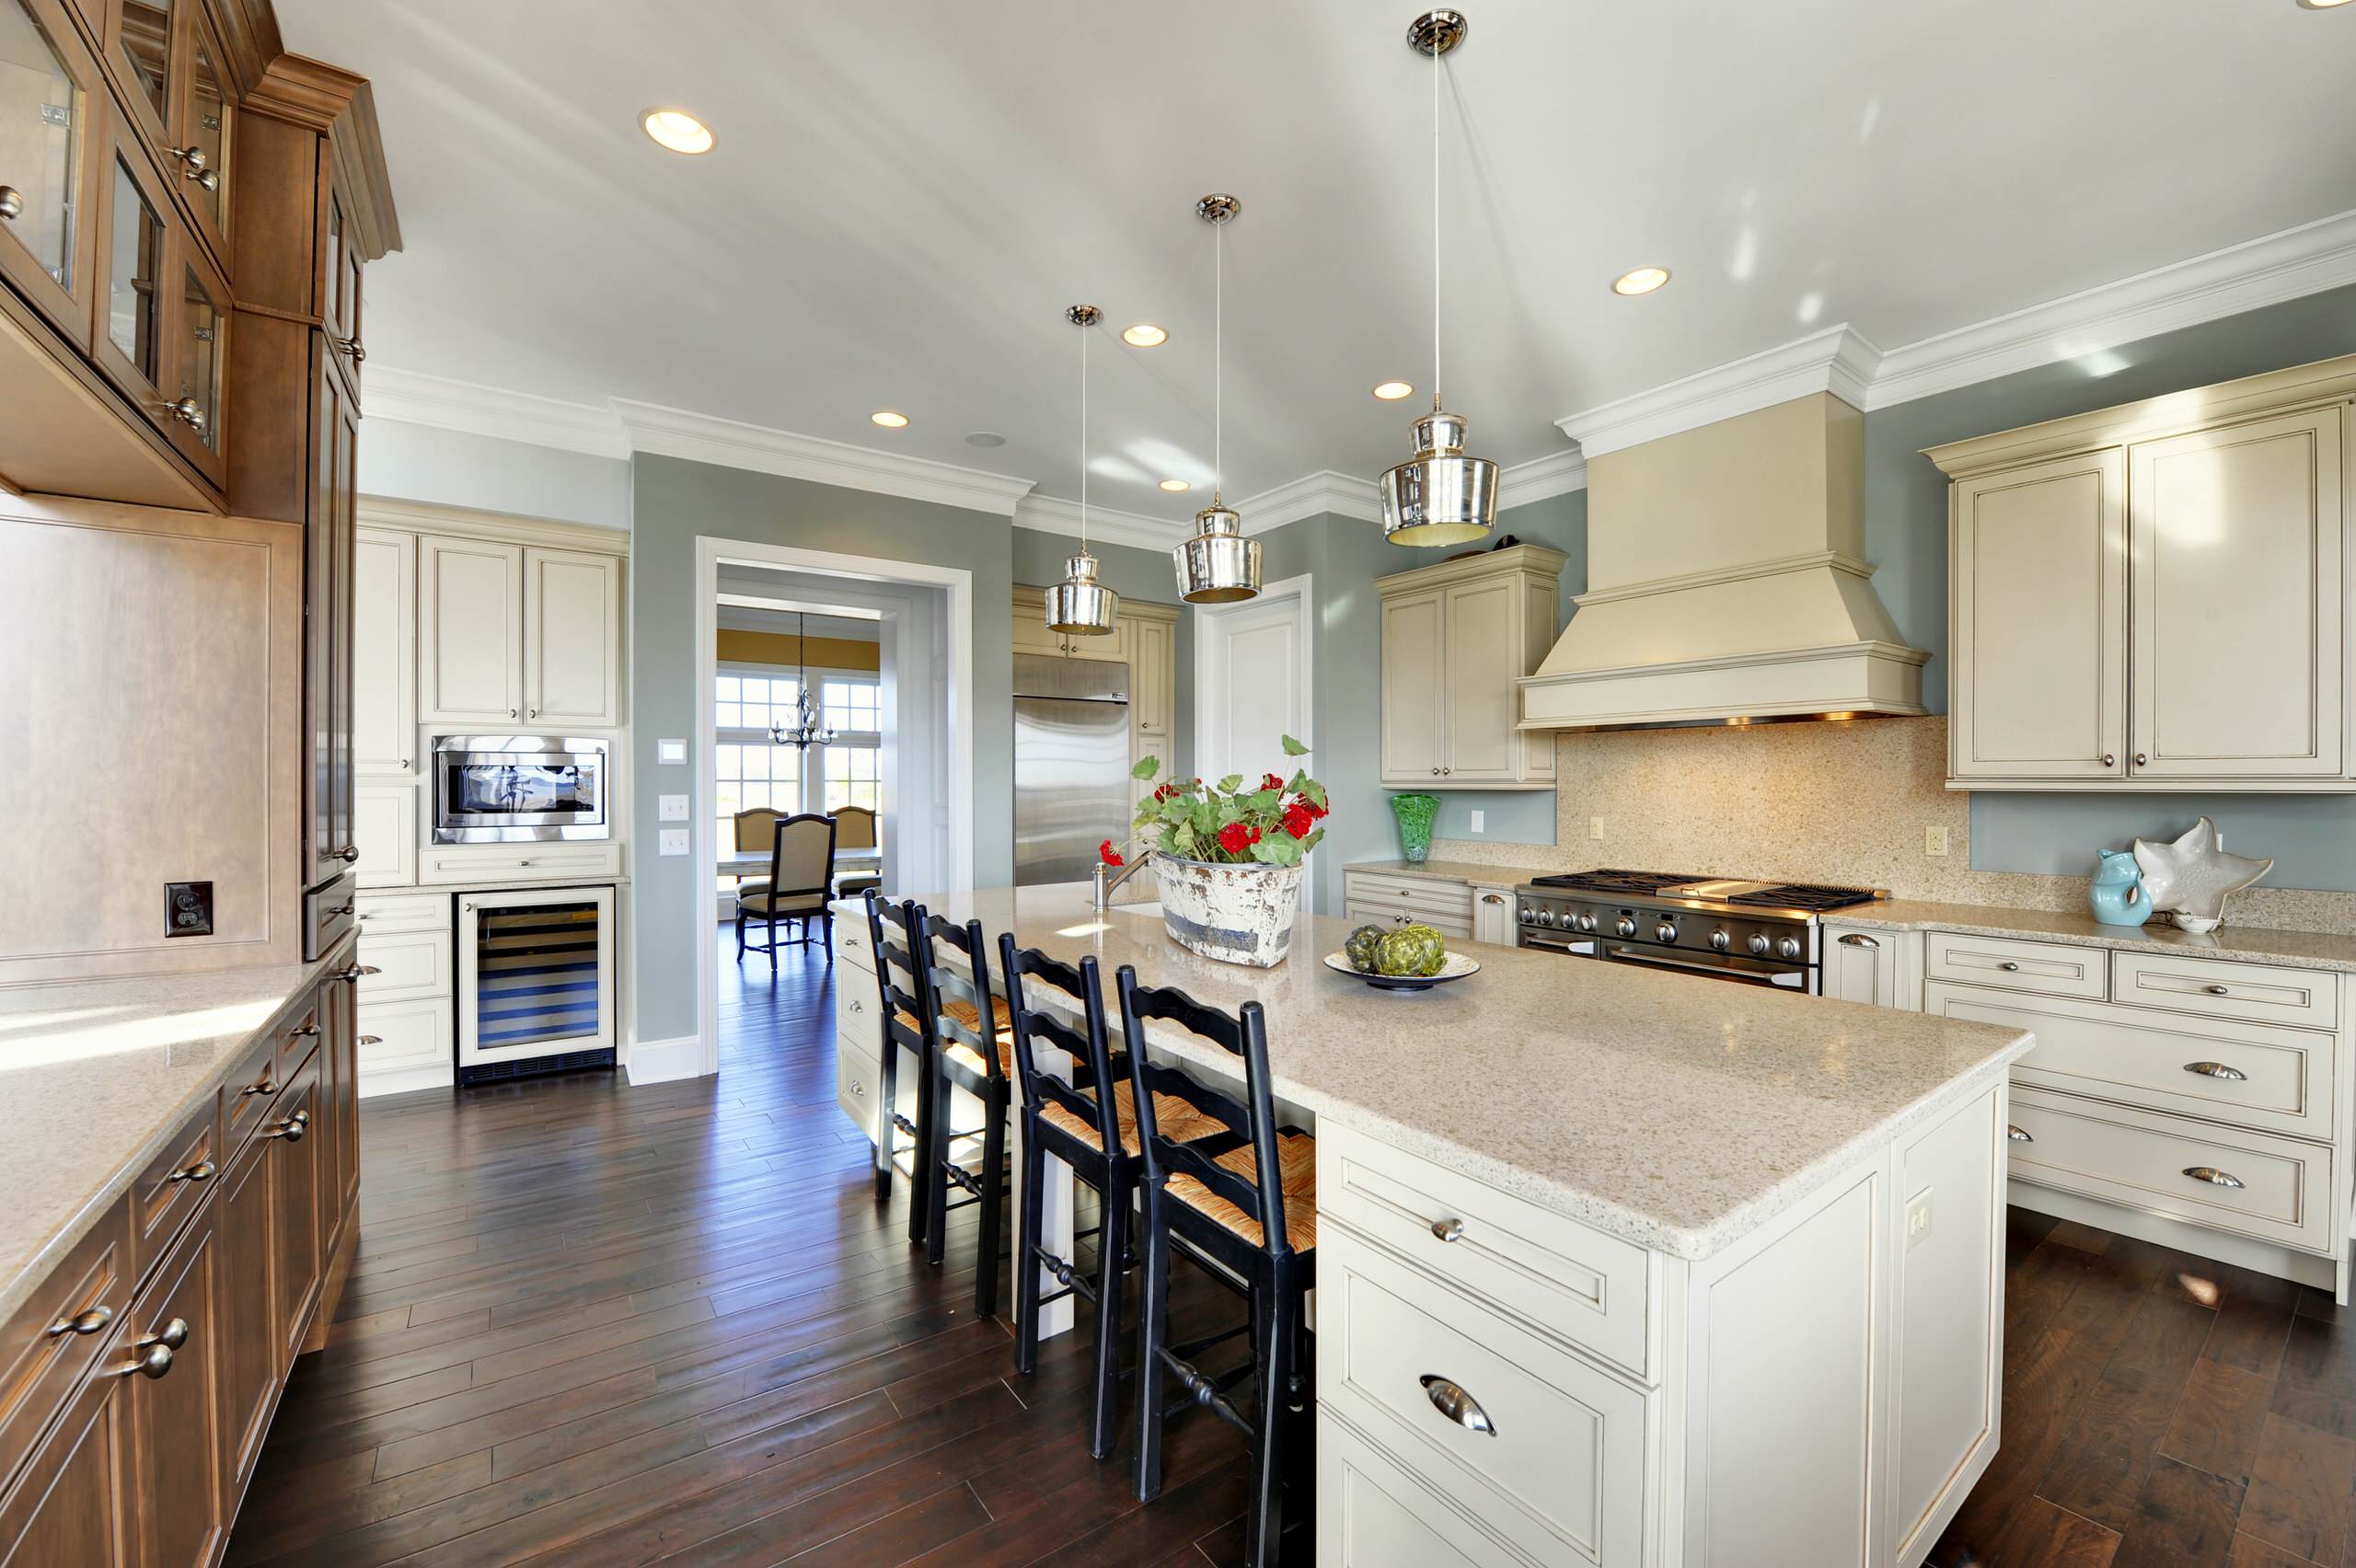
The final step is choosing paint colors for hardwood floors, baseboards, crown molding, and window frames – these elements might not be included in your floor plan but they’re still just as important in bringing out the best of each space in your home.

For example, a minimalist interior might not include much in the way of trim or molding but that doesn’t mean you can’t bring out the best in your home. It’s possible to have an incredibly beautiful space with little more than smart paint color choices and the right accessories.

Whether you’re looking for French country style inspiration or modern simplicity, we’ve got a wide range of palettes available to make every room in your house as stylish as it is comfortable.

There are thousands of paint colors to choose from but using color scheming will ensure that your room looks intentional – even if it’s full of eclectic pieces.

Color Psychology: How Do Colors Affect Mood & Emotions?
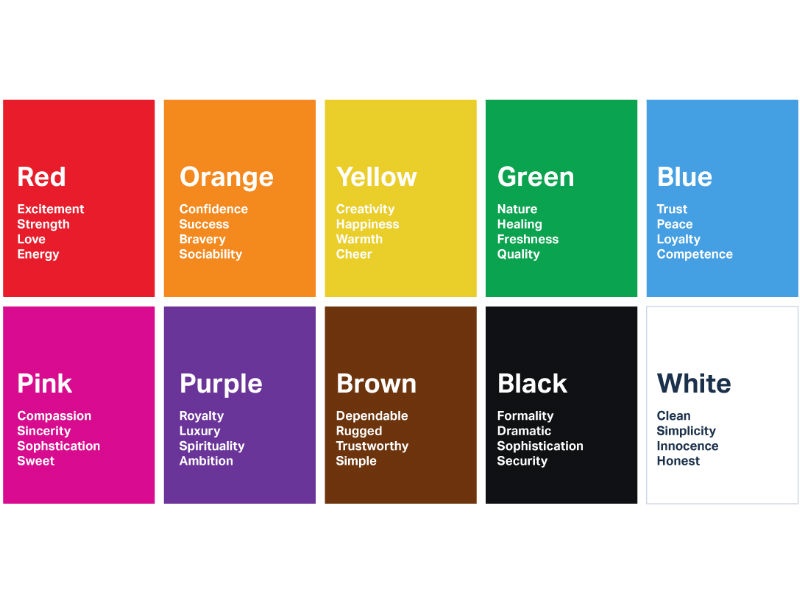
Image Credit: http://londonimageinstitute.com

Final thoughts on easy color schemes 

In conclusion, starting to use color scheme generators might be hard because it is quite easy to get confused by all the different options offered. It is however a very good way of getting started into the world of color theory and understanding how it works. I think that once you have used these kinds of tools for some time, you’ll feel more confident in choosing your colors, knowing why you are using them, and what emotions they are evoking.

The post Easy Color Schemes From A Color Wheel appeared first on Kitchen Infinity.

Did you miss our previous article…
https://chefbuano.com/?p=646

Control Gnats In Plants

Control Gnats In Plants

Gnats are very small files that can be a nuisance to gardeners trying to grow healthy plants. There are many species of gnats, but the one type that is problematic for gardeners in planting beds and potted plants is fungus gnats. If your plants have been eaten away by tiny maggots, then fungus gnats are your culprits.

In this article, I will go over how to identify fungus gnats, how to get rid of them, and tips that can help you avoid future infestations. Keep reading to learn more.

What are gnats?

The most common species found in homes are fungus gnats. They are tiny, black insects with long legs and wings that lack scales. The adults do not eat anything because they do not have mouths, but their maggots can be very destructive to plants. 


Image Credit: http://getgreenbewell.com

Adult gnats lay eggs on soil surfaces or the base of houseplants where fungi grow. Fungus gnat larvae feed off of fungus growing in your plant’s soil. A few types of fungus gnats are Bradysia impatiens, Sciara, Mycetophila fungorum, and Bolitiphila.

Fungus gnats can infest both outdoor and indoor plants, and they like to lay eggs in high-nitrogen soil. If your houseplants are suffering from fungus gnat infestation, you’ll see damage on the leaves in the form of tiny brown or black spots that look like dirt stains. The leaves will start dying off after turning black. In severe cases, small maggots may be visible on plant roots or bases where adults lay eggs.

In addition to being a nuisance pest for planting beds and potted plants, fungus gnats pose risks to human health as well. Their larvae do not only feed off of dead organic material but also excrete it as a waste matter which can contaminate indoor air.

If you have fungus gnats in your home, you may notice a strong irritating sweet smell that smells similar to mold or mildew. If the infestation is bad enough you might start sneezing and seeing more of them flying around near windowsills.

How do you know if your potted plants have these pests?

1) If mushrooms are growing out of the potting mix it is a tell-tale sign that fungus gnats are present in the soil.

2) If you spot small insects flitting about your plants, you also could have an infestation. The larvae of the gnats love to eat root hairs and plant stems. You can tell if your plant has maggots by lifting the potting mix to take a look.

3) Fungus gnat larvae are typically creamy-white with shiny blackheads. They also will leave tiny tracks on the soil surface that resemble little snail paths from all their digging around near plant roots.

4) If fungus is growing out of the soil where it should not be, then you also could have a gnat problem.

5) If you have moldy, spotted leaves or dying plants then fungus gnats could be responsible for the damage.

6) Finally, if you notice signs of root rot, it could be a symptom of an infestation from fungus gnats and other pests.

How to get rid of gnats in plants 

The first thing I would recommend doing is removing any potted plants that are infected with fungus gnats from the area. If possible put them away from your healthy plants to avoid spreading the problem by way of spores during watering cycles. If you cannot seem to get rid of them, then I would recommend removing the infected plant and soil altogether to kill any larvae that might be present.

If your indoor plants are not infested, you can prevent fungus gnats from ever getting into your home by placing sticky yellow traps around baseboards where they tend to fly. If the traps do not work, try using a natural pesticide made from orange peel oil.

How to choose the right pesticide for killing fungus gnats

There are so many pesticides available in stores that it is difficult for anyone without experience or education to know which ones will work best for fungus gnat control. You should avoid unnecessary exposure by way of inhalation as much as possible. This means steering clear of pesticides that use chemicals such as pyrethrin and rotenone. Natural pesticides made from plant extracts or oils can be effective in controlling fungus gnats while being safer for your health and the environment.

Another option is to use a sticky trap that will catch the flying adults before they can lay eggs and reproduce. The traps can be purchased online or at your local nursery.

Fungus gnat larvae grow in moist soil, so drying up the top layer of soil where adults land to lay eggs is another way to kill this invasive species. Some natural pesticides work by way of suffocation because fungus gnats must have a moist environment for survival. Certain products on the market claim to eliminate fungus gnat infestations within 48 hours by dehydrating all stages of their life cycle.

In my opinion, it would be best to try using a biological pesticide as your first line of defense against these annoying pests because they are non-toxic and break down quickly into safe compounds without leaving residue. Biological pesticides are fungi that produce enzymes that paralyze the insect and then digest them over time once consumed. Using a biological pesticide can be especially helpful when you have fungus gnats in your houseplants because natural predators like nematodes will actively seek out larvae in the soil where they can do their job with no chemicals involved at all.

How to make a homemade pesticide 

What you’ll need: one cinnamon stick, two cups of water, and one tablespoon of organic dishwashing soap.

First, put the cinnamon stick in a pot filled with water and bring it to a boil until it reduces by half. Then take out your cinnamon stick and add the dishwashing soap and stir thoroughly.

Pour this mixture into a spray bottle when it has cooled off completely, then when it’s time for pests to appear just spray them away. One thing to keep in mind when making pesticides such as these is that they only last about three days so if you have fungus gnats reoccurring you will want to mix up another batch or switch chemicals to be more effective. It is best to experiment with what you have at home and formulate some sort of natural pesticide that works well for the type of pest you are looking to eliminate.

Tips on how to prevent fungus gnats in plants

Going forward, if you’re having issues with fungus gnats in your plants, be very careful about overwatering. Overwatering will promote root rot which is a major cause of fungus gnat infestations.

If your plants are already being attacked by these pests, carefully look them over for eggs or larvae before bringing them back indoors. The safest way to kill any potential eggs would be using insecticidal soap so they do not reproduce and continue their cycle of eating away at your plants.

Afterward, you want to repot with new soil so that the fungus gnat larvae cannot continue their cycle in the moist environment they love.

Any sick-looking plants should be taken down immediately so they do not infect germinating seeds or nearby vegetation. Getting rid of fungus gnats is essential for plant health as well as your hygiene because if these pests manage to reproduce inside your home it can lead to a breeding ground for pestilence and disease. It’s best to keep an eye on all of your beloved houseplants – this should make gnats in plans become a distant memory through proper irrigation methods.

Control Gnats In Plants – FAQ

How do I get rid of voles in my garden?

Gnats are not the only pests to want to get rid of. Getting rid of voles in your garden can be tough and there are several things that you will need to do for this to happen. First of all, when looking for ways to get rid of voles, you will want to figure out what is attracting these pesky critters into your yard.

The first thing that you should check is if they are coming into your yard because it smells like food, water, or shelter. If this is the case then the easiest way to get rid of them would be by getting rid of whatever is attracting them.

Make sure that you also check for burrows in your garden – if they are already in there it will be much harder to get rid of voles. Regardless of how you plan on getting rid of these critters from your yard, another good idea would be to look into purchasing traps and poisons that can help with the process.

How to Get Rid of Fungus Gnats in Houseplants, Organically
Image Credit: http://homesteadandchill.com

How do I prune tomato plants?

Pruning tomato plants is something that you will want to do to get the most out of your yields. Tomato plants tend to produce at multiple places along the stem, and you must wait until these flower clusters are just about to open before you prune them off. Doing this ensures that your plant will be more productive than ever before while spreading its energy between fewer branches.

Final thoughts on controlling gnats in plants

In conclusion, pests are everywhere. It is important to get them before they get you, especially if your crops are involved. You need to ensure that no pest can get into your garden and destroy all of your hard work. This includes insects, fungi, bacteria, nematodes, and anything else that would be considered a pathogen.

It’s also important to note that pesticides aren’t always the answer. Sometimes herbs or essential oils will do the trick just fine. Nature has provided us with countless different ways in which we can protect our crops from pests without having to rely on unnatural chemicals. Use every tool at your disposal—and try to stay balanced when deciding whether or not pesticides should be used in any specific situation.

The post Control Gnats In Plants appeared first on Kitchen Infinity.

Did you miss our previous article…
https://chefbuano.com/?p=633

What is Cleaning Vinegar and How to Use It

What is Cleaning Vinegar and How to Use It

You want to clean your home, but you don’t want to use harsh chemicals. Many commercial cleaners contain toxic ingredients that can be harmful to both people and the environment. In addition, they often have synthetic fragrances that are expensive and potentially unsafe.

Cleaning vinegar is a great alternative to these products because it’s made from all-natural ingredients like distilled water and acetic acid found in household vinegar. It’s also inexpensive compared to other commercial cleaning solutions – one bottle will last you months. 

Read this article to learn more about cleaning vinegar and how it works.

What is Cleaning Vinegar?

While many types of vinegar are used for cooking and salad dressings, cleaning vinegar is entirely a different product. Other types of vinegar include balsamic vinegar, rice vinegar, apple cider vinegar, red wine vinegar, champagne vinegar, and distilled vinegar.

The only difference between cleaning vinegar and distilled white vinegar is that cleaning vinegar has fewer additives. But they’re both made through a process where alcohols are distilled from the grain. The grain is then allowed to ferment as microorganisms process the alcohol into acetic acid, water, and vinegar.

On a lighter note, cleaning vinegar is 20 percent stronger than white distilled vinegar in tackling chores. While you can use distilled white vinegar for cleaning, do not use cleaning vinegar for salad making and making pickles. This is because it may contain impurities that are not approved for consumption and the acidity level is too strong to be tasty.

Do not confuse industrial vinegar with cleaning vinegar when purchasing at hardware or a large improvement store. Professional landscape crews use industrial vinegar to kill weeds. It contains up to 20 percent acetic acid and is dangerous for indoor cleaning because it emits fumes harmful to inhale.

Why Use Cleaning Vinegar?

Vinegar is a very popular household cleaning product because it is inexpensive and works well on almost all types of surfaces. It is effective for cleaning glass, tile floors, fiberglass bathtubs, sinks, and chrome faucets and toilets. In addition to being an excellent disinfectant, vinegar kills dust mites that live in your carpets.

Vinegar is also an effective odor fighter, helping to take the musty smell out of your basement or garage when cleaning these spaces. If you plan to paint a room in your home, clean all surfaces with vinegar before applying paint for the best results.

Cleaning vinegar is a good product for homes where people are sensitive to chemicals because it is natural and non-toxic. This type of vinegar can be used to clean your kitchen, bathroom, or any other area in the home. It is also safe for pets and children when regularly used in small amounts.

Concentrated white distilled vinegar contains acetic acid, a powerful cleaner that will cut through most dirt and grime. It will not work on tough stains, such as rust or bloodstains, but it can clean almost everything else in your home without harming the environment or leaving streaks and sticky residue behind.

Vinegar also works great as a cleaner for shower doors and other surfaces exposed to hard water as it works well to remove soap scum. However, don’t use vinegar to clean glass surfaces because it will leave a foggy residue on the surface.

How to Make All-Purpose Cleaner Using Cleaning Vinegar

Save some money by making your cleaner with this natural cleaner. Get a spray bottle and fill it with two parts vinegar and one part water. Shake and use like any other multi-purpose spray.

Also, cleaning vinegar doesn’t have the most pleasant smell, so adding a few drops of your favorite essential oil will help it smell better. Five drops of liquid dish soap and ten drops of tea tree oil will leave you with an all-purpose cleaner.

How to Use Cleaning Vinegar on Floors

Cleaning vinegar can be used to clean floors, including hardwood floors and laminate wood floors. To remove carpet odor and dust mite, mix a few drops of your favorite essential oil with some white distilled water in a spray bottle, then spritz lightly throughout.


Image credit: https://www.woodfloorscleaner.com/

To remove unpleasant pet odors from your carpets, wet the spot with vinegar and sprinkle with baking soda. Use your fingers or brush to work on these two, and ensure you wear gloves to protect yourself from skin irritation. Let it sit overnight, then vacuum.

How to do Laundry with Cleaning Vinegar

You can use cleaning vinegar in laundry to deodorize mildew-ridden towels, stinky gym clothes, and pet accidents. It’s also a natural fabric softener and can remove pet hair and lint.

How to do Laundry with Cleaning Vinegar
Image credit: https://post.healthline.com/

All you need to do is add one-half cup to one full cup of cleaning vinegar to your washing machine during the final rinse cycle. Your clothing won’t smell like vinegar, but you can throw some essential oil into the load if you’re worried about the vinegar smell.

You can also use this vinegar as a natural alternative to bleach for brightening up your whites, such as socks, rags, and towels. You can achieve this by boiling water in a pot, then adding a cup of cleaning vinegar and letting it soak overnight for best results.

How to Clean with Cleaning Vinegar

To clean sinks, tubs, countertops, and fixtures, vinegar works effectively. It is acidic; therefore, you should not use it on marble or natural stone surfaces. You can add ½ cup directly into the sink, let it sit for about 5 minutes, then wipe clean.

To remove soap scum from ceramic tile, you can use a spray bottle, fill it with vinegar and dishwashing liquid, and then spray directly onto the tiles. Allow it to sit for about 10 minutes before wiping clean. 

You can also combine baking soda and vinegar to create a paste. Let the vinegar sit for several minutes then scrub away thick soap scum and mildew from your showers and tubs.

For kitchen appliances such as stovetops, microwaves, and sinks, fill a bowl with vinegar and water and place it on the surface. Let it sit for about 10 minutes, then wipe clean with a paper towel or sponge. Try to clean refrigerator surfaces with white vinegar. Use a cloth dampened with a vinegar cleaning solution of equal parts vinegar and water.

To remove the drain, pour vinegar on a scrub brush small enough to get inside the disposal. For cutting boards, spray the surface with straight vinegar then rinse to clean. For cleaning windows, a window cleaner that includes rubbing alcohol and vinegar will do the trick.

How to Clean Faucets Using Cleaning Vinegar

You can also use vinegar to clean your faucets. All you need to do is combine two teaspoons of vinegar and one teaspoon of salt to remove calcium deposits on faucets and fixtures. To get rid of those tough stains, spray your fixtures and faucets with vinegar and then tie a plastic bag filled with vinegar around the fixtures and let it sit overnight.

How to Use Cleaning Vinegar on Toilets

Pour two to three cups of cleaning vinegar into the toilet bowl and let sit overnight. Next morning, sprinkle with baking soda or borax powder, scrub with a brush and then flush.

How to Clean Tiled Surfaces with Cleaning Vinegar

To clean tile bathroom surfaces, mix half-cup white distilled vinegar with a gallon of warm water. Mop bathroom floors and scrub tile countertops with vinegar cleaning solution and allow to air dry.

Clean Your Bedroom with Cleaning Vinegar

Disinfect your mattress by mixing distilled white vinegar with a little rubbing alcohol and tea tree oil in a spray bottle. Lightly spritz on your mattress to get rid of dust mites, mildew, and general odors. You can follow with a dusting of baking soda for a deeper clean.

Clean Your Dining Room and Living with Cleaning Vinegar

Mix distilled white vinegar with olive oil or lemon essential oil to clean wood floors and place in a spray bottle. Lightly mist the floor and wipe clean. Buff with a soft cloth until dry.

To clean area rugs, mix one teaspoon of mild dishwashing liquid in a quart of warm distilled white vinegar. Soak a cloth in the mixture and wring out. Wipe over the rug, going with the grain of the fibers, then vacuum as usual.

When Not to Use Cleaning Vinegar

While vinegar cleaning is great in the kitchen and every room at home, it’s not good for cleaning everything. Never use it to clean marble, granite, limestone, and natural stone countertop and floor. Acetic acid can cause natural stones to pit and lose shine.

You should also never use it on solid wood furniture because it can harm the finish. Do not use white vinegar to clean cast iron and aluminum pans because the acid in the vinegar will strip the seasoning away.

Avoid using vinegar cleaning on any spills and messes involving eggs because it will react with the egg, making it smell worse. Finally, never use it on silver or bronze that’s not solid because you can remove anodized coatings.

FAQS on What is Cleaning Vinegar and How to Use it

Can you cook with cleaning vinegar?

You should never cook or consume cleaning vinegar. Unlike the cooking vinegar, which is indicated on the label, white vinegar may not be tested for impurities that can be harmful to the human body. You can avoid confusion by storing it with other cleaning supplies and not food products in your pantry.

What is the difference between cleaning vinegar and regular vinegar?

Regular vinegar is a weak acetic acid solution made from diluting acetic acid and water. Cleaning vinegar is a much more potent ethanoic-based solution used to remove stains and mineral deposits.

Final Thought on What is Cleaning Vinegar and How to Use it

Cleaning vinegar is not only for your laundry room; it’s an eco-friendly and inexpensive household cleaner. Plus, it’s fresh smelling and safe to use around people. You only need to mix vinegar with water and commence with your cleaning chores.


The post What is Cleaning Vinegar and How to Use It appeared first on Kitchen Infinity.

Gray Dining Room Design Ideas

Gray Dining Room Design Ideas

Dining rooms are often more than just a place to eat dinner. They provide an ideal space for entertaining and socializing, and they can also be used as a showroom for your best pieces of furniture and art. But if you’re designing a dining room from scratch, the first question is: what color should it be?

In this article, we’ll look at some of the most popular grays used in dining room design today. There are so many shades out there, it can be difficult to choose which one is right for your space. Read on to find inspiration and guidance before you get started on planning your perfect gray dining room.

Gray is often seen as a neutral colour

When you hear the phrase, “gray dining room”, what color do you think of? Many people think of a white or black dining room with gray walls, but many other variations can look just as good. There are several types of gray paint to choose from, and depending on the shade you go for, your dining space will have a completely different feel.


Image Credit: http://rhythmofthehome.com

Before committing to any one color in particular it’s important to think about why you want a gray dining room. If you want to create an airy atmosphere then opting for lighter shades is likely your best bet. Darker grays tend to be more formal and work well if you plan on hosting large dinner parties where guests may be dressed up.

Designers will often use other colors in the room such as white or brown to complement the gray walls and make them stand out more

If you’re trying to decide which shade of gray is best for your space, some factors can narrow down your search. If you plan on using a lot of wood furniture in the room then darker grays will certainly make it pop. Look at pictures of your favorite pieces and choose a paint color accordingly.

The importance of lighting

Lighting is another important factor to consider when choosing a gray paint color because brighter spaces tend to work better with lighter shades while dark spaces benefit from darker grays. If you want to add an overhead light or two above your dining table, it will help brighten up an otherwise dim space and look more elegant than stark white walls.

Gray dining rooms typically have dark wood furniture and natural light from windows or skylights which create an airy atmosphere

For the most flexibility, opt for lighter grays if you’re planning to use lots of wood in your dining room design. This way, there are more options when choosing furniture finishes, and if you change your mind on the type of wood used later down the line, it won’t make a huge difference to the look of the space.

Understanding a neutral color palette

When you look at a neutral color palette, it can be difficult to imagine what any color would look like on its own. This is where samples come in handy. A good paint shop will let you take home a small sample of grey paint to see how it looks in your home before you make the final decision.

Alternatively, you can paint an A4 sheet of paper or even a small area in one room to see what it looks like. This way, you’ll still have options if you end up changing your mind about which shade to go for later down the line.

Light-colored grays are great for brightening up spaces that lack natural light whereas dark shades work well in smaller rooms

If there are windows or skylights in the space it will help illuminate the room and create a brighter atmosphere so lighter grays will work better here. Darker shades of gray tend to look more formal so they work best in large dining rooms with few windows.

Consider what you’ll be using the room for

If there are a lot of people in your household, noisy kids and often loud music playing then it might be worth taking a darker shade and painting one wall black or navy. This way the color will make the space seem more intimate and create an illusion that the room is smaller.

Shades closer to white tend to reflect light better which will brighten up dark spaces whereas darker grays look best with less natural light

Remember to measure the space you’re putting the gray color in before deciding which shade to go for. It seems like a simple step, but if you choose a lighter shade and there just isn’t enough natural light you might find it hard to see properly.

A white or brown complementary color is often paired with gray paints as they help draw attention to the walls without overpowering them

If you do decide on a darker hue then it might be worth sticking with a neutral wall color such as black or even painting one of your existing walls another bright hue. This will make the gray look more vivid and create greater contrast between both colors.

Timeless kitchen designs

When it comes to other room designs in your home, also consider the kitchen. Timeless kitchen designs often involve a contrasting color such as white or black which will make the space bright and contemporary.

Use grey to create an airy and stylish look which can be paired with other colors for impact

However, if you’re not fussed about this then it could be worth pairing gray with any shade that works well with it. It is one of those colors that goes well with pretty much anything so don’t feel restricted by particular hues.

Alternatively, you can go with a monochromatic look and choose shades that vary slightly instead of using two contrasting colors. This is also a good choice for those of you who like to keep things subtle and sophisticated.

gray dining room can be masculine, modern, and stylish

Gray isn’t just limited to more formal spaces such as living rooms or bedrooms; it can be used in an array of different ways depending on the décor items you use. For example, it works well with natural materials such as wood and stone which creates a welcoming atmosphere and classic feel.

50 Gray Dining Room Ideas
Image Credit: http://homestratosphere.com

The color gray creates an airy feel, making this space seem larger than it is.

For those of you who want to create a space that looks contemporary and sleek, try pairing gray with cool colors such as blues or greens which will help create an ultra-modern look.

Gray Dining Room Design Ideas – FAQ

What is a good color for a gray dining room?

Grey is a neutral color that can be paired with other strong colors. You may choose to go decoratively “bold” in your grey dining room by painting the walls an intense faded blue or pink and contrasting it with furniture upholstered in vivid shades of green or orange. While many people opt for white ceilings in their rooms, you could try going for a deeper shade such as dark blue or purple – this way you’ll make your ceiling stand out.

What color goes well with grey walls?

Grey is such a neutral color, and several colors look great with it: pale blue, yellow, and pink. These colors aren’t the only choices though; anything from pastel greens to deep purples work well too. Just make sure to use solid-colored drapes and upholstery, rather than patterned fabrics to keep things simple.

Final thoughts on gray dining room design ideas

In conclusion, gray adds a feeling of freshness to all interiors. Using gray for your room designs is a great way to ensure that they look stylish and contemporary without compromising on comfort or warmth at all. Now it’s your turn – have fun designing!

The post Gray Dining Room Design Ideas appeared first on Kitchen Infinity.

What Is Tudor Architecture?

What Is Tudor Architecture?

Tudor architecture is a style that has been used in the construction of homes and other buildings in the United States since 1890. Despite its popularity during this period, there are many who do not know what Tudor architecture is.

This guide will help you understand and learn about Tudor Architecture so that you can easily identify houses built during the period 1890-1940.

Definition of Tudor Architecture

If you’re like most people, you probably have seen a house with features such as half-timbering, steep roofs, tall narrow doors. You may also have seen long casement windows arranged vertically on buildings that resembled castles or cathedrals of Medieval Europe.


Image credit: https://www.seniorlifestyle.com/

You might even be able to identify these features as being part of an overall “Tudor” look but may not immediately recognize them as belonging to one specific architectural style known as Tudor Style Architecture. Tudor refers to a period between 1890 and 1940 when European trained architects came to America and brought their unique styles, making each building distinctly different.

Built for wealthy homeowners, Tudor houses were built of solid masonry with elaborate decorative stone and brickwork. They were also called Stockbroker Tudor because they were built for people who had made their money on Wall Street.

A notable feature that distinguishes them from other kinds of homes is their steeply pitched, front-facing gables usually decorated with intricate carvings. However, the most distinctive feature and most commonly associated with this style is the “half-timbering,” which is the decorative imitation of structural timbers.

The Fall of Tudor Homes

This transitional style continued to pop up in villages throughout England until Elizabethan architecture took over in 1558. While it became so popular during the Tudor Dynasty, it fell out of favor when Elizabeth I came to power. This style lasted until the early 16th century, also coinciding with Henry VII and Henry VIII, who hailed from the house of Tudor.

However, Tudor Revival Architecture is less common than other American architecture styles, but its unmistakable charm makes it a fan favorite. Tudor Revival homes are located in the northern U.S because their facade is ideal for colder climates. These Tudor revival homes are also called mock Tudor. 

Tudor style was also out of popularity around World War II when the resurgence of patriotism encouraged an appreciation of more American style, which is colonial revival. Tudor revival architecture was also expensive to build in the past, so it was more common among wealthy people.

Famous Tudor examples include a Tudor house in Montgomery, which is the landmark Newlands Memorial Mansion. These types of homes are commonly found in the northern United States. The residence has a variety of features, making highly stylized Tudor, including dormers, richly decorative chimney pots, uncoursed stone, half-timbering wide, decorative verge boards, and a stone porte-cochere.

Characteristics of Tudor Houses

Tudor homes are characterized by their steeply pitched gable roofs which are cross-shaped. Other features include the use of stone, brick, or half-timber, small windows with multiple panes, and masonry chimney pots.

Characteristics of Tudor Houses
Image credit: https://simplynorthshore.com/

This stockbroker often featured brick and stone walls on the first story and upper floors were stud-framed and covered with stucco walls and decorative faux timbers.

Materials

American Tudors are easily recognized by their characteristic steep, cross-shaped gable roofs and stucco walls. Decorative brackets and beams support the large overhang of the roof. The facade may be brick or stone, while the other walls are generally finished in stucco, half timber, or wood shingle siding.

Sometimes a large porch covers the front door and extends across the front of the house parallel to the street. A small cottage-style porch may also adorn a side entrance, often under a separate roof extending over a breeze-way or breezeway.

Roof

A distinguishing feature of Tudor house was the steep gabled roof. The steep pitch of the roof was intended to funnel rainwater off as quickly as possible. In several instances, the roofs have been built with a slight curve from front to back to direct more rainfall into the center of the building and then outside.

Roof
Image credit: https://i.pinimg.com/

Cotswold stone slabs replaced the traditional thatched roof. The roofs on the later buildings were of slate and occasionally of tile, but some houses still have thatched roofs today.

Windows

Tudor-styles houses had casement windows grouped in rows of three or more, each opening from a single sash. Double-hung windows were not that common. Windows were divided into six or eight rectangular panes and arranged in a diamond pattern, with the latter style often executed in leaded glass.

Windows were usually placed symmetrically on either side of the doorways. Panes were commonly diamond-shaped, with several panes grouped or separated by stone mullions. Rows of diamond-pane windows are often found on the first floor above the ground floor, sometimes in three large windows capped with ogee arches.

Entrance

The Tudor entrance was part of asymmetrical architectural elements, some for decorative and some for protection. A small entry porch is sometimes incorporated into or at least approaches the main entrance to protect from inclement weather. This is frequently achieved by a direct but unobtrusive entry which consists of two or three steps leading up to an enclosed vestibule.

Entrance
Image credit: https://www.impressiveinteriordesign.com/

Designed for pure comfort, the parlor is often located on the first floor just off the main entrance and is usually furnished with a sofa and chairs. Builders also accented the interior spaces with dark wood detailing on the floors, walls and ceilings.

How to Recognize a Tudor Revival House

Traditional Tudor houses are usually large and located in oversized lots. You can easily recognize them by features such as rectangular windows, half-timbered exterior facades together with stucco or decorative brickwork. You’ll also see chunky iron door ware for medieval architecture, earth-tone cladding colors, and multi paned windows or diamond-shaped where some are leaded glass.

Tudor Style Homes Today

Smaller Tudor homes are also being built today. Architects have taken the traditional Tudor design and modified it into a smaller, more affordable version that can be used in areas where space is limited. So, if you’re building your own house Tudor style, you’ll definitely like the modern design. 

These homes are still recognized for their half-timbered exterior facades, which are made with masonry materials.

Their roofs are steeply pitched to give the homes lots of character but may have tiles, slates, or shingles instead of the traditional thatching. The windows on Tudor homes are tall and narrow, but they can come in multiple panes. Sometimes five to six panes provide better insulation for living in colder climates that are more typically found in Europe, where the design was originally developed.

Problems Associated with Modern Tudor Styles

Even if Tudor houses have been restored to an aesthetic look, their unique look and design will present maintenance and upkeep issues because of compelling elements such as slate roofs, plaster walls, and highly inefficient leaded glass windows.

FAQs on What is Tudor Architecture

Who created Tudor architecture?

Tudor revival was started with a designer called William Morris and architect Richard Norman Shaw in England in the 16th century.

What is an example of Tudor architecture?

The Adams Building, located in Quincy, Massachusetts, is one of the best-known examples of Tudor design. The other good examples are Hampton Court and Hardwick Hall.

Final Thought on What is Tudor Architecture

That’s all about Tudor Architecture. It’s all about the historic elements creating a unique style. In England, this final evolution of medieval architecture is available in many communities in Europe, America, Canada, and Britain.


The post What Is Tudor Architecture? appeared first on Kitchen Infinity.

Did you miss our previous article…
https://chefbuano.com/?p=573

How to Iron Clothes

How to Iron Clothes

Learning how to iron clothes is a useful skill that will benefit you in many areas of your life. Ironing will not only leave you with wrinkle-free clothes but can save you some money on dry cleaning. Learning how to iron clothes is part of learning how to do laundry since the two go hand in hand.

However, ironing clothes is not as simple as it sounds, and there are several things you need to consider when doing so. Different fabrics will require different pressing techniques. You also need to sort your materials ahead of time.

In this article we’ll talk about the most important ones, so you learn how to iron clothes properly. Follow these steps for success in ironing your shirts, dresses, pants, dresses, and skirts:

Clean Your Garments Before Ironing

To have a truly clean garment that you can iron, you should wash it first. Check the label for washing instructions, and be sure to follow them closely. If a garment is not labelled dry-clean-only, you will probably want to wash it before ironing it. 

This is especially true if your clothes have been packed away in a box for a while. It is very important not to skip this step because any dirt or oils from your fingers will transfer to the hot iron, resulting in a shiny spot on your garment.

Clean Your Iron

Rust can get in whatever you’re ironing, so make sure your iron is also clean before you start. Just like how to clean a washer, you can use white vinegar or rub a lemon half on the bottom of the iron. After that, wash it as usual and never use bleach on rust stains. Make sure you clean your iron regularly to prevent steam vents from clogging and making metal plates become sticky.


Image credit: https://hips.hearstapps.com/

Get Out Your Ironing Board and Make Sure It’s Stable

Having a flimsy ironing board is going to cause problems pretty quickly. Not only can you damage your garments with a wobbly surface, but it could also burn yourself or a loved one if the table collapses while you’re in the middle of ironing. You may want to choose a sturdy model that’s heat resistant.

If you don’t have an ironing board, you can still iron your clothes well using a flat sturdy surface like a table and counter so long as you’ve prepared them properly.

Unbutton and Unzip Your Clothes

Buttoned or zipped clothes won’t sit on the ironing board smoothly, so you’ll want to unfasten all the buttons and unzip any zippers before you start pressing the cloth. Ensure you use the pointy part of the iron to get between the buttons. Never iron over the buttons and if you have time, wrap those delicate buttons in aluminum foil before ironing your fabric.

Fill Your Iron with Water for Steam

Fill up your iron reservoir with enough water to produce steam while you iron. You’ll want to use distilled or spring water if you’re particularly sensitive to the minerals in hard tap water, but this isn’t strictly necessary for most people.

Fill Your Iron with Water for Steam
Image credit: https://femina.wwmindia.com/

Steam is better than dry heat when it comes to ironing your wrinkled outfit. This is because the hot steam penetrates more deeply into the fabric fibers and relaxes them. Always start with the coolest temperature recommended on your iron’s settings and increase the temperature if necessary.

Sort Your Laundry by Material

Different materials will require different ironing techniques. Start by sorting your clothes according to the material. Polyester and other synthetic fabrics require the hottest iron temperature, as these materials tend to melt under lower temperatures. Spritz these materials with a spray bottle filled with water to get them damp.

Cotton and linen fabric should also be ironed damp. Pull them out of the dryer before they get completely dry. Use a spray bottle with clean water to spritz each section as you go along. You should use medium heat for polyester and high heat for cotton and both fabrics should be slightly damp.

Wool and silk should be ironed at a low setting. These materials are very sensitive to high temperatures, but they don’t need to be pressed with a cool iron either – you can use a slightly warm temperature for wool and silk garments, especially if their tags indicate it.

Check if Your Iron is Ready

Irons will indicate if they’re ready in many ways. A light may turn and off, or a knob will indicate it’s ready to be set. If you have an iron without any indicators, first turn it on and wait for at least three minutes to feel the effects of the heating process.

An iron must become hot enough to produce steam before pressing can take place. The lowest heat settings won’t produce steam, and pressing over a naked flame can be dangerous.

Use a Damp Cloth When Ironing Lace and Wool

Do not expose delicate items such as lace and wool to direct ironing as it can melt and damage the fibers. Place a damp cloth or an old white towel over the item and iron on top of it to avoid direct contact with the iron. Make sure your fabric is damp and not sopping wet. 

Turn Delicate Fabrics Inside Out Before Ironing

Turn the garment inside and press it from the wrong side to avoid damaging or distorting delicate fabrics. The outside finish of a piece of clothing and any print on it will be pressed down flat by an iron, which is why it’s advisable to always iron clothes inside out.

How to Iron Shirts

If you want to iron a shirt, start at the center of the underside of your shirt collar and work your way to the edge. Drape one side of your shirt’s shoulder over the edge of your ironing board. When iron sleeves, move from the cuff to the shoulder, ironing both sides of the sleeve. 

How to Iron Shirts
Image credit: https://www.dmarge.com/

If you’re ironing French cuffs, use a sleeve board to insert it in the cuff and iron directly on top of the cuff. Otherwise, you could end up with burned fingers or burns on your clothes. Be sure to press down on the folded-over part of the cuff with your iron’s flat surface.

Iron Your Pants from the Waist to the Leg

When it comes to ironing pants with pockets, turn them inside out and start ironing the pockets. But if you have pockets, proceed to the regular ironing process. Go lightly over the pockets so as not to create pocket lines. After that, lay your pants on the ironing board flat with one leg laying on top of the other. Fold back the top leg and iron the inside of the bottom leg.

For a center crease in your pants, start by ironing in the center back. Then roll up your pants so you can iron the leg part. Start ironing from the waist to the hem of your pants in small sections. The same goes when it comes to folding over cuffs and pleats. Here, you can use the steam function if you don’t have a spray bottle.

Iron Skirts and Dresses from the Collar Down

Skirts may seem simple to iron, but complications of pleats, ruffles, and gathers often arise. To iron skirts, make sure to remove the skirt from the hanger. Slide your skirt over the ironing board and begin wrinkle removal using a pressing and not pushing motion.

Start ironing from the collar down toward the bottom of the skirt in sections by moving all wrinkles away from the waistline toward the hemline. Skirts and dresses are made of very delicate fabrics, so they may scorch or be marred by steam. Check your label before setting the iron and test in inconspicuous places to ensure good results.

Keep Clothes Damp

Damp clothes are easier to iron than dry clothes. So, make sure you give your garments some nice coat using a spray bottle. This will make your clothes become wrinkle-free within a short time. 

Hang Your Garments on Hangers After Ironing

You should iron fabric lengthwise to prevent stretching, plus, do not hang your garments on wires after ironing; instead, use non-wire hangers in order to keep your clothes in good shape. For button-down shirts, button the top button to hold the collar up.

Hang Your Garments on Hangers After Ironing
Image credit: https://thumbs.dreamstime.com/

Let Your Iron Cool for At Least 10 Minutes Before Putting it Away

An iron gets extremely hot and can set fire to clothing or dry-cleaning materials like cardboard or paper. If you don’t know the brand of your iron, look for the manufacturer’s name under the soleplate of your iron. Always stand the iron upright when you stop ironing for a moment.

Never iron clothes that are stained, damp, or still slightly wet because the heat will set the stain and make it impossible to remove later on. Always take care not to leave the iron unattended when in use since this could cause a fire hazard. Check the care label before using the steam because some fabrics require a dry iron only.

FAQs on How to Iron Clothes

What can you put on iron to make it slide easier?

When you’re ironing clothes, spray starch will make the fibers stick together and let the fabric glide more easily. However, be careful not to overspray since this can put too much starch on your clothes and stiffen them beyond what’s comfortable.

What is the difference between ironing and pressing?

Although they’re used interchangeably, ironing is the back and forth motion, while pressing is more swiping. Ironing also generally refers to items that require more attention than pressing, which is usually only used on fabrics that don’t need much smoothing out.

Can you iron all the clothing?

Yes, you can iron clothing, unless specified in the laundry tag. You also need to ensure you’re using the appropriate settings for your fabric.

What do you think is the best method for ironing clothes?

The best way to press your clothes is by pulling them straight down onto the board rather than dragging them across it. This allows you to get smooth results without any creases or lines in your clothing caused by the ironing board being slanted.

Final Thought on How to Iron Clothes

As you can see, ironing clothes is simple and only requires the proper use of the best method. You can do this by choosing a flat surface on which to place your clothing and making sure you select an appropriate level of heat for your fabric.

Keeping your fabrics ironed and burn-free is simple when considering a few things in mind as stated in this article. 


The post How to Iron Clothes appeared first on Kitchen Infinity.

Did you miss our previous article…
https://chefbuano.com/?p=567

How To Install A Dryer Electrical Cord

How To Install A Dryer Electrical Cord

You have a new dryer, but the cord is not attached. Installing an electrical cord on your dryer can be complicated if you don’t know what you’re doing. It’s also dangerous because it involves working with electricity. If you are not careful, you could get shocked or even start a fire in your home.

This guide will show you how to install a four-prong power cord onto any electric clothes dryer so that it is safe and ready for use. We’ll walk through all of the steps required to complete this project safely and easily so that anyone can do it without any trouble at all.

What You’ll Need

Phillips screwdriverNut driver or socket wrenchAdjustable pliersStrain relief fitting for4 prong cordUL-listed, 30 amp, and 4 prong dryer cord

Here’s how the process goes.

Disconnect all Electrical Power to the Dryer From the Circuit Breaker

Turn off all power to your dryer at the home’s main electrical panel. Make sure you disconnect electrical from your dryer’s wire connection box. Getting into contact with 240 volts can be dangerous.

Remove Cover Plate for Electrical Connections

After unplugging your dryer from the electrical, remove the metal plate covering your cord’s wiring connection. Locate the electrical cover plate at the back of your dryer, then use a screwdriver or nut driver to remove it. This will expose the wiring terminal block for your dryer. This step is pretty easy if you already know simple electric work such as how to wire an outlet


Image caption: https://diy.sndimg.com/

Remove the Strain-Relief Fitting

Remove the screws on the strain-relief fitting. These screws secure the cord to the back panel of the dryer. Remove the strain by separating the two halves of the fitting and pull them out of the hole one at a time.

Disconnect the Old Prong Cord

Disconnect your old 3-prong cord by removing the three screws that secure it to the wiring terminal block. Pull your old cord off of the terminal block and through the strain-relief fitting. The two outer terminals are hot terminals, while the center is a neutral terminal.

Separate the Dryer’s Neutral From the Ground

Disconnect your dryer’s neutral wire from the ground screw to change your wiring configuration from 3 prong to 4 prong. If you have a white wire coming from inside your dryer and connecting to the ground screw, remove it, then connect it to the neutral terminal on your dryer’s terminal block. If there is a short white wire or metal tab connected to your neutral terminal on the wiring block and ground screw, remove the wire or tab from the ground screw.

Install the New Cord

Next, connect the new four-prong cord by inserting the loose wire end through the hole in your dryer’s back panel. Start by connecting the green wire to the ground screw, followed by black cord wire. Next, connect the red wire to your dryer’s terminal block neutral wire, which should be marked “White” or have a white line on the insulation near it.

The hot terminals are interchangeable, so each can be connected to either of the two terminal block screw terminals. After attaching both hot cord wires, use a small Phillips head screwdriver to tighten down the hot screws.

Install the New Cord
Image caption: https://www.thespruce.com/

Secure the New Cord by Attaching the Strain-Relief Fitting

After connecting your new cord, proceed to install a new strain-relief fitting. Begin by removing the original strain relief, making sure to save the nut and bolt. Use a sharp utility knife to cut through both wires within 1/4 inch of the new strain-relief fitting. Strip back approximately 1 inch of insulation from each wire. Form each wire into a U-shape so they will fit around your new strain relief mounting.

Secure the New Cord by Attaching the Strain-Relief Fitting
Image caption: https://aerosusa.com/wp-content

After that, use fitting screws to squeeze the two halves together. You can also use pliers to tighten down the hot screws. Remember that your old strain-relief fitting won’t work with your new four wire cord. So, make sure you don’t use a strain-relief fitting that won’t fit your new cord.

Reinstall the Dryer’s Electrical Cover Plate

Using screws, reinstall back your electrical cover plate. Remember to attach the wires from the dryer to their matching terminals in your junction box. Make sure you test your new dryer for proper operation by checking its control knobs to confirm that everything is in the off position.

Run your dryer for minutes to ascertain that everything is okay after plugging the dryer back in. To be extra careful, always unplug your dryer after every loading. Make sure you connect your vent duct if removed before using it to dry your clothes.

FAQs on How to Install a Dryer Electrical Cord

How do you hook up a 3 prong dryer cord?

You can hook up a 3 prong dryer cord by attaching the ground wire to the grounding screw of the panel box. Attach one prong on the neutral line to the neutral terminal in your panel box while attaching the third prong to one hot or live terminal.

How safe is a 3 prong dryer cord?

A 3 prong dryer cord is not safe at all. It is hazardous to your safety. It is always best to use a 4 prong dryer cord. 

How do you install an electric dryer cord?

To properly install an electric dryer cord, remove the old cord and replace it with a new one of the same length and gauge. Do not replace any other system components like the outlet receptacle or circuit breakers.

Can you do electrical work yourself?

No, you can’t do electrical work yourself unless you’re qualified electrical personnel. You’ll need an electrical contractor to help you with the light commercial electrical wiring. You must ensure you include the cost of the contractor in your electric projects’ costs

Final Thought on How to Install a Dryer Cord

As you can see, installing a prong dryer cord is a very simple process and one you can do yourself. However, you need to be careful when handling any electrical work as injuries and damages can happen at any time, even if you’re not the one installing the new cord.


The post How To Install A Dryer Electrical Cord appeared first on Kitchen Infinity.

Did you miss our previous article…
https://chefbuano.com/?p=562

Pick Your Perfect Front Door Color with Feng Shui

Pick Your Perfect Front Door Color with Feng Shui

The front door is the first thing that people see when they come to your home. It’s the main portal for people and air to enter your home. It’s called the mouth of qi or universal life force energy in Feng Shui.

If you have a boring, old-looking front door, it can make visitors feel uncomfortable and unwelcome in your home. The front door can greatly influence your health as well. You don’t need to spend thousands of dollars on a new front door or replace the existing one with an expensive designer model.

Instead, repainting your house’s front entranceway with Feng Shui colors will do wonders for how welcoming it feels. Feng Shui is an ancient Chinese practice that offers guidelines on how to live in harmony with nature. Pay close attention to colors that will work well with the exterior of your home, plus what direction is your front door facing. Here are some of the best colors to choose from.

Get Noticed with Red Front Door Color

According to Feng Shui, the most powerful and most auspicious color you can use for your front door is red. Red Feng shui front door colors will help create a certain vibrancy around your home and make it stand out from similar-looking homes. It’s also the color of fire, which will attract prosperity and success.


Image credit: https://imagesvc.meredithcorp.io/

Red also protects and transforms negative energy. If you have a south-facing front door, then paint red to make it visible from the streets and attract good energy and opportunities. This color is related to the Li family according to the Feng Shui Energy Map.

Humble and Solid Black Color Front Door

This Feng Shui front door color is the best color to use on your portico or entrance hall if you have a north-facing entrance door. The Feng Shui element here is the water element, which symbolizes depth and wisdom. Black also helps enhance power and authority, so this color is perfect if you’re looking to increase any of these qualities in your life.

This is a very good Feng Shui for three compass directions that love the water element, i.e, north, southeast, and east. Black can also be a supportive color for building friendships and relationships.

Consider a Happy and Vibrant Blue Color Front Door Feng Shui

If the front door of your home happens to be west-facing or north-facing, then consider this Feng Shui front door color. The Feng Shui element here is the wood element, representing wisdom and knowledge. Feng Shui blue color also relates to good fortune, making it an excellent choice if you’re looking for it to enter your life. Blue is also considered a good Feng Shui color for your door.

Consider a Happy and Vibrant Blue Color Front Door Feng Shui
Image credit: https://www.thespruce.com/

Brighten Up Your Front Door with Yellow Feng Shui

If your front door is south-facing or east-facing, then a yellow color would be a great choice. Yellow represents the fire element which brings warmth and happiness to a home. It also symbolizes intelligence and balance, so if you’re looking for these qualities in your life, consider painting your front door yellow. It’s one of the Feng Shui front door colors that support grounding and stability.

Bring Joy with White Feng Shui Front Door Color

A white or off-white front door Feng Shui color is a good choice if your front door faces toward the north, northwest, west, or southwest. This represents the metal element in Feng Shui, which represents cleanliness and purity. Paint your front door with white to invite metal element qualities such as joy, communication, and precision.

Bring Joy with White Feng Shui Front Door Color
Image credit: https://www.thespruce.com/

Stabilize Your Home with Earthy Browns Front Door Color

Brown door color is a good match for homes with a north-facing front door. Brown and other neutral earthy colors are connected to the earth element and are used to balance, stabilize and nurture inhabitants in your home. Brown represents stability in Feng Shui, so painting your front door brown will bring these same qualities to your life. Brown helps to support your home’s balance, nurture you and your family, plus stabilize your home.

Paint Your Front Door Green to Improve Growth and Abundance

Green is a great color for a front door as it enhances the wood element. This Feng Shui element represents growth and prosperity, so painting your front door green will help to increase these qualities within your life. Painting your door this color will also stimulate money-making opportunities, bring love into your home and encourage abundance in all areas of your life.

Gray for Helpful People and Helpful Situations

 According to Feng Shui, gray is the color that attracts helpful people and helpful situations into your life. Gray gives you a feeling of well-being and safety, especially if you suffer from depression.

Gray for Helpful People and Helpful Situations
Image credit: https://www.thespruce.com/

Painting your front door grey will attract advisers, mentors, and guides who are supportive in preventing financial mistakes. This repetitive frequency will create an energy of security within your home and encourage you to proceed with your decisions without feeling apprehensive.

Charming Front Door in a Fresh Turquoise Blue Color

When your front door is painted turquoise blue, you will find that this brings with it an energy of spontaneity and fun that encourages new beginnings. This color can be very intuitive, creating peace and harmony in your life, so you keep calm even when things around you are not. It’s playful and innocent front door color with excellent Feng Shui energy for a north-facing door.

The Sweet and Inviting Blue-Green Color Front Door

The best choice is a soft blue-green front door color when you want to encourage serenity, peace, and harmony in your persona. This color will open up opportunities while still maintaining serenity in an otherwise fast-paced world.

FAQs on Feng Shui Front Door Colors

How do you choose Feng Shui front door colors?

Use the compass direction or compass app to choose the front door color Feng Shui. The direction of the front door is the starting point for Feng Shui color selection. Find out the direction of the door, then look for the corresponding colors and elements. Also, pay attention to the exterior details that you can’t change.

Final Thought on How to Pick Your Perfect Front Color with Feng Shui

There you go! A fun and simple way to attract and bring positive energy is to repaint your home with these Feng Shui front door colors. These Feng Shui door colors will also help boost your home’s curb appeal. It’s the best home improvement project you can ever carry out.


The post Pick Your Perfect Front Door Color with Feng Shui appeared first on Kitchen Infinity.

Did you miss our previous article…
https://chefbuano.com/?p=551

How to Grow and Care for Helenium [Sneezeweed]

How to Grow and Care for Helenium [Sneezeweed]

If you love late-season color but don’t want to plant many perennials that require extra work and attention, helenium is the answer. Heleniums are a diverse group of plants that can be herbaceous perennials or subshrubs. All have brilliant daisy flowers that attract butterflies, bees and other insects.

The colorful blooms appear from late summer through fall, depending on species and weather conditions. They provide color from September through November in most areas. Growing helenium is easy with the right information to guide you along the way.

Here’s what you need to know about how to grow and care for sneezeweed helenium in your garden.

Colorful Combinations of Helenium

Helenium features bright-green foliage that contrasts beautifully with velvety, daisy-like flowers in orange, yellow, dark red and golden brown shades. As a native to North America and southern Canada, this plant grows in moist, low lying meadows or at the edge of damp woodlands. 

The plants are also characterized by lance-shaped foliage with stiff, upright stems. When planted in early summer, these plants grow quickly to a mature size of two to five feet tall and spread to 24 inches wide. The bloom time for this yellow star happens as early as June, but most flowers bloom in late summer to autumn.

The 1-2 inch wide flowers have a typical daisy pattern with ray florets surrounding the central disk flowers. In most heleniums, 11-21 ray flowers are short and wedge-shaped, but ‘Mardi Gras’ has 18-25 longer, strap-shaped ray flowers. The colors of the ray flowers range from pale or bright yellow to gold, warm orange, coppery brown, and deep red.

Caring for Helenium

Helenium plants are easy to grow from seeds or by dividing the clump after blooming. Grow in any sunny spot in average garden soil that drains well at planting time and then water thoroughly to set the roots deep into the ground. Below are the caring tips for this late-season plant:

Light

Heleniums grow in full sun or part shade but will flower better if they get at least six hours of direct sunlight. They will get leggy if they don’t get at least six hours of sun each day. They will also accept some afternoon shade, especially if your planting area is on a dry side.

Soil

This plant requires moist soil to wet soil, although many of its hybrids are more tolerant to drier soil. They also like soil on the acidic side with a soil pH of 5.5 to 7.0. So, test soil pH before you proceed.

Place them in an area where they’ll enjoy moist conditions and not in a boggy site. A rain garden site where moisture naturally collects is perfect for them, especially under low-lying areas and underneath downspouts. Even though well-draining soil is best, these plants are also clay tolerant.

Watering Heleniums

Heleniums will grow and flower best with an inch of rain per week. In extremely hot, dry weather, try spraying them with a mist of water every day. In the summer, you can pretty much expect to have to water them daily if there is no rainfall. 

Many of these plants will die from being overwatered. They prefer dry soil, so only water them when the top of the soil is nearly dry to the touch. Adding a layer of organic mulch will also conserve moisture and maintain acidic soil pH.

Fertilizing Heleniums

If you choose to fertilize your Helenium plants, use a very low-nitrogen formula, which can encourage more foliage growth at the expense of flowers. This plant may benefit from fertilization in the early spring when growth resumes. They are not heavy feeders, and one application of a balanced flower fertilizer in the early spring will be fine.

Avoid overly rich soils, and excessive fertilization as this will promote rampant foliar growth and fewer flowers. Tall plants may need to be stalked to prevent flopping when they begin to bloom. Pinching back new growth in late spring will promote branching and bushy growth. Divide plants in the spring or fall every three to five years to keep plants vigorous.

Temperature and Humidity

Yellow star plants tolerate humidity and hot summers, but the proper spacing is important to prevent fungal diseases like mildew and rust in areas prone to humidity.

Uses of Helenium Plants

Heleniums are popular as cut flowers and for use in dried arrangements. They can sometimes be found as garden specimens, especially those with tall, mature heights such as the Helenium giganteum variety. Their common name, sneezeweed, comes from a long-lost use of the ground plant as a snuff ingredient. After inhaling, it’s believed that this plant can drive evil spirits from the body. 

These late-season bloomers can be used in beds, cottage gardens, prairies, meadows, wild gardens, and naturalized areas. They can also be used in rain gardens

because they like moist soil. They also combine well in informal perennial, mixed beds and borders with ornamental grasses,

Varieties of Helenium

Butterpat Helenium (Helenium amarum)

Helenium autumnale Common sneezeweed or fall sneezeweed is another good choice for garden plants with its pure yellow flowers. It thrives in moist soils and full sun, which can be challenging to find where I live. It’s best to locate this plant in raised beds or along the edges of rain gardens. This variety grows with bright yellow ray flowers and a prominent yellow disc.


Image credit: https://m.psecn.photoshelter.com/

Double Trouble Helenium

This is another great variety of helen’s flower that has frilly bright yellow flowers with double petals. It spreads out into a nice, neat mound that blooms from mid-summer through early fall.

Salsa Helenium

This Mariachi salsa helenium autumnale is a dense, compact plant covered in bright orange and yellow blossoms beginning in late summer.

Dakota Gold Helenium

Dakota Gold helenium autumnale is a hearty variety with yellow petals and an orange center. It produces numerous blooms from July to September and is perfect for the garden, roadside park, or country estate.

Mardi Gras Helenium

This type of helenium bears 2-inch daisies in rich orange washed with yellow and red. They provide a stunning contrast to the dark green foliage. Its upright clumps may reach three feet tall.

Moerheim Beauty Helenium

The coppery red ray flowers of this plant surround a dark disk. This helenium variety sports large, heavily veined leaves.

Wiltraut

This is an old German variety with orange petals flecked with gold that has deep maroon veining. The large flowers appear over a long period of time and are popular with both gardeners and professional cut flower growers.

The Bishop Helenium

This rare German variety has bright yellow flowers that are about five inches across. The petals flare at the ends and nearly cover the maroon brown center disk. The blooms are very luscious looking, making them popular with gardeners like fresh cut flowers for floral arrangements.

Feueresiegel 

Also known as a fiery lightning bolt, is one of the German nurserymen from Karl Foesrsters. These free-flowering plants have deep yellow flowers marked with fork streaks of red radiating from the light brown disk.

Helenium Companion Plants

Obedient Plant

This is named for the way flowers that are moved to the new position on the new stem stay in place. It produces showy, unusual flower spikes with little tubular flowers in white, pink, and purple. These square stems carry pairs of mid-green, lance-shaped foliage toothed along the edges. These plants tolerate moist soils but may become aggressive when given ample water and full sun.

Obedient Plant
Image credit: https://www.thespruce.com/

Monkshood

This perennial plant has regal blue spires. Monkhood produces tall spikes of hooded purple, blue, white, and bicolor blooms in late summer to fall. It does well in partial shade, though it will grow well in full sun in cool climates. However, this plant dislikes hot weather, so it’s not great for gardeners in hot summer climates.

Monkshood
Image credit: https://www.poison.org/

Daylily

You’ll find daylilies in ditches and fields because they’re so easy to grow. Its flowers are borne on leafless stems. Even though each bloom lasts a single day, superior cultivars carry several buds on each scape, so bloom time is long, especially if you deadhead daily.

FAQs on How to Grow and Care for Helenium Plants

Is a helenium plant easy to grow?

Helenium is easy to grow and can be quite striking in a garden. It comes in many colors and makes a good-cut flower. When you cut the stem, make sure that you leave at least ¼ inch of the stem above the ground to allow regrowth.

Is the helenium plant poisonous?

It is not poisonous. But it can irritate the skin. So you should take proper care when handling it.

What conditions are required to grow helenium?

The Helenium plant needs a sunny position but can be grown in light shade, though this may reduce the flowering season and number of flowers per scape. It prefers moist but well-drained soil. Plant it in rich, moist, but well-drained soil.

How does helenium grow?

Helenium grows as an herbaceous biennial or short-lived perennial flower that spreads by seeds and underground runners. As it can propagate vegetatively, you need not worry about its dying out soon.

Final Thought on How to Grow and Care for Helenium Plant

As you can see, the helenium plant is not difficult to grow and care for. It just needs the right amount of moisture, well-drained soil, and enough sunlight. If these are provided, they will naturally propagate themselves in your garden. You can also use stem cuttings or root division to increase its presence in your garden plot. This way, you’ll never run out of this lovely plant.


The post How to Grow and Care for Helenium [Sneezeweed] appeared first on Kitchen Infinity.

20 Best Kitchen Paint Colors You Should Try

20 Best Kitchen Paint Colors You Should Try

Painting your kitchen is a great way to give it a new look. Not only will a new paint make your kitchen feel clean and fresh, but the right color will help update the look of your outdated kitchen cabinets. However, choosing the perfect paint colors for your kitchen can be a challenge.

You have to consider many elements, such as your kitchen cabinet color. You also have to consider the color of your kitchen appliances, countertops, and flooring. You need to learn how to choose paint colors that will look great on your kitchen. 

We’ve put together this handy guide on choosing the best kitchen paint colors to make your work easier. Let’s get started!

1. Sherwin Williams Cavern Clay

Kitchens with an earthy retro 70s vibe are becoming so popular. Pair your walnut cabinetry with this beautiful terracotta from Sherwin Williams. The warm reddish color is perfect for adding a bit of spice to the kitchen. This paint works well with natural wood tones, avocado green, purplish greys, and creamy white and golden yellow with a dark neutral color.


Image credit: https://i.pinimg.com/

2. Benjamin Moore Upper West Side

This kitchen paint color is warm enough to create a little drama without feeling dark or moody. This paint also looks thoroughly chic with white kitchen cabinetry. When you’re looking for a hint of color but not stray far from quiet hues, Benjamin Moore Upper West Side is the paint color for you.

3. Benjamin Moore Gray Owl

This Benjamin Moore paints color works in the kitchen because it blends well with a range of colorful cabinetry. This paint makes white cabinets stand out, and the paint shade is also light enough to avoid closing off the feel of a room.

4. Sherwin Williams White Duck

Another best kitchen paint color to consider is White Duck by Sherwin Williams. It’s a pitch-perfect blend of beloved greige, meaning that it never feels too beige or grey as the light changes throughout the day. The neutral allows white subway to sing and provides a clean backdrop for rustic wood accents.

5. De Nimes Kitchen Color from Farrow & Ball

De Nimes is a shade from the Farrow & Ball paint line, which works well in the kitchen. The color has a touch of warmth, but it’s not too saturated or dark. This down-to-earth blue-green is among the best colors to anchor a contemporary kitchen with natural hues.

De Nimes Kitchen Color from Farrow & Ball
Image credit: https://st.hzcdn.com/

Incorporate this paint on the upper half of the wall ties together with sprawling grey-streaked marble countertops and blue-black railings base cabinets and shelves. It enables you to achieve an ultra-functional space for meal prep with a moody style.

6. Pure White from Sherwin Williams

This all-white kitchen is a modern classic. The walls and cabinetry have been given a thorough coat of Dulux paint in Pure White, making this the ideal choice of color for high-gloss cabinets that better reflect light around the room.

A combination of white and grey – such as glossy floor tiles and wall-mounted stools keeps the look contemporary. A light oak worktop also helps to introduce warmth into this otherwise featureless space, while metallic silver bar stools provide a sophisticated touch.

7. Oyster Bay from Sherwin Williams

If you’re looking for the uncluttered charm of Scandinavian but still want some all-white color palette, then bath your kitchen walls in this lovely serene shade from Sherwin Williams. And when it comes to flooring, a mix of concrete and natural wood will create a cohesive yet artistic division in the room.

Oyster Bay from Sherwin Williams
Image credit: https://st.hzcdn.com/

Flat paint in a softer grey is just one way to go with white cabinetry, especially if you have dark marble counters and backsplashes that need toning down. The grey acts as a bridge between the two distinct features of your kitchen, and it also brings a cool tone to this otherwise bright space.

8. Treron from Farrow and Ball

This is a dark grey-green that lends a touch of outdoors to traditional and modern kitchens. It acts as a complementary paint color for spaces with a lot of color going on, and it can lend a sense of luxury to a farmhouse kitchen.

A unique blue that looks more grey or green depending on your interior palette. It’s a great paint color for transitional kitchens with furniture in brown shades. The blue brings an unexpected pop of color but is still harmonious with other tones in the space.

A deep grey that evokes metal and machinery, a subtle alternative to black for traditional kitchens or transitional kitchens with dark finishes. It pairs well with brown tones, but try a blue-green like Sea Salt from Behr if you want a more complementary pairing.

9. Berry Brown Paint Color from Behr

A creamy pink-beige that’s chic and modern. This paint color for kitchen cabinets is especially appealing if you like to cook with red or pink hues, as the pale shade will complement them nicely without competing.

A warm grey that combines tans, browns, and beiges. If you’re looking for kitchen paint colors with white cabinets that will blend into a variety of settings, this is an excellent choice. The lighter off-white cabinets and lustrous hardwood floors provide balance while ensuring that the darker color of the walls doesn’t overpower the space.

10. Golden Field from PPG

This is one of the most effective kitchen color ideas to cheer up your space, especially when combined with large windows. You can uplift your kitchen space by painting your subway tile with the golden field, white cabinets, and baby-blue drapes.

11. White on White from PPG

This kitchen color scheme is very classy and simple, with just the right amount of punch. The clean white paint on your cabinets and walls will allow for a little bit of shine from the appliances and tiles. Integrate white on white walls, counters, shelves, and island stools if your kitchen feels more open than its actual footprint.

White on White from PPG
Image credit: https://www.jimenezphoto.com/

12. Glidden Red Delicious

For those of you who are fans of red, this one’s for you. It’s not the most popular kitchen color scheme, but it still manages to work well with any other colors you’re planning to use in your kitchen. The deep red tone on the cabinets is balanced with warm tones on the walls and flooring.

Pair the classic red with cabinetry in its complementary color of cerulean blue for a truly luxurious look. You can also turn down the red with a rich grey or a delicious darker brown like a caramel candy apple.

13. Sherwin Williams Let it Rain

An off-white kitchen is simple, clean, and warm. The light color of the walls reflects light around the room, making it feel larger than its actual measurements. You can always add darker accents for pop like the island or accessories.

Paint your cabinets in this soft color to give them more staying power over time. This paint color combines elements of invigorating blue with calming grey undertones to create the perfect balance.

14. The Spruce Best Home First Frost

This is a milky blue with grey undertones similar to Let it Rain by Sherwin Williams, but it is more of a true blue. This lighter color on the walls allows you to have more freedom when choosing your cabinetry and appliances. There will be less contrast between cabinets and walls, so you can choose darker colors for both without it looking odd.

It boasts of both bright and warm colors. The neutral colors create a calm and serene feel in the room, and the natural light that filters through the windows enhances this effect even more without making it too much on the eyes when you’re in the kitchen all day long. It’s the perfect foundation for a modern kitchen with rose, copper, and gold tones metallic accents. It can also pair with natural wood shelving.

15. Magnolia Homes Cinnamon Sugar

A lot of people use this paint color because it is versatile. It can go perfectly with cool as well as warm colors that already exist in the room. The color palette ranges from neutral to bright and bold, perfect for those who want to create a unique look at home by mixing and matching different elements from their interiors.

Its subtle tan base with pink notes makes your kitchen tranquil and serene. It is a great option for a light, airy kitchen that keeps its decor modern and simple yet elegant. Even though it may seem a bit dull, this shade of dark grey has a lot going on in it.

From the look of the color itself, you might think it would make your kitchen appear darker, but the opposite is true. If you have issues with too much brightness in your kitchen, this color can also help tone down or balance it out for a more calming atmosphere. This is the perfect neutral shade for those who wish to incorporate orange into their kitchens without entirely turning up the heat on their decor. It’s warm enough to provide some accent but still maintains a very relaxed feeling overall.

16. Raffia Ribbon from Behr

Capture the sun-soaked ambiance of the French countryside with warm yet rustic kitchen paint colors. This paint color helps you create the undeniable country charm in your culinary corner. After applying it to the paneled walls of your kitchen, you will notice the warmer hues underneath coming through to offer a cozy atmosphere.

17. Farrow Ball Stiffkey Blue

If you’re looking for a fantastic paint color for your kitchen, this is the best option. Its elegant and timeless color brings a natural feel into your space, plus the depth of the sea and vast sky. The tone of this color works well with other light or bright colors while adding subtle sophistication to your space. It’s also a perfect complement to colors such as green, lilac, and green.

18. Benjamin Moore Regent Green

A very dark green paint color is suitable in older homes with more traditional cabinetry. So, if your home looks old, you cannot lack a perfect paint color for your kitchen. Regent Green by Benjamin Moore is a smart choice for painted cabinets. This color works well with more traditional décor while adding warmth and depth to your space. It looks great on oak cabinets.

19. Hale Navy by Benjamin Moore

Choosing a dark blue cabinet paint color is ideal for making a small kitchen appear more spacious. Hale navy is one of the most popular Benjamin Moore paint colors that work well with oak cabinets. It’s a great complement for woods and stone or marble countertops, as well as white, grey, and yellow walls.

Hale Navy by Benjamin Moore
Image credit: https://i.pinimg.com/

It looks good in matte or satin finish mixed with matte black, which pulls on cabinets for contemporary style.

20. Benjamin Moore Classic Gray HC-170

Another great color for mid-toned kitchens is grey paint colors. Quarried Oak by Benjamin Moore is a warm grey with green undertones, ideal for cabinetry if you have dark walls and cabinets. Its warmth stops the space from feeling cold or monotone. It looks great with warm, honeyed hardwood floors.

FAQs on Best Kitchen Paint Colors

What is the most popular color for the kitchen?

The most popular color for the kitchen is grey because it’s bold, clean, and remains versatile. It also allows a neutral backdrop to add your personality with colored cabinets and kitchen accessories.

Final Thought on Best Kitchen Paint Colors

Painting your kitchen is a great way to refresh the space and give it an entirely new look. The color you choose will depend on your personal preference, but there are some colors that work better in the kitchen than others.


The post 20 Best Kitchen Paint Colors You Should Try appeared first on Kitchen Infinity.

Did you miss our previous article…
https://chefbuano.com/?p=510