Roofing – The Process of Constructing Or Replacing a Roof

The roof is the uppermost part of a building or home, protecting against rain, snow, sunlight, extremes of temperature and other weather conditions. Choosing the right roofing materials involves more than just cost and aesthetics, it requires an understanding of climate conditions and future maintenance needs. Contact Roofing Downingtown PA now!

There is a wide variety of roofing materials available for homes. Some are more durable than others. New options include plastic polymer blends that resemble wooden shakes and slate, perfect for older houses that need added durability.

How to Price a Roofing Job (for Contractors)

There are a number of different roofing materials to choose from. The type that works best for your home depends on a few factors, such as the local climate and aesthetic preferences. Some of the most common options are asphalt shingles and metal roofs. These two types are also among the most cost-effective. There are also a number of other choices, such as wood shingle or shake roofs and stone tiles.

Rolled roofing is an inexpensive option that comes in rolls and can be rolled up or nailed down. It is best for low-slope or flat roofs. It is not recommended for a steeper slope because it does not allow water to flow down the roof easily. It is also susceptible to damage, as it does not expand and contract like a traditional shingle roof.

Built-up roofing, or BUR, is another popular choice for residential and commercial buildings with flat or low-slope roofs. It is comprised of multiple layers of roofing felt, asphalt, and mineral granules. This type of roof is often seen on the roofs of schools and hospitals.

Another type of roofing is a membrane roof. These are made of a variety of watertight materials, including Neoprene and PVC. They are durable and affordable and can last up to 35 years. Thermoplastic roof membranes are one of the fastest-growing types of roofing. They have a high temperature tolerance and come in a wide range of colors and styles.

Brick or concrete roofs are typically a more expensive option but are extremely durable. They can withstand high winds, salty air, and fires and may last up to 150 years. They are heavy, however, and can add significant weight to a structure, leading to issues.

Wood roofs, comprised of either shingles or shakes, offer a rustic and textured look for your home. They can be crafted from pine, red cedar, cypress, and other hardwoods and are available in a range of finishes. The difference between shingles and shakes is that shingles are milled into uniform length and thickness while shakes are split right from the tree, giving them a wedge-like shape.

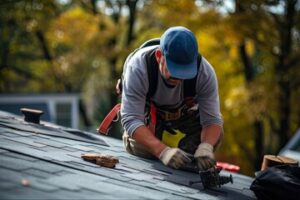
The roof is an important part of a building, providing protection and insulation from weather elements. Roofing is the process of constructing or replacing a roof, and it involves several steps to ensure a quality result. Roofing contractors have the expertise and experience required to properly install a roof and protect the structure from moisture damage.

Before starting any work, the existing roof must be inspected thoroughly to identify problems and determine the best course of action. This will help the contractor determine the right type of materials and estimate costs. The contractor will also need to make sure the building is structurally sound and able to support the new roof.

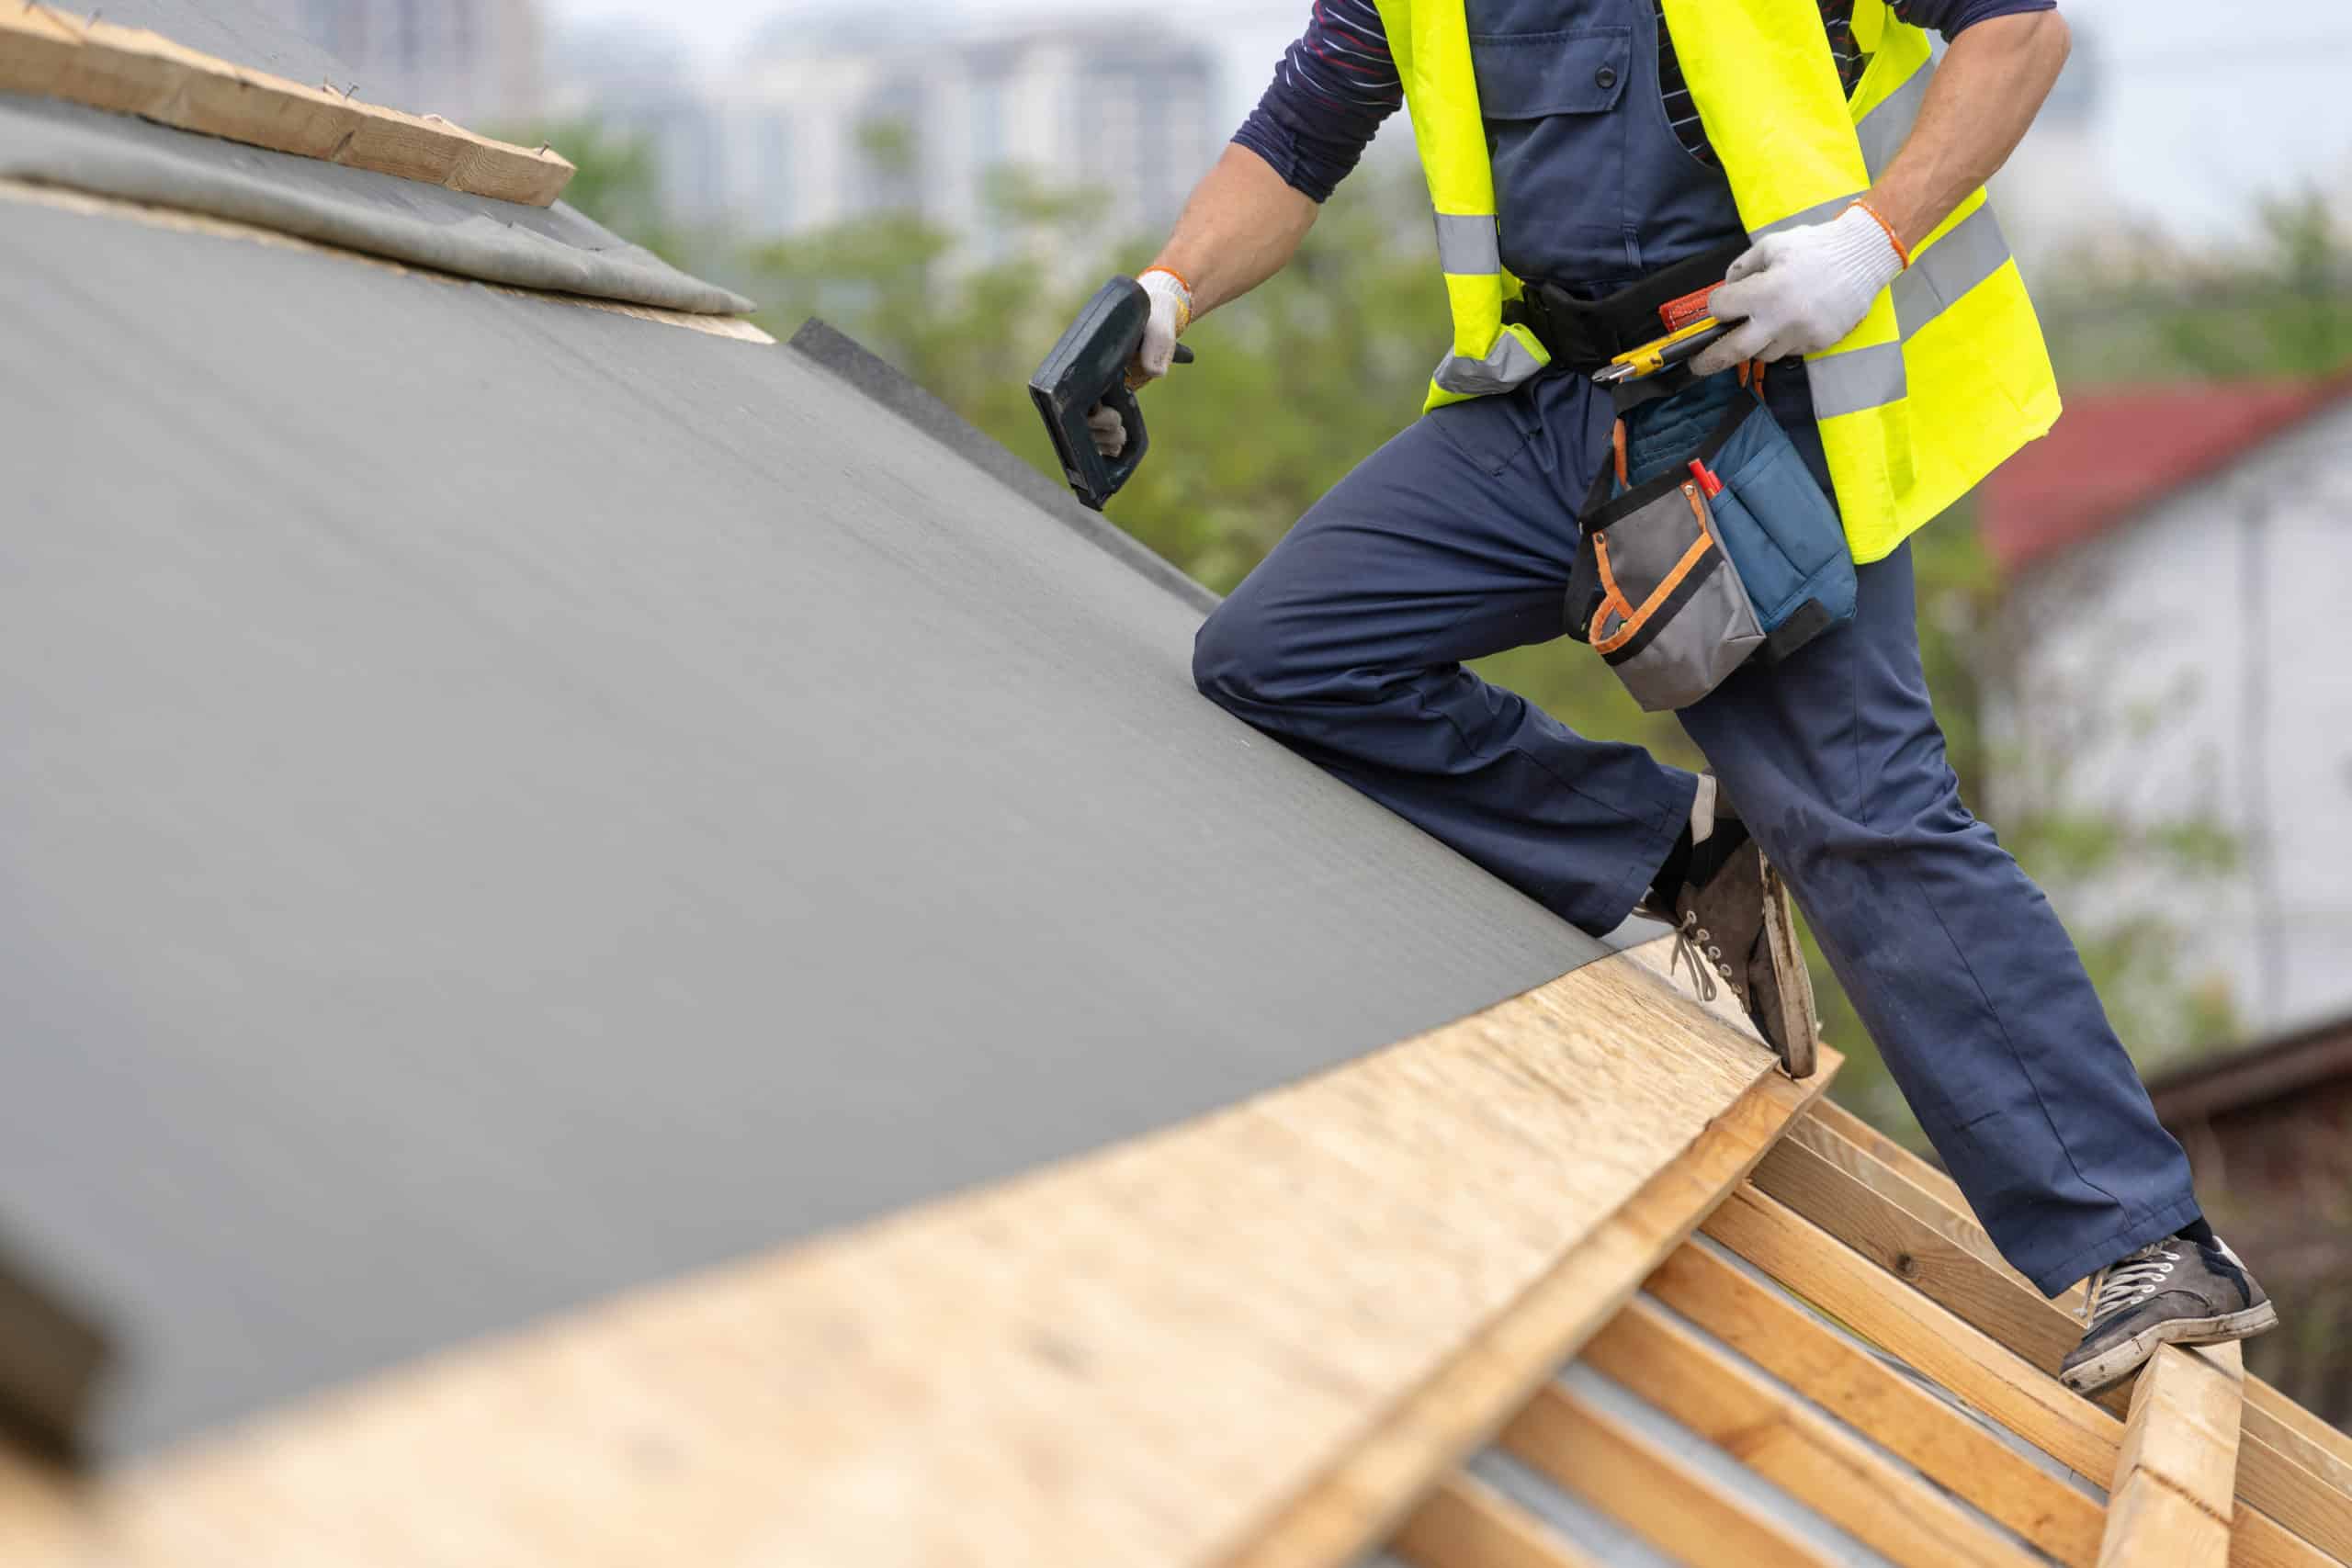
The installation process starts with removing the existing shingles and flashing, which exposes the roof deck. The underlayment is then installed, and a cap nail is put down every four to six inches along the edges. The next row of underlayment is overlapped and nailed in the same way, with nails being closer together near the edge and further apart farther towards the center of the roof. Waterproofing is also applied to the valleys, where water often collects.

A roof must be inspected and maintained regularly to reduce the risk of weather-related damage. Regular inspections can catch small problems before they become major issues that cost thousands of dollars in repairs. A typical maintenance schedule includes annual roof cleanings and quarterly inspections to identify potential problems and repair them before they escalate.

These inspections should include a close examination of the shingles for excessive wear and tear, damaged or missing shingles and other signs of material decay. In addition, the flashing around chimneys and vent pipes should be inspected for signs of leaks. This can be done by looking for caulking that is lifting or peeling, or for rust on the metal. It is also a good idea to examine the condition of the gutters, fascia and soffit to ensure they are in good condition.

Finally, tree limbs should be trimmed periodically to prevent them from overhanging the roof. This is especially important during stormy weather when heavy limbs can break off and cause damage to the roof. Inspections should also be made of large accessories, such as the chimney to remove a soot-like material called creosote, and skylights and vent outlets to ensure they are free from water leaks.

If you’re in need of roof repairs, it’s a good idea to get professional help. These contractors can perform a variety of services, from replacing damaged shingles to repairing the flashing and tar paper. They can also seal up gaps and cracks to prevent water infiltration. In addition, they can replace any insulation that has become worn or tattered.

When determining whether or not it’s time to call in a roofing professional, the first thing that needs to be done is an inspection. This will include getting up into the attic, crawl space, or whatever else is needed to access the underside of your roof. This is where you’ll find evidence of water leaks, such as damp spots on the ceiling or walls.

The condition of your shingles will also need to be assessed. Are they torn, ripped, or missing altogether? If so, they’ll need to be replaced. However, if the shingles are still in relatively good shape, it might be more cost effective to simply repair them instead.

Before doing any actual repairs, it’s a good idea for a homeowner to have a few basic roofing tools. These should include a hammer, pry bar, and some sort of nail puller or shears. The preferred tool of most roofers, though, is a cat’s paw – a special device that can remove nails without damaging the shingle beneath. You’ll also want to have a dumpster close at hand, and some tarps to place over foundation plantings and shrubbery if necessary.

Another factor that can impact the price of a roof repair is the type of material that was originally used. Asphalt shingles are typically on the lower end of the cost spectrum, while metal and slate tiles are on the higher side. Finally, the pitch of your roof and its design can also affect labor costs.

Re-roofing is one of the most expensive ways to fix a roof, but it can also be the best way to restore an existing roof’s appearance. This is because re-roofing can be less invasive than a full replacement, since it only involves placing the new shingle overlay or roofing material on top of the existing shingles. However, it’s important to remember that re-roofing can also void or shorten the warranty on your new shingles.

A yearly inspection of your roof can also prevent costly repairs down the road. Check the chimney for a buildup of creosote, which can be removed with a brush and water-repellent products. Inspect the chimney’s mortar and bricks to make sure they are in good condition. Check the plumbing vent boots for cracks and tears in the rubber, as well as the metal base. If the base is rusting, it can allow water to seep into the house along the pipe.

The design of a roof can also help with uplift resistance. A hip roof style is more aerodynamic and is inherently more resistant to the uplift forces of high winds than a gable end wall. In addition, gable end walls can be braced to reduce their vulnerability. For existing homes, a wood adhesive with a caulking gun can be applied to the intersection of rafters and decking to increase the uplift resistance of the roof structure.

Other factors that can help with uplift resistance include the use of drip edges along the eaves. This is particularly important for older shingles, which can be more susceptible to wind uplift than newer shingles. For shingle roofs, using a six-nail pattern instead of the standard four-nail pattern can also increase the uplift resistance of a roof.

A well-designed ridge vent is another important feature of a windproof roof. This is especially true for houses around Lake Michigan, which are subject to severe storms and high winds. A ridge vent with the proper wind-resistance rating can help with uplift resistance and can also prevent water from penetrating into the attic.

Your roof is your home’s first line of defense against mother nature. From high winds and severe weather to the constant sun exposure, your roof takes a beating. It is important to choose a durable roofing option that can resist damage for years. Durable roofing materials are highly resistant to moisture, fire, wind, hail and rot. They are also easy to repair, which saves you time & money on repairs or replacements.

Why You Should Consider Air Duct Cleaning

It’s a good idea to tidy up so that your technician has easy access to your vents and HVAC equipment. You’ll also want to be home so that you can greet them and show them where the vents are located.

Air Duct Cleaning Salt Lake City uses specialized equipment to remove dirt, dust, and debris from your ductwork system. The process uses negative pressure to dislodge particles and a truck-powered vacuum to suck them away.

What Is The Best Air Duct Cleaning Method?

Before cleaning the ducts, you should first do a visual inspection. Remove the vent covers in each room and look inside for mold, rodent droppings, or other debris that might indicate a problem with the ductwork. You can also find out if your air ducts need cleaning by noticing drafty rooms, extreme temperature variations between rooms, and musty odors. If your ducts are located in uninsulated spaces like attics and crawlspaces, they can be particularly susceptible to leakage, which wastes energy and may even pose a carbon monoxide danger.

If your ductwork is exposed, you should feel along seams and joints and listen for whistling noises. A reputable duct cleaner will use the National Air Duct Cleaning Association (NADCA) standard cleaning methods to clean your ducts, registers, filters, plenums, evaporator coils, and air handlers.

Leaks are the most common reason for ductwork to need cleaning. You can test for them by holding a smoke stick, incense, or piece of paper up to your ductwork connections and joints. If the smoke or paper moves erratically, you have a duct leak that a professional should repair.

Another reason to get your ducts cleaned is animal dander, which can build up and circulate throughout the home. This contaminates indoor air, aggravating respiratory conditions and exacerbating allergy symptoms. It can also circulate after a fire or flood, leaving behind contaminants that can worsen the effects of smoke and water damage.

A duct cleaning company will use brushes and other agitation devices to loosen the dust and dirt accumulated in the ducts over time. Then, a truck-powered vacuum can remove this material from the ducts and dispose of it properly.

Lastly, the ducts should be inspected again to ensure the cleaning process has caused no problems. If the ductwork leaks, you must have it sealed by a professional. This step will ensure the contaminated air does not recirculate and pollute your home again. If your ductwork is sealed correctly, your home’s indoor air quality will improve drastically, and you can avoid the health complications that are associated with poor indoor air quality.

Clean air is vital to the health and comfort of everyone in your home. Air ducts containing pet dander, dust, dirt, mold spores, mildew, and other contaminants can cause allergy attacks or exacerbate conditions like asthma, bronchitis, and other respiratory issues. The toxins may also circulate throughout the house and trigger foul odors. Air ducts should be cleaned regularly to reduce the need for repairs, sick time, doctor visits, hospital bills, and other costs associated with poor indoor air quality.

A professional service provider will use a variety of brushes and tools to dislodge contaminants. This is usually accompanied by vacuums that suck up the debris and dust. This is the most thorough method and can be expensive, but it provides a complete clean. It is recommended that this type of cleaning be done every five years or so.

Once the ducts have been agitated and vacuumed, they should be visually inspected for any debris that is left behind. This will help to determine the next step of the cleaning process. The service provider should note any areas with a lingering smell, as this could indicate the presence of mold or other contaminants. Some service providers will recommend applying chemical biocides to encapsulate or kill microbiological contaminants. It is important to remember that these chemicals should only be used after the ducts have been thoroughly cleaned of all visible pollutants.

Depending on the size of your home, you may need to have a few different air ducts cleaned. The air ducts that lead to your return and supply vents are typically the most heavily contaminated. A simple test to see which ducts are return or supply ducts is to put a tissue on the vent opening. If the tissue sticks, it is a return duct; if it blows off, it is a supply duct.

The cleaning process will also include your air handler and plenums, so ensure you have a clear path to these units. This may involve moving furniture out of the way and can take some time. It is recommended that you plan for the duct cleaners to work when your family will not be disturbed. You should prepare for your baby’s naptime or your Zoom meeting to be held at another location during the day of your appointment.

Air is pulled into your home through the HVAC system, then recirculated on average 5 to 7 times daily. That re-circulation brings in dust, allergens, and pollutants from the outside environment. When the evaporator coils in an air conditioning unit are dirty, they use more energy to cool your home and have a shorter lifespan than clean coils. Annual cleaning of the air handler and evaporator coils can reduce the energy used by your HVAC system, save money on your energy bills, and improve indoor air quality.

An air duct cleaning service will use professional equipment to remove contaminants from your air handler’s evaporator coils, blower motor, and drain pan. Depending on the service provider and your home, they may also clean the registers, grilles, fans, and the HVAC unit itself. They will typically begin by removing the cover and evaporator coils and vacuuming as needed to remove any loose particles from the surface.

Then, they will agitate all the surfaces in your air handler with brushes and air-whipping tools to stir up and move any remaining settled dust. Next, they will use the vacuum collection device to suck out the loosened debris into the collection container. Once the ductwork and air handler are cleaned, they should re-test your HVAC system. This test, called a blower door test, creates reverse pressure in the house and makes leaks easier to identify.

A reputable air duct cleaning company should take between three and five hours to perform an air duct cleaning. If a contractor claims they can do it in less time, they are likely taking shortcuts and just cleaning what you can see. A reputable company should thoroughly clean all the ductwork, including the vents, AC units, and other hidden components. They should also perform a blower door test after they finish and provide you with a written report of their findings. Be sure to clear a path to your air handler and ducts, and keep children and pets out of the way during the process. The noise and movement could scare them.

A dirty duct system can contain animal dander, pollen, dust, mildew, and other allergens. These toxins are circulated throughout the house, aggravating existing allergies or asthma and creating new ones. These toxins are also a perfect breeding ground for bacteria, germs, and other types of fungi. Dirty air ducts are a major cause of year-round respiratory problems in many people, especially those with asthma or allergies.

Duct cleaning removes these contaminants and allows the clean air to flow through your home. Clean ducts reduce respiratory symptoms in people who suffer from these conditions, making breathing easier for everyone. Dirty air can trigger sneezing, coughing, and sinus congestion, even for those without respiratory conditions.

Several methods are used to clean air ducts, but the best is a compressed air system that uses an air compressor with a special hose and nozzle. This tool forces compressed air through the duct and into the vents, dislodging dirt and debris and sending it into a collection bag. Another option is a vacuum that works similarly. Both of these tools are effective and safe to use, but they aren’t a substitute for an inspection by a professional.

Before beginning a duct cleaning, locating the supply vents is important. This is usually easy; the vent will be a straight run for a short distance, then turn in two opposite 90-degree directions (known as a tee). It’s helpful to have a flashlight handy when looking inside the duct, and it helps to know which direction the tee is facing.

Once the tee is identified, start at one of the supply vents and push in the cleaning head until it reaches the end of the duct. This may take some effort, and you’ll want to be careful not to puncture the duct, but don’t be afraid to push hard. When the cleaning head reaches the end of the duct, pull it out and move to the next vent. Repeat the process until all of the ducts are cleaned.

Dumpster Rental – A Convenient Way to Get Rid of Junk

Dumpster Rental

Waco Dumpster Rental is a convenient way to get rid of junk. Whether it’s a big cleaning project or going through the belongings of a deceased relative, this service can help reduce stress and save time.Dumpster Rental

You will also need to register your business, which varies by state. This process involves filing paperwork and paying fees. You may need a waste disposal license, zoning permit, or health and safety permits.

Dumpster rentals can be a cost-effective solution for businesses that need to manage large amounts of waste. They are typically used in construction and renovation projects, but can also be useful for residential and commercial cleanup. The cost of renting a dumpster can vary depending on the size, duration of the rental, and the type of debris that is being disposed of. Some companies also charge additional fees for items that are considered hazardous, or for same-day service. However, if you shop around and compare prices, you can find a good deal on a dumpster rental.

Some of the most common reasons to rent a dumpster include completing a major landscaping, construction, or renovation project; cleaning up after a home remodel; or moving to a new house. The costs of these types of projects can add up quickly, so having a large trash container on hand can help you save money.

Other reasons to rent a dumpster include doing a yard cleanup; cleaning out the garage, shed, or attic; or participating in a neighborhood cleanup. Dumpsters can be filled with a variety of materials, including metal, wood, and bricks. It is important to check with local garbage disposal centers for specific rules and regulations on these types of materials. In addition, some municipalities have drop off sites for hazardous waste such as paint and solvents.

Before renting a dumpster, make sure to understand the terms of your contract. Most companies offer weekly, daily, and monthly rental periods. Weekly rentals are the most popular, and can be more cost-effective than a daily rental. Some companies may even offer discounts for longer rental periods.

Once you’ve chosen a business structure, it’s time to start making some financial projections. You’ll need to calculate startup costs, including the purchase price of your dumpsters and other equipment. You’ll also need to estimate operating expenses and any unforeseen costs that might come up. Remember to account for taxes and licensing costs.

One of the most important aspects of any business is keeping track of your finances. You’ll need to keep track of income and expenses, and separate your personal and business accounts. You’ll also need to register your business with the state where you operate. This process varies by state, but it usually involves filing paperwork and paying fees.

Environment-friendly

The world generates a lot of waste, and it doesn’t always end up in the right place. This is especially true for construction projects and home renovations, which produce a large amount of trash that needs to be contained and disposed of properly. When you use a dumpster rental, you can rest assured that your waste is being handled responsibly and in an environmentally-friendly manner. The service also helps prevent waste burning, which is a major cause of air pollution. If you’re going to rent a dumpster, make sure to discuss what kinds of wastes you intend to dispose of with your provider. It’s important to disclose everything so that they can offer you specific instructions on placing the containers. You can also ask your dumpster rental company to handle hazardous materials such as chemicals and medical waste.

Dumpster rental services help reduce the amount of trash that ends up in landfills by sorting recyclables from non-recyclable waste. This not only saves space in landfills, but it also reduces methane emissions, which are a potent greenhouse gas. Waste management companies also work with recycling facilities to divert waste from landfills and repurpose it. They can recycle things like plastic, metal, cardboard, and paper into new products and help save money for businesses that need to dispose of their trash.

In addition to saving on landfill space, using a dumpster also reduces environmental pollution caused by truck transport. A full-size dumpster requires only one trip to the landfill, while a truck would need to make multiple trips if it was hauling the same load. This reduction in transportation emissions can greatly reduce the amount of carbon dioxide that is emitted into the atmosphere.

Using a dumpster also protects you from fines from homeowner’s associations, which often impose penalties for incorrect trash handling and disposal. Loose piles of trash can easily drift away from your property and pollute the surrounding environment, causing odors and harming wildlife. If you hire a dumpster rental company, the trash is kept consolidated and safe until the waste disposal professionals come to collect it.

Flexible

Dumpster rental is a flexible solution to help businesses and individuals get rid of waste safely and efficiently. It allows you to customize your waste disposal needs and schedule your delivery and pickup at a time that fits your convenience. You can even choose a dumpster size that meets your specific needs. Whether you’re doing home renovations or cleaning up an office space, renting a dumpster is an efficient way to reduce your waste and protect the environment.

Before you rent a dumpster, make sure that you have a clear plan for disposing of your unwanted items. This can help you save money by avoiding extra fees. For example, you might need to pay a fee for overfilling the dumpster or for disposing of prohibited materials. Moreover, you should also prepare your property before the dumpster arrives to ensure a smooth process. This includes clearing out clutter and identifying items that need to be thrown away. Finally, you should clear your driveway and ensure that it is free from obstructions such as low-hanging branches or power lines.

To start your dumpster rental business, you need to decide on the legal structure of your company. There are several options available, including limited liability companies (LLCs), partnerships, and sole proprietorships. You also need to register your business with the state where you want to operate. The process varies by state, and you may need to file paperwork and pay registration fees.

Once you’ve registered your business, it’s important to market your dumpster rental services to potential customers. Developing a website is a great way to promote your business and make it easy for people to find your services online. The website should have a professional design, clear navigation, and relevant content. In addition, it should be mobile-responsive to improve the user experience.

Lastly, it’s crucial to provide excellent customer service to your clients. This will ensure that they’re happy with your services and recommend them to their friends and family. You can do this by implementing a referral program, offering discounts, and being responsive to customers’ concerns.

Reputable

Dumpster rental is a reputation-based industry that requires a high level of customer service. A good reputation and positive reviews can attract new customers and boost business. However, it’s important to understand that not every marketing strategy is the same. Different methods work better for different industries, and you should focus on those that are most effective for your dumpster rental business.

First, it’s important to know what makes a dumpster company reputable. A good one will be licensed, insured, and offer competitive prices. In addition, they’ll be transparent about their pricing and policies. For example, some companies charge an extra fee for heavy materials that exceed the weight limit, while others include all fees in a flat rate that you agree to from the start.

To find a reputable dumpster company, read online reviews. It’s also a good idea to ask friends and family members if they’ve used a particular dumpster rental company before. This will give you insight into their experiences and help you decide whether to hire them or not.

It’s also a good idea to check online reviews on Google My Business and home services-related websites such as Angies List. These reviews can give you a sense of how well a dumpster company treats their customers, including their customer support team. If you see a lot of red flags, you might want to consider hiring a different dumpster company.

A successful dumpster rental company will have a large customer base, so it’s important to keep them happy. This will ensure repeat business and help your company thrive. In addition, loyal customers are more likely to recommend your services to their friends and family. Keeping your customers happy will also help you get more referrals and improve your search engine optimization (SEO).

A successful dumpster rental business will need to invest in its marketing strategies. This includes developing a strong website, blogging, and social media channels. It will also need to use local keywords in its content and optimize its website for SEO. Additionally, it will need to develop relationships with local contractors, construction firms, and event planners to increase its reach and visibility.

Costs and Benefits of Roof Replacement

Roof Replacement

Roof Replacement NJ is a significant home improvement. There are several factors that impact the cost, including location and climate.Roof Replacement

A quality roofing system is a long-term investment. It will add value to your home and ensure its integrity. It also will help lower your energy costs.

The roof replacement cost varies depending on the material used, home size, slope of the roof, and local labor rates. It can also vary depending on whether a permit is required and whether other repairs are needed to be made before putting in a new roof.

Many homeowners decide to replace their roof when it is near the end of its life expectancy or if there are signs that the roof is leaking or has other damage. However, some homeowners may be able to save money by replacing just a section of the roof instead.

In general, a roof replacement can cost between $9,000 and $11,000. About 40% of the total cost is for materials, and 60% is for labor. It is important to hire a roofing contractor with experience in roof replacements, as they can help you find the right materials for your budget and provide you with an accurate estimate.

Most roofing contractors charge by the square foot or bundle, or by a roofing “square” (a 10 ft x 10 ft slab of materials). Most roofs are shingle-based and range from $3 to $7 per shingle. Other materials such as metal or tile can be significantly more expensive. The roof shape and style will also affect the price, as some styles require different installation considerations or are more compatible with certain materials.

A roof’s pitch will impact the labor costs, as steeper roofs are more difficult to work on and will require additional safety equipment. If a homeowner needs to file an insurance claim for storm damage, that will add to the overall project cost as well.

Another factor that can increase the cost of a roof replacement is the number of chimneys, skylights or other special features. These will usually require specialized flashing and extra labor to install, which can significantly increase the roof replacement cost.

A few options for paying for a roof replacement are personal loans, home equity loans or credit cards. Homeowners should carefully consider their options and choose a lender that offers competitive rates. If possible, they should try to use no more than 30 percent of their available credit, as using too much can negatively impact a homeowner’s credit score.

Materials

The type of roofing material you choose can significantly affect the cost of a new roof. It’s also a great opportunity to upgrade your home’s look and style. There are a variety of roofing materials to choose from, ranging from low-cost asphalt shingles to luxury copper. Some materials, like wood shakes, can add a more rustic or natural appearance to your home. Others, such as slate, are more expensive but are extremely durable and can last over 100 years.

Metal roofing is a good choice for homeowners looking for energy efficiency and long-term protection. It’s available in a range of colors and profiles, including standing seam panels and shingle-style tiles. Metal roofs are highly reflective, making them an effective heat barrier. They’re also fireproof and resistant to high winds. If you live in an area prone to wildfires, however, you may need to get a special fire-resistant roof.

If you’re looking for a more affordable option, consider a rolled asphalt roof. It costs about $2,000 to install and is available in a wide array of styles. It’s also easy to repair and can be re-shingled in the future, making it a wise choice for most homeowners.

Another material to consider is concrete and clay tiles. They’re more expensive than shingle roofing, but they are very durable and can last over 100 years. They’re also fireproof and can withstand heavy snow and rain.

In addition to the material, it’s important to replace the underlayment, which is the part of your roof decking that’s protected by the shingle layer. This protects against water damage and helps your shingles hold their seal. Depending on your roof, you might need to replace the fascia boards, as well.

Other roofing materials, such as cement or slate, are more costly but offer a long lifespan and beautiful aesthetics. Slate, in particular, is known as a “forever” roof because it can last over 100 years when properly maintained. It’s also the most fireproof of all roofing materials and is very resistant to high winds, rain, and hail. Slate, though, is very heavy and requires specialized framing.

Installation

Choosing a contractor is an important part of the roof replacement process. You want to make sure the roofing contractor is licensed and insured, and has a good reputation. You can ask for references and reviews from past clients to help you determine if the company is a good fit for your needs. It’s also a good idea to request a written estimate and a detailed description of the work. If possible, you should try to negotiate with the roofing contractor to get the best price for the job.

The installation process for a new roof is usually straightforward and relatively quick. First, the roofers will install underlayment and drip edge. Next, they will install the shingles or tiles. Finally, they will add vents and caps for a cohesive design.

Your roofing contractor will need to tear off the old roof before installing the new one. This will usually take place in sections, and they’ll start on the furthest corner of the roof away from your driveway. This will allow them to keep the old materials away from your yard and house while they’re tearing it off.

Once the contractors have removed the old roof, they will clean up any debris that’s left around your home and landscaping. The crew will use blowers to clear the dust and debris from the gutters, as well as to remove tarps from the ground. They will also run magnets over the tarps to pick up any nails that have dropped.

In addition to replacing the shingles, the roofers will install the sheathing, rafters, and trusses, if needed. The roofers will also repair any rotted wood and apply a new coat of paint to protect the sheathing from the elements. They will also add insulation to reduce your energy costs and improve your comfort level.

After the roof is installed, a quality control person will come out and do a walk-through to double-check the installation for any leaks. They will look for any areas that are prone to leaks such as chimneys, skylights, ridge vents, and pipe flashing. They will also inspect the shingle seams and flashing to ensure that they are sealed properly.

Warranty

When you invest money in a roof replacement project, you want to be sure that your investment is protected. That’s why many homeowners choose to purchase a manufacturer and workmanship warranty. However, it is important to understand what these warranties cover before you buy them. They are not all the same, and they will differ in terms of coverage and length.

Manufacturer warranties cover the roofing materials, such as shingles, that your contractor uses. These warranties typically last for 10-30 years and have a standard version as well as a premium option with longer durations. Some manufacturers also offer lifetime policies, although these aren’t common. A manufacturer’s warranty may be voided if the homeowner doesn’t properly maintain or use their roof, such as by failing to conduct regular inspections and maintenance. They also may void the warranty if they hire a different contractor to perform work on their roof.

The standard warranty that comes with your new roof will usually cover leak repair for a certain number of years, and some will include additional coverage for hail or high wind damage. However, homeowners should be aware that the majority of leak repairs will not be covered by this type of warranty. In addition, most manufacturer warranties will not cover roof penetrations that have been made after the roofing system is installed, such as a chimney, plumbing vent, or water heater, or leaks due to poor design such as a poorly pitched or ventilated roof.

Workmanship warranties are much broader in coverage, and they often have a shorter duration than manufacturer warranties. These are designed to protect you against errors on the part of your roofers, such as installing ice and water shield or step flashing improperly. They also typically won’t cover problems that can be traced back to the homeowner, such as leaks caused by decking or shingle installation or other factors beyond their control.

The best way to keep your manufacturer and workmanship warranty in good standing is to get your original contractor involved from the onset of your roofing project. They can consult with the manufacturer on your project and review any design details that might put your warranty at risk. They can then recommend changes to your project that will lower the chance of your warranty being voided.

Paint Colors For a Mid-Century Home

paint

paintAs a design style that encourages transitional indoor-outdoor living, mid-century modern homes demand peaceful body paint colors to match their sleek exterior details.

Mellow honey yellow looks gorgeous with strongly colored wood upholstery and works well with brass accents. 

Holding down both keys puts the tool into constrained straight-line mode, which is useful for generating perfectly consecutive lines without using the mouse. This mode is only available for certain devices.

Although earth tones and vibrant hues might get most of the attention when it comes to paint colors for a mid-century home, blue can also be a great option. This shade can add a touch of mystery and depth to your home while still feeling light and airy. If you’re leaning toward a dark blue hue, sample it on your home first to ensure it will look as good as you imagine. Blue is also a great color for trim, as it pairs well with crisp whites and other neutrals that are popular choices for mid-century modern homes.

Consider Raccoon Fur or Boothbay Blue for a rich and inky blue. These blues can tie your home’s different accent colors and wood tones together for a cohesive design that feels fresh year-round. Bravo Blue is a perfect option if you’re looking for a more muted blue. This light blue shade is just the right amount of bold and works well with the gray siding on this mid-century modern home.

Aqua shades are another popular choice for mid-century modern homes because they pair well with warm and cool accent colors. Magnolia Home’s Morning Calm is a soothing aqua shade with a light and bright feel but doesn’t feel overpowering. This shade can be paired with neutrals like whites and browns, yellows, oranges to create a vibrant accent color scheme.

Earthy greens were popular in the ’50s and ’60s, and they’re also a great choice for mid-century modern homes. Relentless Olive and Green Root are two shades of earthy green that look lovely in this type of home.

While black and charcoal aren’t usually considered exterior paint colors for a mid-century home, they can work well if you want your house to stand out. You can use these shades to frame your front door and windows to make them pop and draw attention to your house’s unique features.

Honey yellow is another popular paint color choice for mid-century homes. It is a warm shade that pairs well with many other colors, including blues and greens. It can also work well as an accent wall or trim paint. When choosing a shade of yellow, it’s important to consider your surrounding landscape and architecture. You want to avoid too bright colors, as this may clash with your home’s style.

If you’re looking for a more neutral option, white is always a great choice for mid-century modern houses. This classic color creates a clean canvas that works well with most accent colors and can help to make your furniture stand out. White is also a versatile choice for exterior paint, as it can achieve a light and dark look.

While earth tones and brighter colors tend to get the most attention regarding mid-century modern paint options, grays are just as popular. Neutrals subtly contrast many other hues and can be used for an entire room or as an accent. For example, in this mid-century kitchen, Graphite OC-47 creates an elegant backdrop for the brass stools and wool boucle chairs.

When selecting a body paint color for your home, it’s important to remember that mid-century modern is all about simplicity and functionality. A peaceful body paint color will allow your home’s details to shine and give guests a clear idea of where to enter the space. Adding other elements will also help ensure that your home’s design is manageable.

If you’re ready to add a splash of color to your home, don’t be afraid to try a bold shade like Heartthrob red. This bold fire engine red is not for the faint of heart, but it will certainly make a statement. That is a perfect shade in an entryway, powder room, or living room. Just be sure to balance it with other neutral shades in the room to avoid overdoing it.

Olive green is a natural shade that works well with mid-century modern decor. This shade creates a neutral backdrop that lets the other colors in your room shine, such as bright yellows and reds. It can be used as an accent or primary color in a room.

It pairs nicely with wood furnishings, especially walnut or oak, and it also looks good with various wall materials, from brick to cork to concrete block. Olive paint can even be used on a home’s exterior to create a warm, earthy look.

The deeper shades of green will work best with muted neutrals like beige and cream. They also pair well with browns, mustard yellows, and burnt oranges for an autumnal vibe. You can even pair a light shade of olive green with white for an airy, serene effect.

If you don’t want to go as bold with your color choice, a classic white like Pure White is a great backdrop for any furniture and accessories in your home. It’s a versatile shade that will always stay in style and complements most types of wood furniture.

You can also choose to use a matte finish on your walls, which provides a smooth and subtle look. That is a common choice for homes with more traditional styles and is ideal for rooms where you plan to hang artwork or family photos. It’s also a good choice for bathrooms or kitchens where moisture can cause other finishes to fade.

If your home has a lot of wood accents, you can create a more natural look by painting the trim in a color that matches your olive-green walls. That will create a cohesive look and highlight the features of your home’s architecture.

The other popular color choice for the mid-century modern era is red. This bold shade is not for the faint of heart, but it can be a stunning choice for entryways, bedrooms, and living rooms. Opt for a Cherokee Red or a similar shade for a muted red.

Yellows provide a cheerful and optimistic accent to any room. They look particularly good in kitchens and dining areas, where they can help stimulate appetite. Lighter shades of yellow can also be used as a neutral for walls and ceilings, allowing you to use bolder patterns in other parts of your space.

From a bright mustard to a warm golden yellow, your mid-century home has plenty of options. The more brilliant hues are energizing, while the golden tones are mellow and welcoming. Both pair well with muted greens and ochres that were popular in the mid-century era, making creating a cohesive look throughout your home easy.

If you want to add a pop of color without going overboard, try a soft mustard shade like Yellow Groove or Honey Bees. These soft and delicate shades are pretty enough to be used in a kids’ bedroom or powder room, but they will still make a statement. Yellow Ochre is another warm and inviting option that would be neutral in specific contexts, such as an entryway or hallway.

Other options for bright yellows include a robust Taxi Cab Yellow (SW 6681) or Sunnyside Up. Both of these shades have a hint of orange, which is a color that has been linked to confidence and optimism. That is a great paint color in a bedroom or kitchen, especially with blues or reds.

There are also yellows with a bit of gray, which adds a sense of sophistication to your home. Yellow has a vintage flair and looks great with white trim.

Alternatively, consider a buttercream shade like Buttercream or Eggshell if you’re looking for a more neutral yellow. These creamy yellows are gentle and neutral, making them perfect for the front room of your home or as an accent wall in a living room.

If you’re a fan of the rich and decadent gold hues popular in the mid-century, consider pairing them with burnt orange fabrics or wallpaper. That will create a unified and harmonious look that will bring your mid-century modern home into the current design trends.


Unhappy With Something Around Your House? Change It!


You can increase your home’s value by doing some home improvements. There are some simple ideas about renovating your house in order to increase your house’s value. These ideas will help you keep them cost-effective and do the ones that are most valuable to make your house worth the most.


One of the quickest, easiest and cheapest ways to improve your home is paint. Whether it is the outside or the inside, both areas will look new and transformed. Pick neutral shades and brighter trim colors. Plain white walls tend to make your home look like a rental and not owner occupied.


Put in a garden. It can be a lavish outside nursery, or a simple box window in the kitchen to grow your herbs. The addition of live plants and the appeal they bring to your home is unmatched. If you don’t have much of a green thumb, plant strong plants that need little attention, and add a timed drip or sprinkler system for easy watering.


To save on your electric bill, try switching from regular light switches to dimmer switches. Dimmer switches allow you to select how much light you want to use in a particular room. By doing so, you can use less electricity to light a whole room, and add a sense of mood as well.


When it comes to home improvement, be sure that you are not causing your home to awkwardly stand out from the rest of the neighborhood. This will ensure you will be able to resell it and also, that you will not receive scorn from your neighbors. Be creative, but try to lean toward conservative with colors. With additions, keep your the total size of your home somewhat near that of your neighbors.


As you just read in the above article, with some simple tips, anyone can remodel their home and elevate its value in a cost-effective way. The correct improvements will help your house to stand out when you decide to sell, which ensures a fast and lucrative sale.

R and K Investments, Georgie Tales, Red Lotus Energy Healing, Global Startup Blog, Medical Home HI, ESM Calendar, Holographic Ledfan, Lifespan VL, Days 7, I Work At Home Based Business Opportunity, Pressure Washing Sugarland TX, The Farm On FIsh Market, Trillium COve Home And Garden, Knoth Plumbing And Heating, A Year Of Business Success, Madison County Cares, Stalbans Davenport, Monument PD, MT Business Answers, DE Frank Youth Space, Magical Lighting Concepts, Faizan 4 IT, Blue Ridge Home Fashions Inc, Executive Mentor, United Motor Coaches, Get Leading Culture, Mr I Teacher Resources, The Expeditional, The Red Ink Conference, Munster Tree Care, BillDecoste, The Home Souq, Viscon Edu, Biscaynees, C21 Court Square Realty, Aulias Kitchen, Chef Buano, Innovation Parkaz, High Performance Home Tour, NCTDA.


What is the KonMari Method?

What is the KonMari Method?

Many people live in cluttered homes which end up complicating their life as well. It’s not that they don’t know how to declutter your room but the process itself is very complicated. 

Well, if you could focus on the things in your home that give you joy, then everything else would fall into place. Marie Kondo has developed a method that makes this easy and simple, so you can get rid of clutter fast without having to sort through every item in your house one by one. It’s called the KonMari Method because she says we should only keep items that spark joy.

Here’s everything you need to know about the KonMari method.

What is the Konmari Method?

KonMari, also known as KonMarie or Marie Kondo, is a tidying expert in Japan. She has written several bestselling books on the process she uses to transform individuals and families. Created by Marie Kondo, professional home organizer and author of the bestselling book, The Life-Changing Magic of Tidying Up, the Konmari method emphasizes removing clutter from your home and surrounding yourself with things that spark joy.


Image credit: https://tidycasa.com/

In other words, the konmari method is a simple but effective tidying method that ensures you’ll never relapse to clutter again. It uses unique selection criteria by choosing what sparks joy. Through this tidying process, you can reset your life and spend the rest of your life surrounded by the people and things you love most.

After the release of the Netflix TV show Tidying Up with Marie Kondo in 2019, many people globally have been using Marie Kondo’s tips to declutter their homes and stay organized.

How Does the KonMari Method Work?

KonMari has six basic rules that can help you declutter, get organized and create a home filled with items that make you happy. Here’s how the KonMari method rules work:

Commit Yourself to Tidy Up

The KonMari method is not a quick fix for a messy room. Instead, it’s a chance to reset your entire life, but only if you commit to following its principles. The first rule of tidying is setting your intention to seriously tidy up and resolving to put in the time and effort required. 

When approaching your tidying festival with a clear vision and a can-do attitude, you’ll find the energy and motivation you need to tidy all your belongings in one go. The effort will be worth it in the end, and you’ll not only experience the joy of living with objects that you love, but you’ll also be on the path of establishing your ideal lifestyle.

Marie Kondo’s theory is the more you can get rid of, the easier it will be to tidy up and remain organized. So, don’t get discouraged if the process takes longer than a day.

Imagine Your Ideal Lifestyle

Before you start, imagine your ideal lifestyle and identify the objects that make it a reality. If this is your first time tidying up, you might not be able to picture what your perfect life looks like. But it’s never too late to change and improve after all.

Marie Kondo’s tidying process isn’t about decluttering your house or making it look neat on the spur of the moment for visitors. It’s all about tidying up in a way that will spark joy in your life and change it forever. 

Consider what kind of a house you want to live in and how you want to live in it. Make sure you describe your ideal lifestyle. You can draw and sketch out what it looks like if you like. You can also describe in a notebook or cut out photos from magazines.

When you imagine your ideal lifestyle, you’re clarifying why you want to tidy and envision your best life. The tidying process represents a turning point, so make sure you consider the ideal lifestyle you inspire.

Finish Discarding First

Once you know what your ideal lifestyle is, you’ll be able to decide which items have value in your home and fill a purpose for that lifestyle. Considering each item and sorting them to keep and discard piles allows you to create more space for the organization and storage solutions that come later in the Konmari method.

Discarding items is not the point of the Konmari method, but it’s important because it provides the opportunity to determine the items that will help you live your life as you envision it as well as those items that no longer fit into your lifestyle. After you’ve discarded, you can turn your full energy and attention to what sparks joy.

Sort by Category, Not Location

The Konmari method advises sorting by category rather than the room. This allows you to work on one type of item at a time and ensures that each category is treated with equal importance. In other words, you’ll have a hard time getting motivated to finish if all of your clothes are in one room and the books are in another.

If you’re cleaning your home room by room, you’re most likely rearranging items and tossing out only a few things since it doesn’t feel like a ton of clutter for that room. Tidy by categories such as clothes, books, papers, miscellaneous items and sentimental items. 

This way, you’ll be on the right track to success. If you find yourself doing this, try to give each category its own dedicated space and do your best not to keep related items together. The Konmari method prefers that you spread out categories throughout your entire home.

Follow the Right Order of Tidy

This is probably the most important aspect of Konmari. You want to tidy up in the correct order to meet your tidying needs by starting with what’s most necessary first.

The right order for this method includes clothes, books, papers (all documents and manuals), miscellaneous items like small electronics and accessories, and mementoes.

sk Yourself if it Sparks Joy

Deciding if something sparks joy is the criteria for keeping and discarding items when decluttering. In the Konmari method, your feelings are the standard for decision making, especially knowing what sparks joy. To determine this when tidying, you need to pick up each object at a time and ask yourself quietly if it does spark joy.

Pay attention to how your body responds. Joy is personal, so that everyone will experience it differently. By selecting only those things that inspire joy, you can precisely identify what you love and what you need.

How to Use The Konmari Method at Home

Clothes

The first category you need to tackle for a tidy house is clothing. While you might be used to cleaning out clothes in your closet and then your drawers, the Konmari method suggests gathering clothes and accessories from all over your home, including your bedroom closets, coat closets, drawers and under the bed and put them all in one pile.

This will allow you how much you have and help you realize how much you don’t wear. If an item sparks joy, keep it and if not, give it to gratitude and donate your clothing. You can then learn how to iron the clothes remaining ones correctly and arrange them the right way.

Books

After clothes, the next category on the Konmari method checklist books, gather every book in your home and put them in a pile to decide which ones spark joy and which ones don’t. If your ideal lifestyle means that your space is filled with books, keep them.

Books
Image credit: https://www.shortform.com/

Papers

Every paper in your home, including documents, letters, bills and receipts, should be sorted using the Konmari method. Keep only what you need or use daily, plus one copy of everything else.

Miscellaneous Items

Any other items that don’t fit into the above categories should be put in a pile to determine what sparks joy and what doesn’t. Sort through everything carefully. Create groups like electronics, beauty supplies, home decor, canned goods and writing utensils.

Miscellaneous Items
Image credit: https://storage.googleapis.com/

It might be tempting to go room by room for an extensive category; make sure you gather items from all over your home and put them in one pile. That way, you’ll be able to store similar items together to easily find them and not have anything to spread out.

Sentimental Items

Sentimental items hold deep meaning and can be tough to part with. If you’ve ever seen the episode of ‘Hoarders’ where the woman won’t get rid of her deceased mother’s old suitcase, this method isn’t for you.

Sentimental Items
Image credit: https://justagirlandherblog.com/

Keep only those sentimental objects that truly bring you joy and store them in a designated area. That way, you’ll have them but won’t be reminded of them at every turn.

How to Store Items that Spark Joy

After deciding what to keep in your home, good storage solutions will help you keep everything organized. Here are some of the best Konmari organization and storage tips:

Try Konmari Folding

The Konmari folding method is perfect for organizing your clothes. Marie Kondo didn’t only create her method of decluttering and organizing, but she has also shared a unique folding technique for clothes and linens. The Konmari method of folding helps keep drawers, baskets and bins neat and tidy.

Use Boxes in Drawers

Don’t toss them out if you have gift boxes, shoe boxes, and jewelry boxes. These are great DIY home storage solutions for keeping small things like jewelry, beauty supplies, phone chargers and other miscellaneous things organized in drawers and cabinets.

Store Papers in File Organizers

The paper file organizer is perfect for storing mails, bills and other papers. It protects your documents from getting lost in the clutter of the drawer.

Invest in Wicker Baskets

Wicker baskets are great for keeping your cupboard free from clutter. Use them to store foodstuffs, dry fruits, snacks and other kitchen essentials.

FAQs on What is the KonMari Method

Is the Konmari method effective?

The Konmari method is a highly efficient and effective organizing strategy that has helped many people declutter their homes. The beauty of this method is that it doesn’t follow any specific order in tidying up – you can start from anywhere and go on to the next activity.

What are the benefits of the Konmari method?

The Konmari method advises people to get rid of useless, unnecessary belongings. If applied correctly, this will help you find more relaxation and peace in your life. It also teaches you not to keep hold of things that do not bring joy into your life.

Final Thought on What is the Konmari Method

Do you have items that spark joy that you can’t fit in your home? Well, get organized with these temporary storage solutions with extra space storage to keep items that fit your ideal lifestyle, even if you don’t have room for them now.


The post What is the KonMari Method? appeared first on Kitchen Infinity.

Did you miss our previous article…
https://chefbuano.com/?p=1299

Why Window Air Conditioners Freeze-Up

Why Window Air Conditioners Freeze-Up

Window air conditioners are not designed to be in super cold climates, which means that if you live in a climate that gets below freezing, your window AC will freeze up. This can happen when the unit is running or not being used correctly – it’s just part of how they work.

In this article, we’ll explain how to prevent your window AC from freezing up, as well as give you some tips on how to keep your energy bills down. Keep reading to find out more. 

Solutions To Try When Your Window Air Conditioners Freeze-Up

To keep this from happening, you should either turn off the unit when it’s not being used or install an insulation kit to help protect it from the cold. If you do have any problems with frozen windows, it’s best to call in a professional to help you out. 

Insulation kits are fairly inexpensive and easy to install, so this is a great solution for anyone who wants to make sure their window AC stays functional all winter long. For more information about the kits, contact your HVAC contractor for advice. They’ll be able to help you find a good insulation kit that will keep your room as cold as possible without having to worry about it freezing up.

Another solution is to shut off the AC entirely when it’s not being used. You can do this by removing the front grille and locating the switch, then moving it into the off position. This will stop it from recirculating warm air back into your room, which should help prevent freezing up while also saving energy costs.

Image Credit: http://storables.com

Even if your window AC does freeze over, you shouldn’t let that stop you from using it – just remove some of the ice before turning on the power again (never use hot water or open flames like hair dryers for this). You should be safe to run it normally again, but keep an eye on the ice levels to make sure they don’t get too high.

Other Solutions To Try

While there are manytypes of air conditioning systems, all with their own ways of working, the following solutions might also be worthwhile trying if the above tips do not work.

If you’re not comfortable installing an insulation kit or turning your AC completely off when it’s not in use, there are a few other things you can do to try and prevent freezing.

One is to keep your windows open while the AC is running; this will help to circulate the cold air and keep it from building up. You can also try using a space heater to keep the room warm while the AC is on, as this will help to prevent the unit from freezing over. While it may not be the best idea to use a space heater if you have small children or pets, it can help a great deal.

Most importantly, it’s a good idea to make sure that any air bubbles in the window seal are eliminated before turning on your window AC. These can build up from condensation and cause issues, so poke each one with a long needle until you don’t see them leaking out anymore. If they’re blown out completely, there will be no pressure buildup to cause ice problems – just make sure your windows are as tight as possible before using the unit again.

Window AC’s should not be left running while unattended for safety concerns and also since doing this could prevent the unit from working properly due to over freezing. Shutting the window AC unit off when not in use is a good way to prevent this. The insulation kit is also an easy and effective solution to try. If these solutions do not work, then freezing may be unavoidable in colder climates. 

In this case, just monitor the ice levels and remove any ice before turning the unit back on. Following these instructions should keep your room cool all winter long without having to worry about your window AC freezing up.

The Importance Of Not Having Dirty Filters

Make sure that you’re cleaning the filter regularly. This will help improve airflow and stop the unit from working harder than it needs to, which can also lead to freezing.

When the filter becomes clogged with dust, debris, and pet dander, it is not able to do its job properly. This can cause your window AC unit to work much harder than it needs to by making it run longer for the room to become cool again after shutting it off (this is known as short-cycling).

If you notice that your filters are dirty or clogged up regularly then you will want to replace them more frequently if possible.

Why Window Air Conditioners Freeze Up – FAQ

Can an AC electronic board be responsible for freezing units?

When window air conditioners freeze up, many people wonder if they need to replace the entire unit. In some cases, the electronic board may be at fault and need to be replaced. However, several other factors can cause an air conditioner to freeze up as well.

How do I know if the electronic board is bad?

The best way to determine if the electronic board is bad is to have it tested by a professional. If you are experienced in electrical work, you may be able to test the board yourself. The most common symptom of a bad electronic board is that the AC will not turn on at all. 

You can usually test the board by checking for power at the connector. There should be power at all of the connectors, each connector should have 12 volts. The voltage may not be exact depending on your model, so you may need to check the manual for the correct reading.

How do I test an electronic board?

You can test an electronic board by removing it from the unit and testing it with a multimeter for a continuity test. If you are not comfortable removing wiring or working with electricity, then you should take your AC to a licensed repair shop to have this done for you. If there is no power at any of the connections when attempting to start up the window air conditioner, then the board is likely bad.

What causes my AC to freeze up during use?

A window air conditioner freezes up for a variety of reasons. The most common reason is a temperature that the unit can’t deal with. However, there are several other possible causes. One common cause is a dirty filter. When the filter is clogged with dirt and dust, it can prevent air from flowing through the unit properly. 

Another common cause is a blockage in the condenser coil. If the coil becomes clogged with debris or lint, it will prevent the unit from cooling properly and can cause it to freeze up. Finally, if the refrigerant levels become too low, it can also cause the AC to freeze up.

How do I fix my window air conditioner that has frozen?

There are several other possible causes, so it is important to determine the root of the problem before attempting to fix it. If the filter is dirty, you can clean or replace it. If the coil is clogged, you can clean it with a vacuum cleaner. If the refrigerant levels are low, you can add more refrigerants. However, if none of these solutions work, then you may need to replace the entire unit.

Final Thoughts On Why Window Air Conditioners Freeze-Up

4 Reasons Your Air Conditioner Is Frozen & How to Fix It | Blair's Air

Image Credit: http://blairsair.com

In conclusion, there are several reasons why a window air conditioner may freeze up. By knowing the most common causes, you can usually fix the issue yourself. If you are not comfortable working with electricity, then it may be wise to seek professional help if your AC freezes up.

Finally, if you want to know what the best air conditioners are, ones that function correctly in different types of weather, you can check out our best air conditioners buying guide


The post Why Window Air Conditioners Freeze-Up appeared first on Kitchen Infinity.

Did you miss our previous article…
https://chefbuano.com/?p=1295

Sewage Ejector Pump

Sewage Ejector Pump

Sewage ejector pumps are an essential and often overlooked part of a septic system. If your sewage ejector pump is not working properly it can lead to major issues that could cost thousands of dollars in repairs or replacement.

In this article, we will discuss what a sewage ejector pump is, when you should replace it, how to install a new one, and how to maintain and troubleshoot your current pump. We will also answer some of the most common questions about sewage ejector pumps. Keep reading to find out more. 

What is a sewage ejector pump?

A sewage ejector pump is a centrifugal pump that is generally used in septic systems but can also be found in household waste disposals.

Image Credit: http://rooterman.com

It works by drawing water out of the septic tank and forcing it through the building drain system where it eventually leaves your home. Because of this, these pipes are usually located near or in the basement.

There are two main types of sewage ejector pumps – rotary vane pumps and diaphragm pumps. Rotary vane pumps are more common, but diaphragm pumps are quieter and can handle more solids.

When should you replace your sewage ejector pump?

The general rule of thumb is that you should replace your sewage ejector pump every 5-7 years. However, this may vary depending on the type of pump you have, how often it is used, and the condition of the septic system.

If you are not sure whether or not it is time for a replacement, there are a few telltale signs that can help you decide:

If the pump is making strange noises, vibrating, or leakingIf the pump smells bad or is creating an excessive amount of noiseIf the pump is not working properly or is constantly clogging

If you are experiencing any of these problems, it is time for a replacement. All of these issues can cause extensive damage to your septic system and can be very costly to repair.

How to install a new sewage ejector pump

Replacing a sewage ejector pump is not a difficult task, but you must take your time and follow the proper steps.

The first step is to shut off the power to the pump. You can do this by flipping the breaker switch or by unplugging the pump.

Next, remove the cover plate from the pump and disconnect any hoses or wires that are attached.

Then, use a screwdriver or wrench to loosen the bolts that hold the pump in place. Be careful not to damage them as they will need to be reused later.

After you have loosened the bolts, lift the pump out of its cradle and attach it to your new sewage ejector pump. Make sure that the wires are also facing the correct way before you tighten any nuts or bolts.

Once everything is secure, reattach all hoses and wires and replace your cover plate.

Finally, turn on your power supply and test out your new sewage ejector pump. If everything works properly, then you’re done. If not, don’t worry- there are plenty of troubleshooting tips for this later in the article. 

You can also check out this article onhow to install sump pumps if you’d like to know more about similar installation processes.

Sump Pump Cost: Average Prices, Installation – Forbes Advisor

Image Credit: http://forbes.com

How to maintain and troubleshoot a sewage ejector pump

While replacing an old sewage ejector pump can be relatively simple, maintaining it over its lifetime can be a bit more difficult.

There are a few things that you can do to help keep your pump running smoothly:

Clean the pump regularly and remove any debris or build-up that may have accumulated.Make sure that the seals and gaskets are in good condition and properly lubricated.Check the hoses for leaks or damage and replace them if necessary.If the pump starts to vibrate excessively, try adding additional insulation or baffles to quiet it down.

Troubleshooting tips 

If you are having problems with your sewage ejector pump, there are a few troubleshooting tips that you can try:

If the pump won’t turn on at all make sure that you have turned off and unplugged the pump and then check your circuit breaker.If the breaker is fine, try turning it on for 5-10 seconds before turning it back off again. Plug in the pump and see if it works properly.If this doesn’t work, there may be an issue with one of your wires or hoses. Check them out to make sure that they are connected properly or replace them accordingly. If they seem to be working fine, then there may be a problem with your electrical connections. Try tightening any loose wires/connections before calling a professional for help. If water is leaking from the pump check to see if the bolts are tight on the base of the pump. If they are, then there may be a problem with one of your hoses or wires.If these don’t seem to be the issue, try applying Teflon tape or pipe dopes to any threaded connections on your hoses and pipes. This will help seal any leaks that may have developed over time. If you can hear bubbles in your tank but you’re not getting any water out, the first thing that you should do is make sure that both valves are completely closed. Once this has been done, check for cracks or holes in any hoses or pumps leading into/out of the area around the tank.If everything seems to be in order, you may need to add more water to your tank. You can do this by opening up the valve and letting the water run until it is at the desired level. If this still doesn’t work, then you may have a blockage in your line and will need to call a professional for help. 

Hopefully, these tips will help you keep your sewage ejector pump running smoothly for years to come.

Sewage Ejector Pump – FAQ

What is a sewage ejector pump?

A sewage ejector pump is a pump used to remove wastewater from a building. The wastewater is typically removed from the lowest level of the building, such as a basement or crawlspace.

What are the benefits of using a sewage ejector pump?

The main benefit of using a sewage ejector pump is that it can help to prevent flooding. A sewage ejector pump can help to keep the wastewater in the building’splumbing system and out of the basement or crawlspace.

How do I know if I need a sewage ejector pump?

The best way to determine if you need a sewage ejector pump is to contact a professional plumber. They will be able to assess your building and determine if a sewage ejector pump is necessary.

How much does a sewage ejector pump cost?

The cost of a sewage ejector pump will vary depending on the size and type of pump you need. You can expect to pay anywhere from several hundred dollars to several thousand dollars for a quality sewage ejector pump.

How do I install a sewage ejector pump?

Installing a sewage ejector pump typically requires the help of a professional plumber. They will be able to help you install the pump and ensure that it is working properly.

Final thoughts on a sewage ejector pump

In conclusion, sewage ejector pumps are found in many different types of commercial and residential appliances. Though they may vary in size, the pump itself is relatively easy to maintain and repair when needed. 

These devices tend to last a very long time so you will probably not have to worry about replacing one for quite some time. If problems do arise, sewage ejector pump replacement can be done by most people with little technical experience.

The post Sewage Ejector Pump appeared first on Kitchen Infinity.

Did you miss our previous article…
https://chefbuano.com/?p=1291

Brown Patch Lawn Disease

Brown Patch Lawn Disease

Brown patch lawn disease is a common problem that affects many gardens.

Brown patches on your grass are not always caused by the same type of fungus or bacteria, so it’s important to have a professional identify the problem before you try to fix it yourself.

In this article,  we will discuss what brown patch lawn disease is, the signs of brown patch lawn disease, how to prevent and treat brown patch lawn disease, and where you can find more information about diagnosing and treating brown spot diseases in your yard. Keep reading to find out more. 

What Is Brown Patch Lawn Disease?

Brown patch lawn disease is a fungus that affects grasses. It can cause patches of your lawn to turn brown, and in severe cases, it can kill the grass. The fungus thrives in hot, humid weather, and so the best way to prevent brown patch lawn disease is to make sure your lawn is healthy and well-maintained.

Image Credit: http://scotts.com

By watering your lawn properly and mowing it regularly, you can help to keep the grass healthy and reduce the chances of brown patch lawn disease. If you do notice signs of brown patch lawn disease, it’s important to take action right away to prevent the fungus from spreading.

Alternatively, you can also treat brown patch lawn disease with fungicides. There are many different types of fungicides available, so it’s important to talk to a professional about which one is best for your situation.

Signs Of Brown Patch Lawn Disease

The most common sign of brown patch lawn disease is a large, circular patch of brown grass. The edges of the patch will be well-defined, and the centre will be relatively dry. In some cases, you may also see small patches of pink or purple fungus growing on the edge of the brown patch. If you see any of these signs, particularly if you live in an area where the fungus is common, it’s important to have your grass tested.

Another common sign of brown patch lawn disease is the appearance of lesions on the leaves of the grass. These lesions will be dark green or brown, and they will often have a yellow halo around them. If you see any lesions on your grass, it’s important to contact a professional right away.

How To Prevent And Treat Brown Patch Lawn Disease

Brown patch lawn disease is difficult to eliminate, but there are some things you can do to ensure that it doesn’t spread or get worse. The best way to prevent brown patches is to keep your grass healthy by regularly mowing, fertilizing, watering, and aerating it. If you have prolonged periods of hot weather every year, consider installing shade trees so that your yard is cooler. If possible, choose two different kinds of grasses for your yard so they don’t all die at once if one type gets sick.

Moreover, you can also treat brown patch lawn disease with fungicides. There are many different types of fungicides available, so it’s important to talk to a professional about which one is best for your situation.

If you do see signs of a brown patch, it’s important to take action right away to prevent the fungus from spreading. You can treat the fungus with fungicides, or you can try to remove the affected areas of grass and replace them with new sod. It’s important to remember that brown patch lawn disease can be difficult to get rid of, so you may need to take these steps more than once to get rid of the fungus completely. Speaking of fungus, here’show to get rid of mold

Finally, it’s important to remember that not all patches of brown grass are caused by brown patch lawn disease. Many other things can cause your grass to turn brown, such as drought, pests, and poor soil quality. If you’re not sure what’s causing the problem, it’s best to contact a professional so they can diagnose the issue and recommend a course of treatment.

Other Important Considerations

If you hire a company to diagnose and treat your lawn, make sure that they use environmentally-friendly fungicides. Some types of fungicide can be harmful to the environment and even pets and children. It’s also important to water your lawn after treating it with fungicide because too much moisture will encourage the fungus to grow again.

You should also remember that brown patch disease is more likely to attack the cool-season grasses in your yard. Tall fescue, Kentucky bluegrass, and ryegrass are all very susceptible to brown patch disease. This means that some parts of your yard may die while other parts thrive depending on what type of grass grows there naturally.

Bermuda grass is less susceptible to brown patches, so if you have this type of grass in your yard, you’re less likely to see signs of fungus.

In short, brown patch lawn disease is a difficult fungus to get rid of, but there are some things you can do to prevent it from spreading or getting worse. If you see any signs of the disease, contact a professional right away so they can recommend a course of treatment. 

Remember that not all patches of brown grass are caused by brown patches, so it’s important to diagnose the problem before taking any action.

The weather conditions

Humid weather combined with cloddy soils can cause a fungal brown patch. The fungus that causes the disease proliferates in moist conditions. To prevent brown patch lawn disease, strive to keep your grass as dry as possible. Watergrass deeply and infrequently to encourage deep root growth.

How to Identify, Control and Prevent Brown Patch - Lawnstarter

Image Credit: http://lawnstarter.com

Brown patch lawn disease – FAQ

When does brown patch lawn disease show up?

Brown patch lawn disease often appears in late summer or early fall.

What are the symptoms of brown patch lawn disease?

The most common symptoms of brown patch lawn disease are circular patches of dead, brown grass. These patches can often be several feet across and can spread rapidly.

What causes brown patch lawn disease?

Brown patch lawn disease is caused by a fungus that thrives in moist conditions. The fungus feeds on the grass’s leaves, causing them to die and turn brown.

How can I treat brown patch lawn disease?

There is no cure for brown patch lawn disease, but you can take steps to prevent it from spreading. You can start by mowing your lawn at the proper height and removing dead or dying patches of grass as soon as you notice them. 

Finally, try to keep your lawn as dry as possible; don’t let water stand on it for long periods, and make sure that you’re not over-watering your lawn.

What do dark rings around the patches mean?

If you see dark rings around the patches of brown grass, it means that the fungus is also attacking the roots of the grass. This can kill the grass and cause it to turn black.

What should I do if my lawn is severely affected by brown patch disease?

If your lawn is severely affected by brown patch disease, you may need to replace it with new grass. You can start by removing all of the dead or dying grass and then tilling the soil to loosen it up. Next, spread a layer of topsoil over the soil and then sow the new grass seeds. Finally, water the area well and keep it moist until the seeds germinate.

Final thoughts on brown patch lawn disease

In conclusion, brown patch lawn disease is a serious problem that can cause a lot of damage to your lawn. Early detection and treatment are essential for preventing any long-term damage. Be sure to keep an eye on your lawn and contact a professional if you suspect that your garden may have this disease.

For further reading, check out this post onhow to test soil ph. This will ensure that your soil isn’t too acidic and won’t end up having trouble absorbing the right nutrients.

The post Brown Patch Lawn Disease appeared first on Kitchen Infinity.

Did you miss our previous article…
https://chefbuano.com/?p=1287