Vinyl House Siding: Pros and Cons

Vinyl House Siding: Pros and Cons

Vinyl siding is a great material for anyone looking to improve the look of their home. This type of siding can be very durable and resistant to damage, making it a good choice if you have kids or pets who tend to destroy your property.

However, vinyl siding has some disadvantages that you should consider before installing this product in your home. For example, vinyl is not as energy efficient as other siding materials such as wood siding or fiber cement panels. Also, vinyl siding tends to fade over time due to exposure to sunlight and other weather conditions than fiber cement siding and wood siding.

In this article, we’re going to look at some of the pros and cons of vinyl house siding to help you make an informed choice. Read on.

What is Vinyl House Siding?

Vinyl siding is a durable form of plastic commonly used in residential and commercial buildings. Vinyl siding comes in a variety of styles, colors, and textures, even imitating the look of wood siding and other siding materials to suit your needs. You should know which one to choose when building your own house so you don’t end up with what you don’t like.


Image credit: https://www.kpvinylsiding.com/

Vinyl siding is also very easy to install, which is why it has become one of the most popular types of exterior siding in the United States. 

Pros of Vinyl Siding

Easy Installation

Vinyl siding is made to be easy to install, which means that you can get the job done in less than half a day. That’s why most homeowners choose to install it themselves. However, it’s always recommended to seek professional help and advice before tackling this project.

The installation process requires the help of a contractor for their expertise. Proper installation means less likelihood that the siding will expand or crack over time, leading to bigger and more expensive maintenance issues. Construction warranties may also be voided by faulty or improper installation, so make sure you do your research and seek professional help if needed.

Material Durability

The material used in vinyl siding is also very durable, meaning it will last for many years. Vinyl doesn’t warp, rot, crack, or peel with time, so you don’t have to worry about costly replacements down the road as a homeowner.

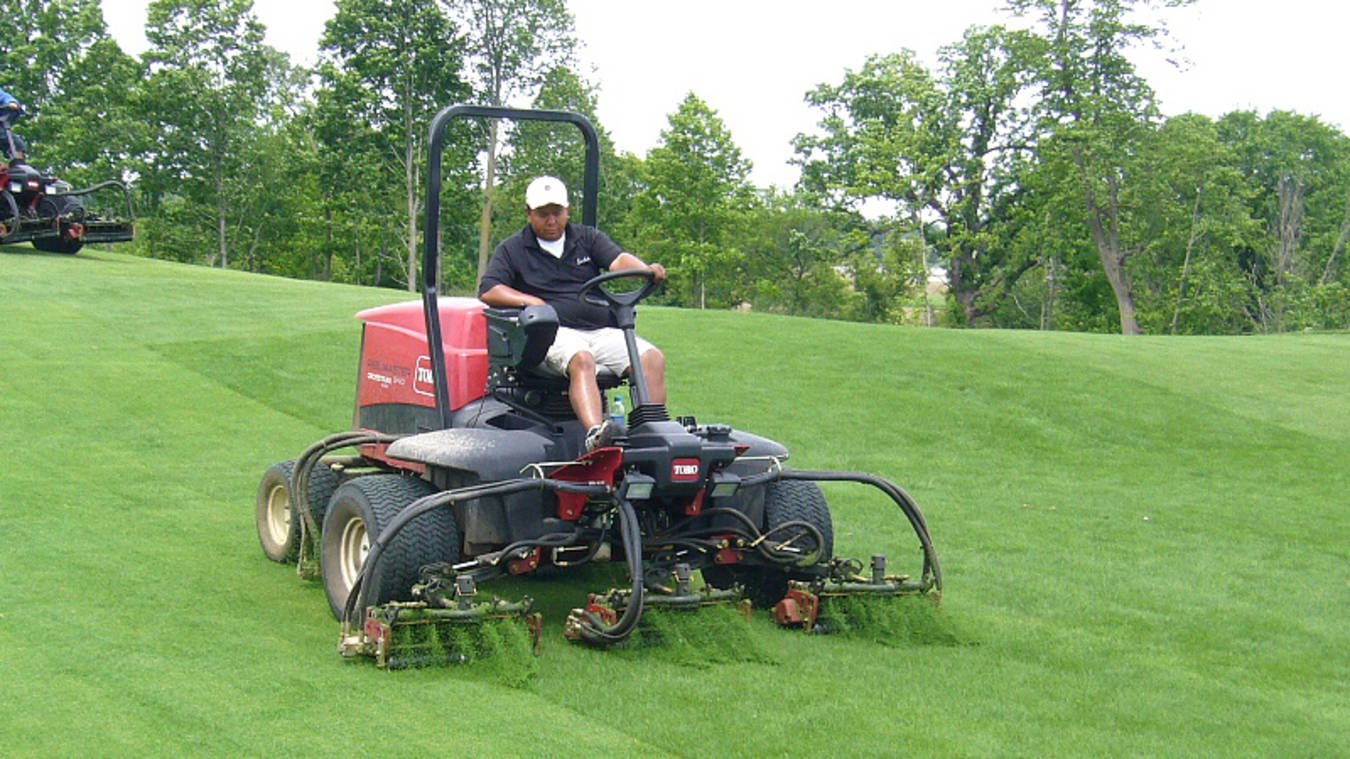
When installed properly, vinyl also won’t shrink, expand or contract over time. This is beneficial to the homeowner who wants a trouble-free product that requires minimal upkeep and maintenance. In case a rock flies from your lawnmower and pierces the siding, you can replace the plank fairly easily and cheaply.

Most manufacturers also boast a lifespan for the vinyl siding of up to 30 years. A properly installed and well-maintained vinyl siding does a good job of protecting a building’s exterior surfaces while keeping its interior well insulated.

Relatively Inexpensive Compared to Other Siding Materials

Like stone or brick, vinyl is an investment. For around $1 per square foot installed (the average cost for new home construction), you get long-lasting siding that will protect your home in many climates. It’s also relatively inexpensive compared to other popular materials such as wood clapboard siding, wood pulp, fiber cement siding, and aluminum.

Though the prices will vary depending on the manufacturer and the installation process, you can expect vinyl siding to cost between $3.50 and $7 per square foot. Fiber cement siding is double that price. So, if you want the most bang for your buck, you can never go wrong with vinyl flooring.

No Painting Required

One of the biggest benefits of vinyl siding is that it does not require painting. This is because the material, made from polyvinyl chloride (PVC), has a color built into it that makes it resistant to sun damage and ultraviolet rays. With no need for paint or maintenance, you will save yourself time and money.

Vinyl siding colors cannot be mechanically abraded, scratched off, or stripped. So, if you wish to restore or change the color of your vinyl siding via residential exterior painting, this siding material is highly receptive to paint. With vinyl siding, you can easily outfit your home or business with any color scheme of your choice as long as you know how to choose paint colors

Vinyl Siding is Low Maintenance

Although vinyl house siding does not require paint, it will wear down over time and need to be replaced. The occasional cobwebs, bugs, mud, and other debris can easily be sprayed down using a garden hose. Never use a power washer on your vinyl siding, as this could cause serious havoc if the water enters your home through cracks around the siding or exacerbate minor tears in the crevices.

Cons of Vinyl Siding

Despite all its benefits, vinyl siding has its setbacks. Here are the cons of vinyl siding:

Moisture Problems

Vinyl houses siding does not absorb moisture; rather, it creates a waterproof barrier between your home and the outside elements. Vinyl siding is installed over a styrene insulation board which can cause water vapor to become trapped in the wall cavity without an escape route.

Vinyl siding
Image credit: http://blog.newhomesource.com/

Thus, if water seeps into small cracks and holes in the vinyl, this can cause major damage to the wood foundation or create conditions that attract mold, mildew, rot, and termite infestation.

Vinyl Siding is Less Eco-Friendly

Vinyl siding is plastic and is made of polyvinyl chloride, which isn’t eco-friendly. The manufacturing process produces greenhouse gasses such as nitrogen oxide and carcinogens, including dioxin. Another by-product of vinyl siding manufacture is sulfur dioxide which causes acid rain and smog.

This process also requires a vast amount of electricity. These gasses and chemicals can contribute to climate change and pollute the air. That’s why most recycling plants do not accept PVC products because they’re both challenging and expensive to recycle.

Vinyl Siding May Lower Your Home’s Value

Although it is cost-effective, vinyl siding still requires a large initial investment. If you’re looking to sell your home soon, this may be a deterrent for potential buyers who might not want the inconvenience of dealing with maintenance and replacement costs on their own.

Vinyl siding may decrease your home’s value since many homebuyers tend to view it as inferior to real wood, masonry, or other materials. It could potentially result in lower offers if and when you decide to move to your home later.

Maintenance Issues

Even though vinyl siding can withstand harsh conditions such as strong winds and heavy rainfall, it can have some maintenance issues. Vinyl siding is sensitive to extreme heat and cold. If you live in an area with harsh winters or summers, your vinyl siding may warp because of the temperature changes.

Besides irregular coloring, warping can also affect how tightly your panels lock together, leading to water damage if it’s not fixed immediately. Siding planks often split or break due to the expansion and contraction caused by temperature changes. If a lawnmower sends a rock flying at your house, it may pierce the siding. Vinyl siding cannot be patched, so the entire plank must be replaced.

Installation is Simple But Not Full Proof

Although vinyl siding is easy to install, it can be expensive to have a professional do the job for you. Vinyl will not bend around corners, so if your house has rounded corners, you’ll need someone with experience installing vinyl siding to do this part of the job. And if your siding is nailed too tightly, it will expand, crack, bulge or warp.

Construction warranties often last only one year, and the product warranty may be voided by faulty installation. Not every contractor has invested in proper training and certification, which is loosely regulated and expensive. Whether you’re investing in a brand new vinyl siding or seeking a siding replacement, you must do your homework well while hiring contractors for this project.

Color Fading

Many vinyl siding brands have been tested to resist color fading when exposed to UV light from the sun. Inferior materials may fade in just a few months, causing homeowners lots of headaches and expenses. In fact, some contractors refuse to use certain products because they don’t hold up well over time.

While there are many vinyl siding manufacturers, not all of them are equal in quality. Indeed, some vinyl house siding brands require homeowners to use specific cleaners and paints. Using the wrong products can destroy your beautiful new siding over time.

FAQS on Vinyl House Siding

What happens if water gets behind vinyl siding?

Rainwater leaking from your gutter ends up behind the siding and causes a wall to rot. However, vinyl is a rare siding product that remains completely unaffected by the water behind it.

What do you put under vinyl siding?

You can install vinyl siding over common wood sheathings such as plywood, oriented strand board, or other materials.

Final Thought on Vinyl House Siding

Whether the pros of vinyl siding outweigh the cons or vice versa, there are many reasons to select vinyl as your siding material or consider other options. But whatever the case, make sure you hire a siding specialist that can install, repair, and replace your property’s siding.


The post Vinyl House Siding: Pros and Cons appeared first on Kitchen Infinity.

Did you miss our previous article…
https://chefbuano.com/?p=1283

Bissell Proheat 2x Revolution Pet Pro Carpet Cleaner Review

Bissell Proheat 2x Revolution Pet Pro Carpet Cleaner Review

If you have pets and your house is carpeted, you know better than anybody that these two can be hard to maintain. But not if you have the Bissel proheat 2x revolution pet pro carpet cleaner. According to those who’ve tried this carpet cleaner, pet hair, pee, and other pet stains are no match for it.

But does it really live up to its name? Is this carpet cleaner worth the price? Well, in this review, we’ll look at the key features, pros and cons, and value of this carpet cleaner. Read on to see if it’s worth your penny.

What Is Bissell Proheat 2x Revolution Pet Pro Carpet Cleaner?

Bissell proheat is the latest high-tech carpet cleaner from Bissell, a company widely known for its quality cleaners. In the age of digital everything, this cleaner is not just your usual machine that sprays water onto your carpets and sucks it back up again with a dirty waste tank also filled with water after being filtered. This cleaner uses hot tap water to clean your carpets and then recycles the water into the tank with little to no wastage.


Image credit: https://www.bissell.com/

This little machine may be small, but it packs a punch. Not only does it offer the perfect carpet cleaning solution, but with its built-in stain remover, it can also remove most pet stains and odors without you having to scrub at them yourself.

Bissell Proheat 2x Revolution Pet Pro Carpet Cleaner Features

This is the best Bissell carpet cleaning machine for pet owners, but what has made it so popular? Here’s a quick overview of this machine’s key features:

Express Clean Mode

The Bissell proheat 2x revolution pet pro carpet cleaner has a one-touch mode specifically for pet stains. Just press the button, and the machine does all the work for you, including heating the water to the perfect temperature. This feature is indeed a time saver for all homeowners who don’t have much time at their disposal. It also has a deep cleaning mode that you can switch to remove stubborn stains.

Heatwave Technology

This Bissell cleaner also comes with Heatwave technology, which helps maintain the cleaning temperature. With this, your carpets are always being cleaned at the right temperature, no matter how long the job takes. You don’t have to worry about always adjusting the temperatures, which can be time-consuming.

Dual DirtLifter PowerBrushes

These PowerBrushes help you dig deep down into the fibers of your carpets and extract all the dirt, dust, and pet hair. The brushes loosen all the dirt before actually removing them and leaving your carpet as clean as new. Not only will this leave your carpets cleaner, but it will also extend their lifespan. This feature comes in handy for anyone who wants to deep clean a carpet

ntibacterial Cleaning

If pet odor takes over your carpet, no need to worry if you have this machine. With its built-in antibacterial cleaning, this machine will eliminate the stench that comes with pet stains and odors. The technology controls all the bacterial that could be hiding in your carpet, living it clean and fresh.

2-in-1 Upholstery Tool

Another thing you’ll love about this machine is the 2-in-1 upholstery tool. This tool lets you clean furniture, stairs, and other delicate surfaces easily. The narrow width of the tool means that you can get into tight spaces and remove all the dirt, dust, and pet hair with little effort.

Comes Complete

If you buy this pet carpet cleaner, you won’t need to buy anything else separately as it comes fully equipped for the job. The machine comes with an 8-ounce bottle of Bissell’s professional Deep Cleaning formula, a trial size of their SpotBot Pet stain remover, a crevice tool, and a dirty water tank to collect dirty water that comes from carpet cleaning. In addition, the machine features a generous 3-year warranty.

Comes Complete
Image credit: https://www.thespruce.com/

Bissell Proheat 2x Revolution Pet Pro Carpet Cleaner Pros and Cons

Pros:

Here are some things that you’ll love about Bissell proheat 2x revolution pet pro carpet cleaner:

Hot tap water is used to clean your carpets: This means less wastage, so you’re being eco-friendly when using this machine. It saves time and effort by having a pre-programmed one-button mode for pet stains.Made specifically for pet owners: If you have pets, this machine comes as a huge relief as it has tons of features that are perfect for pet owners. These include the Express Clean Mode, Heatwave technology, and antibacterial cleaning. It also comes with a 2-in-1 upholstery tool for delicate surfaces.3-year warranty: This machine is built to last, and in case anything does go wrong, you’re covered with a generous 3-year warranty.Easy to Use: The machine also comes with a user guide, making it easy for you to set up and start using it.It offers powerful cleaning: The Dual DirtLifter PowerBrushes help to dig deep into the fibers of your carpets and extract all the dirt, dust, and pet hair. This leaves your carpet as clean as new.Easy to clean: This carpet may be bulky, but it’s one of the easiest to use even for those learning how to clean a carpet. You have to plug it in, wait till the Ready indicator light turns on, and press the Express Clean button.Comes complete: All you need to get started is included when you buy the Bissell carpet cleaner. This includes a 32 oz bottle of their professional deep cleaning formula, a trial size of their SpotBot Pet stain remover, a crevice tool, and a dirty water tank at no additional cost.

Cons:

Here are some things you might not like about Bissell proheat 2x revolution pet pro carpet cleaner:

Heavy and bulky: The machine is heavy and bulky, making it difficult to move around when cleaning. The cord is also short compared to other machines.Makes noise: The machine makes quite a bit of noise when used, which might be a problem for some people.Only cleans carpets: If you’re looking for a machine that can also clean your furniture and stairs, then this is not the one for you.Not easy to set up: The machine is not as easy to set up as some other machines on the market. However, it comes with a detailed instruction manual that you need to keep nearby.

Bissell Proheat 2x Revolution Pet Pro Carpet Cleaner Performance Comparison

The Bissell proheat 2x revolution pet pro carpet cleaner is a clear winner when it comes to performance comparison with many other carpet cleaners. It has many perfect features for pet owners, such as the Express Clean Mode, deep clean mode, Heatwave technology, and antibacterial cleaning. In addition, it comes with a 2-in-1 upholstery tool for delicate surfaces. The machine also offers powerful cleaning with the Dual DirtLifter PowerBrushes.

So, if you’re looking for a powerful and efficient pet carpet cleaner, the Bissell proheat 2x revolution pet pro is a perfect choice. It comes with a generous 3-year warranty and is easy to use. Plus, it’s perfect for removing pet stains and hair from your carpets.

Should You Buy Bissell Proheat 2x Revolution Pet Pro Carpet Cleaner?

So, are you asking if this carpet cleaner is really worth it? Well, you have the answer in the review above. But to be sure, we can guarantee that the carpet cleaner is worth the money considering all the features and the advantages. Bissell proheat 2x revolution pet pro carpet cleaner is a perfect choice for pet owners who need to deep clean their carpets. And if you’re looking for a machine that’s easy to use, this is just what you need.

Not to mention that it’s not as expensive as other carpet cleaners out there. So, if you’re looking for a powerful and efficient pet carpet cleaner, the Bissell proheat 2x revolution pet pro is a perfect choice. It comes with a generous 3-year warranty and is easy to use. Plus, it’s perfect for removing pet stains and hair from your carpets.

Well, we won’t fail to mention the downsides, which are, as we have already said, the weight and noise. Plus, it’s not easy to set up and not suitable for cleaning stairs and furniture.

To sum it all up, this is a good buy if you’re looking for a carpet cleaner that can solve your pet hair problems. So, if you have the money, go ahead and buy it.

What Users are Saying About Bissell Proheat

Bissell proheat rates well online as most users give it a 4 to 5-star rating. Most positive reviews praise the carpet cleaner for its powerful cleaning performance. However, some negative comments say that it’s heavy and bulky, just as we’ve stated.

One reviewer said they love the carpet cleaner because it gets rid of pet stains in just minutes. They also mentioned that their pets love to drink from a certain area of their home, which has resulted in tough stains over time. Overall, most users love this carpet cleaner and won’t hesitate to refer others.

Our Verdict on Bissell Proheat 2x Revolution Pet Pro Carpet Cleaner

We think you won’t find a better carpet cleaner for pet owners than Bissell proheat. The reasons are obvious. First, the rug doctor has a unique design that makes cleaning easy and efficient. Second, the Dual DirtLifter PowerBrushes make deep cleaning a breeze. Plus, it comes with a generous 3-year warranty and lets you clean carpets as well as furniture and stairs.

So, if you’re looking for a powerful carpet cleaner that’s perfect for pet owners, Bissell proheat 2x revolution pet pro is the one you need. It’s easy to use and efficient, making it a great choice for busy pet owners. You can’t go wrong with this carpet cleaner if you want to always have a clean carpet.


The post Bissell Proheat 2x Revolution Pet Pro Carpet Cleaner Review appeared first on Kitchen Infinity.

Did you miss our previous article…
https://chefbuano.com/?p=1279

29 Christmas Table Decorating Ideas

29 Christmas Table Decorating Ideas

You want to add some Christmas spirit to your table, but you don’t know-how. The best way to get into the holiday mood is by adding a variety of colors and decorations that will make everyone feel merry and bright at dinner time.

Adding color can be as easy as changing up your tableware and adding seasonal patterns or textures. There are so many things you can change around on your table, from napkin rings, placemats, glassware, candles.

Having a colorful place setting with beautiful details will help set the tone for an enjoyable evening with friends and family. To help you out, we have put together this quick guide with everything you need to know about decorating your Christmas table.

1. Wreath Christmas Table Runner & Napkin Rings

For a simple yet elegant table setting, you can place a green wreath with red berries at the center of your plate. This is one of the easiest ways to incorporate festive details into your decor while combining textures and varying levels for an exciting tabletop.

The naturalness of the materials used makes this table runner very easy to match with most decor styles. Using mini wreaths as napkin rings is one of the best Christmas decorations you can bring to the table setting.

2. DIY Mason Jar Centerpiece

If looking for a festive centerpiece idea, look no further than the classic Mason jar. If you like this idea but are not really into DIY projects, we found some easy and affordable premade mason jars that we think are perfect for your holiday table.


Image credit: https://masonjarbreakfast.com/

3. Add Dimension and Height to Your Decor

Bring your Christmas table decor to life by adding dimension and height. This is very easy with flowers, garlands, and candles on your table. These items can be easily found at your local craft store or big-box retailer.

4. Bring Mercury Glass Candles

Create a Christmas tablescape design using mercury glass holders. The mercury-looking finish is a big trend right now, so you’ll be able to find this kind of table decor in different shapes and sizes. It will add an interesting detail that catches the eye.

Bring Mercury Glass Candles
Image credit: https://i.pinimg.com/

5. DIY Garland Runner

Keeping your Christmas tablescape nice and simple is a great way to uncomplicate holiday decorating. Incorporating a no-fuss garland runner with white candles combined with cinnamon sticks and a holly place setting is the perfect way to decorate your Christmas table without spending too much time or money.

DIY Garland Runner
Image credit: https://www.guidepatterns.com/

6. Farmhouse Style Christmas Table Decor

This is a perfect example of how to use rustic Christmas decor. Farmhouse style is all about shabby chic and handmade details, so your Christmas table will look warm and inviting in no time.

7. Vertical Garland Ideas for Christmas Tables

Vertical garlands are the new trend in Christmas decor, and this modern take on a traditional wreath is stunning. You can add it to any empty wall space in your home; the staircase, behind the front door, or above your mantelpiece, for example. The garland feels festive but not overly Christmassy, creating a conversation piece to anchor the holiday dining area that you won’t feel pressured to take down too soon. Use dramatic green and white garland hung on the wall behind the dinner table.

8. Woodsy Christmas Table Decorations

This chic rustic motif is all about keeping it real. These holiday centerpieces are made with natural elements that you probably already have on hand at home or can acquire easily enough. This is a great theme if you want to mix modern and traditional, using fresh flowers for height and fallen tree branches to display your lovely vintage ornaments.

Woodsy Christmas Table Decorations
Image credit: https://i.pinimg.com/

Details like forest green candles and napkins, a striped linen table runner, a vase full of white flowers and seasonal greenery, olive wood napkin holders, and chargers will add a homey look to your Christmas table.

9. Mint and Gold Holiday Table Decorations

A touch of mint gives this table a fresh feel, but the pure white flowers and soft gold cutlery decorations keep it from looking too cool and contemporary. The result is a pretty backdrop that feels romantic and elegant mixed without being stuffy or overbearing.

10. DIY Mini Cranberry Wreaths

These mini wreaths are quick and easy to whip up, but they pack a major visual punch. Make them in minutes with simple craft supplies like ribbon, twigs, berries, and glue. Decorating your Christmas table doesn’t have to be an elaborate affair to make a big impact.

DIY Mini Cranberry Wreaths
Image credit: https://ae01.alicdn.com/

Bring in cranberries, tree trimmings, and stamped brown Kraft paper name tags to create a festive Christmas brunch place setting that will make your guest feel welcome and special.

11. Mini Birch Branch Trees as Christmas Table Decoration

Add a rustic and natural element to your Christmas table setting with these simple yet elegant DIY mini trees. These easy Christmas centerpiece ideas can be finished in just minutes, and they add a natural touch of elegance to any holiday season.

Brighten up the season by mixing red, green, blue, and silver when decorating your Christmas table! A great way to do this is by using a favorite Christmas ornament as the centerpiece and filling your table with red, green, and silver plates, glasses, and chargers.

12. Cake Stand Centerpiece

Using a cake stand as the base of a table centerpiece is one of the ways of decorating your table while hosting a Christmas dinner. Bring group candles and sprigs of greenery atop a cake stand for an easy Christmas table.

Cake Stand Centerpiece
Image credit: https://ae01.alicdn.com/

13. Outdoor Christmas Table Decorations

Add a touch of whimsy to your holiday dinner table with these festive ideas for outdoor Christmas table decorations. Outdoor-friendly centerpieces, place settings, and more. You can mix vintage candlesticks, wood plates, and a natural centerpiece of leaves and flowers to create a non-traditional, laid-back festive vibe.

14. Chandelier Hanging Christmas Centerpiece

Think way outside the box with these unique Christmas table decorations. Hang a chandelier over your dining room table and attach candles to it for a sparkly gold atmosphere.

15. Table Runner

A table runner is another great idea for adding warmth to your Christmas decor. Pick one that features holly or bows, or go for a classic red-and-green color scheme. The table runner should be a few inches wider than your table to leave room for plates and other items.

16. Consider Royal Purple

Mixing a pale green and natural red centerpiece with unexpected royal purple accents can be an eye-catching and modern approach to your holiday dining table decor. Plus, the unexpected royal purple napkins can create unexpected twists on holiday table decorating.

17. Natural Gold

Try to play with pale golden wood tones in your modern dining room table by creating a gold and white Christmas brunch table with gold flatware, white and gold dishes, white napkins, faux snow, and a fuzzy white table runner. You can also line it up with gold and white vases filled with flocked greens.

18. Consider Candy Cane Centerpiece

Grab the mini candy canes that didn’t make it onto your Christmas tree and put them to use as Christmas centerpieces.

19. Consider Icy Blue

Blue and silver is a wintery color combination, which can be used to create an elegant feel on your festive table. Keep the rest of the decoration simple by adding white candles, silver cutlery, and white flowers. Bring in vases holding bright pinkish flowers to add a more traditional Christmas note.

20. Kitchen Island Ideas

If you love to cook, you can create a rustic atmosphere for your holiday table by adding pinecones, fresh cranberries and even tiny LED lights on the tablecloth. While some people prefer simple looks for their Christmas tables, you can use wooden spoons as decor. Set them on top of napkins folded like Christmas trees.

21. Pretty Peninsula

If you are looking for a more modern approach, visit glamorous homes on the web to find out how they decorate their Christmas tables. Decorate your table with all white flowers in elaborate vases. If you love trinkets, this is the best time of the year to bring them out. The kitchen peninsula can also stay up all season, making even small meals or coffee breaks feel festive, and the kitchen comes alive with holiday spirit.

22. Oranges, Cedar, and Walnuts

Another modern table runner is to light your table with candlesticks instead of vases. Set an orange on the center of each plate, and lay dried cedar springs or bay leaves all around it. Finish this arrangement by adding walnuts, apples, or napkin rings

23. Consider Starlight Season

The night is not only the best time to view stars but also a wonderful time to deck your table with them. You can hang small white lights from the bottom of tall silver vases and fill each one up with water. Next, add starlight garlands from these tall vases to the tabletop. Finish by placing votive candles around the table.

24. Create Extra Comfort by Using Ribbon Tied Chairs

Chair ties are always a great option for table decorating ideas. If you have chairs that do not feature these, use ribbon wrapped around them to create bows at the back or front of each chair.

25. Use Taupe

Use a chic and understated color palette of taupe, black and white to complement your decor while creating a holiday theme. Add some nicoly leaves and grasses from your garden to add a festive look and a subtle scent. Finish it off with a mix of votive candles and candlesticks for a candlelit glow.

Use Taupe
Image credit: https://loveincorporated.blob.core.windows.net/

26. Add Christmas Vibe with Stripes and Checks

Opt for stripes and check-in contrasting colors if you do not want to go with a solid and chic color like taupe. Match them with your tablecloth or runners to create a unified theme. Try red and green, black and white, or even blue and beige; the choice is yours.

27. Create Dazzling Christmas Centerpiece with Twisted Ribbon

Why not try a ribbon centerpiece if you want something striking and exceptional? It is easy to make too. Just take some colorful ribbons of different sizes and wrap them together in a loose twist before securing them around the base of your candlesticks or votive candle holders. You can add some pine cones for extra appeal.

28. White and Silver is Always in Style

Just bring in the metallic theme if you prefer a more glamorous look. White evokes crisp cleanliness, while silver gives an opulent appeal. Just add some pine cones or berries to break the monotony of the color scheme. This might seem too simple, but it can create a huge impact when you consider that minimal effort is needed to create this look.

29. Christmas Tree Table Decorating Ideas

If you want a more dramatic effect, go for a Christmas centerpiece. It can make a huge difference and be a conversation piece. Just get your artificial tree and dress it up with some colorful ornaments in silver or white colors. You can leave it as it is or add some pine cones or berries.

If you are into miniatures, this might be your thing for table decorating ideas. Of course, there’s a lot of preparation involved, so if you have the budget and time, go ahead and do this. Different themes are available, but you can choose your favorite or mix and match. You can either focus on the human-sized miniatures or go for the tiny trees.

FAQs on Christmas Table Decorating Ideas

Why is tableware important in table setup?

The right tableware helps to set the mood by complementing both the food’s visual aspects and the general theme of the dinner.

Final Thought on Decorating Christmas Table

There you have it. While decorating your Christmas table, you have to pick one or two that you like and then go ahead with it. This will help in making the dinner more memorable for years to come.


The post 29 Christmas Table Decorating Ideas appeared first on Kitchen Infinity.

Did you miss our previous article…
https://chefbuano.com/?p=1270

Acidic Soil: What It Is, How You Can Change It

Acidic Soil: What It Is, How You Can Change It

Finding the right soil pH is important for the health of your plants. A proper pH balance helps plants develop strong root systems and uptake vital nutrients. While many gardeners focus on adding organic matter to their soil, testing soil pH levels is equally important.

Once you find your soil’s pH level, you can add things like limestone or elemental sulfur to balance it out. Acidic soil can be a real problem for your plants. It can stunt their growth and prevent them from absorbing basic nutrients needed for healthy plant development.

In this article, we’ll explain all about the importance of pH levels in your soil and how you can adjust them to help keep the plants happy and thriving. Let;’s get started.

What is Acidic Soil?

Acidic soil is soil that has a pH level of less than 7.0. This means that the soil is more acidic than neutral and can challenge plants to grow. The most common causes of acidic soil are high levels of rainfall, pollutants, and chemical fertilizers. The soil pH scale ranges from 0 to 14 with 7 as neutral.


Image credit: https://blog.zoysiafarms.com/

Acidic soil can have a harmful effect on plant growth by inhibiting nutrient uptake, damaging root systems, and causing leaf discoloration. It can also be a haven for pests and diseases.

Evaluating Soil

Identify Your Soil Type

Before testing your soil or adding anything to it, it is important to know what type of soil you have. Understanding the ecology of your land will help you determine if acidic soil is a result of natural conditions or something that you can fix.

For instance, well-drained soil and loose soil will be easily altered, while compacted soil with lots of clay in it will be difficult to change.

Understand Your Soil pH

Soil pH is a measure of how acidic or alkaline your soil is. A pH of 7 is neutral, below 7 is acidic, and above 7 is alkaline. The lower the pH, the more acidic the soil. Soil pH value can be affected by many things such as rainfall, organic matter, minerals in the soil, and the types of plants growing there.

Consider What You’re Planting

Some plants prefer more acidic soil than others. For example, blueberries and azaleas thrive in acidic soil, while rhododendrons and dogwoods prefer more alkaline soil. If you’re trying to grow a plant that prefers a different pH than your current soil, you’ll need to adjust the pH.

Test the soil’s pH

Testing the soil’s pH is as simple as buying a kit at your local nursery, or you can ask your county extension agent for a soil sample and testing instructions. Once you’ve tested the pH, make plans to raise or lower it depending on what kind of plants you want to grow and their preferred pH level. The good news is that there are simple DIY soil tests that you can do.

Have Your Water Tested

Your water supply might be what is affecting the soil’s pH level, so have a sample of your well or tap water tested to see what its pH is. If you don’t test the soil and the water, you’re not going to know whether your problem is with your soil or your water supply.

How to Change Soil pH

Make sure you check your soil’s pH every year by sending a soil sample to your local extension office to have them perform the test for you.


Increasing Soil pH

To make soils less acidic, the common practice is to apply a material that contains some form of lime. Ground agricultural limestone is also frequently used. Here are other ways of increasing the pH level of your soil:

Increasing Soil pH
Image credit: https://deepgreenpermaculture.files.wordpress.com/

Pick a Liming Material

There are many liming materials on the market, and they come in different forms. These ground limestone products include pulverized, granular, pelletized, and hydrated. Depending on your soil type and the amount of moisture in the ground, one of these products might be a good option. 

Pulverized lime is finely ground and easily absorbed by the soil. However, it’s more difficult to spread because it can clog the applicator. Granular and pelletized lime is less likely to clog when spread with a fertilizer spread over turf areas.

However, it’s not as effective at altering the soil pH. Hydrated lime should be used with extremely acidic soils because it’s more water soluble and can quickly increase the soil’s pH. Some lime sources contain micronutrients like dolomite, a mixture of calcium and magnesium carbonates.

However, you should only use dolomite lime if your soil is magnesium deficient. Do not add more magnesium to soils that are already high in it.

Consider Adding Wood Ashes

Wood ashes can also be used to increase the pH of acidic soils. The potassium, calcium, phosphate, and boron in wood ashes help to make the soil more alkaline and provide some nutrients to plants. 

When using wood ashes, it’s important to take into consideration the amount of sodium present. However, wood ash is not as effective as lime, but it can dramatically increase a soil’s pH over time.

Due to this, you should closely monitor your soil as you apply wood ash. Keep the ash from contact with any plant roots or germinating seedlings because it may damage them.

pply the Liming Source

Once you’ve determined that your soil is acidic, the next step is to add a liming source. A liming source is an agent that helps raise the pH of acidic soils. There are many different liming sources available, but the most common are limestone and lime.

Water the Soil Regularly

Putting a liming source into your soil is not enough. You must water it to help it move through the soil to where you want it. Lime moves through the soil very slowly, so be patient; wait at least one growing season before testing your soil again.

Decreasing the Soil pH

Some types of fertilizers can also help acidify the soil and most of them are safe to apply. These acidifying fertilizers include monoammonium phosphate, ammonium sulfate, diammonium phosphate, urea, and ammonium nitrate. Make sure you read the label on the fertilizer bag to determine if it’s acidifying fertilizer.

Use Organic Materials

Over time, organic matter such as pine needles, compost, or composted manure can acidify the soil. If you have added organic mulches to your soil in the past, test your pH annually. Organic matter is also good in improving soil drainage and aeration.

Consider Applying Sulfur to Lower Soil pH

Sulfur can help adjust the soil’s pH to desired levels. It is especially helpful for high-pH soils. However, sulfur does not last as long as lime, so you may have to reapply every few years. You should use elemental sulfur rather than sulfate or sulfite forms of sulfur that can be harmful to plants.

An excellent way to lower the pH value of small beds or garden areas is the addition of sphagnum peat. Sphagnum peat is also a good source of organic matter. Granular sulfur is also the safest, least expensive, but the slowest acting product to use when lowering your soil pH. The addition of sphagnum peat to large areas would also be cost-effective.

pply Aluminum Sulfate if Soil pH Is too Low

If the soil pH value is too low, you can apply aluminum sulfate to increase the acidity. This compound makes the soil more acidic due to a chemical reaction involving aluminum. Be sure to read the product label to ensure that the aluminum sulfate you are using is specifically for agricultural use. Also, avoid applying aluminum sulfate if the soil is already too acidic.

Apply Aluminum Sulfate if Soil pH is too Low
Image credit: https://blog.lawneq.com/

Till the Materials into the Soil and Water Well

When applying lime, sulfur, or aluminum sulfate to the soil, be sure to till them into the soil and water well. This will help the materials to dissolve and move through the soil so that plants can absorb them. If you do not water your fertilizer well, plants may not receive all of its benefits.

Rinse Your Plant After Application

If you are applying any fertilizer to your plants, be sure to rinse them off with water after application. This will help to remove any residue that may remain on the foliage and prevent any damage from occurring. 

If sulfur or aluminum sulfate gets on the leaves of your plants, you’ll need to rinse it off with a hose. Failure to rinse them off can result in burns to the leaves and damage to your plants. Watering your plants will also help the compounds.

FAQs on Acidic Soil: What it is and How You Can Change it

What happens when the soil is acidic?

Soil acidity decreases the availability of plant nutrients such as phosphorus and molybdenum. It also increases the availability of some toxic levels, such as manganese and aluminum.

Is acidic soil good for plants?

No, it’s not. Acidity can stunt a plant’s growth and make it more susceptible to pests and disease. However, most plants thrive in slightly acidic soils because that pH affords them good access to all nutrients.

Why is it important to control the pH of the soil?

A soil’s pH is one of its most important characteristics because it influences the availability of essential nutrients for plants. By managing the pH, you can ensure your plants have what they need to thrive, increasing yields and decreasing inputs.

Final Thought on Acidic Soil: What it is and How to Change it

There you have. Taking your soil acidity into account is an important part of gardening, whether you’re trying to grow acid-loving plants or not. Luckily, it’s not difficult to manage the pH of your soil, and most soils can be brought into a desirable range with a little effort. 


The post Acidic Soil: What It Is, How You Can Change It appeared first on Kitchen Infinity.

Did you miss our previous article…
https://chefbuano.com/?p=1265

How to Remove Gasoline Stains and Odors

How to Remove Gasoline Stains and Odors

Gasoline is one of the most difficult stains to remove from clothing or carpeting. The stain will not only be hard to remove, but it can also cause an unpleasant odor. Since gasoline evaporates quickly, you have a short time frame to clean up and treat the stain before it becomes permanent.

Luckily, there are several ways that you can go about removing gasoline stains and odors from your clothes and carpets. Below, we’ll cover some of the more popular removal methods.

Before You Begin

Before you start, make sure you test any detergents or cleaning solutions in an inconspicuous area to avoid damaging the fabric. Cleaning chemicals and the dryer’s high heat can interact with the gasoline, so it’s not safe to use a home dry cleaning kit for these stains.

If it’s dry clean only, immediately take the garment to a professional dry cleaner. Do not dry the clothes in a clothes dryer until the stain is entirely gone. This is because if gasoline is still present in the garment, it can ignite your dryer and cause a fire. 

Tools and Materials

Paper towelsSoaking basinWashing machineScrub brushBaking sodaWaterStain remover stick, spray, or gelAmmoniaVinegarOrange cleanerDish soap

Instructions

Remove Excess Gasoline

If the gasoline splashes on your clothing and has begun to soak into the fibers, you need to remove it as much as possible immediately. Place a couple of paper towels over the stained area’s top, press down, and then pat dry with another clean paper towel until no more gasoline transfers from the garment. 


Image credit: https://www.thespruce.com/

You can also use baking soda to absorb gasoline from a wet spot on your clothing. Make sure you prevent the flammable towels or cloths used for blotting from starting a fire by setting out the cloth or towel to air dry. Flammable gas fumes will dissipate in the open air.

Once your item is dry, find a sealable metal tin, put the towel or cloth in it, and wet the material until it’s damp. Seal the container and discard it with your trash. 

Pre Treat with Stain Remover

Before you treat the stain with a stain remover, test the product on an inconspicuous area of the garment to ensure that it does not cause any discoloration or damage to the fabric. Apply a liberal amount of the stain remover to the clothing.

Pre Treat with Stain Remover
Image credit: https://www.thespruce.com/

Stain removers can be found at most local grocery stores in either an aerosol can or a liquid form. Wash the clothing at the hottest setting appropriate for the fabric. Hot water is necessary to remove the gas fully from the clothing.

Use Liquid Dish Soap or Heavy-Duty Laundry Detergent

Dish soap has powerful enzymes that can help it break down oil and grease left behind by food, and it can work very well for other stains such as gasoline. You can also use enzyme-based heavy-duty liquid detergent.

Apply two tablespoons of dish soap or liquid detergent with a soft-bristled brush. Allow your clothing to sit for up to five minutes before soaking it in hot water for 30 minutes. Make sure you use the hottest water safe for the fabric type. Remember not to use DIY laundry detergent as it won’t be effective enough.

Treat with Baking Soda Paste

Another great way to remove gasoline stains and odors is to make a baking soda paste. Mix two parts baking soda to one part water in a bowl. Apply it to the stain, then use a scrub brush to rub it into the fabric. Leave your clothing out to air dry to absorb the paste, then brush off the excess baking soda.

If the stain and odor remain, repeat the step or soak the stained clothes overnight submerged in water with one cup of baking soda added. Wash, rinse, and check for odor. Repeat the baking soda paste application or baking soda soak until the odor is gone.

Soak Lingering Odors White Vinegar

If you still have a gasoline smell after trying baking soda, you can try using white vinegar. Pour white vinegar into a spray bottle and spritz the area where the gasoline odor is present. Let the vinegar sit for about 30 minutes, then blot it up with a cloth.

The vinegar smell will dissipate over time. If you want to get rid of the gas smell in your car, soak the gas with old towels or clean rags as quickly as possible. Then use a mixture of equal parts baking soda, white vinegar, and hot water to neutralize the odor. 

Rub and wipe it away with a clean rug. If the smell lingers, use a few sprays of Febreze to get rid of the smell.

Soak Heavily Soiled Items in Ammonia Solution

Another way to remove gas stains and odors is by using ammonia. Soak the clothing in the washer full of warm water and one cup of non-sudsing household ammonia. This will smell, so make sure you shut the lid. Let them soak for several hours overnight, then drain and wash as usual. 

The ammonia will neutralize the gasoline odor. Never use chlorine bleach or detergent containing chlorine with ammonia. This mixture can make a dangerous chlorine gas that produces toxic fumes.

Remove Gasoline Stain with Coca Cola

Another household remedy for gasoline odor and stains is Coke. Soak the stained clothing in a bucket of Coca-Cola and let sit overnight before washing as usual. This will also remove any grease, oil, or tar stains from items such as motor oil and grease stains on clothes, driveway spills, and grass trimmings stuck to your clothes after cutting the lawn.

You can also add two cans of Coke and one box of baking soda to a sink filled with cold water. The Coke will break down the stain while baking soda absorbs the odor.

Fast Orange Laundry Detergent

If you have a severe gasoline odor, Fast Orange is a laundry detergent that can help. This detergent is formulated to remove stains and odors on clothes caused by gasoline, oil, and other mechanical fluids. Add one cup to your washing machine and let it run through the entire cycle.

You can also use this detergent for hand washing by pouring a little of it into the water, stirring it up, and letting the fabric soak for about 30 minutes. Then rinse the clothing, and the gasoline stain and odor will be removed.

FAQs on How to Remove Gasoline Stains and Odors

Can you put gasoline-stained clothes in the dryer?

It’s not good to put gasoline stained clothes in the dryer because the heat will set the stain and make it harder to remove. The best way to dry clothing that has been stained with gasoline is to line dry or air dry the clothing outside. This will help to dissolve the fumes and reduce the risk of fire.

Can you use bleach on gasoline stains?

You should never use bleach on gasoline stains because it will make them worse. Gasoline stains are oil-based, and bleach will only set the stain, making it more difficult to remove.

Final Thought on How to Remove Gasoline Stains and Odors

Gasoline can be a tough stain to remove. But if you follow the above tips carefully, removing gasoline stains and odors won’t be a problem. Also, consider pre-heating the clothing with the right products to break down the stain and odor before washing to effectively remove these types of stains.


The post How to Remove Gasoline Stains and Odors appeared first on Kitchen Infinity.

Did you miss our previous article…
https://chefbuano.com/?p=1261

10 Houseplants You Can Grow in Water

10 Houseplants You Can Grow in Water

Growing plants in water is not a common practice. Houseplants that grow in water are beautiful and easy to care for. You don’t need any green thumb or special equipment to start growing these plants. All you need is a jar, fill it up halfway with clay pebbles at the bottom, add soil on top of the pebbles. You can then plant your seeds or seedlings and wait until they bloom.

The best part about houseplants that grow in water is that they will last forever without replacing them every year like other types of plants do. These are low maintenance indoor plants which means there’s no need for watering them very often or fertilizing them.  

What which ones are those plants? This article outlines 10 houseplants that grow in water and would be perfect for your home.

1. Spider Plant

This is a very decorative and popular houseplant with many small white flowers, perfect for decorating your home. Spider plant also makes one of the best plants for the bedroom, thanks to its beauty and air purification. It’s great because the leaves on the Spider Plant are so big and add contrast if you place them in a group with other smaller plants or flowers around them.

To grow this plant, take a few cuttings from the parent plant and place them in a glass jar or any container filled with water. You can leave them there or move them into a pot with soil after they root. If you plan on moving them to a pot, let the roots grow until they seem strong enough to support the plant.

2. Lucky Bamboo

Lucky bamboo is one of the easiest plants to grow in water without much sunlight or maintenance. It’s a popular type of houseplant because it’s believed to bring good luck and fortune to the owner. The hardy stalks of lucky bamboo can become a living centerpiece, no soil required. 

The indoor plants grow in water, and a narrow vase is a perfect fit for them. You can purchase these plants online, and their basic versions are inexpensive. The lucky bamboo tends to become top-heavy and will topple in smaller containers, so look for a container that’s sturdy enough.

Plant them in a wider container and surround them with colorful gravel or pebbles, which will add to the ornamental value and provide some support.

3. The Chinese Evergreen

The Chinese evergreen plant is also known as the claw or peace lily plant. The dark green leaves of this houseplant are shaped like claws, and they can grow to be four feet tall. This lush greenery is the perfect indoor plant for beginners because it’s hardy and doesn’t require too much attention.

Chinese evergreen plants are also carefree indoor plants tolerant of low light conditions and general neglect. These features make it a popular indoor plant for those looking for no-fuss greenery. This plant also makes an excellent office or dorm room plant. To grow it in water, clip six-inch-long stems, placing them in a bright room and indirect sunlight as too much light can cause algae growth.

4. Heartleaf Philodendron

Heart leaf philodendron is an easy-to-grow houseplant that thrives even in low light. To grow heartleaf philodendrons in water, cut off any stems hanging over the edge of a container and place them in indirect light until new leaves appear. These vining plants are harder to kill than to keep alive.


Image credit: https://www.thespruce.com/

It has glossy, heart-shaped leaves with stems that can cascade down four feet or more. If you want a more compact plant, occasional pinching back leggy stems will help maintain a bushy growth habit. To grow this tropical plant in water, take a four to eight-inch long stem cutting, remove the bottom leaves, and place them in water.

Keep the container in a site with bright light but away from direct sun. Also, avoid keeping the plant in a cold room as it grows best in temperatures above 70 degrees Fahrenheit. Feed philodendron plants occasionally by adding a drop of liquid organic fertilizer to the water.

5. Sweet Potato Vine

Although the sweet potato vine is a tender tropical, it can be grown in water indoors. Cuttings should be made from green stems and allowed to heal for at least 24 hours before planting them in containers filled with peat-based potting mix or a mixture of perlite or gravel and sand. This trailing plant can grow four to five feet long.

It has lime green, heart-shaped leaves, but many cultivars offer unique and eye-catching foliage. Leaf colors range from burgundy to purple to bronze, and foliage is also varied for layers of interest. You can clip pieces of the stems in autumn to grow indoors over winter, then take six to eight-inch long cuttings, clipping just below a leaf node.

6. Coleus

Coleus plants are easy to propagate and grow by rooting stem cuttings in water, allowing you to create a colony of handsome coleus houseplants. They make a lovely counterpiece in a mason jar filled with water. 

Coleus
Image credit: https://www.chatelaine.com/

To grow coleus, take a six-inch cutting and remove the leaves from the bottom four inches, then immerse it in a jar filled with water and watch it grow for several weeks. Adding a bit of compost tea to the water during monthly changes will help your coleus plants thrive. This plant also requires indirect sunlight, making it a great choice to grow indoors all year round.

7. Peace Lily

The peace lily is a lovely tropical plant with showy white flowers, which enjoys the humidity of the bathroom. It will grow in water as long as you provide it with indirect light and room to spread. In order for your peace lily plants to thrive, you should rinse them carefully before putting them into their jar of water. 

This will help remove any built-up fertilizer salts. If you buy peace lilies, examine their roots carefully for damage before planting them. Fill a container with distilled water and not chlorinated water, which will damage the plant. Cut a hole on the top of a plastic stopper and use this to keep the plant in place by placing it at the top of the container.

Insert your lilies in the container and ensure the roots are completely submerged. You can add a few drops of liquid fertilizers or a small quantity of water soluble fertilizer. However, be careful with a peace lily in the house as it’s among the plants that are toxic to pets

8. Wandering Jew

Wandering Jew is one of the easiest houseplants to grow using this method. The plant should be well watered before you place it in its container. You don’t have to worry about fertilizer because it has no nutritional needs. 

To grow a wandering Jew in water, submerge the cuttings from the mature wandering Jew plant in a jar of water, submerging only the stem and not the leaves as the latter submerged in water will rot the cutting. Leave in an area with plenty of sunlight and watch it root in just a few weeks.

9. Impatiens

The key to successfully growing impatiens in water is to select the right kind of stem cuttings. Take young, soft shoots that are just pink in color with no flowers or buds. Cut off about 1 inch of these shoots under running water.

Impatiens
Image credit: https://www.chatelaine.com/

Impatiens can also grow as marginal pond plants, and that’s how much they adore water. Snip off a few stems at the end of the growing season and overwinter them in a vase where they’ll root and grow as clones of the parent plant.

10. Pothos Plant

Pothos plants are some of the easiest houseplants to grow in water. Cut off a stem or two from an existing pothos plant and place them in a vase or jar of water. Plant the stems in the soil as soon as they root (usually within 2-3 weeks). Make sure the potting soil is damp but not wet.

Pothos Plant
Image credit: https://empire-s3-production.bobvila.com/

FAQs on Houseplants You Can Grow in Water

What are growing plants in water called?

The technique of growing plants in water without soil is called hydroponics.

What are the benefits of houseplants grown in water?

Houseplants grown in water generally have more vigorous growth and lush foliage than those grown in soil. They’re also easier to care for because you don’t have to worry about watering them regularly or fertilizing them.

Final Thought on Houseplants that You Can Grow in Water

Are you looking to add some green cover but lack space and time in your home? Well, with these house plants that need only water to grow, it’s easy to have some plants around that don’t require much attention. In addition, these indoor plants add life to an otherwise dull dorm or living room. So, what are you waiting for? Plant these house plants and enjoy the beauty they bring.


The post 10 Houseplants You Can Grow in Water appeared first on Kitchen Infinity.

Did you miss our previous article…
https://chefbuano.com/?p=1255

20 DIY Couch Cover Ideas

20 DIY Couch Cover Ideas

You have a couch that’s past its prime time, and you’re on a tight budget. There are plenty of ways to update your couch, but most of them require spending money or taking up too much time. When you turn to these DIY couch cover ideas, then you won’t have to buy new furniture for your house.

Whether you want a new couch and chair or you want to redo your bedroom, there’s always a slipcover for your headboard. These slipcovers are easy to do and will instantly transform your home. Plus, you can give your old couch and chair a new look by spending only a fraction of what it would cost to replace them. 

Here are DIY couch cover ideas for making your custom slipcovers in no time at all.

DIY Sofa Slipcover

This sofa slipcover is perfect for those who want to update their furniture on a budget. You’ll need some basic supplies, including a sewing machine and fabric. You’ll also have individual covers for the frame and cushions. This way, you won’t have to worry about constantly adjusting your cover every time someone sits on it.

DIY Drop Cloth Slipcovers

Repurpose old drop cloths to make your slipcovers. Depending on the look you want to achieve, you can make them patchwork-style or one solid piece. If you plan on painting your walls, this style is great because you can remove it at any time without damaging the underlying fabric.


Image credit: https://i.pinimg.com/

You can find drop cloths at almost any departmental or home improvement store at a relatively low cost. The covers will extend the life of your couch by a number of years and give your home a look you’ve always wanted.

Easy Sectional Cover

Do you have a sectional sofa but no cover for it? This easy DIY project is perfect for you. All you need is a piece of fabric that’s at least two feet wider and four feet longer than your sectionals. 

Easy Sectional Cover
Image credit: https://m.media-amazon.com/

This is a great way of covering your sectionals and ensuring you get the slipcover that fits perfectly. You can get a brand new look and create any pattern and design you like. These DIY slipcovers are very important.

Patio Furniture Covers

If you have patio furniture, it’s important to keep it covered when not in use. Not only will this protect the furniture from the elements, but it will also help to keep it looking new for years to come. 

Patio Furniture Covers
Image credit: https://www.patioproductions.com/

A simple patio furniture cover can be made out of a fabric that’s at least six feet wide and ten feet long. These DIY outdoor cushion covers can help transform your outdoor space.

No Sew Bench Cushion

If you have an old bench that could use a little bit of TLC, why not try this no-sew bench cushion? This project is easy and only takes a few supplies. You’ll need some batting, fabric, scissors, and a needle and thread but no sewing machine. Bench seats always make any area feel cozy and relaxing. So, you can DIY your bench cushion and customize it to your liking. 

Easy Sofa Slipcover

If your sofa looks a little worse for wear, don’t worry. With this easy DIY slipcover, you can easily give it a new lease on life. This project will take you just a few hours to complete and only requires a few supplies.

All you need is some fabric, scissors, and a sewing machine if you have sewing skills. This simple and quick fix is a great-looking temporary fix that will transform your couch from a drab to fab.

IKEA Couch Makeover

Don’t worry if you have an old IKEA couch that you’re not quite sure what to do with. With this easy DIY makeover, you can easily give it a new lease on life. This project will take you just a few hours to complete and only requires a few supplies.

All you need is some fabric, scissors, and a sewing machine. You’ll sew through the buttons and add extra stuffing to your couch cushions. This DIY slipcover is budget-friendly, and the results will look amazing.

Dyed Sofa Slipcover

This is a great way to renew your old furniture in your living room. All you’ll need for this project is fabric dye and rubber gloves. You can also use a stencil if you prefer the look of that instead. The results will not only look fantastic but will cost you next to nothing.

If you’re looking to give your living room a bold new look, you’re going to want to take a look at this project. Plus, dying your couch cover can help cover up any old stains and signs of wear.

DIY Outdoor Cushion Covers

If you’re like most people, you probably spend a lot of time on your deck or patio during the summer. One way to make these spaces even more comfortable is to add some new cushions. But, buying new cushions can be expensive. Instead, why not try making your own? 

This project is easy and can be completed in a few hours. Plus, the results will be fantastic. You’ll need cushion covers, Paint or fabric dye, Paintbrush or sponge, Masking tape, and Scissors.

DIY Tufted Cushions

Tufted cushions are chic, but they’re also very expensive. Luckily, you can make them yourself without spending too much money or time. For this project, you’ll need cushion covers, Scissors, Measuring tape or ruler, a Pencil or pen, and Thread. 

This easy-to-follow tutorial will allow you to transform a budget-friendly sofa into a stylish anchor piece for your living room. In just 20 minutes, you can transform this couch’s entire look.

DIY Slipcovers with Piping

Piping can add a nice touch to any home décor project, and these slipcovers are no exception. For this lovely design, you’ll need cushion covers (fabric or foam), Scissors, Pencil/Pen, Measuring tape or ruler, and a Piping foot if your sewing machine doesn’t come with one already.

Whether you make your piping or purchase it at the store, this DIY couch cover keeps costs low without compromising on looks.

DIY Armchair Slipcover

Why not include your favorite armchair for fun as you’re making over your living room or sitting area? Here, learn how to make a DIY slipcover for an armchair.

This project is a little more complicated than others, but it’s still doable for almost anyone with basic sewing skills. To make it even cheaper, use drop cloths because they’re cheap, but that doesn’t mean they’re uncomfortable.

Couch Pet Protector DIY

Simplicity is key when working with slipcovers, and this DIY couch cover follows that rule. Use an old blanket or even a foam cushion to create a removable accent for your sofa that looks great but provides the perfect place for pets to snuggle up too. 

These pets can cause havoc on couches, especially if they have sharp nails. They love to climb all over sofas, causing some serious damage. Thankfully, this DIY tutorial can provide you with a durable couch cover that will run along the back and arm of your sofa to protect it from pets.

Easy DIY Ruffled Sofa Slipcover

This easy DIY sofa slipcover doesn’t require much sewing, and it’s the perfect way to refresh your room without spending a lot of time or money. Plus, this is a great option for those who don’t have the necessary sewing skills to pull off something more complicated. 

This idea couldn’t be simpler: measure your couch and head to the fabric store to pick up some coordinating fabric. You’ll also need a few basic supplies, like a sewing machine, needle, thread, pins, and scissors. The ruffles give your sofa and chair a comfortable and welcoming look.

This makes it go along with your DIY farmhouse furniture. These are much easier to make than they look, and you can cover your entire living with ruffles in just a couple of days.

DIY Ottoman Slipcover

You can cover those ottomans and make them look new again. If you’re making slipcovers from your couch and chairs, why not make one for your ottomans, so your entire living room set looks new? This DIY slipcover is easy to make, and you don’t even have to sew it. 

You can also opt for one with pom-poms that can be easily removed so you can wash the DIY slipcover. If you don’t like poms, you can add a pleated skirt to your ottoman slipcover instead.

DIY Sheet Sofa Slipcover

You don’t have to buy expensive slipcovers from department stores to get that new furniture look. Instead, try to repurpose old sheets and make your DIY slipcover. 

DIY Sheet Sofa Slipcover
Image credit: https://photos.demandstudios.com/

You can buy inexpensive sheets if you don’t have a set that you can use, and they’ll look like a real thing. You can use them to cover the entire sofa, even the cushions. You can also remove and wash them regularly.

DIY Reclining Couch Slipcovers

Are you looking to give your old couch a new look? You can always use a slipcover to cover it. You have to buy the slipcovers that fit your reclining couches, and they should perfectly match your sofas’ size and shape.

After that, make modifications to your regular couch slipcover to make it fit over the reclining sections and cover those sections so that they stay put when the couch is reclined.

Striped Slipcover for Kid’s Sofa

If you have kids, they might want to have a couch of their own. You can surely buy them one, but it’s also possible to upcycle an old sofa into something that both adults and kids can use. Just remove the back cushions and cut out pockets for toy storage.

Striped Slipcover for Kid’s Sofa
Image credit: https://cdn.decoratorist.com/

Then you can remove the seat cushions and sew some thick fabric or batting onto the bottom to make it a bit more comfortable. Finally, add a striped slipcover for an extra touch of fun.

Slipcover for Sofas with Attached Cushions

If your couch has attached cushions, you can still add a slipcover by measuring the width of the couch and adding an inch or two for seam allowances. Cut out a piece of fabric that’s at least two inches longer than the width of the couch, and sew the edges together. 

Whether your cushions are attached to the back or the arms, you can customize a slipcover pattern to fit perfectly. Make sure your measurements are accurate and leave enough room to tuck the slipcover around your cushions when you put it on.

DIY Settee Slipcover

Measure the width and depth of your settee. Draw these measurements on paper, adding about two inches at each end for seam allowances. Cut out the pattern you’ve drawn and use it to cut a piece of fabric that’s wider than the settee but not so wide that it will hang over onto the floor. The settee tutorial will instantly brighten up any room, and it’s so simple to make.

FAQs about DIY Couch Cover Ideas

re slipcovers worth it?

Yes, they’re worth it because they can change up the look of your house in minutes. Plus, they’re easy to wash and can protect your furniture from spills and dirt.

Do I need a pattern?

No, you don’t need a pattern. You can measure the width and depth of your couch and then cut out a piece of fabric that’s the right size.

Final Thought about DIY Couch Cover Ideas

As you can see, these couch cover ideas are super easy to make. Just pick the one that you like best and get started. These DIY couch cover ideas can instantly change the look of your home.


The post 20 DIY Couch Cover Ideas appeared first on Kitchen Infinity.

Did you miss our previous article…
https://chefbuano.com/?p=1248

How to Design a Nursery

How to Design a Nursery

Are you looking for ways to design a nursery for your newborn baby? Well, there are so many beautiful baby items out there you can use to create a lovely place for your little one. You want to create a beautiful nursery for your newborn baby, but you don’t know where to start. 

We’ve created this guide with all the tips and tricks you need in order to design a lovely place for your little one. Let’s get started!

Plant a Seed

Naomi Alon Coe who is an interior designer of Little Con Interiors, specializing in nursery and child design, says that many clients come to her with a single item that inspires the overall design. It can be a wallpaper pattern or just a crib or another piece of furniture they fall in love with.

Decorate the Walls with Decals

Your baby’s nursery is one of the most important rooms you will design. It contains everything your child needs for napping, feeding, and playing. Take some time to think carefully about how you want it to look.

Wall decals are inexpensive, easy to install yourself, and can be removed without causing damage if you change your mind about the decoration you want. You can find a wide range of shapes and colors in the local shops near you or online.

dd Relevant Furniture to Your Baby Nursery

When it comes time to start furnishing your nursery, you’ll likely spend lots of time looking at different cribs, dressers, and changing tables. It can be difficult to know what to buy when your child is still very small, and their needs may change rapidly. One piece of furniture that will come in handy is a rocking chair.


Image credit: https://momlovesbest.com/

Not only does it provide a comfortable place for you to rock your baby to sleep, but it can also be used as a feeding chair. If you’re looking for a dresser to match your nursery decor, make sure you select one that has storage for diapers and other baby items. Every nursery also needs a glider to get the baby back to sleep and for late-night feedings.

Doing so will allow you to keep everything neatly organized in one place. Storkcraft Portofino 4 in 1 convertible crib or changing table will convert from a crib to a toddler bed then a full-sized bed. It also features plenty of shelving and drawer space. The changing table also detaches to act as a nightstand when your baby is past the diaper stage.

Maximize Your Small Space

According to interior designers and decorators, if your baby’s nursery is small, you’ll want to consider the feature wall color. You can easily and inexpensively paint the room a light color to make it look bigger.

Maximize Your Small Space
Image credit: https://www.thespruce.com/

Also, add a mirror to open up the appearance of the room. In addition, consider buying a baby a rounded crib as opposed to a traditional one. The round crib isn’t always cheap, but it’s a gorgeous family heirloom that you can pass down from generation to generation.

Round cribs can go into different areas of the room more than rectangular ones. You can also put a round crib center of the room if needed.

Consider Upholstered Nailhead Double Chaise

If you have a little more space, consider adding an accent chair to the room. The chair can be used as a place for your child to sit or nap, or it can simply serve as decoration. You could even put this beautiful West Elm upholstered chaise in the room.

From there, furnish the rest of the room with a mix of storage and display pieces. Look for pieces that will grow with your child. A changing table that can later be used as a desk or a low dresser that can function as a bookshelf are great options.

Don’t Go Overboard with a Theme

It can be tempting to settle on a theme for the nursery right away, but it’s best to wait until your baby’s arrival. Some babies are born with dark hair and olive complexions, while others are born blonde and fair-skinned. Babies also come out looking like either their mom or dad, meaning that they might already look like they fit into a certain theme.

If you’re not sure what theme to choose, it’s best to go with a gender-neutral design that can grow with your child. For example, interior designer Cathie Hong of Cathie Hong interiors cautions against overdoing the modern trend of having a nursery theme.

Even if your nursery has a specific theme, try to keep the color palette soft and minimal to create a calm and non-stimulating environment for both the mom and the baby.

Design a Room the Will Grow with Your Baby

While you might want to create a beautiful room for your baby’s arrival, it’s important to keep in mind that the room will have to grow with your baby.

An interior designer called Bean recommends choosing elements in draperies, wall coverings, and lighting so that with a few changes in furnishings, art, and accessories, the room can still work for tweens and teens.

Consider the Lighting

When lighting your nursery, use dimmer switches because they create a calming atmosphere. You’ll also want to have plenty of task lighting so that you can see what you’re doing when you’re caring for your baby at night.

Also, consider a ceiling fan or overhead light combo because they’re an excellent accessory in a nursery to keep it cool, comfortable, and ventilated. After some diaper changes, you’ll be thankful for having a well-ventilated room. 

Test your bulbs for overheating and ensure you’re using the appropriate bulb wattage for your lamp, especially table lamps. Avoid floor lamps; even if they look nice next to a reading chair or a dim corner, they’re not the best choice ever for a nursery.

Make a Nursing Nest

A nursing nest is a great addition to your nursery if you’re planning to breastfeed. It’s a comfortable place for you and your baby to relax together and can be helpful in getting your newborn to latch on correctly. You can make your own nursing nest out of a soft blanket or buy one that’s already made. You can also keep a small end table with drawers or shelving for cubbies next to your cozy nursing chair for your stuff.

You can stock a few things, including baby food, nursing pads, burp cloths, extra blankets for spit-up incidents, and wipes. You can also store a water bottle, maybe a good book or magazine, and a feeding log if you’re early in the game.

Changing Area

You’re going to want a changing area in your nursery. This can be as simple as a changing pad on top of your vintage dresser, a changing tray, or an actual changing table. If you have the space, go for the changing table – it’ll make diaper changes easier. You’ll want to have plenty of stores nearby for diapers, wipes, ointments, powder, and other essentials. 

Keep a good stock of diapers in the nursery to make late-night changes easier on you and your baby. If you have a big enough budget, it might be worth getting a pack n’ play bassinet to keep in the room for speedy diaper changes during the first few months.

Install Black Out Shades or Drapes

Your baby will likely sleep best in a dark room. Install blackout shades or drapes to ensure the room is as dark as possible when your little one is trying to get some shut-eye. This will not only help your baby sleep better but will also keep the room cooler in the summertime. It’s great for comfort but, most importantly, for safety.

Get Organized

No one likes a messy room. Learn how to declutter your room to clear off surfaces. Make sure to put away any loose or potentially dangerous items before your baby arrives. If you store everything in the closet, you’ll have easy access to all clothes for middle-of-the-night changes. You can use cubbies, baskets and toy boxes to throw stuff in and locate it easily later on.

Get Organized
Image credit: https://media.front.xoedge.com/

At least one wall should be reserved for changing diapers, dressing, bathing, and so on. You’ll want to have easy access to a sink, toilet, and storage for diapers, wipes, and other necessities. When choosing nursery furniture, it’s important to think about both form and function. 

You’ll need a place for your little one to sleep, play, and store all of their necessities. Few of us can afford to buy a changing table, so you’ll want to look for items that can double as both a play area and diaper station. A dresser with ample storage space and a mirror provides room for clothes, toys, diapers, and other baby essentials.

Keep Colors in Nursery Simple and Practical

When it comes to color, it’s best to keep things simple in the nursery. Bright colors can be stimulating and overstimulating for a newborn baby. Stick to neutrals like grays, greens, and blues, or go with soft pastels. Knowing your child’s gender ahead of time is also essential as it can help you determine the color palette.

For example, if your kid is a baby girl, you can paint walls in lavender and white, with a carpet in the same colors. For your son’s nursery, consider other neutral colors that are colors of boys. Make sure you redesign and tweak the room to reflect your child’s personal tastes.

These colors will be soothing for your little one and won’t clash with their eventual room décor. If you’re looking for more helpful tips on nursery design, check out the Pinterest board.

FAQs on How to Design a Nursery

What are the most important factors to consider when designing a nursery?

The most important factors to consider when designing a nursery include the qualification of the staff, getting ready for school, and health and safety.

When should you prepare a nursery?

It’s best to put together a nursery before your baby is on the way so you won’t feel rushed when the time comes.

What color should I paint my baby’s room?

While it’s tempting to go bold, painting your little one’s bedroom in bright colors could restrict their vision and sense of security. Stick to neutrals like yellow, blue, and white.

What should I put on the walls?

Artwork can be a great decoration for your little angel’s room. It helps them express their personality while teaching them about shapes, patterns, and color recognition. Don’t forget to include pictures of your family members too.

Final Thought on How to Design a Nursery

As you can see, answering how to design a nursery is not as difficult as it seems. Just keep in mind your child’s needs and wants, and make sure to have a lot of fun with the process. 


The post How to Design a Nursery appeared first on Kitchen Infinity.

Did you miss our previous article…
https://chefbuano.com/?p=1244

Ceramic Tile Flooring Review: Pros and Cons

Ceramic Tile Flooring Review: Pros and Cons

Are you looking for flooring material that can be used in the living room, kitchen, and bathroom? Ceramic tile is a great flooring material, but it comes with some advantages and disadvantages that you should consider before installing them in your home. 

Also, deciding whether ceramic tiles are best for your new floors depends on your style preference and budget. Let’s have a comprehensive review of ceramic tiles to see if they can be a great option for your home.

What is Ceramic Tile Flooring?

Ceramic tile flooring is a type of hard tile made from clay. It is then kiln fired, making it a durable and long-lasting material. Ceramic tiles are available in a variety of colors, sizes, and shapes. They can be used in both residential and commercial spaces. 


Image credit: https://www.westsidetile.com/

Ceramic tile is also known as porcelain tile or non-porcelain tile. Porcelain tiles are more durable and dense than non-porcelain tiles. Ceramic tiles come in many varieties depending on the production process. Natural stone tiles are a well-known type of tile flooring, while other types of quarried stone include granite, marble, and slate.

Each of these tile flooring types has its specific characteristics and appearance. Natural stone tiles are more expensive than ceramic tiles.

Pros of Ceramic Tile Floors

Ceramic tiles are known for their versatility, low maintenance requirements, and moisture resistance. They have a hard surface that doesn’t hold onto or attract dust, dirt, or pollen. Learn some of the pros of ceramic tiles below:

Easy to Maintain

Ceramic tiles are relatively easy to maintain, requiring only a basic mopping every so often. If any stains, dirt, or liquids get on it, they will all rest on top and won’t get absorbed. You can also keep them clean frequently by using a vacuum with a soft brush attachment or a broom to get any loose debris and dirt off the floor. 

If any stains happen, you can use any cleaner, just like how to clean tile floors of different kinds. In addition to being easy to clean, germs won’t harbor on the floor, making it a great advantage when running a business that serves the public, such as a restaurant.

They’re Affordable on Any Budget

One of the biggest pros of ceramic tile flooring is that it is one of the most affordable types of flooring that you can buy. It ranges in price, so no matter what your budget is, you will be able to find a style and color that fits your needs. Most tiles will cost around $5 to $10 per square foot.

Tile is also more cost-effective than hardwood flooring but expensive than carpet. You can also find low-end ceramic tiles for as little as $0.50 per square foot and high-end tiles for as much as $15 per square foot. 

When finalizing your budget, ensure you account for additional installation costs such as labor, tools, and supplies. This is because as you look into the better-looking tile and professional installation, tile flooring can cost more than quality hardwood flooring.

They Can Withstand High Traffic Areas

One of the benefits that ceramic tiles offer is that they can support heavy foot traffic. This means you can walk on them every day without wearing them down or having to worry about creaking noises while you walk over them. However, keep in mind the quality will yield more wear and tear than higher-end tile.

The intense firing process makes ceramic harder to crack than porcelain or stone tiles. A quality tile flooring installation should last 20 years, which could add long-term value to your property if properly maintained.

Water Resistance

Another benefit of ceramic tiles is that they are extremely water resistant. This will be perfect for areas with high humidity or the possibility of spilling liquids, giving you peace of mind knowing your floors will remain safe. There is a protective layer on top of the material, making it stain and water resistant. 

This is very important in bathrooms and kitchens as the ceramic tile will last longer than other materials. If you buy unglazed tile such as traditional Saltillo tile, you’ll need to seal it to protect the surface from any liquids it might encounter. It must be properly sealed because the grout lines between the tiles can be susceptible to moisture. 

Otherwise, water can get down deep into the lines, weakening their installation and putting them at risk for mold growth. This can lead to costly problems down the road.

Ceramic Tiles are Durable

Another element to consider is the durability of ceramic tiles. These floors are extremely sturdy and can stand up to heavy foot traffic very well. They won’t crack or break like other materials would, so you don’t have to worry about any unnecessary replacements that might affect the aesthetic value of your home. 

And when one tile ends up breaking due to severe impact, you can easily replace the tile without redoing the entire floor. This allows you to keep your overall costs down because you don’t need to replace your tiles regularly.

They’re Allergen Resistant

Due to their hard, solid surface, ceramic tiles have a lot less porous area than other materials. This, in turn, makes them resistant to allergens and bacteria that might affect the overall health of the people living inside a house.

Allergen particles are easy to spot and remove, making them a great choice for family members who suffer from allergies and asthma. Ceramic tiles are a great option for people looking to keep the environment of their house free from harmful allergens or irritating materials floating in the air.

Ceramic Tiles Come in a Variety of Designs

The ceramic tiles currently on the market come in various colors, patterns, finishes, and designs, from subtle neutrals to bold mosaics. This makes it easy for homeowners to find the perfect tiles to match their home’s interior design scheme.

Ceramic Tiles Come in a Variety of Designs
Image credit: https://www.homestratosphere.com/

Modern printing technology has also led to styles that mimic concrete, wood, and marble. This means that you can create a truly custom look by cutting your tile into planks or larger squares to make your space feel more open. You can also learn how to paint ceramic tiles and give them a perfect look.

Cons of Ceramic Tiles

The durability and moisture resistant feature of ceramic tile comes at a cost. So, it’s important to understand the drawbacks of this flooring option before heading to the home improvement center to make the purchase:

They’re Not Very Comfortable to Walk On

One of the biggest complaints about ceramic tile is that it’s not very comfortable to walk on. This is because it’s a hard surface, leading to joint pain and leg fatigue over time. Tile’s hardness can also be uncomfortable in areas where people stand for long periods, like in front of the kitchen sink or stovetop.

However, a few strategically placed area rugs and cushioned mats can help absorb some of that discomfort. As an advantage, the tile floor will feel great to step on the cold floor during the hot summer months.

It’s Slippery When Wet

Another drawback is that ceramic floor tile, like other hard surfaces, can be very slippery when it gets wet. This can pose a safety hazard if you have young children or older adults in your home. It’s especially dangerous to walk on tiles with water or ice because it can cause people to slip and fall. 

It's Slippery When Wet
Image credit: https://www.covertecproducts.com/

This floor option is quite slippery, and if you’re installing them in highly trafficked areas, you want to prevent accidents as much as possible. In that case, avoid installing them in spots where liquid or water is spilled often on the floor, leading to injuries. For example, avoid using them in public bathrooms as you don’t want a lawsuit on your hands from a customer slipping on the wet tile flooring.

They Require Maintenance to Prevent Moisture Damage

Another thing to consider before picking ceramic tile flooring is that it requires a lot of maintenance. If you’re not careful, the tiles could get damaged from water and moisture, making them a breeding ground for bacteria and germs. With the grout lines acting as a pathway for liquid, this can be especially dangerous if anyone slips or trips.

A grout sealer is highly recommended on ceramic tile flooring to keep the moisture out and prevent damage like tiles’ watermarks. This also ensures that moisture doesn’t damage the underlying subfloor causing it to warp or crack. On top of this, having perfect subfloor conditions will ensure your tiles stay in place for years to come.

They’re Heavy

Tile flooring is heavy, making it a bad choice for upper-story installations. If it’s necessary to put tile flooring on the top level of a business establishment, then a professional should first check out the framing and building structure to ensure it can support the weight of tiles.

Ceramic Tile is Hard

Tile flooring is made out of ceramic, which is naturally hard. If you’ve ever stepped barefoot on a tile floor and felt the pain or heard your mother telling you not to run around on it, then you know how tough ceramic tiles are. Resilient floors can be softened with padded underlayment, but tile cannot.

Therefore, it doesn’t make for the best material for those who need to stand for hours at a time. You can use area rugs or throw rugs in the places where people stand most, like in front of the kitchen sink or behind the counter at the cash register.

High Installation Cost

Ceramic tile installation is not a do-it-yourself project. It’s also a time-consuming job that needs professionals. And, because of all the labor involved in the process, it is one of the most expensive flooring options you can choose.

Homeowners who want to install their tile should be careful of products that are easy to install and avoid tricky tiles such as large rectified tile, polished stone tile, and natural clay or Saltillo tile, which should be left for professionals.

FAQs on Ceramic Tile Flooring Review

Is ceramic tile good for flooring?

Ceramic tile is a good choice for flooring because it is durable, easy to clean, and can be installed in many different patterns and different rooms at home.

How can you tell porcelain tile from ceramic tile?

Ceramic tile is usually made in pottery or kiln, while porcelain tile comes from the same conditions but undergoes further refinement. The clay used in porcelain tiles tends to be purer and refined than ceramic tiles. Ceramic is designed for indoor use, while porcelain can be used indoors and outdoors.

Final Thought on Ceramic Tile Flooring Review

There you have it. The pros and cons of using ceramic tile on your floors. So, before you make the final decision on what to put down, make sure you weigh all your options.


The post Ceramic Tile Flooring Review: Pros and Cons appeared first on Kitchen Infinity.

How High Should Grass Be Cut?

How High Should Grass Be Cut?

Keeping your grass healthy and at the right height is important if you want to enjoy it. If you don’t know how high the grass should be cut, you will have difficulty keeping your landscape looking great. This can lead to many problems down the road that are very difficult to solve.

There are different factors that decide how high grass should be cut. So, you need to do some research before deciding how much of an adjustment needs to be made with regard to cutting the lawn.

Our guide below can help answer this question for you and teach you more about cutting lawns in general.

The Rule of Thumb

How high should you cut the grass when you mow? The general rule of thumb for determining how high the grass should be cut is only to cut off no more than one-third of the height of your lawn. Each mowing should only remove about the top third of the grass blade.

It’s recommended that you stick to this rule of thumb and a lesser degree in spring. If you can’t remember the measurements in summer, consider mowing at a greater height. It’s also a good idea to choose one of the higher settings of your lawnmower wheels when the weather is hot or dry and mow at that height until you approach the fall season and the weather starts to cool off a bit.

Factors to Consider on the Rule of Thumb

Types of Grass

The first thing that you will have to think about is the type of grass lawn you have. Some people don’t realize it, but there are different types of grass, and they all grow at different speeds and heights. Every grass type has its mowing height.

Keeping the Weeds Away

The next factor to think about is weed control. Weeds love growing in tall grass, and it’s important that you keep theirs under control. If you leave your grass too long, the weeds will take hold and ruin your lawn and use up a lot of water and nutrients from the soil.

Keep the Bugs Away

That’s not the only reason to keep your grass short. Bugs also like heat, and just like humans, they spend their time in shadier, cooler places. If you have a very tall lawn, it will grow over these areas and make them hotter because there won’t be any shade for the bugs to escape the heat.

In addition, too long grass is difficult to mow, and long grass clippings have to be removed and cannot be left on the lawn.

Laziness Doesn’t Pay

Keeping your grass cut short is also better for you. It’s far easier to maintain a shorter lawn because it requires less mowing, meaning that you can advance the cutting height more often. The mowing frequency depends on your grass type, its optimal height, and the grass growth speed, depending on the weather conditions.

For instance, cool grass such as Kentucky bluegrass and fine fescue grows faster during the cool spring and fall weather. While the exact heights vary depending on the grass type, the range of cool-season turf is between 1 and 5 inches.

Different Grasses Require Different Mowing Heights

All lawns are not the same. For instance, cut the grass too short, it becomes stressed, thin and you’ll be left with a shallower root system. Cutting the grass crowns will also make the turf vulnerable to weed pressure and require pesticide applications to prevent weeds and discourage pests.

Warm season grasses such as zoysia grass and Bermuda will tolerate a shorter, tighter cut, while cool season grasses like fescue and bluegrass need to be mowed taller to help shade the root system and keep heat stress away.

Mowing Too Low Damages Grass

Mowing your lawn too low will have a detrimental effect on your grass. When you cut the grass too low, it causes damage to the plant’s crown and results in a weaker root system, making your lawn more vulnerable to weeds, disease, and pests.

Mowing Too Low Damages Grass

Mowing too low reduces the density of the grass, making the lawn susceptible to invasive summer weed pressures. By mowing your grass too low, you may unknowingly be promoting crabgrass to grow because shade provided by higher cut grass blades shields the crabgrass seeds from much-needed sunlight.

Mowing too low also makes the turf vulnerable to summer heat. Without taller grass blades to shade the summer sun, low mowing can lead to stress damage quickly during long periods of summer drought.

How Short To Cut Grass in Spring?

At a minimum, it is best to cut turf no shorter than 3 inches during the early spring. If you have been postponing trimming your lawn because there was snow on the ground and cold weather, do not be tempted to mow just yet. Wait until grass blades begin hardening off on their own as summer approaches.

Mow cool season grass to a height of 3 inches tall and cut warm season grasses as low as half an inch up to 1.5 inches.

What Height Should Grass be Cut in Summer?

As temperature rises, your lawn height also goes up in summer. So, as the summer arrives, raise your mower height for cool season grasses and keep it closer to four inches. A taller plant shades the soil and keeps the root zone cooler during high heat periods. If you allow your lawn to grow too tall, it can result in broader leaf blades, lower plant density, and more susceptibility to turf diseases.

The Best Height to Cut Grass in the Fall

When inching into the fall, mid-length grass is the preference. Tall grass can get matted and become diseased in winter, but lawn roots can get exposed to extremely damagingly cold temperatures when you cut too short. So, focus on striking a balance in fall to prepare your lawn for winter.

Cut your cool season grass to about 2.5 inches before the first frost in winter and mow warm season grasses to two inches in fall.

How Often Should You Mow Your Grass?

Having a routine mowing schedule for your lawn is key. Grass will grow at different rates depending on fertilization, season, and weather conditions. Grass that is too long will not only make your lawn look shaggy, but it can also lead to problems with the health of your grass.


Image credit: https://www.arbor-nomics.com/

Long grass can prevent water, sunlight, and nutrients from getting to the soil, which can cause your grass to turn yellow or brown. It can also increase weed growth and create an environment where insects and diseases can thrive.

What is the One-Third Rule?

Regardless of your grass species, you shouldn’t remove more than one third of the grass height when mowing. This is important because the grass is a living plant, and they all undergo some stress when cut.

What is the One-Third Rule?
Image credit: https://res.cloudinary.com/

FAQs on How High Should Grass be Cut

Can you mow your lawn when it’s wet?

No, avoid mowing your lawn when it’s wet because other than jamming the lawn mower blades and clogging the discharge chute, wet grass can also leave clumps of grass on the lawn. Grass collecting on the mower blades also aids in tearing the grass much like a dull blade. Keeping your lawn mower blade sharp shouldn’t be overstated.

How often should the mower blade get sharpened?

Keep your mower blade sharpened as a cleaner cutting blade results in less stress on the turf. A dull mower blade rips and shreds the grass leaf, making the plant susceptible to disease. A good rule of thumb is to sharpen your blade every ten mower hours.

Final Thought on How High Should Grass be Cut

As you can see, keeping your lawn about two and a half inches tall and leaving the grass slightly taller about three inches in the shady areas will maintain a healthy lawn. It is also important to keep your mower blade sharpened and collect the grass clippings. Follow these tips, and you will be on your way to a lush, green lawn.


The post How High Should Grass Be Cut? appeared first on Kitchen Infinity.

Did you miss our previous article…
https://chefbuano.com/?p=1236