International Laundry Care Symbols

International Laundry Care Symbols

Laundry care symbols are used to help people understand how to wash their clothes.

Some symbols indicate the type of fabric, while others tell you how much water and detergent are needed for a specific kind of item. There are different ways that clothing labels provide this information as well, including by using words such as “Wool” or “Delicate.”

In this article, we’ll explore why it’s important to know the symbols and how you can find out which symbol your clothes have. Keep reading to find out more. 


Image Credit: http://ihateironing.com

What are laundry care symbols?

The symbols on your clothing labels or tags are called laundry care symbols. These can give you general washing instructions, like whether an item is dry-cleaned only, machine washable, or hand wash only, and/or more specific guidelines on how to care for the piece of clothing. 

By using the laundry care symbols, you can get closer to understanding how to take care of your clothes. Some symbols indicate the type of fabric, while others tell you how much water and detergent are needed for a specific kind of item. 

How do you decipher them?

Different countries use different laundry care symbols. Therefore it is important to note that there isn’t just one universal set of washing instructions on clothing labels around the world. 

The United States often uses basic graphics on their tags (including dots inside shapes) while other countries might include text like “Machine wash cold,” or “Do not bleach” in addition to or instead of symbols. It is great to know what the laundry care symbols are for your favorite clothing brands, but it can be even more helpful to learn how you can decipher them yourself.

Why is it important to know the symbols?

Knowing and understanding how to read your clothing labels can not only save you money in laundering fees and ensure that clothes last longer, but also help reduce the amount of water pollution you create.

Laundry care symbols can indicate whether a piece of clothing needs to be washed in cold or warm (or even hot) water, which often helps cut down on energy costs for heating wash water.

This can be especially helpful if you live in an apartment with communal laundry facilities where the machine already has hot water running through it before you start using it. Another great benefit is that by giving your clothes the proper care and attention they need, you will be able to maintain their appearance and make them last longer. 

How you can find out which symbol your clothes have

Since there isn’t just one universal set of washing instructions on clothing labels around the world, it’s best to look up how your favorite brands recommend caring for each piece of clothing. 

Many major companies with multiple locations across different countries provide information about laundry care symbols on their website or online help section. Additionally, if you know where a garment was purchased and plan on returning there again in the future you can ask an employee what type of symbols it has so that you can know what to expect when you care for it in the future.

For clothes from brands without a website, you might have to do some more investigating. With a small amount of research, you should be able to find out which laundry care symbols they use and how those correspond with general washing instructions around the world.

If you know the symbol, but don’t understand what it means, you can use an online translator or speak with someone who speaks both English and the language that matches up to your washing instructions. Most importantly, if you’re buying clothes for yourself or caring for clothes that were bought as a gift for someone else, make sure that they are washable before purchasing them.

Where else do you see these symbols?

When it comes to doing laundry, remember that laundry care symbols aren’t just found on laundry tags. They can be found on just about anything that you might wash in the washing machine. Most common are clothing care symbols, but you can also see them on your bed sheets, towels, curtains, and even tablecloths.

How to Wash Clothes | Laundry Tips and Tricks
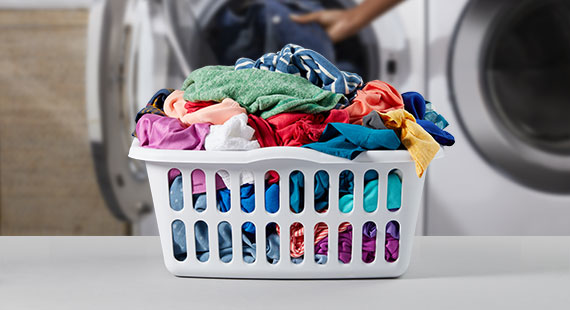
Image Credit: http://tide.com

The next time you go to do a load of laundry or send something out for dry cleaning make sure to look up its symbols so that you know what kind of care it needs. This will help cut down on costs from using the incorrect amount of detergent or having your clothes accidentally bleached.  

International Laundry Care Symbols – FAQ

How did the international laundry care symbols come about?

The development of a common set of symbols was born out of necessity, in response to the great demand for standardized symbols within internationally operating textile companies. The need for easily recognizable symbols that are not language-dependent but are valid worldwide has been widely recognized over recent years by garment manufacturers, laundries, and consumers alike.

How do I clean my washer?

Cleaning a washer is more than just putting some clothes in and pressing a few buttons.

It takes some planning, preparation, and the proper use of cleaning products; it’s important to know how to do it properly.

There are many different types of washers – top-loaders and front loaders being the main types. This means that washing machine cleaning is a little different depending on the type you have. But there are a few general rules that clean all washers: don’t overload your washer, avoid using too much detergent or bleach, and always follow the instructions given by your manufacturer for safe usage.

Final thoughts on international laundry care symbols

In conclusion, there are a wide variety of symbols used in laundry care symbols. The main goal for these symbols is to make sure that clothes can be safely washed and cleaned. Even with the development of new cleaner ingredients, these symbols will still work effectively so it’s important to pay attention to them before washing your clothes.  

The post International Laundry Care Symbols appeared first on Kitchen Infinity.

Did you miss our previous article…
https://chefbuano.com/?p=650

Easy Color Schemes From A Color Wheel

Easy Color Schemes From A Color Wheel

A color wheel is a perfect tool for deciding on a paint job or designing your next room.

Knowledge of what colors are opposite each other can be used to create entire palettes, and some schemes are more appropriate than others depending on where you plan to put them to use.

In this article, we’ll show you the most important things to know about color schemes and offer some advice on how they can be used in your home.

Let’s dive deep into this topic. 

The color wheel is a great way to get inspiration for your next paint job.

Whether you’re looking for kitchen paint colors when you have white cabinets or need to find the right bedroom colors, a color wheel is a great tool. The same goes for exterior house painting. Each color you see has similarities and differences to other colors on the wheel based on their level of intensity and brightness (or dullness). You can use these findings to determine what color would work best in your home.


Image Credit: http://blog.closetomyheart.com


Choose colors that are opposite one another on the wheel

The complementary scheme is when two opposite colors – typically one warm and one cool – are paired together in a room. For instance, you can paint your walls in an intense yellow hue, then pair it with a strong navy or cobalt blue color for accent pieces. This particular pairing is one of the most visually appealing color schemes around.

The triadic scheme is when three colors are evenly spaced on the wheel. This particular scheme can be very versatile because it offers a wide array of options for harmonizing your room. For instance, warm neutrals make great compliments to this plan, as do earthy or muted hues.

Don’t limit yourself to just two or three colors either – try adding a complementary or contrasting color for some visual interest and appeal. It’s also important not to overdo it – sometimes less is more when it comes to planning out your perfect palette.

Sometimes color inspiration can come from the most unexpected places. If you’re trying to figure out what color of yellow would look best on your kitchen or bathroom walls, then taking a peek at the color wheel may help you get inspired.

When looking at paint for your walls it’s important to note that some colors are better than others depending on where they are placed in your room (obviously paint with super high VOCs should not be used near windows). Note how pink looks amazing against lighter shades of blue and gray but clashes with too much orange. Similarly, green pops when paired with light neutrals like yellows and grays but will clash if placed next to purples or reds (unless that is its complementary scheme).

There are many color schemes out there

To avoid clashing, you’ll need to know a little bit more about complementary and contrasting colors. Complementary schemes are when two colors directly opposite each other on the color wheel are paired together. This pairing creates a vibrant look but also one that may be too overwhelming depending on how dark or light the hues are.

That’s why it’s important to pair your complementary colors with those from either side of their analogous group (this is where our third scheme comes in). The split complementary scheme pairs a color from its analogous group with two colors from either side of its complementary group.

The triadic scheme is another way to harmonize your room using three different colors – typically one warm, one cool, and one either neutral or vivid. You can also try new things like tints, tans, and shades which are color hues that have been altered with black, white, gray, etc.

There are endless color schemes to choose from but it’s important to remember that too many contrasting colors won’t look great together unless you’re going for a bolder look. Experimenting is one of the best ways to find out what works for your home so don’t be afraid to try something new.

Steps to choose the right paint colors

Follow these steps to learn how to choose the right paint colors

Step 1: Find Your Color Scheme

Choosing colors for your walls is an important part of decorating, but it can feel overwhelming. There are thousands to choose from between paint, fabric swatches, and accessories so it’s important to narrow down the best place to start your search.

Color schemes are found all over home design so you can take inspiration from anywhere – whether it’s a trendy interior blog or your favorite nature scene on a postcard – and translate that feeling into color palettes for any room in your house including living rooms, kitchens, bedrooms and children’s rooms.

Color schemes work well on their own but they also pair well with one another so if you find a scheme you love, try playing around with different combinations to see what you like best.

As you’re choosing your colors, it’s important to keep in mind that some areas of your home receive more light than others so dark shades will show the most wear and tear. 

Step 2: Choose Your Wall Color

This is where things can get exciting – play around with different accent walls or use all four ideas to bring out the best of any space in your house. Paint swatches are available at every hardware store but if painting isn’t an option, consider using vinyl wallpaper instead. It has become incredibly popular over the last few years because it’s quick and easy to install, removable, and comes in so many different colors. It also looks great against darker accent wall hues since lighter shades can be overwhelming.

If you prefer the look of fabric wallpaper but don’t want to put too much work into finding the right color palettes, consider using paint chips instead. They’re available at every hardware store and are an inexpensive alternative to paint that easily allows you to play around with various ideas until you find that perfect hue for your walls.

Step 3: Curate Your Accessories

Now that your floor plan is done and you have all four room color schemes ready to go, it’s time to pick out accessories. This is all about personal style – you might like to decorate with modern art or vintage pieces, black and white photography, or colorful botanicals. Find what you love and make it the focus of your room.

Step 4: Decide on the paint colors

The final step is choosing paint colors for hardwood floors, baseboards, crown molding, and window frames – these elements might not be included in your floor plan but they’re still just as important in bringing out the best of each space in your home.

For example, a minimalist interior might not include much in the way of trim or molding but that doesn’t mean you can’t bring out the best in your home. It’s possible to have an incredibly beautiful space with little more than smart paint color choices and the right accessories.

Whether you’re looking for French country style inspiration or modern simplicity, we’ve got a wide range of palettes available to make every room in your house as stylish as it is comfortable.

There are thousands of paint colors to choose from but using color scheming will ensure that your room looks intentional – even if it’s full of eclectic pieces.

Color Psychology: How Do Colors Affect Mood & Emotions?
Image Credit: http://londonimageinstitute.com

Final thoughts on easy color schemes 

In conclusion, starting to use color scheme generators might be hard because it is quite easy to get confused by all the different options offered. It is however a very good way of getting started into the world of color theory and understanding how it works. I think that once you have used these kinds of tools for some time, you’ll feel more confident in choosing your colors, knowing why you are using them, and what emotions they are evoking.

The post Easy Color Schemes From A Color Wheel appeared first on Kitchen Infinity.

Did you miss our previous article…
https://chefbuano.com/?p=646

How to Use Core Aeration

How to Use Core Aeration

Maintaining a healthy lawn is hard, but there are a number of steps you can take to achieve this. You need to fertilize your grass, mow it at the right height, and water it regularly. But if nutrients don’t reach the soil underneath your turf, you’re going to have problems with thatch build-up and nutrient loss.

Lawn aeration helps improve drainage by removing plugs from the top layer of soil, allowing air and water in a while, helping reduce soil compaction below ground level. It also brings up minerals that were trapped beneath the soil surface into contact with roots for better absorption.

If you’re looking for ways to achieve and maintain a beautiful lawn, then this article will help you learn more about using core aeration. We’ll discuss why it’s needed and what it involves. Read on!

What is Core Aeration?

Core aeration is one of the best practices for lawn care because it improves overall health and appearance while reducing weed growth potential. The process involves using an aerator machine or core aerating tool which removes plugs from two inches deep or more depending on how long you run the machine over your lawn’s surface. This will help loosen compacted soil and allow water and air to reach the lawn’s roots better.


Image credit: https://www.fairwaygreeninc.com/

What is the Best Time for Core Aeration?

For cool season grasses, core aeration should be performed in early fall or early spring. For the warm season grasses, core aeration should be done in late spring to early summer. When aeration combines with growth, grasses recover quickly and fill in areas where aerator equipment exposes soil.

When Do Lawns Need Aeration?

All lawns can benefit from core aeration, especially when the soil is compacted. Lawns in heavy shade or with thatch build up are great candidates for core aeration. Any time grass has difficulty growing or staying healthy due to compaction or poor drainage, this indicates that core aeration might be needed. Soils high in clay also benefit from core aeration.

Also, note that dethatching and aerating are two different things, although they work in handy. Thatch is the layer of decomposing organic matter that forms at the lawn surface between soil and grass. The thatch works like compaction to block the passage of air, water, and fertilizer to the roots.

Dethatching removes some grass blades while aerating opens up channels in the soil to allow air, water, and nutrients to reach grasses’ root systems. Aggressive spreading grasses like Kentucky bluegrass in northern lawns and Bermuda grass down south form more than any other grass type.

If your grass looks stressed and your soil is hard to the touch, you may have compaction problems. You can confirm that by using a simple screwdriver test. Take your regular screwdriver and stick it into your lawn’s soil by hand.

Why Core Aeration Helps Lawn

Lawns get heavy use, such as acting as neighborhood playgrounds and racetracks. Kids and pets running around the yard can also lead to soil compaction. That said, your grass roots need air, water, and nutrients to grow thick, deep, and strong. When the soil becomes compacted, it will inhibit the flow of essentials that supports thicker, healthier tuff growth.

Excess lawn thatch and heavy organic matter buried under the grass surface can also starve the grass of essential elements. Therefore, the hollow tine core aeration will help alleviate additional compaction so air, water, and nutrients can reach grass roots.

If lawn grasses are deprived of their basic needs by compacted soil, they’ll struggle, especially in stressful situations such as heat and low rainfall, thus losing their healthy, rich color. The grasses will gradually thin and die out completely. If there’s no oxygen, water and nutrients will be inches away.

Other Methods of Aerating Your Lawn

Apart from plug aerators or core aeration, there are other methods of aerating available equipment. They include:

Spike Aeration

Spike aerators have hollow tines that penetrate the soil and remove small cores of soil. Spike aeration is quick, easy to install, and can be used on lawns with little maintenance. The spikes create holes for water and nutrients by pushing soil aside.

Spike Aeration
Image credit: https://cf-images.us-east-1.prod.boltdns.net/

Slicing Aerators

These are blades attached to a wheel, which slice through the lawn’s surface. This method is similar to the spike aerators in that it also removes cores of soil from your lawn. The slices will give rise to new shoots and roots, giving rise to thicker turf.

How to Aerate Your Yard

You can find lawn aerators, power rakes, and other power equipment at your local store, hardware stores, and some big-box retailers. You can also hire lawn service from equipment rental companies and lawn and garden stores. Here’s how to aerate your lawn:

Flag Utilities

Flag utilities or other pipes loosen the soil around those with a shovel. Remove plugs from holes, then drag the aerator behind you across your lawn. With space between each pass, turn over all of the soil that was brought to the surface. Replant grass seed or transplant seedlings as desired

Time Your Aeration Right

For best results, time your aeration to coincide with your lawn’s physiological stage of development. Late summer is the best time for quick relief from compacted soil, while late spring or early fall are ideal times for lawn restoration and strengthening. Aerate when the soil is soft, like after an irrigation cycle or a recent rainfall. 

This will allow the hollow tines to penetrate the soil easily, making it easier to do their job. Hollow and solid-core aerator tines will struggle to penetrate hard, dry soil, making the process less effective.

Be Thorough

Cover your entire lawn at least once and the second time at a cross angle. Pay attention to lawn surfaces with heavy foot traffic, driveways, and sidewalks because these sections will be more compacted. If your lawn is smaller, you may only need to do it once.

Forget the myth that if you apply a pre emergent herbicide on your lawn in the spring, it will destroy your herbicide barrier. This is not always true because aeration won’t affect crabgrass control or weed prevention.

What to Do After Aerating

After aerating, if possible, combine lawn aeration with other lawn care maintenance such as fertilizing, adding soil amendments, and overseeding. Water, fertilizer, and grass seed needs to get through the lawn surface into the soil where they can start growing grass roots. After aerating your lawn, let soil plugs or extra soil dry where they fall.

What to Do After Aerating
Image credit: https://peppershomeandgarden.com/

Core aerating will open the soil to allow water, fertilizer, and seed to move down in the soil for faster root growth. You can also help restore your lawn by application of fertilizer immediately after core aeration. Better yet, make your compost for this purpose.

FAQs on How to Use Core Aeration

When should you core aeration?

Core aeration can happen anytime, but the best time is usually in the spring and early summer or fall. It’s recommended to core aerate when there’s the most root growth.

Should you water before core aeration?

Yes, you should water one to three days before aerating. This is because the soils must be moist to help the machine penetrate through to remove soil plugs. Do not aerate overly soaked and completely dry soil because the aerator will pull out small soil cores from the lawn, which should be left to break down.

Final Thought on How to Use Core Aeration

As you can see, adding aeration to your annual task list will help you maintain your lawn and make it look more beautiful. Plus, you save money in the long run by having a healthy lawn.


The post How to Use Core Aeration appeared first on Kitchen Infinity.

Did you miss our previous article…
https://chefbuano.com/?p=641