Bed bugs are the worst nightmare for many people. These tiny creatures can really make life unbearable if they find their way into your furniture. You have to get rid of bedbugs in furniture quickly before they multiply and spread throughout your house.
So, how do you get rid of bed bugs in your furniture? Laundering, bed bug traps, diatomaceous earth, couch encasement, and steamer are some of the ways to remove bedbugs from your furniture.
But for any of these methods to work, you have to follow the right steps. Here is a simple guide on how to get rid of bedbugs in your furniture.
Signs of Bedbugs in Your Furniture
Signs of bedbugs in your furniture are pretty straightforward. They never vary as homes with bedbug infestations always have the same signs.

Image credit: https://i.insider.com/
The first thing you need to do is check underneath your couch cushions. Flip your couch and check underneath. Here are some of the signs of bedbug infestation in your furniture or home if you’re not sure of what to look for:
Bed Bug Eggs and Shells Easily Detectable
Bed Bug shells are not easily detectable because they look just like your regular furniture’s dust. However, it would be very hard to find them in plain sight when you have an infestation. So, the best way is to use a magnifying glass and check for bed bugs by focusing on nooks and corners where they are commonly discovered.
After that, look for easily detectable shells because they are translucent and milky white. For bedbug eggs, you can easily notice them because they’re slightly larger.
Bed Bug Feces and Blood Stains
By using a magnifying glass, you can easily spot feces and bloodstains. These are very tiny, so be careful when inspecting the area. You can determine whether it’s just dirt or something else through further observation by checking for specks of black spots surrounding the area.
If there are many dark spots in the area, it’s likely that the specks are bloodstains or feces. Also, try to check for possible bed bug excrement by looking at the stains closely.
Dead Bed Bug
Another sign of bedbug infestation is that when you apply some treatment, you’ll see many of them dying from your treatment. They’ll be scattered all over your wooden frame. Dead bugs look exactly like the living bedbugs, but the only difference is that they’re not moving. When it comes to size-wise, they’re also the same and color-wise, which is the color of an apple seed.
Living Bed Bugs
The bedbugs that are still alive will be reddish-brown because they will feed on your blood. These bed bugs also tend to scurry away from you or hide in their cracks when you go near them, which would make it difficult for you to get a good look at them. They’ll only go when they’re hungry, but that’s rarely daytime. They’ll only go for a meal when you’re on the couch sleeping.
Ways of Getting Rid of Bed Bugs in Your Furniture
Start with Laundering Your Furniture
The easiest way to kill bed bugs in your furniture is to start by laundering them. Start with washing everything that’s machine washable. Learn how to clean your upholstery while employing hot water while doing so, or at least boiling them for an hour.
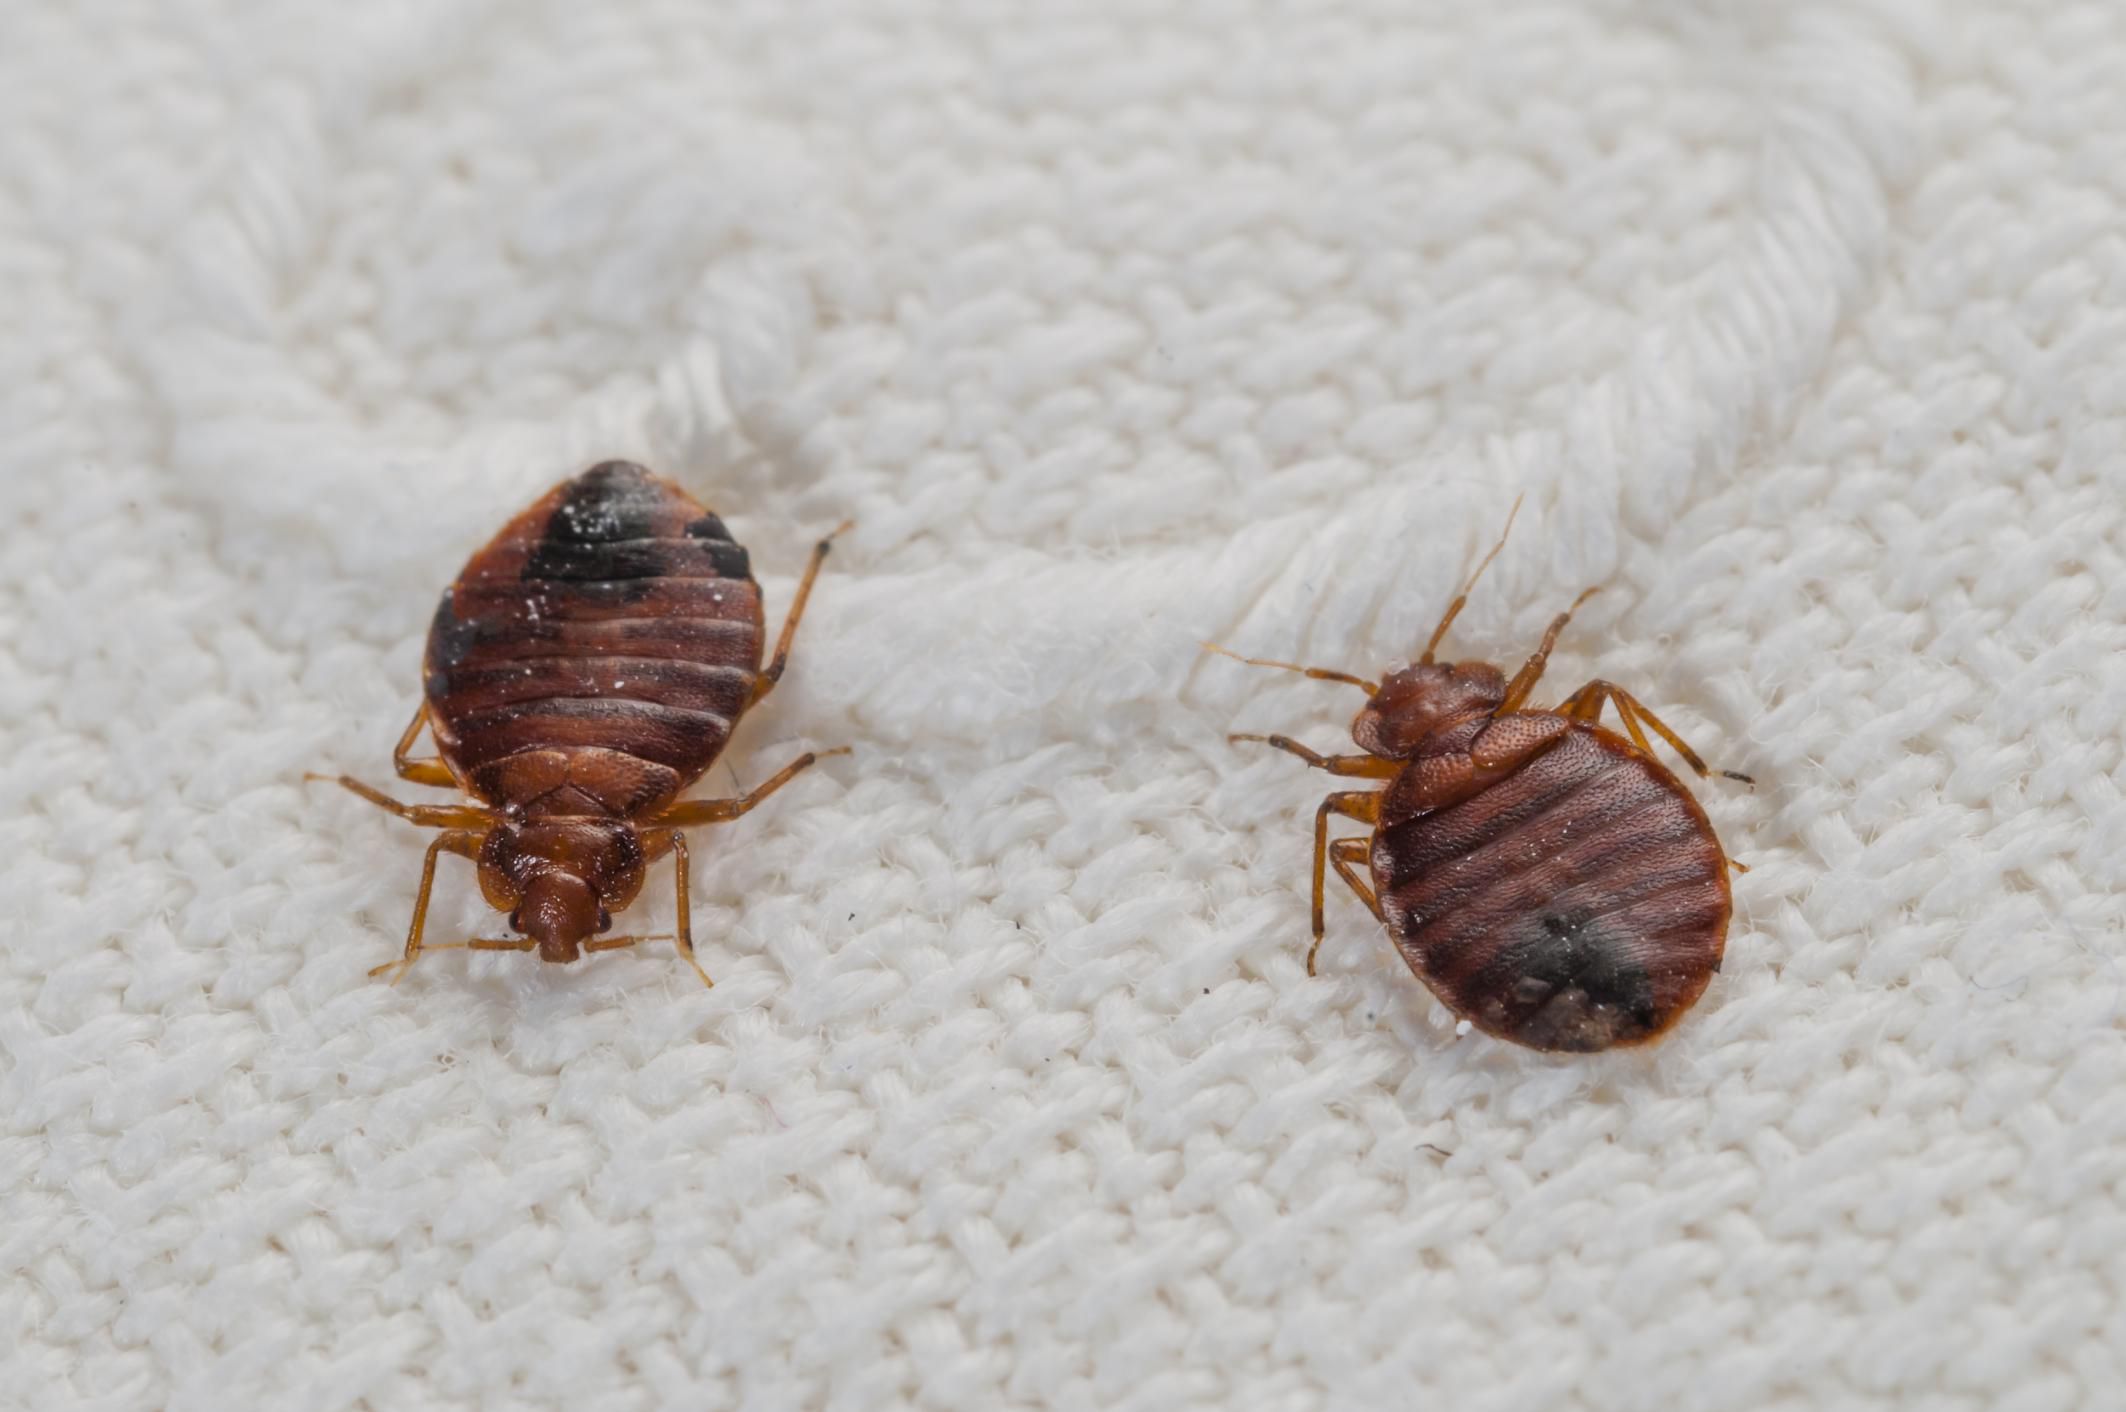
Image credit: https://www.thespruce.com/
Before laundering, put them in a large plastic bag or box, then wash them smoothly and quickly to avoid disturbing bed bugs, which can scatter them all over your house.
Use regular or high heat for at least one hour. After laundering, dry them up in your clothes dryer. Make sure you set up a high temperature to let it dry for half an hour and kill all the bed bugs. While it’s drying, clean and wipe down your frame, and look for holes in the structure.
Then, leave the frame to dry and put back the dried cushions and fabric to your furniture. If you have bulkier cushions, you can dry them at your local Laundromat at a high temperature.
Use Bed Bug Couch Cover
If your couch is a pull-out or a hideaway, you can invest in a bed bug cover. You can find them online and at some furniture stores. These covers are zip-closed and have tiny mesh holes to let air through while keeping the bugs out. They aren’t 100% effective, but they’re better than nothing.
Make sure you treat your frame and cushions before moving to this step and ensure all the bloodsuckers are dead. Then, use a steam cleaner along the edges of your couch. After that, use the vacuum cleaner to vacuum all the sides of your furniture. Now that your furniture is clean and dry, wrap it with a bed bug couch cover and zip it properly.
Use Bed Bug Traps to Catch Bed Bugs
If you don’t have enough time to buy a couch cover, you can always rely on bed bug traps. These are sticky pads that catch the bedbugs whenever they try to climb up your bed or sofa. The bugs get stuck to this pad and are unable to move again. You should put these under the couch and chair legs to make sure you keep your bed bug problem under control.
Use the Right Insecticide Spray
No matter what, using chemical sprays is never recommended. But in times like these, when there is no other option left, you might depend on these insecticides. Before spraying any of these chemicals on your furniture, make sure you are wearing the right clothing.
Wear gloves and the right kind of mask to block your nose from any chemicals that might be harmful to you. Keep the kids away from this place when you are spraying insecticides, especially around the house. Use natural bed bug sprays instead of these chemical treatments.
The only disadvantage with natural spray is that it can only kill these pests when in direct contact and cannot provide continuous protection. You can also use dusting sprays instead of insecticides to dust your furniture legs.
Usage of Vacuum Cleaner
Vacuuming is not only good in eliminating bed bugs, but it also keeps the bed bug numbers down. It does this by picking up a lot of bedbugs and their eggs. So you should vacuum the dust, cobwebs, and other places where these bugs are most likely to hide.
Vacuuming also helps to control bed bugs by eliminating their signs such as their shed skins and fecal matter. Make sure you dispose of your vacuum bag in a tightly sealed plastic bag and throw it outside where none of the bed bugs can infiltrate your home again. This will drive away all the bugs from your home.
Kill the Bed Bugs with Steam
Steam cleaning is a great way to kill the bed bugs, and it also helps get rid of their eggs and nymphs, which can be difficult to remove manually. The steam kills them on contact, so you need not worry about any residual effect. But make sure that the steam does not reach such high levels that it might damage your furniture or belongings.
Use Diatomaceous Earth
If possible, place diatomaceous earth in cracks and crevices and behind bed frames and headboards. Do the same inside electronic devices such as radios and televisions. If your furniture has joints with gaps, go ahead and apply some diatomaceous earth in those joints as well. The dust prevents the bed bugs from reaching maturity and feeding on you.
You can also scatter this powder on the outside of your bed frame. Go for food-grade diatomaceous earth that is safe for you and your kids.
Invest in Non-Upholstered Furniture
Upholstered furniture is the most challenging because of the fabric that it is made of. Instead, get yourself some wooden furniture if you are serious about ridding your home of bedbugs for good. Make sure you treat upholstered furniture by applying pesticides and encasing the furniture in a large plastic bag. Heat treatment can also help you get rid of bed bugs from upholstered furniture.
When using pesticides, be careful and follow all safety guidelines from the manufacturer. Their labels should have detailed information on how to use and protect yourself when using these products. On the other hand, non-upholstered furniture is the best bet because you don’t have to worry about bed bugs hiding in the fabric.
FAQs on Different Ways of Eliminating Bed Bugs in Your Furniture
How long do bed bugs live on furniture?
Bedbugs can live for over a year without feeding on blood. It’s important to remember that not all bedbugs will be seen in your mattress or bedding. Some may stay in cracks and crevices in the walls and behind your furniture.
How long will my bedroom remain bedbug-free after I spray?
It may take up to two weeks before the last of the bedbugs have been wiped out from your home. It’s advisable to carry out a repeat application after two weeks to get rid of everything.
Final Thought on Different Ways of Treating Bed Bugs in Your Furniture
As you can see, bedbugs can infest your furniture anytime, it doesn’t matter whether you’re house is clean or not. Another thing you must know is that getting rid of bed bugs is not as easy how to get rid of ants. But with a few tools and methods mentioned in this article, you can be sure of protecting your furniture from these annoying bugs and have a bed bug-free home.
The post How to Treat Bedbugs in Furniture appeared first on Kitchen Infinity.
Did you miss our previous article…
https://chefbuano.com/?p=421