How to Remove Ballpoint Permanent Water-Based Ink

Ballpoint permanent water-based ink stains are one of the most common and frustrating stains to deal with. The good news is that there are several ways you can tackle this stain yourself before having to call in a professional or replace an expensive garment.

Here’s what you should do if you get ballpoint permanent water-based ink on your clothes, carpeting, upholstery, wood floors, or any other surface. Before anything, never wash and dry your clothing before removing ink stains, as the dryer will set the stain and make it nearly impossible to remove.

If the garment is washable, immediately put stain remover on both sides of the fabric and scrub with a toothbrush or other small brush. After you’ve done this, get a clean towel wet with water and lay it over top of the stain for about 15 minutes until the ink transfers onto the towel.

What You’ll Need

Shallow bowl or tubLiquid laundry detergentClean, dry towels or cloths

Determine the Kind of Ink You’re Dealing with

Not all pens are ballpoint pens, and different pens use different kinds of ink that need to be removed in different ways. For ballpoint pen ink, the most effective way to get rid of it is by rubbing alcohol or nail polish remover together with a clean, dry rag or towel. While fountain pen ink can be soaked up using egg white.

For marking pen ink, use rubbing alcohol and hydrogen peroxide, and for permanent marker stains, use nail polish remover, rubbing alcohol, and a clean, dry towel. But for stamp pad inks and permanent ink markers, need to be done in dry cleaning. Pens also have different ways of getting rid of their stains.

For traditional ballpoint pens, rubbing with a dry towel or rag is usually effective, but gel pens have highly pigmented ink that can be removed with nail polish remover and rubbing alcohol. So, it’s important to check any online office store to search for the model of the ballpoint pen, whether it’s a gel pen or a rollerball.

Blot the Stain

One way of getting rid of a pen stain is to blot it carefully with a paper towel. But try to avoid making the stain bigger while doing so. Paper towels may cause the ink to spread, but they are effective in absorbing stains compared to the cloth or other materials that can also damage your clothes.


Image caption: https://blog.neighbor.com/

The process involves applying pressure on the area and rubbing it carefully. In that case, apply water to the stained area, then use a clean cloth to dry it. While blotting, the stain should be transferred to the cloth because it can absorb more ink compared to paper towels.

Remove the Stain with Toothpaste

This works best when you can use an old toothbrush or toothpaste to clean the pen stains on the clothes. This is just like what dentists do when they apply a small amount of toothpaste to remove plaque and stains from teeth, except for this time, it will be used for removing scars left by ink. 

Toothpaste contains baking soda and hydrogen peroxide, which both work as bleaching agents and thus cause the ink stain to fade away. However, do not use toothpaste on silk or any other form of delicate clothing item because the substance may cause damage to the material.

Make a paste with just enough water to create a thick texture that is not too runny. Apply the paste onto the stain by brushing it over the affected area, then leave it on for an hour before rinsing off with soap and warm water.

Blot the Stain with a Rubbing Alcohol

You can use a paper towel or clean cloth to blot rubbing alcohol on the stain. This will help to dilute the stain, making it easier to remove in the wash. The towel underneath may become wet and soiled from the ink leaching out.

So, dry the area as soon as you blot it. Repeat this process until there are no more ink stains to remove, then rinse the stained area with cold water and dry it. This may completely free up rubbing alcohol. If you’re trying to get rid of ballpoint pen ink after using the rubbing alcohol, then you’ll need to apply regular DIY laundry detergent onto the area and leave it for three to five minutes.

Soak the Stained Cloth in Milk

Soak the ink-stained cloth in milk for about half an hour and then scrub the stain gently with a toothbrush, cuticle brush, or soft-bristled brush. The fat content of the milk will help break down the ink stains, making it easy to remove using other methods that you can think of, like water or basic laundry detergent.

Do not soak the entire garment but soak the stained area only. After that, rinse thoroughly with warm water. Pen ink is made of a water-soluble base, and milk contains a large percentage of fat. The properties in milk will help break down the ink stains, making it easier to remove them with other methods.

Use Hand Sanitizer

Using hand sanitizer on pen stains is great as it contains alcohol, which you use to remove the pen ink in your garment. Soak a cotton ball with hand sanitizer and apply it to the stained area. Let it rest for some time before you rinse it off completely. 

Use Hand Sanitizer
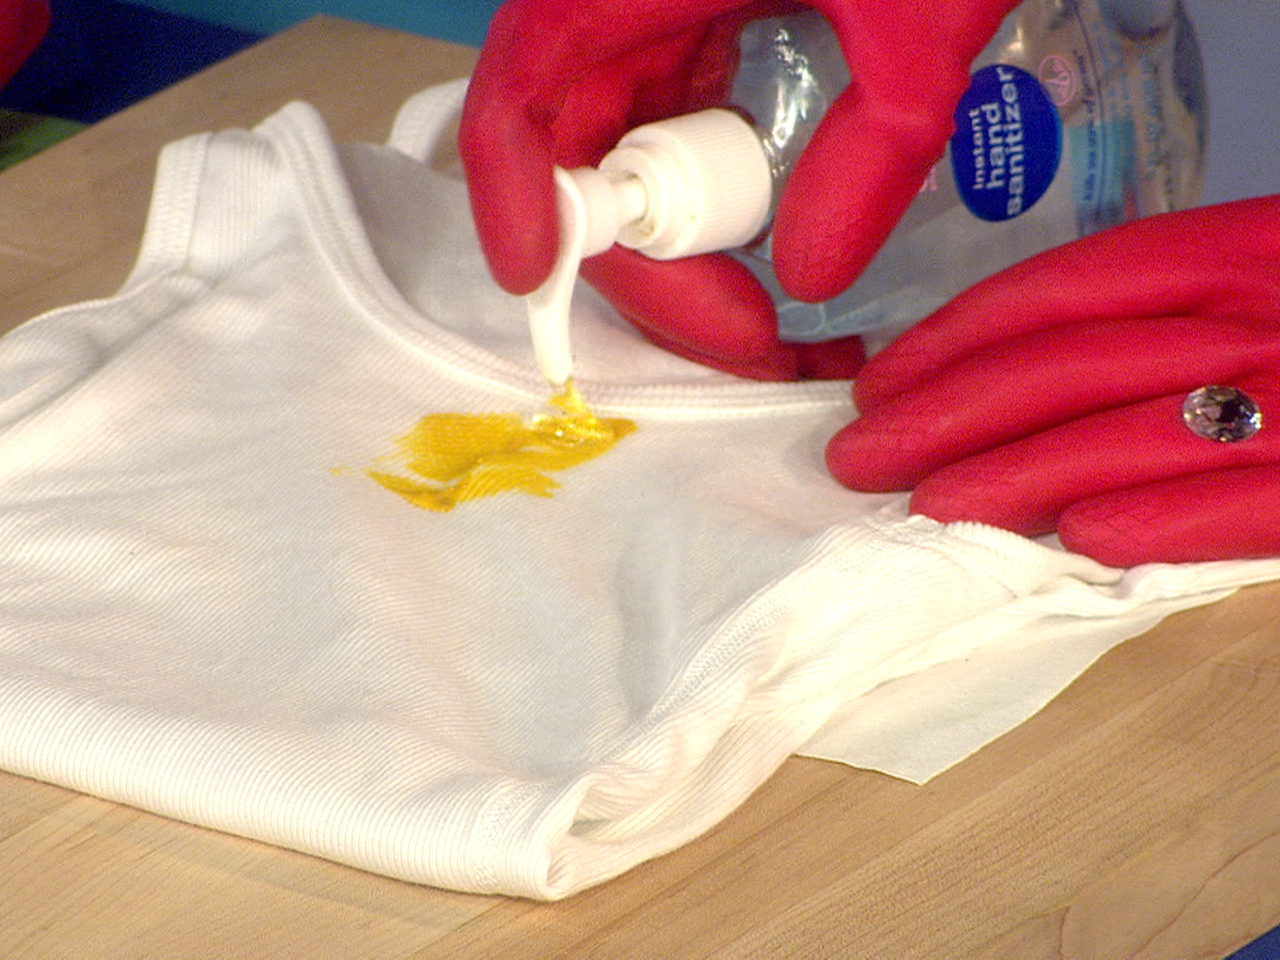
Image caption: https://media-cldnry.s-nbcnews.com/

Treat Ink Stain with Alcohol and Vinegar

You can also treat the pen ink stains with a combination of alcohol and vinegar. Take equal parts of each ingredient, mix them into a bowl. Use this solution on the stained area and rest for 15 minutes, rinse it off completely using water only. Make sure the fabric is thoroughly saturated with this solution. Pour some table salt on the stained area, then wait for ten minutes. After that, scrub the ink stain with a soft brush and rinse with hot water.

Check the Fabric and Wash the Cloth

Place the stained cloth or clothing on a flat surface. Check for colorfastness before using any home remedy to remove pen ink stains. If it is a washable marker, apply the solution of mild soap and water, let it rest for five minutes, and then rinse with plain water. Once you are satisfied with the results, launder as usual.

After the stain is gone, use hot water to rinse the area once again. Dry the clothing by rolling it in a towel to soak up any excess moisture. Make sure the hot is safe for your fabric. For stubborn stains, mix a solution of oxygen-based bleach and cool water. Wet the stained fabric and apply a small amount of solution.

Let it stand for five minutes, then rinse with warm water until all traces of the bleach are gone. If the stain persists, mix a fresh solution and repeat the cleaning process. Make sure the stain is removed completely before drying your clothes.

Treat the Ballpoint Stain with Ammonia

Put on rubber gloves and use an eyedropper or cotton swab to add five to six drops of ammonia solution in a bowl of water if you want to remove ballpoint pen ink from the carpet. Soak a small piece of cloth in the ammonia solution and apply it to the stained area. Let it dry for several minutes, then rinse with warm water. If the stain responds to this treatment, repeat until the stain is removed. Do Not Mix Ammonia with Chlorine Bleach.

Treat Stains with Sandpaper

Suede and other fabrics with a napped surface consist of many filaments, making ink stains remain on the surface. You can get rid of this by rubbing the stains with sandpaper. This way, you can remove ink stains from suede shoes and other items made of napped fabric.

You can also use an old toothbrush or nylon brush if you don’t have sandpaper. Do not use more force, as this can damage the fabric any further. Test it on an inconspicuous area first to make sure it doesn’t damage the fabric.

Treating Ink Stains with Nail Polish Remover

Another method to remove ink stains from suede or fabric items is by treating them with nail polish remover. It has acetone content that can break the stain-ink complex, so this way, you can easily clean out the stain, making it look as good as new.

Use Nail Polish Remover
Image caption: https://www.rd.com/

Although it can work well on tough ink stains, nail polish remover can damage your fabric. So, test it on an inconspicuous area first to make sure it doesn’t damage the fabric. Make sure you move the stained area in a clean, dry cloth and wipe them with a clean cloth dipped in the nail polish remover. Rinse it completely from the fabric, making sure it doesn’t have acetone content.

Treating Ink Stains with Body Spray and Lemon Juice

Body Sprays are good for treating fresh ink stains. This is because body sprays contain alcohol, breaking down the ink, making it easier to clean. If you have a ballpoint pen or permanent marker stain on your clothes, spray the stain with plenty of lemon juice and leave it covered for an hour before washing. To speed up this process, use hot water instead of cold water while washing.

Experiment with other Methods

Gel ink formula differs from ink formula for ballpoint pen. You can experiment with methods using hairspray, baby oil, rubbing alcohol, or peanut butter using different methods of application and time duration. Always ensure you rinse your clothes between methods.

FAQs on How to Remove Ballpoint Permanent Water-Based Ink

Can you remove pen ink using baking soda?

Baking soda can remove ink stains, but it does not affect ballpoint permanent water-based ink.

How do you remove a permanent ballpoint?

Permanent ballpoint can be removed using rubbing or ethyl alcohol, baby oil, hairspray or peanut butter.

How do you remove permanent ink from t-shirts?

You can remove permanent ink by applying pressure with a spoon on the affected area and then washing it in hot water.

Final Thought on How to Remove Ballpoint Permanent Water-Based Ink

As you can see, removing a ballpoint permanent water-based ink stain can be a bit of a hassle. If you don’t have the time or patience to deal with these stains by hand, it is best to take your garments to a dry cleaner who will have the proper equipment and chemicals to easily remove them.


The post How to Remove Ballpoint Permanent Water-Based Ink appeared first on Kitchen Infinity.

Did you miss our previous article…
https://chefbuano.com/?p=183

How To Sew Face Mask

The great outdoors is a wonderful place to enjoy, but it can also be harsh on your skin. Dirt and dust in the air, windburn from riding in an open vehicle, or walking through high winds can cause dryness that leads to premature skin aging. Too much exposure to cold temperatures can also have the same effect.

You could wear gloves when working outside, but they make it hard for you to do many tasks like operating power tools or gardening equipment. Sewing up a simple face mask is one way that you can protect yourself against these hazards without sacrificing mobility or comfort.

By sewing this facemask together with some basic materials, you’ll have something inexpensive and easy enough for anyone who knows how to use a needle and thread. With this simple tool around your neck or hanging off your belt loop, you’ll always be prepared when Mother Nature doesn’t cooperate with your plans.

The DIY face mask pattern in this article will teach you how to make a pleated fabric mask by using elastic ear loops or fabric ties. The pattern piece also includes instructions for inserting nose wire to the upper nose bridge to create better fitting for your fabric face mask. If you learned how to sew curtains then this is going to be easy. Below is a simple guide that can help you sew your face mask easily.

DIY Face Mask Pattern Materials

Cotton fabric with a tight weaveSewing machine and threadScissorsRuler Pins or clips⅛ flat elastic for ear loops or 4 fabric tiesFor an adult face mask, cut one fabric rectangle 16 inches long and 8.5 inches wideFor kids and mid-sized children, cut one fabric rectangle 14 and 15 inches long and 6.5 and 7.5 inches wide

Draw the Face Mask Pattern

For your first face mask, you’ll need a piece of paper that’s at least 2 feet across and 4 1/2 feet long. This pattern should include one vertical line that runs straight down the middle of the sheet and one horizontal line near the top and bottom to help you fold it around your neck. You can make some adjustments to the size and shape of your mask depending on your preference and what you’re trying to accomplish.


Image caption: https://i.ytimg.com/

Sew to the Top Side with Pocket

Fold your fabric rectangle into half lengthwise, with the good sides facing each other. Sew along this long edge to connect the two pieces, using a large 5/8 seam allowance. Leave three to four-inch in the side seam unsewn, creating a filter pocket for your head.

Sew to the Top Side with Pocket
Image caption: https://homemadeonourhomestead.com/

If you don’t need a filter pocket, then that’s fine. But you need to leave an opening in the fabric mask when you complete this step. Once you’ve attached the elastic alternatives and turn your mask right side out, the opening will be in the center of the mask, which doesn’t look that great. Use an iron to press the seam open, then fold the excess seam allowance inside the mask so it’s hidden inside.

Make sure you provide the raw edge of your cotton fabric with an elastic casing. You can use a thin elastic cord or thin elastic with an overcast stitch. Finish the bottom edge with topstitch to keep your fabric pieces from fraying.

Pleated Face Mask Sewing Pattern with Elastic or Ties

When it comes to mask sewing patterns, you can use ties or elastic. If you’re using elastic, pin one piece near the opening in your mask, then place the elastic ends from the top and bottom corners of your rectangle fabric. This will create the ear loop once you’ve turned your mask right side out and pleated. Place the ends of the elastic casing under the topstitch on either side. You can also use a thin cotton cord or ribbon for ties instead of elastic. Just sew the casing at the end of your mask, and proceed to make two ear loops.

Pleated Face Mask Sewing Pattern with Elastic or Ties
Image caption: https://sarahmaker.com/

Alternatively, you can use fabric ties. Cut two fabric pieces into five inches long and stitch the casing for your fabric ties at one end to create loops. Leave an opening in the middle so you can thread each piece through. Apart from fabric ties, you can also use bias tape, twill tape, and strips of ribbon. All you need to do is to fold the strips in half to encase the raw edges before stitching.

Sew the Sides to Secure the Ties

With your 3/8 seam allowance, sew each side of the mask. Do a backstitch at the beginning and end of your stitching to secure it. Use scissors to trim the seam allowance. Be careful not to clip the stitches. Turn your face mask right side out. After that, push out the corners using a blunt end of a chopstick or eraser at the back end of a pencil.

Proceed to insert a nose form and push it in, so it’s between the fabric layers. Create a flexible nose piece by cutting pieces of pipe cleaners. Cut 6 inches of a cleaner pipe, floral wire, or other flexible wire to create the nose piece. Length is up to you, but it should be about the same as your mask. For the two pieces which will connect your nose piece, make a lark’s head knot using your ribbon and tie this around the bottom of one of the pieces. The rope part should be at least twice as long as you want it to be once it’s doubled.

After the nose is made and both ribbon pieces are tied on, you’ll want to partially hand sew your ribbon onto the mask. This will be hidden by the nose piece you make later, so it doesn’t matter too much how it looks. Just get them mostly attached and set aside for now. Next, cut out a triangle for the front of your mask.

This will become the chin strap, but don’t cut it out just yet. First, you need to attach the sides with a running stitch or whip stitch so that they stay in place when you sew on your chin strap

Make the Pleats

Make your DIY mask with three evenly-spaced pleats to ensure a comfortable fit. Start by measuring the back of your head from ear to ear, then dividing that number by three. Measuring your face is more accurate. Once you have that measurement, divide it again by 2 for seam allowance.

Use your markings to create the pleats. Pin the folds down to ensure all pleats are the same depth, then sew them down with a whip stitch. When you wear your mask, the pleats should be able to open downwards to prevent particles from entering your mask.

Use a sewing machine or needle and thread to sew the sides of the mask closed. Leave one side open so you can insert the lining. Use your measurements to cut two pieces of fabric for the lining of your mask, then pin them together with right sides facing each other. Sew around the perimeter, leaving an opening at one end so you can turn it inside out. Next, hem the opening by folding the edge inwards and sewing it down.

Finish the Mask

Topstitch all around your face masks to ensure that the lining and exterior are securely attached. Cut two pieces of elastic that are long enough to fit around your head comfortably with some overlap. Pin one end of each piece of elastic together, right sides facing.

Finish the Mask
Image caption: https://i.pinimg.com/

Sew around the perimeter, leaving an opening at one end so you can turn it inside out. Trim any excess fabric or loose threads. Turn the mask right side out and press, taking care to fold the seam, so it’s not visible on the outside of your new mask.

Next, remove your bobby pins if you used them for shaping, and pin the opening closed. Stitch around all three edges of the opening by hand or sewing machine to finish closing it up.

What is the Importance of Fabric Face Mask

The use of cloth masks is very important as it helps slow the spread of diseases. Many makers are sewing homemade surgical face masks for their families, communities, and health centers. There is high demand for all types of face masks, especially during this coronavirus period.

Finding disposable face masks is a bit expensive, making people look for a cheaper alternative to protect their faces. People have been encouraged to use reusable fabric face masks whenever they’re in public where there is no social distancing.

There is also high demand for protective equipment for health care workers, which has prompted the rise of homemade surgical masks. A surgical mask has been regarded as the stoppage to the widespread of virus in many hospitals.

FAQs on How to Sew Face Mask

What is the best fabric for a face mask?

Stretchy fabrics are best because they provide the most comfort. Also, it’s important to make sure your fabric is skin-friendly—so something like silk may not be ideal for a mask material.

re face masks easy to sew?

Individual patterns for face masks are available on the web, but they’re pretty easy to make on your own.

What type of sewing machine do you need for making a face mask?

Any straight-stitch machine or serger should do the trick. You can use either a sewing machine or hand stitch the opening closed if necessary.

What is the best fabric to use to make a face mask?

The best choices for DIY face masks are cotton t-shirts, pillowcases, and other cotton materials. You can also increase the effectiveness of filtration by using a double-layer material. Do not use non-woven interfacing or if you want to use it, make sure you avoid fusible and iron-on types.

Final Thought on How to Sew a Face Mask

When it comes to face masks, comfort is key. Make sure you choose your fabric carefully and that the mask isn’t too loose or too tight. Enjoy.


The post How To Sew Face Mask appeared first on Kitchen Infinity.

Did you miss our previous article…
https://chefbuano.com/?p=179

How To Grow Strawberries From Seed

Strawberries are delicious and juicy fruits. They’re also very easy to grow. The problem with growing strawberries is that most people don’t know how to do it right. Most of the time, they end up buying them at the store or, even worse, not planting them at all because they think it’s too much work for something so simple.

This guide will teach you everything about growing strawberry plants from seed, including where to buy seeds, when to plant them, and what kind of conditions are best for germination. We’ll make sure you get your first harvest in no time. Also, learning how to grow strawberries from seeds is the cheapest method to produce lots of strawberry plants.

What You Need to know about Strawberries

Growing strawberries from the seed requires patience because the germination can last up to 3 weeks and strawberry plants grow very slowly.When planting strawberry seeds, you should be aware that self-pollinating strawberries will not produce any fruit. For your plant to bear fruit, you’ll need another variety of strawberries nearby. Unfortunately, many gardeners end up growing strawberries from the seed without getting any fruit.If you’re expecting to have strawberries in the same year, you’ll need to start your seeds indoors, about eight weeks before the last frost, and transplant them outside once they’re 2-3 inches tall.Growing strawberries from seeds begin with selecting your preferred strawberry varieties. After selecting the strawberry cultivar that suits your garden and buys the strawberry seed, move to the plant.Also, remember that strawberry seeds from hybrid cultivars won’t reproduce the true form. But varieties such as alpine varieties and heirloom seeds can produce just as delicious fruit.If you’re growing strawberries from the seed, it’s helpful to note that strawberry seeds can remain dormant for up to two years and should be planted in autumn or spring. And plant them about 1/4 inch deep.You also need to cold-treat the seeds before planting to encourage germination. You can cold treat by wrapping the seeds, putting them in an airtight container, and placing them in a freezer.You can also increase the speed and likelihood of germination by placing your strawberry seeds in a sealed plastic bag with damp paper towels. This will make seeds think that winter has come and gone. After this, remove and keep them in a sealed container until it reaches room temperature.Once your strawberry seeds have reached room temperature, you can plant them in a seedling starter mix. Then, keep them under a light source of 100 watts.After two weeks, water your strawberry seeds and note any sprout that comes out from the soil. This will allow you to know which ones have germinated and which one hasn’t.Seeds should then be planted just beneath the soil surface in either autumn or spring after cold treatment. The seeds should be planted about 1/4 inch deep.Strawberries are perennials, so you can plant once and enjoy fruit for many years. However, strawberries grown from seed are unlikely to produce the same fruit as the parent plant.

When to Plant Strawberries

You can plant your strawberries in the fall, winter, or spring. It’s recommended to sow seeds in a pot indoors and wait until they show signs of sprouting before planting outside.

Being that strawberries are perennials, they come back every year. Of course, bare-root strawberries can be planted anytime. But if you want to plant your strawberries from seeds, keep them indoors in the early spring. This will help them until the last frost since they are very cold hardy.

When it comes to planting bare root strawberries, you can do that any time after the last frost until mid-summer. However, keep in mind that your strawberry crowns will be more productive if they are planted during times of less heat stress.

Location for Planting Strawberries

Strawberry plants can grow almost everywhere. A strawberry plant isn’t picky, which makes it comfortable growing in almost any soil condition. But to make sure you are successful with your strawberry plant, there are some things you need to consider first.

You can grow them in containers, hanging pots, and raised garden beds. Most strawberry plant varieties do well where there’s sunshine, so make sure your growing location gets enough direct sunlight. Also, choose varieties that are hardy to your region. Your strawberry seeds should be able to germinate in two to three weeks if you keep them in a well-lighted room with direct sun.

Double-check their care requirements since they vary from variety to variety. The best time for planting strawberry plants is in spring so that their roots have enough time to establish themselves before winter comes. Then you can enjoy fresh strawberries from late summer through fall.

Caring for Strawberries

Strawberry plants can provide fruit to harvest for all seasons. It can also be summer-fruiting, monthly-fruiting, or everbearing. Strawberries need full sunlight for at least 6 hours a day. They also require moist but well-drained soil, so it’s best to plant them in raised beds if your garden soil is heavy clay.

You can also encourage the best growth for your strawberry seed by providing well-draining soil with organic compost or fertilizer. You can also block the weeds from competing with your plant by adding organic mulch around the base of the plant. Remove your weeds as soon as you see them.

Prune off the yellowed or brown leaves from your strawberry plants to help them get as much moisture and nutrients as possible. Many gardeners also like pinching off the leaves once they blossom, so you can do the same. This will help direct the early growth into your bushy leaves.

If your strawberry plant seedlings are not getting direct sunlight from supplementary light, you can provide additional warmth with a grow light. If you do not have such a lighting system, provide at least six hours of sunshine for your plants each day. And if your strawberry seedlings sprout too close to each other, thin them when they’re about an inch tall.

Strawberry Planting Guide

Gather the Supplies

SeedsPots with holes in their bottom for drainagePotting soilWatering can or hoseTwist ties, string, or mesh screenOptional: Strawberry potting mixOne fresh strawberry  Scissor or knife

Get at Least One Strawberry

Of course, you’ll need a strawberry plant to get the seed. You can pick one growing from outdoors or buy a pack of fresh strawberries from the shop.

Extract the Seeds

Take one strawberry, then use a toothpick or knifepoint to scrape off the seeds from the fruit. It might be difficult to extract the seeds, but it depends on the ripeness of the fruit and other factors. Sometimes, the seed can come out with some fruit flesh, but it’s okay. After extracting, place them in a piece of paper towel to dry them off.


Image caption: https://content.instructables.com/

Create Seedling Pots

You can use toilet paper rolls for this. Flatten the roll, then cut it in half lengthwise to get two equal pieces. Put a few drops of water on the surface of the soil, then put four or five strawberry seeds each into two toilet paper rolls that you have prepared. Cover with some more soil and flatten gently with your fingers. Water again, making sure not to overdo it. You can learn how to make a compost bin for the purpose of growing your plants, such as strawberries. 

Prepare the Seedling Pots

Fill up each pot to the top with soil using a gardening trowel or a large spoon. Make a small hole in the middle for each seedling you have placed on the surface of the soil using a pen or just your fingers. Dip one end of a popsicle stick into some water, then place it gently over the hole and leave it to dry a bit before removing it. You don’t want to drown your seeds by giving them too much water before their first leaves have appeared.

Prepare the Seedling Pots
Image caption: https://www.thespruce.com/thmb

Make the seeds easy to move around by placing the entire container inside a clear plastic bag. Seal the bag by knotting it with a rubber band or a small piece of wire. You can now move the container around until you find the best spot for it, away from direct sunlight and preferably at room temperature. Your seeds will be able to create a small visible seedling in two to three weeks if they are viable.

After two weeks, you can take off the bag and open up any vents in it to help improve humidity while reducing the risk of dehydration or fungal infection. Remove them once the seeds appear because the intensified sunlight can burn them in a sealed container. The strawberry seeds will germinate anywhere between 10 days to three weeks, which is why it’s important for them to not be buried too deep in the soil at this

Transplanting and Harvesting

After the plants have turned six to eight inches tall, you can transplant them to larger pots or outdoors if it’s the right time of year for your strawberries. You should harvest them around 12 to 18 months after they are initially transplanted.

FAQs on Growing Strawberries from Seeds

How long does it take to grow strawberries from seed?

Your seeds will germinate in one to six weeks. After that, you can transplant them into a larger pot or outdoors. It takes around 12 to 18 months for your plants to mature and produce strawberries.

What is the fastest way to germinate strawberry seeds?

Allow your seeds to germinate for a few days, then place them in a warm place. Once they’re dry, damp them with a paper towel, then scatter your seeds onto a moist paper towel. Place the entire sheet into a plastic bag, seal it, and then place it in a warm spot. Check on them once or twice a day, adding water when necessary.

What is the best soil for strawberries?

Strawberries thrive in nutrient-rich soils but will grow well in most climates.  Also, make sure to test soil pH since strawberries need a pH of 5.4 to 6.5.

Final Thought on How to Grow Strawberries from Seed

As you can see, growing strawberries from seeds is not a very tricky task, and it will pay off. There is nothing more rewarding than harvesting fruits you’ve grown yourself, especially after the long wait to see your plants blossom into beautiful strawberries.                   


The post How To Grow Strawberries From Seed appeared first on Kitchen Infinity.

Did you miss our previous article…
https://chefbuano.com/?p=177