The great outdoors is a wonderful place to enjoy, but it can also be harsh on your skin. Dirt and dust in the air, windburn from riding in an open vehicle, or walking through high winds can cause dryness that leads to premature skin aging. Too much exposure to cold temperatures can also have the same effect.
You could wear gloves when working outside, but they make it hard for you to do many tasks like operating power tools or gardening equipment. Sewing up a simple face mask is one way that you can protect yourself against these hazards without sacrificing mobility or comfort.
By sewing this facemask together with some basic materials, you’ll have something inexpensive and easy enough for anyone who knows how to use a needle and thread. With this simple tool around your neck or hanging off your belt loop, you’ll always be prepared when Mother Nature doesn’t cooperate with your plans.
The DIY face mask pattern in this article will teach you how to make a pleated fabric mask by using elastic ear loops or fabric ties. The pattern piece also includes instructions for inserting nose wire to the upper nose bridge to create better fitting for your fabric face mask. If you learned how to sew curtains then this is going to be easy. Below is a simple guide that can help you sew your face mask easily.
DIY Face Mask Pattern Materials
Cotton fabric with a tight weaveSewing machine and threadScissorsRuler Pins or clips⅛ flat elastic for ear loops or 4 fabric tiesFor an adult face mask, cut one fabric rectangle 16 inches long and 8.5 inches wideFor kids and mid-sized children, cut one fabric rectangle 14 and 15 inches long and 6.5 and 7.5 inches wide
Draw the Face Mask Pattern
For your first face mask, you’ll need a piece of paper that’s at least 2 feet across and 4 1/2 feet long. This pattern should include one vertical line that runs straight down the middle of the sheet and one horizontal line near the top and bottom to help you fold it around your neck. You can make some adjustments to the size and shape of your mask depending on your preference and what you’re trying to accomplish.

Image caption: https://i.ytimg.com/
Sew to the Top Side with Pocket
Fold your fabric rectangle into half lengthwise, with the good sides facing each other. Sew along this long edge to connect the two pieces, using a large 5/8 seam allowance. Leave three to four-inch in the side seam unsewn, creating a filter pocket for your head.
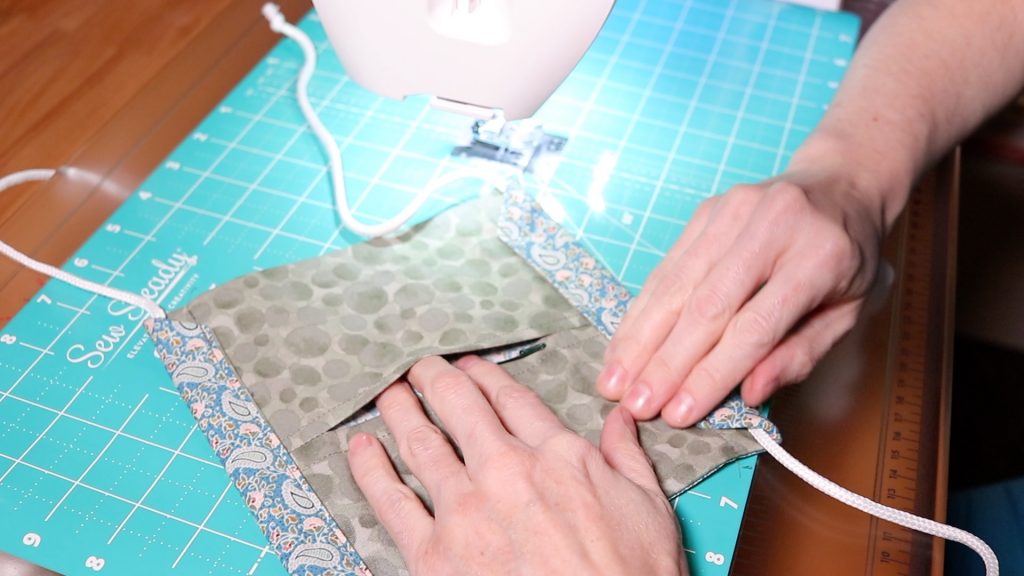
Image caption: https://homemadeonourhomestead.com/
If you don’t need a filter pocket, then that’s fine. But you need to leave an opening in the fabric mask when you complete this step. Once you’ve attached the elastic alternatives and turn your mask right side out, the opening will be in the center of the mask, which doesn’t look that great. Use an iron to press the seam open, then fold the excess seam allowance inside the mask so it’s hidden inside.
Make sure you provide the raw edge of your cotton fabric with an elastic casing. You can use a thin elastic cord or thin elastic with an overcast stitch. Finish the bottom edge with topstitch to keep your fabric pieces from fraying.
Pleated Face Mask Sewing Pattern with Elastic or Ties
When it comes to mask sewing patterns, you can use ties or elastic. If you’re using elastic, pin one piece near the opening in your mask, then place the elastic ends from the top and bottom corners of your rectangle fabric. This will create the ear loop once you’ve turned your mask right side out and pleated. Place the ends of the elastic casing under the topstitch on either side. You can also use a thin cotton cord or ribbon for ties instead of elastic. Just sew the casing at the end of your mask, and proceed to make two ear loops.
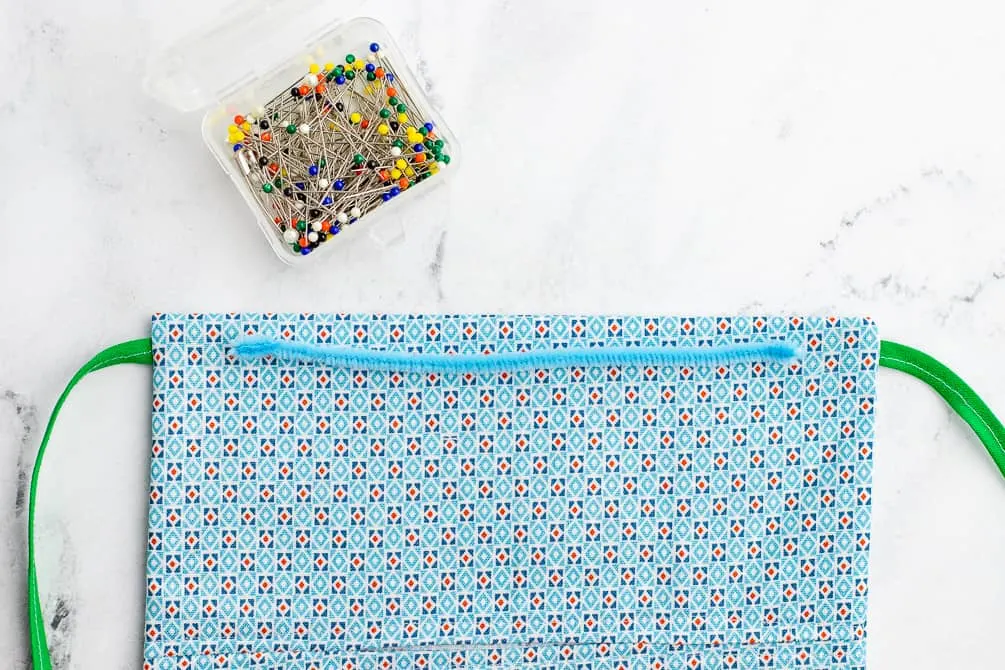
Image caption: https://sarahmaker.com/
Alternatively, you can use fabric ties. Cut two fabric pieces into five inches long and stitch the casing for your fabric ties at one end to create loops. Leave an opening in the middle so you can thread each piece through. Apart from fabric ties, you can also use bias tape, twill tape, and strips of ribbon. All you need to do is to fold the strips in half to encase the raw edges before stitching.
Sew the Sides to Secure the Ties
With your 3/8 seam allowance, sew each side of the mask. Do a backstitch at the beginning and end of your stitching to secure it. Use scissors to trim the seam allowance. Be careful not to clip the stitches. Turn your face mask right side out. After that, push out the corners using a blunt end of a chopstick or eraser at the back end of a pencil.
Proceed to insert a nose form and push it in, so it’s between the fabric layers. Create a flexible nose piece by cutting pieces of pipe cleaners. Cut 6 inches of a cleaner pipe, floral wire, or other flexible wire to create the nose piece. Length is up to you, but it should be about the same as your mask. For the two pieces which will connect your nose piece, make a lark’s head knot using your ribbon and tie this around the bottom of one of the pieces. The rope part should be at least twice as long as you want it to be once it’s doubled.
After the nose is made and both ribbon pieces are tied on, you’ll want to partially hand sew your ribbon onto the mask. This will be hidden by the nose piece you make later, so it doesn’t matter too much how it looks. Just get them mostly attached and set aside for now. Next, cut out a triangle for the front of your mask.
This will become the chin strap, but don’t cut it out just yet. First, you need to attach the sides with a running stitch or whip stitch so that they stay in place when you sew on your chin strap
Make the Pleats
Make your DIY mask with three evenly-spaced pleats to ensure a comfortable fit. Start by measuring the back of your head from ear to ear, then dividing that number by three. Measuring your face is more accurate. Once you have that measurement, divide it again by 2 for seam allowance.
Use your markings to create the pleats. Pin the folds down to ensure all pleats are the same depth, then sew them down with a whip stitch. When you wear your mask, the pleats should be able to open downwards to prevent particles from entering your mask.
Use a sewing machine or needle and thread to sew the sides of the mask closed. Leave one side open so you can insert the lining. Use your measurements to cut two pieces of fabric for the lining of your mask, then pin them together with right sides facing each other. Sew around the perimeter, leaving an opening at one end so you can turn it inside out. Next, hem the opening by folding the edge inwards and sewing it down.
Finish the Mask
Topstitch all around your face masks to ensure that the lining and exterior are securely attached. Cut two pieces of elastic that are long enough to fit around your head comfortably with some overlap. Pin one end of each piece of elastic together, right sides facing.
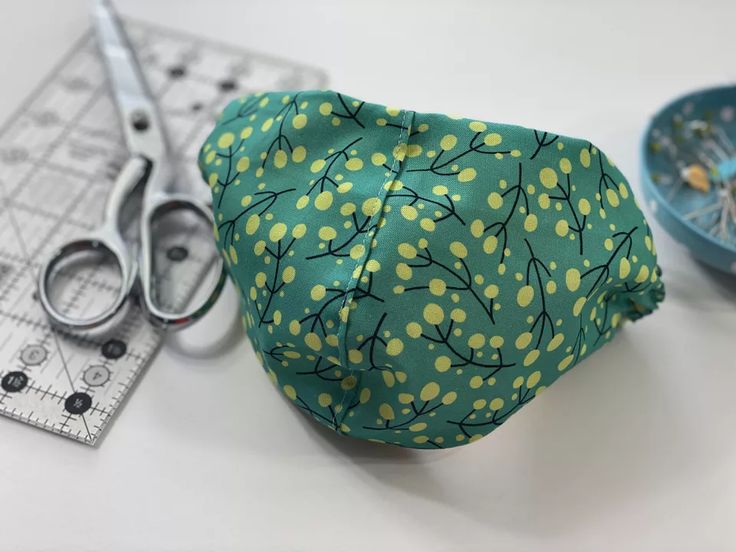
Image caption: https://i.pinimg.com/
Sew around the perimeter, leaving an opening at one end so you can turn it inside out. Trim any excess fabric or loose threads. Turn the mask right side out and press, taking care to fold the seam, so it’s not visible on the outside of your new mask.
Next, remove your bobby pins if you used them for shaping, and pin the opening closed. Stitch around all three edges of the opening by hand or sewing machine to finish closing it up.
What is the Importance of Fabric Face Mask
The use of cloth masks is very important as it helps slow the spread of diseases. Many makers are sewing homemade surgical face masks for their families, communities, and health centers. There is high demand for all types of face masks, especially during this coronavirus period.
Finding disposable face masks is a bit expensive, making people look for a cheaper alternative to protect their faces. People have been encouraged to use reusable fabric face masks whenever they’re in public where there is no social distancing.
There is also high demand for protective equipment for health care workers, which has prompted the rise of homemade surgical masks. A surgical mask has been regarded as the stoppage to the widespread of virus in many hospitals.
FAQs on How to Sew Face Mask
What is the best fabric for a face mask?
Stretchy fabrics are best because they provide the most comfort. Also, it’s important to make sure your fabric is skin-friendly—so something like silk may not be ideal for a mask material.
re face masks easy to sew?
Individual patterns for face masks are available on the web, but they’re pretty easy to make on your own.
What type of sewing machine do you need for making a face mask?
Any straight-stitch machine or serger should do the trick. You can use either a sewing machine or hand stitch the opening closed if necessary.
What is the best fabric to use to make a face mask?
The best choices for DIY face masks are cotton t-shirts, pillowcases, and other cotton materials. You can also increase the effectiveness of filtration by using a double-layer material. Do not use non-woven interfacing or if you want to use it, make sure you avoid fusible and iron-on types.
Final Thought on How to Sew a Face Mask
When it comes to face masks, comfort is key. Make sure you choose your fabric carefully and that the mask isn’t too loose or too tight. Enjoy.
The post How To Sew Face Mask appeared first on Kitchen Infinity.
Did you miss our previous article…
https://chefbuano.com/?p=179