Carpet vs Hardwood Flooring Comparison

Carpet vs Hardwood Flooring Comparison

When it comes to home interior design, there are many options available. However, you’ll need to make the right choice to get the best results.  There are several types of flooring that can be used for your house interior design, but carpeting and hardwood are the most popular ones.

We’ve created this guide on carpeting vs hardwood flooring so that you can learn what factors may affect your decision when choosing between these types of flooring for your home interiors. So, if you’re replacing your floors and wondering how to choose between carpeting vs hardwood flooring, don’t worry. This article is for you.

Sustainability 

Carpets

Modern carpets are created by threading closely spaced loops of synthetic fibers through large sheets of backing material. There are also some natural fiber carpets made out of cotton and wool. Most carpets come in synthetic materials, and they’re manufactured in huge rolls where they can be bought in any quantity.


Image credit: https://modernize.com/
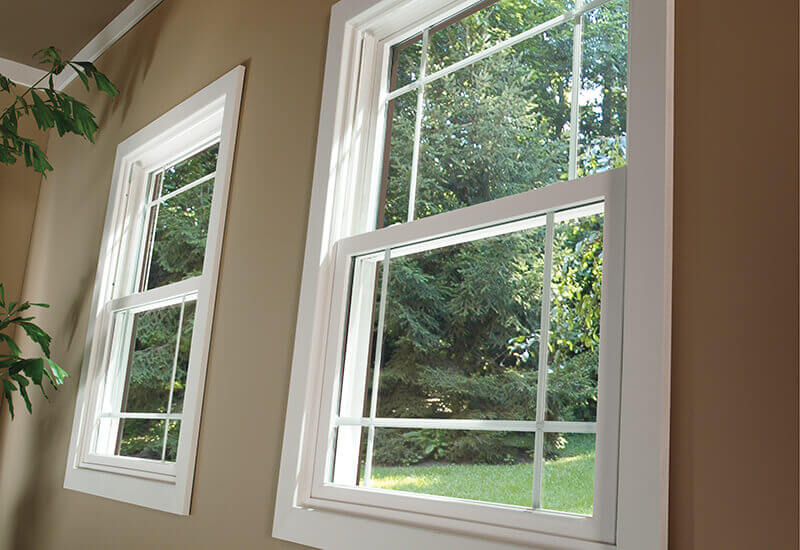
Hardwood Floor

Modern hardwood flooring comes in one of two forms. There is solid hardwood flooring, which boasts of solid wood that is milled from rough lumber from felled hardwood trees. The boards are smoothly sanded on the top surface and are left slightly rough at the bottom. 

Another hardwood flooring form is known as engineered hardwood flooring. This is the most economical type of modern wood flooring. Engineered wood flooring has the same tongue and groove construction and can be installed the same way as solid hardwood floors.

ppearance

Carpet

Appearance is another big difference between hardwood flooring and carpet. Both hardwood and carpet flooring comes in several styles that can meet any interior design, but carpet offers variety in color, texture, and feel. While there’s a substantial difference between hardwood and carpeted floors, carpets are more available in wood-like, making them more decorative. 

The great thing about carpet is that you can choose any color, making it a very versatile flooring choice as you can mix and match colors and shades based on other design choices in your room.

Hardwood

The look of hardwood flooring is easily recognizable, and its main appeal is natural wood tone colors and the appealing pattern of wood’s grain. Hardwood flooring creates a bold statement, and that’s why it’s called the prestige in flooring. When it comes to appearance, your style and the style of your house will determine the best flooring option.

Cleanliness and Care

Hardwood Flooring

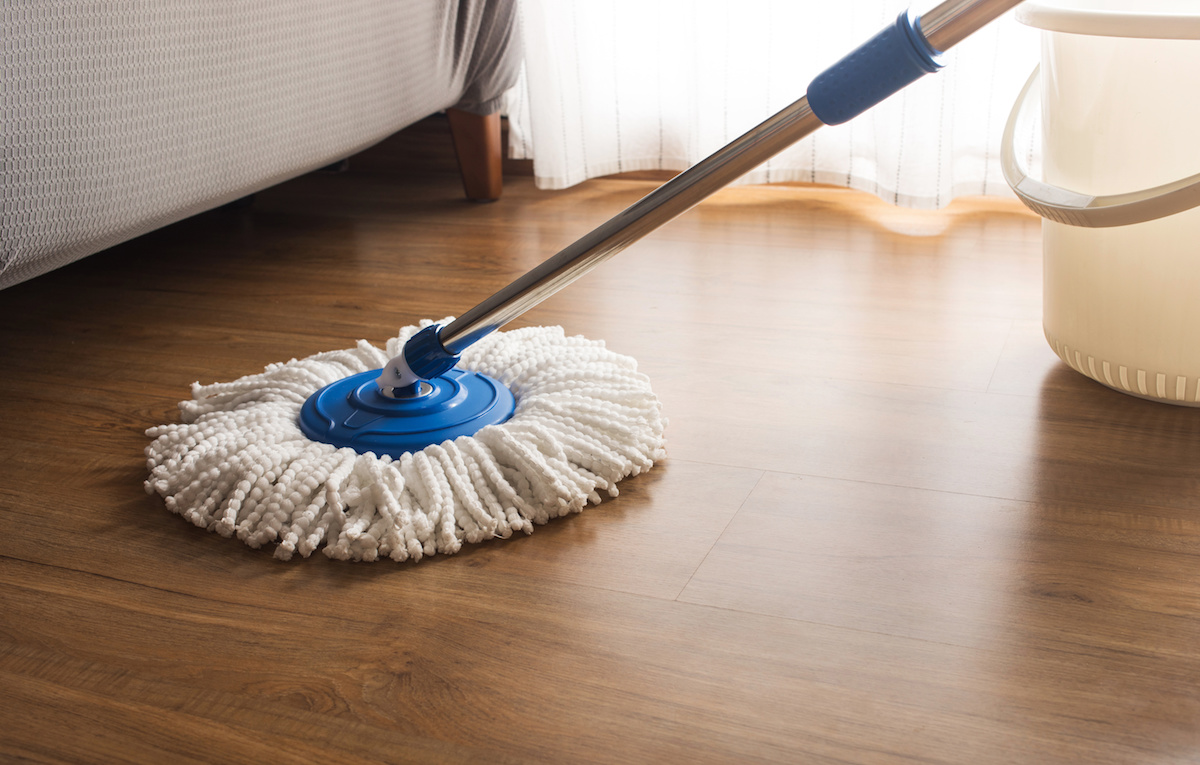
Hardwood flooring is easy to care for and maintain with regular cleanups. This flooring type doesn’t require deep cleaning too often. While cleaning hardwood floors, it’s advisable not to use liquid cleaning products as these can warp and damage the natural fibers that make up the floorboards.

Hardwood Flooring
Image credit: https://res.feednews.com/

It’s also easier to spot dirt on hardwood floors than carpet floors, making it easier to notice when your floors need a wipe and a good cleaning. Hardwood floor cleanings include sweeping and vacuuming with a hardwood vac to maintain its appearance and condition. Periodic damp mopping with the wood cleaner will also remove deeper dirt and most stains.
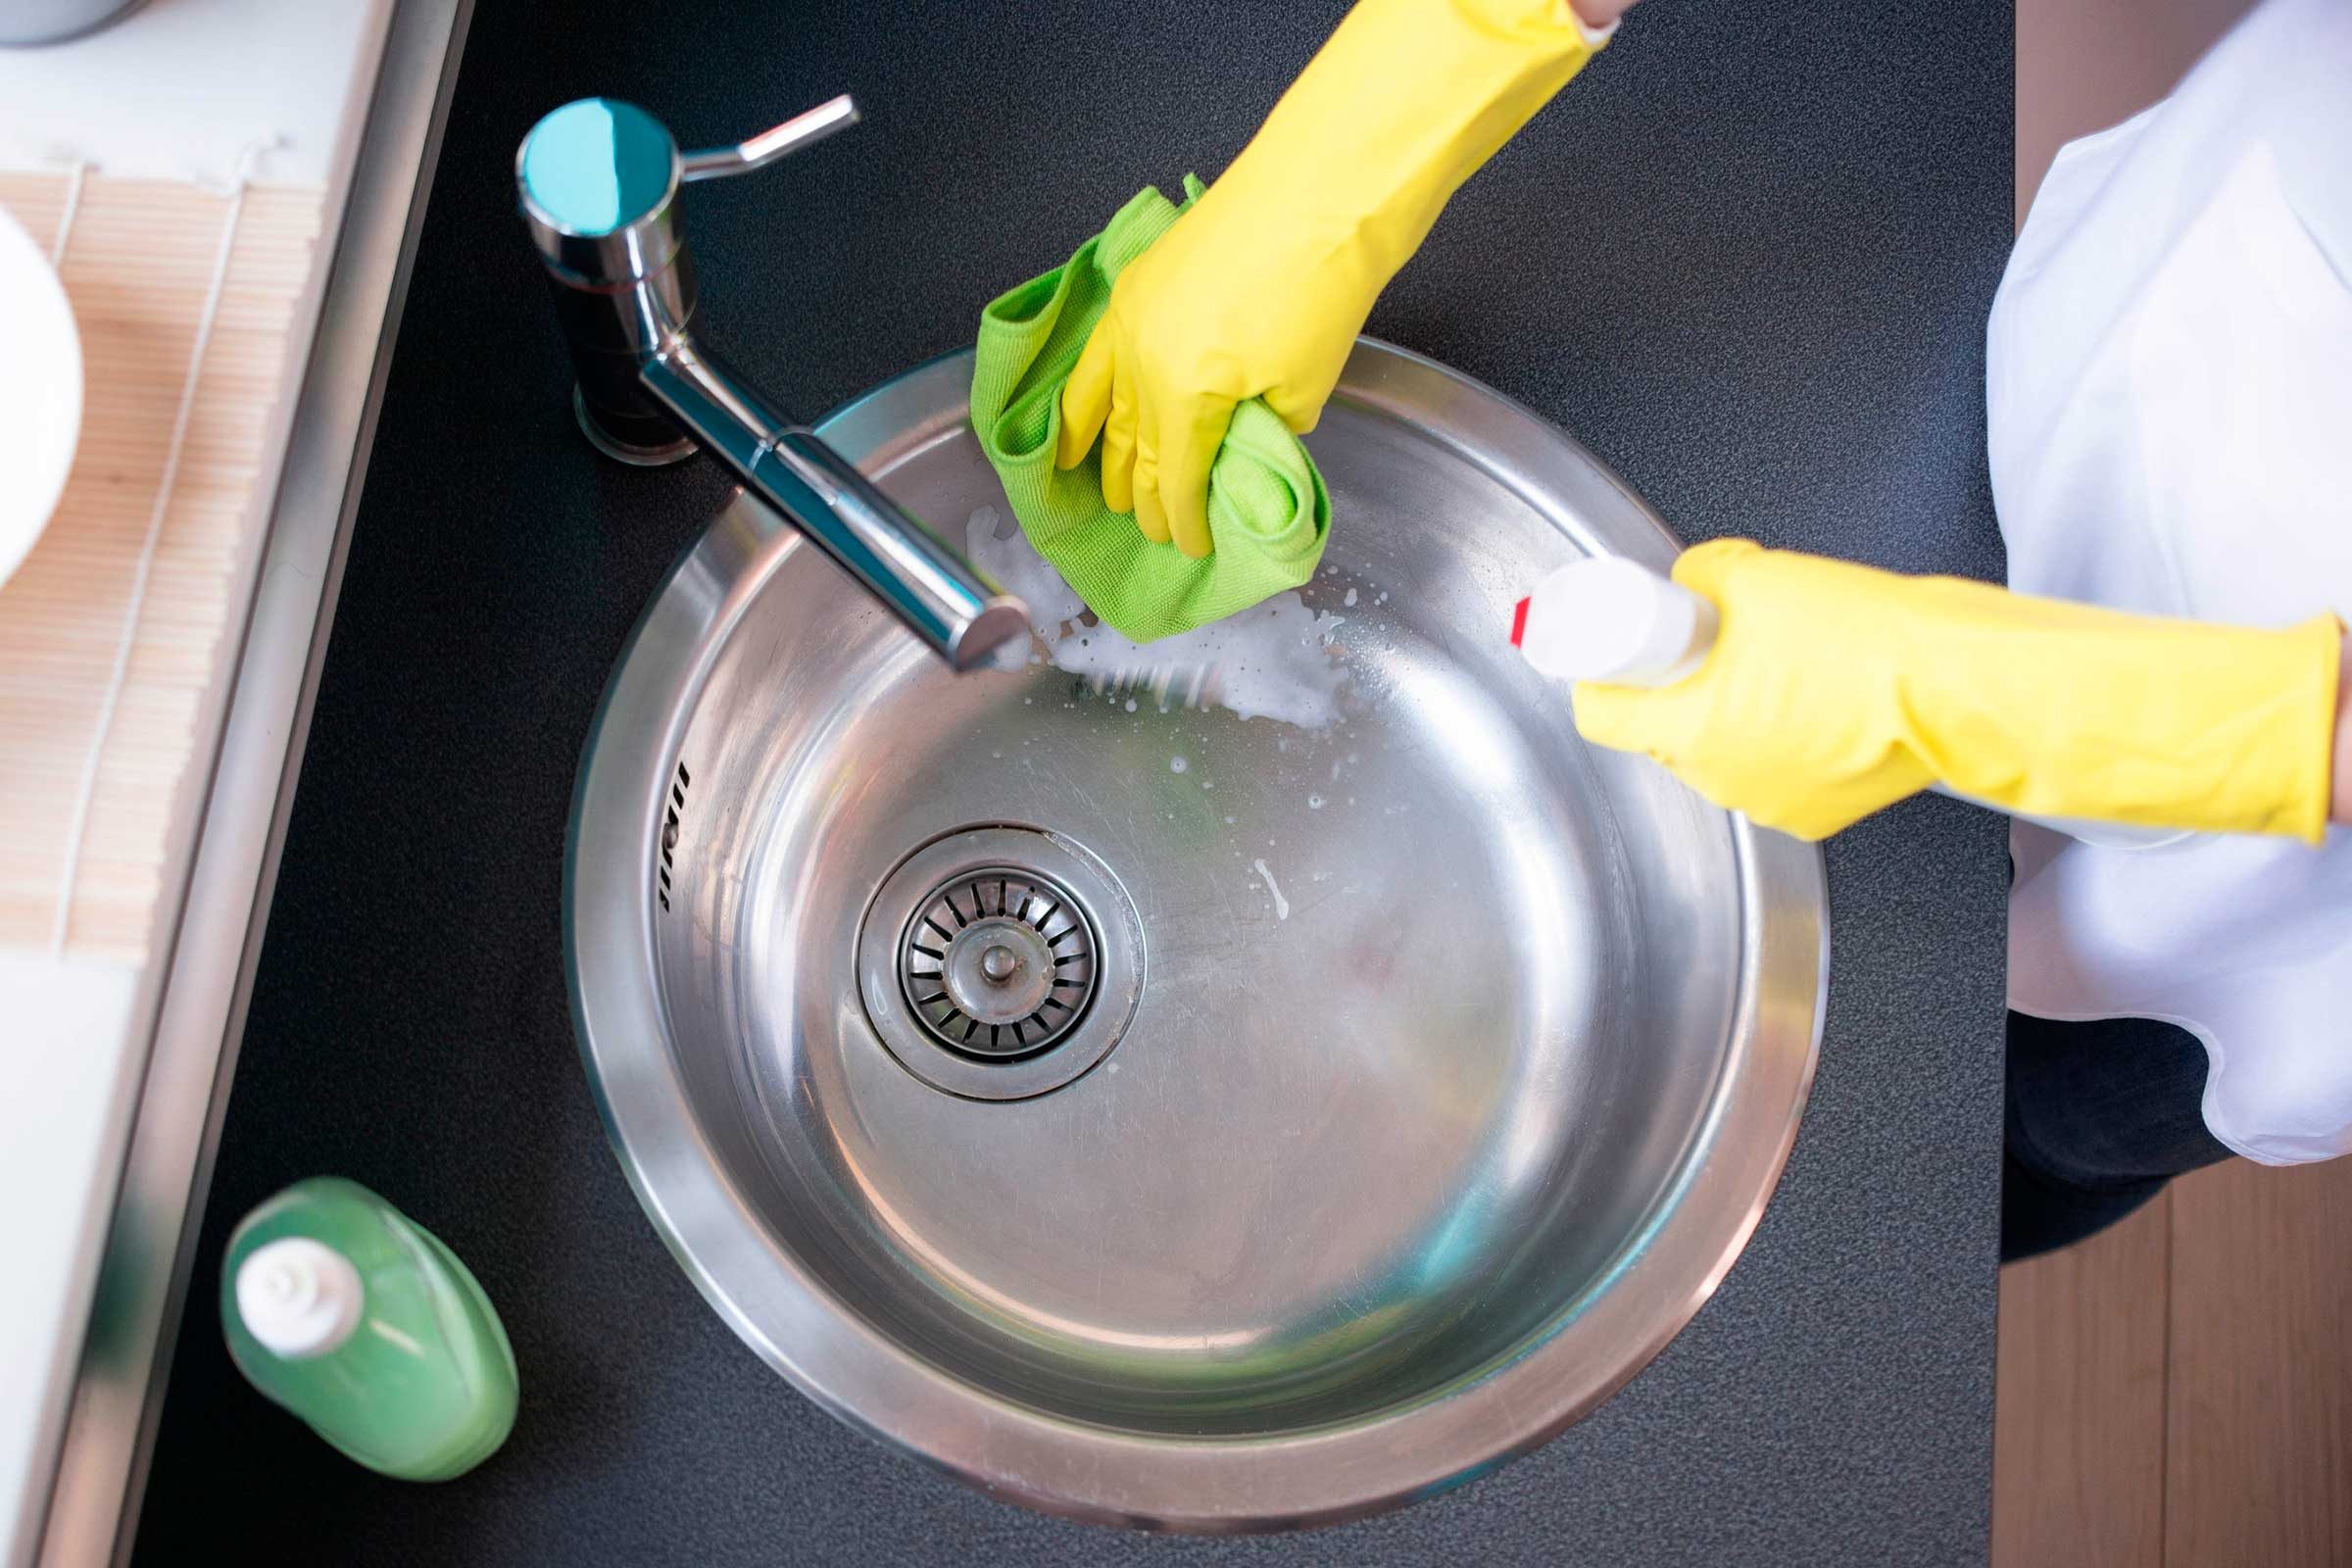
Carpet

Cleaning carpet flooring seems daunting because stains can soak and settle permanently on the surface. To prevent stains, turn your rug over once a week to let the other side be exposed to sunlight and air for a day. Not doing so can create a musty smell forming on dark spots in your carpet, especially if you have pets at home. 

Carpet
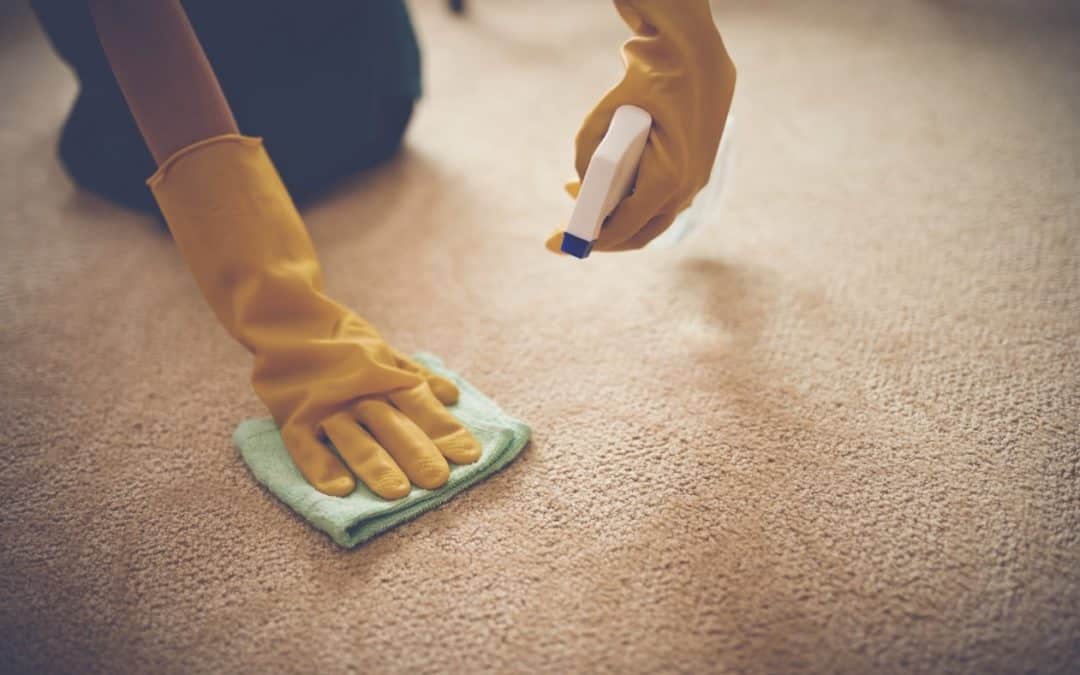
Image credit: https://2avk1yzaj801re7g11oaur7q-wpengine.netdna-ssl.com/

Wipe spills immediately using a clean cloth with warm water or a commercially available solution. Regular vacuuming can also help get rid of dust, dirt, pollen, and other allergens. If left without vacuuming, these elements can get stuck in the carpet fibers causing unpleasant odors.

Durability and Maintenance

When considering the durability of your hardwood flooring vs carpet, there are different things that you must consider. Don’t only concentrate on the lifespan of the flooring type, but consider the impact of your daily life on it. Factors such as foot traffic, your habits, visitors, and pets will greatly influence the durability of your flooring.

Hardwood Floors

Hardwood is a durable material that can last 50 to 60 years if properly maintained. But they’re also more expensive in most cases. When evaluating cost, consider the initial price of the wood flooring and its installation and maintenance costs over time. Think about how much it costs to refinish hardwood flooring

Hardwood flooring will also last longer if you care for it properly, both by taking good care of it and making sure that you clean up spills quickly. Hardwood floors can also warp when exposed to too much liquid and can dent and scratch from furniture movement and shoe traffic.

Carpet Flooring

Carpet is a more forgiving floor type. As long as you deal with spills immediately and frequent vacuuming, you won’t have to worry about dents and scratches. However, carpeting still does need occasional professional upkeep, such as cleaning and re-stretching. Occasional professional cleaning service can also extend the life of your carpet. 

The best flooring type for durability and maintenance is hardwood flooring because it is made to last and does not need any professional upkeep. Even if you do manage to inflict some damage, hardwood flooring can be refinished or patched, unlike carpeting which has to be completely replaced when damage is done.

Cost and Installation of Carpet and Hardwood Flooring

Hardwood

Professionals usually do hardwood flooring installation because of its weight and intricacy. You will need to foot the bill for this aspect of the project, too, as well as for upkeep in general. A DIY installation can save you money and time, but it can cause you some additional cost if not properly installed.

Hardwood
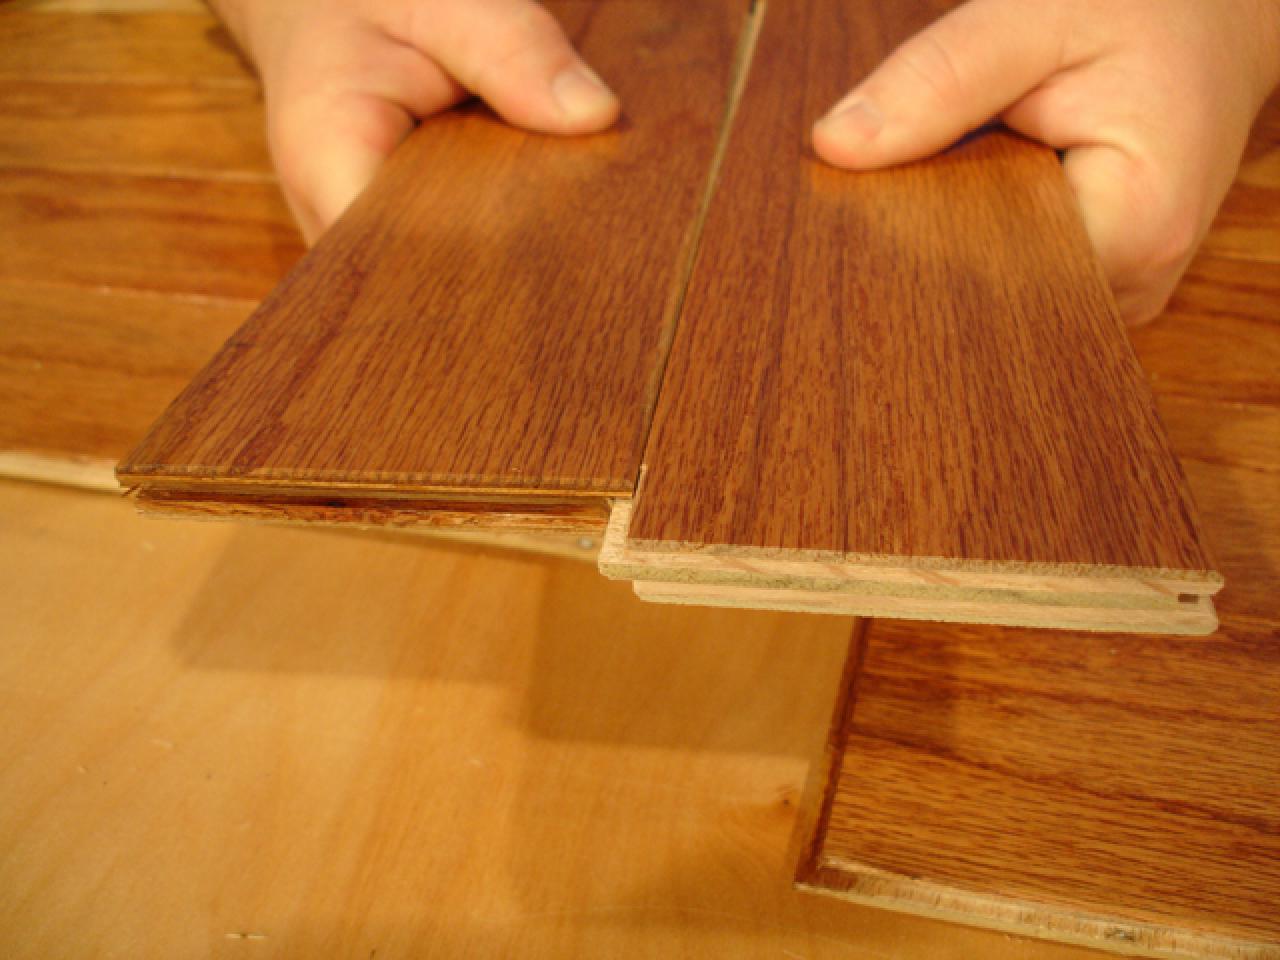
Image credit: https://diy.sndimg.com/

Fortunately, solid hardwood flooring and engineered hardwood flooring products are pre-finished in the factory, but you’ll have to pay more to have them pre-finished. Solid hardwood floor costs start at around $4 per square foot and go up from there. And on average, hardwood floors cost about $8 per square installed.

Carpet

Installation of carpeting can be done yourself or by a professional at your request. Carpet padding is about an inch thick, and if you purchase high-quality padding, it will last the life of your carpet. It will cushion your feet from bumps in the floor and keep the carpet fibers uniform and neat-looking. 

Carpet
Image credit: https://www.timberlinehouston.com/

The most convenient flooring for cost and installation is carpet flooring because it can be pulled back to install underlayment for hardwood flooring. It’s also cost-effective compared to hardwood flooring.

For example, perfectly acceptable carpeting may be available for less than $1 per square foot installed. The cost can also run as high as $20 per square foot.On average, most carpets purchased at home centers cost about $3 per square foot, while solid hardwood flooring starts at around $4 to $8 per square foot installed. Also, the cost of professional installation is higher on hardwood floors.

Resale Value

Hardwood

Most homeowners prefer having hard flooring surfaces such as hardwood and ceramic tiles because they’re easy to clean and tend to hide flaws the best. Even estate agents agree that when it comes to carpet or hardwood flooring, hardwood is likely to increase the resale value of your home. Hardwood is a natural material and is much longer-lasting than carpet.

Carpet

Carpeting tends to wear down over time and may show signs such as wrinkles, spots and footprints after a few years of use. All these tend to lower the resale value of the property which you’re trying to sell. Also, new carpet can also lead to home improvement than an old carpet.

They could also be a turn-off for potential homebuyers who’d rather have hardwood that’s clean and in good condition. Therefore, the flooring type with the best resale value is hardwood flooring. Hardwood resale value wins even when you ask real estate agents in the market.

Radiant Flooring

Both carpets and hardwood floors can be installed with radiant heating. And because of the insulating properties, you must be careful when choosing both carpet and radiant heat systems that can work together. In some cases, you may need to set the radiant heat system higher for the carpet to warm sufficiently.

On the other hand, hardwoods work with many radiant heat systems because they transmit heat with little loss. But it’s not recommended to use radiant floor heating under a plank wider than three inches.

Environmental Impact

Carpet

Some natural carpets such as wool have less impact on the environment than synthetic carpeting. Wool and other natural fibers are renewable and biodegradable. Furthermore, most synthetic carpets are made from petroleum which is not renewable and is a non-biodegradable material. 

They can break down unevenly, releasing volatile organic compounds as they age. The downside of natural fibers is that they cannot be recycled, and when disposed of in landfills, they will take a very long time to decompose.

Hardwood Flooring

If you’re concerned about the environment and want renewable flooring, then hardwood flooring is your best option. Hardwood is a renewable material, especially if you ensure responsible harvesting and planting of trees.

Homeowners who are looking for more sustainable flooring material can look to hardwood flooring as their best option. Most hardwoods are also recyclable, which means they won’t sit in landfills for decades.

Water and Heat Resistance

Carpet

The synthetic fiber materials used in most modern carpets make them highly resistant to water damage. It’s also important to prevent water from seeping down into carpet padding, which can cause mold and mildew growth. This is especially important with groundwater damage from flooding or leaky roofs.

Additionally, tile carpets can be damaged by heat, such as burning cigarettes and hot pans. Some carpet materials can also emit toxic gases if a serious home fire ignites.

Hardwood Flooring

Wood flooring is not recommended in any location with constant water and moisture. It’s also not recommended for below-grade installation against a concrete slab because contact with concrete can cause swelling. Wood flooring materials also emit formaldehyde gas over time. However, engineered wood flooring may be stable to water and moisture.

Engineered hardwood flooring has a moisture barrier to stop water from seeping into the subfloor before it ever reaches your main joists below. You can also install engineered hardwood flooring directly against concrete slabs that are dry and free of cracks or joints where water could infiltrate.

Comfort and Sound

Carpet

With its soft fibers and insulating pad, carpeting is more comfortable to walk on than hardwood floors. High-pile carpeting is soft and thick underfoot, while lower-pile carpeting feels more like an even surface. Carpet can be made from various materials, including nylon, wool, cotton or synthetic fibers. 

The sound absorption of carpet comes from the insulating pad underneath the carpet fibers, but that means the carpet is better at trapping sound inside the house.

Hardwood Flooring

Hardwood floors are loud compared to carpet, especially when installed on the upper levels; the people below will hear footsteps and other sounds from above. The hardwood floors amplify the sound of children running on the upper levels because it’s a harder surface with no insulation capabilities.

Hardwood floors are less comfortable underfoot, but they have a timeless elegance that carpeting can’t match. Also, since hardwood floors are laid in strips, any surface imperfections can be covered up with a strip of wood over the problem area or damp mopped to free the particles.

FAQs on Carpet and Hardwood Flooring Comparison

Which type of flooring is suitable in an active environment?

High-quality carpets can sustain high foot traffic if you keep them level and smooth to avoid irregular wear.

Which one is the warmer flooring type?

Carpeting is warmer than wood flooring, but only when the carpet is not glued directly onto concrete. Wood floors, on the other hand, allow cold air to move through between individual boards.

Final Thoughts on Carpet vs Hardwood Flooring Comparison

As you can see, there’re many factors you need to consider when choosing between carpet and hardwood flooring. The answer on which one is better depends heavily on your particular situation, budget, and taste.


The post Carpet vs Hardwood Flooring Comparison appeared first on Kitchen Infinity.

How To Care For Orchids Indoors

Orchids require a lot of care but if you’re willing to put the time into it then it could be an opportunity for you to grow something that will last many years.

In this article, we will discuss how orchids need to be cared for indoors. Let’s dive deep into this topic.


Image Credit: http://bhg.com

Caring for your orchids

Orchids are beautiful and exotic plants that require a lot of care. They need to be kept in warm areas, away from drafts or cold air. Be sure to keep them out of direct sunlight as they are sensitive to light.

As with other plants, orchids require a good amount of water and should be watered once every 1-2 weeks depending on the humidity. The pot should have a drainage hole to ensure that excess water will not sit in the soil for too long.

You can fertilize your orchid every month using a mixed fertilizer. Do not allow the fertilizer solution to remain on the leaves as it can burn them. Instead, make sure the fertilizer is poured into the soil around the roots where it will be absorbed by the plant more easily. You can tell if your orchid needs watering because its leaves will droop slightly – don’t wait until its leaves are completely soggy.

Repotting your orchid plant

Orchids can live for a long time, however, they require repotting every 2 – 3 years to provide fresh nutrients and soil.

You also need to decide what size pot you want your orchid in. They tend to either be smaller pots for younger plants, or they can grow into bigger-sized pots as they age depending on how their flowers mature. You should consider using clay or plastic pots as both have been known to work well with orchids.

You must use the right type of soil as this will ensure that water doesn’t sit at the bottom of the pot and over saturate the roots. That being said, it is equally important that excess water can drain from the pot.

When you are ready to repot your orchid plant, choose a new pot that is only 1 size larger than the previous one. It is important to slowly transition your plant from a small pot to a bigger pot as this helps prevent water-logging and shock which could kill the roots. Only make amendments to your orchid’s soil when it is completely dry – never do so when it is wet since this will activate fungus growth.

Here are some steps on how to properly repot an orchid plant:

Remove your orchid from its old pot

Carefully remove the orchid plant from its old pot by gently squeezing it on the sides of the pot until you feel the root ball loosen.

dd some new, fresh potting soil 

Using a clean pot, add your pre-moistened commercial orchid bark mix to allow for proper drainage so that excess water can flow out.

Remove any dead leaves and roots

Using a clean pair of cuticle scissors remove all dead roots and leaves. If there are any black spots on it then this is most likely an indication that the plant has been infected with fungus.

Repot your orchid into its new pot 

Gently place the orchid into its new pot and push down on the root ball so that it is secure in its pot. Add more soil around the outside of the root ball until it is completely covered.

Water your orchid plant 

You can now carefully water your orchid to ensure that it is well hydrated, but again do not allow any liquid to sit at the bottom of the pot. You should never have to repot your orchids at any time other than every 2-3 years, which you will know due to their roots growing out through the drainage holes. If this happens then simply remove some of them before repotting.

Cutting off any dead roots

It is important to periodically cut off any dead roots as they can cause your orchid plant to rot and die. You should only do this when the soil is completely dry, and not when it is wet since this will activate fungus growth.

1) Find the dead roots that you wish to remove by gently running your hand through the root ball. You can tell which ones are dead rather than alive because they will be totally dry and somewhat brittle, whereas live roots are moist and pliable.

2) Remove them using a pair of clean cuticle scissors or sharp knives, making sure you leave at least 1/2 inch behind. You should also try to angle yourself so that you avoid cutting any living roots as well.

3) If there is still some of the brown root left after removing it with your cuticle scissors then simply break it off using your fingers. This ensures that nothing is left for fungus to feed on which could ultimately kill the plant.

Preventing fungus from spreading

You must remember to remove any dead leaves and roots as these can lead to the spread of fungus within your orchid plant. If there is a black spot on it then this is an indication that the plant has been infected with fungus and should be removed immediately so as not to encourage further growth.

1) You should start by removing all dead parts of your orchid using fresh cuticle scissors.

2) Next, use a cotton swab to lightly rub alcohol around the area where you will be making your cuts – this will help kill off any remaining fungus that could otherwise cause further infection.

3) Lastly, use a fresh cuticle to very carefully remove the fungus, making sure that you do not remove any living tissue.

Giving your orchid the proper amount of light

You should make sure that you place your orchid in an area that receives at least 6 hours of sunlight per day. If the leaves are pale green then this is a good indication that it isn’t receiving enough light. However, if the leaf tips are turning brown then this means that it gets too much sun which can scorch its leaves, so try to move it elsewhere. You can also use artificial lighting instead since these will never burn your plant. Please note, however, that only certain types of orchids should be kept indoors.

The type of orchid you have should determine where you’re going to keep it. Some orchids prefer indirect light, while others need a lot of direct sunlight. 

Pruning your orchids

After your orchid plant has flowered, it is important to prune the stem.

Follow these steps to correctly prune your orchids plant:

Cut off any dead or dying leaves by cutting the stem just beneath the leaf.Always cut at an upward angle to maximize water intake.If you want, also prune flowers so it encourages further flowering.Remove all diseased and sickly parts of the plant.You mustn’t touch the “bud” of your flower while pruning as this can affect its development. Do not use chemicals on your orchid plant while pruning either.

Also, pruning should be done naturally without using any harmful products.

Orchid Care: How to Grow and Care for Orchids
Image Credit: http://almanac.com

How to care for orchids indoors- FAQs

My orchid is flowering, do I repot it now?

No. Paphs are the exception to this rule as they will flower just before they are due for repotting, after which you should not water them for three weeks.

How much water should I give my orchid?

Allow your orchid to dry out completely between watering, use rainwater if possible, and never use softened water. Use a liquid fertilizer every other week during Spring and Summer.

How do I plant roses in my garden?

If you want to plant roses, dig a hole twice the size of the pot and put some fertilizer in it. Carefully remove your rose from its pot and gently tease the roots apart so there’s plenty of room for them to grow. Place it in the hole and fill it with soil, pressing down firmly as you do so. Water thoroughly after planting.

When is the best time to plant my brush box?

Brush boxes are typically grown from seed which will germinate at any time of year given enough warmth, light, and moisture – however, they can also be planted when adults if conditions are suitable or purchased as container-grown plants. Soil should be moist yet well-drained, acidic (pH 5-6) neutral (pH 7), or alkaline (pH 7), and exposed to full sun or partial shade.

How do I grow cilantro at home?

Cilantro loves warm weather. You can grow cilantro in your garden almost any time of the year, but spring and summer are the high seasons. Soil should be kept slightly moist until seedlings emerge – after which point you would want it slightly dryer. Cilantro thrives best in full sun, or partial shade with six hours of sunlight or more per day. 

Final thoughts on how to care for orchids indoors

In conclusion, orchids require a lot of care but if you’re willing to put the time into it then this is an opportunity for you to grow something that will last many years.

Keep the above tips in mind and you’ll have beautiful-looking orchids that you can be proud of.

The post How To Care For Orchids Indoors appeared first on Kitchen Infinity.

Did you miss our previous article…
https://chefbuano.com/?p=817

Reasons Why Orchids Won’t Bloom and How to Fix Them

Reasons Why Orchids Won’t Bloom and How to Fix Them

Orchids are beautiful and exotic, but they can also be frustrating if you’re trying to grow them.  One of the most common problems people have with orchid growing is that their plants won’t bloom. It’s very disappointing when your plant doesn’t produce flowers because it’s such a rare event.

If you love orchids, this guide will help you get the most out of your investment in these stunning plants.  Even if it hasn’t flowered for years, there are still things that can be done to encourage blooming. Orchids are one of those flowers that require very specific care, so they don’t wilt and die on you before they even get a chance to bloom. Below are reasons orchids won’t bloom.

Insufficient Light

If you want your orchid to rebloom, try moving it near a brighter location. Orchids need at least 12 hours of bright light so they can survive and grow. You should learn how to care for your orchids indoors so they can grow well and bloom.


Image credit: https://i1.wp.com/

To ensure they get enough sun, there are different places to put them in the house, but the ideal place is by a window to get good sunlight exposure. It will also help if you rotate them once in a while so that all sides get enough light. Move your orchid to a place where it gets a few hours of direct morning and afternoon sun.

This will ensure the plant gets enough energy to make a spike with lots of flower buds. Dendrobium orchids and cymbidium orchids are also orchid varieties that require bright light and not direct sun. Lack of sufficient light is one of the reasons why orchids fail to bloom, so if you plant indoor orchids, you may try to grow light to achieve flowers.

Getting Too Much Light

If you’re trying to grow your orchid in direct sunlight, it may die. However, too much shade can also be a cause of failure orchid bloom. Indirect light or morning sun is best for most orchids, and if the light is bright where you live, go ahead and put your plant in direct sunlight. Avoid excess sunlight for the best-blooming orchids.

If you also place your orchid in full sun, you’ll see severe symptoms such as sunburned leaves, and an overabundance of artificial light can also suppress blooming. In addition to cooler nighttime temperatures, the shortening days of autumn can signal an orchid to form buds.

If you’re keeping an orchid indoors, in a room where the light stays 24 hours a day, then your orchid is missing an important natural cue. If you’re using artificial light, then use a timer to simulate the cycle of natural daylight and darkness.

Overwatering

Overwatering is most often the cause of orchids’ failure to bloom. Just like humans, orchids need oxygen to survive. Excess water displaces oxygen in the potting media, starving roots and suppressing blooms. Most orchids need to dry out between watering, and you should allow them to have wet feet by allowing water to saturate in the root zone.

Overwatering
Image credit: https://imagesvc.meredithcorp.io/

Orchids growing in the right kind of potting mix will rarely suffer from overwatering. Signs of overwatering include roots turning brown, while wrinkled leaves can be a sign of too little water or too much water. Don’t wait to see a pot of muddy mix and a dying orchid; instead, give your orchid adequate care while it’s in bloom and out of orchid bloom.

Varying Temperature

Orchids like to be warm and relatively dry during the day, but they require a drop in temperature at night. Orchid flowers need bud building overnight temperatures (under 10 degrees Celsius). For example, Paphiopedilum orchids need temperatures of 70 to 80 degrees during the day and 50 to 60 degrees at night. Warm temperatures between 20 and 25 degrees Celsius will encourage buds to form on your orchid flower spikes.

Cooler conditions can prevent your plant from forming buds. It is possible to have too much of a good thing if the temperature stays above 25 degrees Celsius during the day and night, as your plant will stop flowering. Try to expose your orchids to nighttime temperatures 10 degrees cooler than daytime temperatures for two weeks at the start of the orchid’s growing season.

Orchids Need Proper Nutrition

If you fertilize your plant too much, the excess nutrients can build up in the potting media and cause your orchid to bloom. You also need to feed your orchid well during its flowering season. Give it a regular fertilizer that has trace elements, which will help promote bud formation. But also be careful because too much fertilizer can stop your plant from blooming.

Of course, orchids are not heavy feeders, but an orchid living in the sterile inorganic potting mix may need a nutrient boost for its best performance. The best fertilizer to use is a urea-free fertilizer that provides nitrogen even in the absence of microorganism activity common in rich garden soils.

Moth orchids, in particular, initiate blooming spikes in response to a month and cool nighttime temperatures. At home, you have two options to encourage blooming. These options include keeping your orchid near a bright window at night in the early fall, keeping air-conditioning low during the day, and turning it up at night.

Roots Need Attention

Most orchid growers find it tricky when it comes to repotting orchids. When your orchid media begins to break down, the orchid roots can suffocate from lack of oxygen. In addition, some orchids will resent having their root zone disturbed, and they’ll refuse to bloom for six months to a year after repotting.

Roots Need Attention
Image credit: https://i2.wp.com/

In order to determine whether your orchid needs to be repotted, evaluate the root system and not foliage. If you see the orchid roots turning brown and the planting material resembling garden soil in its density.

Also, if you see more than two roots creeping over the edge of the pot, it may be time to repot. You can also divide your orchid plant to maintain blooming vigor.

Know Each Season of Your Orchid Variety

Each orchid type has a time of the year when it will naturally bloom. It may not be the same season that the orchid was blooming when purchased since nurseries can force orchids to bloom off-cycle. Many orchids bloom in the fall, winter, and spring.

Knowing the season that your orchid bloom will save you the frustrations of waiting for it to bloom. For example, Phalaenopsis orchid grows new leaves in the summer and early fall and sets a bloom spike in the late fall. Most Phalaenopsis orchids are known for blooming off-season for many reasons, but many will follow this pattern.

After you’ve identified your orchid, make sure you learn about its blooming cycle. Vanda orchids, for example, bloom two to three times a year, with each bloom cycle lasting up to six weeks. On the other hand, popular cattleya and cymbidium orchids only bloom once a year, but they’re very easy to maintain, making them popular choices for novice growers.

Underwatering

Underwatering is one of the most common reasons orchid plants won’t bloom. The best way to avoid this problem is to water your orchid regularly, but don’t over-water it. Water generously during spring and summer season but taper off as fall starts to set in. Stop watering altogether when winter begins because this will help your orchid properly rest.

You can test the moisture of your orchid’s medium by pushing your finger into it. If you feel any moisture, hold off on watering until the surface is dry. Remember not to water again until the top layer is dry because this will cause overwatering and root rot.

To prevent underwatering, mix water with some water-soluble fertilizer at the same strength you’d normally use when feeding your orchid. Water generously, but ensure that excess water drains away from the plant’s roots before drying up.

Cut Spent Flower Spikes for a Stronger lant

After your moth orchid has finished blooming, snip off the flower spike. An orchid needs to rest after flowering to build up its energy, so don’t fertilize your orchid for at least a month after it blooms.

Cut Spent Flower Spikes for a Stronger plant
Image credit: https://images.saymedia-content.com/

After this waiting period, you can feed your orchid with a balanced 20-20-20 fertilizer once every three weeks to keep it happy and healthy. Note that some orchid species and hybrids rebloom on old spikes. You can also contact the American orchid society or contact your seller to get a replacement or refund.

FAQS on Reasons Why Orchids Won’t Bloom and How to Fix Them

How long does it take an orchid to rebloom?

Phalaenopsis orchids take a month or several months to rebloom, while most varieties bloom annually.

Why is the orchid not flowering?

If your orchid is not flowering, improper light exposure, incorrect potting media, and overwatering are the most common reasons.

Why did my Phalaenopsis stop blooming?

Phalaenopsis stopped blooming because of root rot which can be caused by too much water or cold conditions.

Final Thought on Reasons on Why Orchids Won’t Bloom and How to Fix Them

If you perform all these steps religiously, your orchid might begin blooming again in no time and you’ll love your gardening skills. Orchids are blooming plants, and as such, they require a lot of attention. However, by following the basic care tips above, you should have no trouble keeping your orchid blooming.


The post Reasons Why Orchids Won’t Bloom and How to Fix Them appeared first on Kitchen Infinity.

Did you miss our previous article…
https://chefbuano.com/?p=811

How to Clean the Burners on a Gas Stove

How to Clean the Burners on a Gas Stove

Cleaning gas stove burners can be difficult to do by yourself, especially if you don’t have the right tools. There are many different kinds of cleaning products available in your local store, but not all of them will work for all types of stoves. If you’re looking for a quick and easy way to clean your burners on a gas stove, then look no further. 

This article will help you eliminate any build-up of grime from inside your stove’s ports as well as its burners within minutes. If you follow these tips, you’ll understand why you should not ditch your gas stove as it will be as clean as new. Let’s get started!

How Gas Burner Works

The burners on your gas stovetop consist of a burner assembly attached to a small gas intake valve on the front or at the top of the stove. Gas stove burners operate by receiving an air-gas mixture that is sent through the main gas line. Gas stoves have a gas valve that attaches the main gas line to the stove and sends the air-gas mixture to each burner. 


Image credit: https://engineer.decorexpro.com/

When the burner control knob opens the intake valve, it allows gas to flow through the venturi tube. The gas then enters the venturi tube through one of the wide ends, increasing in pressure as it passes into the narrow section of the tube. The burner head is a hollow metal disk with holes and slots in the outside edge.

The burner head sits atop and directs flames emerging from the burner head. The older burners have a pilot light, while the newer gas stove burners have a small spark pilot located on the side of each burner. A light pilot or electric spark pilot controls the airflow, allowing you to generate more or less flames as possible.

How Often Should You Clean Your Stove’s Gas Burners?

Gas stoves are simple and trouble-free. Typically, you can clean the burner once a year. But, it’s important to clean it when the flow of gas becomes hindered due to food residue that may spill on the pots and pans. Food residue can clog the ports around the burner heads.

If left unattended, this food residue can be quite hard to remove. Clean your burners whenever the burner becomes irregular and exhibits a yellow color. Below are the steps you need to take to clean your gas stove burner properly. Take time and refer to your owner’s manual if necessary:

What You’ll Need

Old toothbrushNon-abrasive scrubbing padDish soapDry towelBaking SodaPaper clipDamp cloth

Read Manufacturer’s Instructions

Before you start cleaning, it’s always a good idea to refer to your owner’s manual. This can serve as a safety reminder, and it may reveal some tips on the best way to clean your burners.

If your cooktop didn’t come with the manual, you could always download a manual online via the manufacturer’s site. The manual will recommend tools and cleaning products, saving you from many hassles.

Turn Off Gas Supply Valve

Clean gas stove burners before turning them off. Make sure you shut off the valve before doing anything else. Before removing the burner caps, ensure your gas is off. Look under the burner caps and access the burner heads. 

Proper gas flow is dependent on clean burner heads, so ensure you clean stove burners first. A valve will be nearby, connecting your stove to the main gas line. Make sure you turn off the valve before cleaning. Also, ensure the stovetop and burners are completely cooled before you begin cleaning.

Remove Burner Caps

Remove the burner caps and set them aside. Once a sturdy grip is established, twist each cap counter-clockwise to remove it from the stovetop. The order of the caps does not matter because you will reattach them later on during the cleaning process.

Remove Burner Caps
Image credit: https://www.thespruce.com/

Many gas burners have a removable ceramic disc that sits atop the burner to diffuse flame. If you have this kind of burner, lift the disc off the burner, making sure that the burner is completely cool before doing so.

Remove Burner Heads

Use a flathead screwdriver or other suitable tool to loosen and remove the burner heads and caps. Take care not to damage the gas line connected to the burner because you will be reinstalling them later on during the cleaning process. Set aside and inspect each burner head as you remove it from the stovetop.

Look for built-up debris inside the gas jets, at the edge of the burner head, where it sits on top of the stovetop surface. Be careful not to damage the venturi tube beneath when lifting the burner head.

Soak and Scrub the Removed Parts

Place the burner heads and caps into a bowl or other suitable container. Fill this with warm water and liquid dish soap and let it soak for 30 minutes. If you find that there is still residue on the parts, try soaking them overnight instead.

Once they’ve soaked, pull them out and scrub them with an old toothbrush to remove debris. If the toothbrush can’t remove some debris, use a straightened paper clip to unclog the head and cap holes. Make sure you don’t damage the metal of the burner head as you clean. 

You can also use one part water and one part baking soda to remove stuck-on debris. You can also make your cleaning paste with one cup of baking soda and half a cup of vinegar. Apply a paste on the surface of your stove using a clean cloth or sponge.

Rinse the Parts

Use whatever you used to make the paste and rinse it off with running water. Make sure the area is dry before replacing the parts. Shake to remove excess water, then dry with a damp cloth.

Rinse the Parts
Image credit: https://www.thespruce.com/

Allow all the parts to air dry completely before reassembling the burners. As the parts are drying, turn your attention to cleaning other parts of your stove. Make sure you learn how to clean drip pans and grills. soak and scrub all these parts well.

Reassemble and Test Your Burners

After you’ve washed and rinsed your burners, pat them dry with a towel and set them aside. Let them air dry until they’re entirely free of water. Once the burners are dry, reassemble them. Reassemble the drip pans, grills, burner heads, and caps. 

Reassemble and Test Your Burners
Image credit: https://www.forkandspoonkitchen.org/

Before turning on your stove, inspect all of them to make sure they aren’t dripping water. On electronic ignition stoves, take care not to bend or damage the ignition electrode as you install the heads.

Relight the Pilot Lights

After you’ve reassembled your burners, relight the pilot lights by pressing down gently on each knob. Open each gas valve slowly and light the burners. If there’s no flame, ensure that the knobs are turned to the pilot setting. 

As you do this, make sure you follow the manufacturer’s instructions for relighting the pilot flames. Test the burners to ensure they operate correctly as unusual flame color and shape may indicate that the burner heads are not completely dry.

FAQs on How to Clean the Burners on a Gas Stove

How do you clean the grates and burners on a gas stove?

If the grates contain dirt, grime, or grease, mix three parts of baking soda into one part of water. Coat the grates in the mixture and wait for 20 minutes. Wipe down the burners with a soft cloth and if you have burners coated in baking soda paste, rinse first to avoid damaging the finish.

How do you deep clean a gas stovetop?

You can use a soft bristle brush and a mixture of vinegar and water in a spray bottle with baking soda paste when deep cleaning your gas stove top. If you notice sputtering, shut off the burner and clean out any food build-up left in the gas line before turning the gas back on.

Final Thought on How to Clean the Burners on a Gas Stove

Cleaning your gas stove burner shouldn’t be an uphill task. Take your time and be thorough with your cleaning process. Make sure everything is properly rinsed before drying. This way, you’ll have clean stove top burners that are ready to fire up your next meal. 


The post How to Clean the Burners on a Gas Stove appeared first on Kitchen Infinity.

Did you miss our previous article…
https://chefbuano.com/?p=799

What Is A Lap Pool

What Is A Lap Pool

Lap pools are a great way to get in some exercise and relaxation. They’re smaller than an Olympic-sized pool, so you can swim more laps without feeling exhausted. Plus, lap pools come with all sorts of other benefits: they’re cheaper than most other types of pools; they don’t need much upkeep and maintenance, and the water is heated for year-round use. A lap pool may be just what you’ve been looking for.

In this article, we’ll help you learn more about lap pools and how you can benefit from them. Plus, we’ll tell you everything you need to know to get one for yourself. Keep reading to find out more.


Image Credit: http://naturalpools.com.au

What defines a lap pool

A lap pool is a small, rectangular pool that is shorter than an Olympic-sized swimming pool. They are usually around 25 yards in length, but this can vary depending on the manufacturer. Some lap pools are only 12 feet long. These shallow pools are perfect for swimmers of all ages and abilities.

As you might have guessed, lap pools are made to be used specifically for swimming laps. That’s why they are not too deep – more than 6ft is considered very deep, and even then most lap pool depths range from 3ft to 5ft across their entire surface area. Most of these pools don’t exceed 7ft of depth at any location.

The cost of a lap pool

Lap pools are much cheaper than other kinds of swimming pools. This is because they don’t require too many special features and materials. They don’t need as much flow or filtration as other kinds of pools, so there’s just less that goes into making them. For that reason, if money is an issue for you when looking to buy a pool, then a lap pool could be the right choice.

The price range for these pools can vary greatly depending on where you live and who built them. There are cheap lap pool models out there which run only around $2000 or less – but this might not include installation or equipment costs. At the high end of the scale, some companies charge over $20,000 for their lap pools – and this isn’t even including installation.

For the most part, however, lap pools generally cost around $10,000. Some smaller models may be less than that while larger ones might go up in price significantly. These costs also depend on where the pool will be built. 

In-ground vs. above-ground lap pools – which one is best?

To answer this question, you must decide how you’re going to design your backyard. What we mean is, you need to know if you’ll be putting in a deck or patio around the pool. If you will be, then an above-ground lap pool may be your best bet.

But how is this different from an in-ground lap pool?

Well, an above-ground model means that the entire pool is built on top of its deck/patio. The upper edges of the pool go up high enough where it meets with the rest of your yard. Some models have a thin lip that goes over the edge and looks just like a regular in-ground pool. These are usually made out of fiberglass and vinyl which allows them to blend in almost seamlessly with your lawn. Also, since they don’t have to dig too far into the ground, they are lighter and easier to install.

In-ground lap pools, on the other hand, take a lot more time and money to build because they have to dig deep into the earth. These pools come with a much better filtration system because their water has to pass through layers of ground before returning into the pool itself. That makes in-ground lap pools last longer but it also means that you’ll be spending more money on installation.

Where should I put my lap pool?

Decide where you want your new lap pool by considering how easy it will be for you to use it. Also, think about what kinds of activities will be taking place around or in your pool – will it get pretty rowdy with kids playing around or will you also need somewhere for your grill area? If so, work these considerations into the placement of your pool.

To maximize how much sun exposure you can get, place your lap pool near a deck or patio with full southern exposure. This way, even during wintertime, the water in your pool won’t be too cold to swim in. And if you put it close enough to where you’ll be sitting and relaxing at then that’s even better – you don’t want to have to walk too far just to cool off after doing laps.

You might also decide to build your sauna next to a lap pool – in this case, go for the same orientation as you did for your pool. If you want to be able to see your lap pool from your sauna then it should also have southern exposure. This will allow an easy transition between them both so that you don’t have to travel far when moving from one place to another.

Do I need a pump in my lap pool?

Yes, if you are using your lap pool purely for recreational purposes, even if only once in a while. You’ll need to have some kind of filtration system to maintain the cleanliness and healthiness of the water inside – this is important because people swim in it. The best bet for this would be to get an above-ground model with a built-in pump since they’re the simplest to install and maintain.

But if you will be using your pool regularly and want it to last a long time then you should get an in-ground lap pool – these come with their filtration system which is far more reliable than whatever pump you may use for other models. You do need to take care of both though, make sure that your pump is always working properly otherwise dirt might accumulate on the surface. In this case, it’s best to have a backup system in place just in case something goes wrong.

What Is A Lap Pool – FAQ

What type of person uses a lap pool?

Since the water in a lap pool is kept still it can be easily heated to improve comfort during your workout. This is very useful if you want to swim year-round. However, lap pools can be reheated and used for outdoor workouts in the warmer months. They are most commonly used by competitive swimmers (or anyone wanting a high-intensity workout).

How much does a lap pool cost?

The price of a lap pool will vary greatly depending on the style, size, shape, and features that you would like included. In-ground lap pools typically start around $40k but can go up to well over $100k for an Olympic-sized pool with all the bells and whistles. Most individuals looking to install their lap pool should budget anywhere from $15,000-$30,000 after installation costs have been factored in.

Lap Pools | Lap Pool Price
Image Credit: http://endlesspools.com

What is the maintenance required for a lap pool?

Lap pools require very little maintenance if they are properly built and cared for according to the manufacturer’s specifications. However, the chemicals needed to keep the pool sanitized must be regularly added to the water. During the summer months, be prepared for an increase in maintenance as there is typically a higher demand for swimming pools at this time of year (this also means that you should drain your pool if it will not be used for over 30 days).

Final thoughts on what a lap pool is 

In conclusion, a lap pool is a type of swimming pool that is often used as part of an exercise regime. The name ‘lap’ comes from the fact that they are designed to be swum through in straight lines, typically up and down the length of the pool – hence ‘lap’.

Before going ahead and installing a lap pool in your home, be sure to consider the above tips to make the right choice for your specific needs.

The post What Is A Lap Pool appeared first on Kitchen Infinity.

Did you miss our previous article…
https://chefbuano.com/?p=772

Double Glazed Windows

Double Glazed Windows

Double glazed windows are an excellent way to maintain the temperature and keep your home more comfortable. They’re also a great investment because they help reduce noise and energy loss, especially in cold climates. Double glazing window systems come with many different options including low-emissivity glass, argon gas, or spacer bars.

In this article, we’ll take a look at the different types of double glazing window systems available, and why replacing your old windows with double glazed models is an excellent idea. Let’s dive deep into this topic. 


Image Credit: http://mydecorative.com

What a double glazed window constitutes

Double glazing is an effective solution for insulation and noise reduction. Some may even have a Low-E coating that reduces heat loss during the winter months. Let’s take a look at the different types of double glazing window systems available, and why replacing your old windows with double glazed models is an excellent idea.

There are four types of double glazing window systems available – aluminum or vinyl frame construction with insulated glass units (IGUs), IGUs only, metal-clad wood frames with IGUs, and metal-clad wood frames without IGUs. The first three types have a spacer frame to separate the two panes of glass. The last type does not have a spacer frame and is often used in new construction.

The aluminum or vinyl frame construction with insulated glass units (IGUs) is often referred to as double-glazed windows or an insulated window unit (IWU). This method uses two panes of glass separated by a sealed insulating air space between an interior and exterior setting. Once assembled, the sealing compound is injected into the chamber, and then injected air (and sometimes nitrogen gas) is blown in at high pressure to expand the mixture for final installation between the jamb liners of the frame.

This method seals and insulates the window and allows for easy installation and removal without damaging the window unit. The interior of the aluminum frame has a dry glaze that is meant to seal any potential leaks in between the glass or gas fill areas. The exterior of this type of double glazing unit has a protective coating that resists corrosion, moisture, heat buildup, and ultraviolet (UV) light penetration while allowing maximum visibility from inside your home. Metal clad wood frames with IGUs often have aluminum cladding on the outside instead of vinyl. This option helps protect against any issues with high humidity or condensation on colder days where moisture can cause damage to these windows over time. 

Insulated glass units only use two panes of glass with an inert gas (argon or krypton) between the panes. Because there isn’t any kind of spacer between these panes, this window type does require special installation methods for sealing and insulating purposes. This is why they are often referred to as double-glazed windows or an IWU (insulated window unit).

Installing double glazed windows

When it comes to double glazed windows installation, you’ll want a professional to take care of this job unless you have some experience doing DIY projects around your house. Installing these kinds of windows can be time-consuming and even dangerous if there isn’t proper training involved for how to handle insulated glass (IGUs). Installing IGUs is a delicate process and can require special tools, handling, and care. 

If you live in an old home where the windows won’t support new double-glazed windows, sometimes it’s more cost-effective to replace your existing windows with IGUs (double-glazed windows or IWU). These types of window systems don’t require any kind of frame support like older window frames might (here’s more information about how to frame a window correctly). If you’re interested in this option for your home, be sure to discuss the pros and cons of replacing versus installing new IGUs with a professional installer.

Framing a window for a double-glazed unit is a bit more complicated than framing a regular window. Double glazing also requires thicker glass and special installation methods, so be sure to hire an experienced contractor for this job.

Some windows, especially older ones or those that are out of square or bowed, might not be able to support the installation of a double glazed window. If this is the case, you’ll want to consult with a professional contractor on whether it’s better to install IGUs only or completely replace your existing windows with new double glazed units.

A potential drawback of installing double-glazed windows is they can have more condensation issues than single-glazed windows. Make sure you’re aware of any condensation issues with these kinds of windows before committing to having them installed in your home.

Different types of insulation are used for both single-glazing and for glass systems using IGUs. The following are some common examples:

Organic glass wool or rock wool is used for traditional single glazingSilicone-based formulas are often used between panes of triple-pane windows.Polyurethane foam is usually added to the spacer bars in IWUs (insulated window units) which helps reduce condensation and improve energy efficiency.Vapor barriers can also be used with IGUs to prevent moisture from seeping into your home during the winter months. 

It’s important to make sure you pick the right kind of vapor barrier formula though as some types may not allow enough moisture release for proper indoor ventilation. This will cause high humidity levels indoors, mold growth, and issues with condensation on cold days.

Double Glazed Windows – FAQ

What’s the difference between window glazing putty vs caulk?

When it comes to window glazing putty vs caulk, what you’ll find is that they both serve the same function, that being to seal a window in place. However, when it comes to caulking vs putty for windows, there are some major differences between the two materials.

The biggest difference you’ll find when comparing caulking vs putty for windows has to do with how each material cures and adheres to a surface. When you apply a typical window glazing compound in your home, it will contain a drying agent in its chemical composition that causes it to harden into place after just a couple of hours. On the other hand, caulk takes anywhere from 24-72 hours to cure on its own before environmental factors begin to affect it at all.

re double pane windows better than single-paned?

When it comes down to double vs single glazed windows, most people will find that both panes offer their own set of pros and cons. The big thing you’ll want to keep in mind when making this decision has to do with the type of energy efficiency your home is currently experiencing. If you’re looking at replacement windows, then there’s a good chance that they come with dual pane glass already installed. 

Single vs double pane windows - know the difference
Image Credit: http://pellabranch.com

Final thoughts on double glazed windows

In conclusion, double-glazed windows add a layer of strength and insulation to your home. Understanding the pros and cons that these will bring to your home is crucial before making any decision.

We hope that the above content has helped you to get to know more about the topic in order to reach this right decision.

The post Double Glazed Windows appeared first on Kitchen Infinity.

Did you miss our previous article…
https://chefbuano.com/?p=768

Incredible Uses For White Vinegar

Incredible Uses For White Vinegar

Everyone knows that vinegar is great for cooking, but did you know it has many other uses? Vinegar can be used around the home in lots of ways. The best part is that it’s inexpensive and readily available.

If you’re looking for a natural alternative to fabric softener, white vinegar is just the thing. This common household ingredient is inexpensive and easy to find in any grocery store. It’s also mild enough to cause skin reactions or discolor clothing as some detergents might.

Here are some great uses for vinegar around your home. You’ll save money by using less harsh chemicals.

Use White Vinegar to Kill Weeds

One of the best ways to kill weeds is by using white vinegar. Pour white vinegar directly onto the leaves of the plant you’re trying to get rid of. You can also use full-strength vinegar in spray bottles to kill weeds on sidewalks or driveways. Just be sure you don’t get any on your clothing, as it will stain. For best results, use vinegar on a day of dry, sunny weather.

Care for Your Home Pets with Vinegar

Pets such as dogs and cats are often bothered with itchy and scaly ears, especially if you have a dog with floppy ears like a retriever. Dilute white vinegar in equal parts water and use a cotton ball to clean the inside of your pet’s ears. You can also make a gentle shampoo by adding one or two tablespoons of vinegar to your pet’s bathwater to remove odors from its fur.

If you see unwanted cats creeping around your yard, spray or pour vinegar on the plants they like to use as a litter box, and they will move elsewhere.

Clean Your Coffee Maker with Vinegar

If you’re a coffee-lover, you know that once you’ve brewed a pot, the last thing you want to do is dump it down the drain. However, stale coffee can ruin your next pot-brewing experience. Run some vinegar through your coffee maker to remove the unwanted flavors of old coffee and put yourself on track for a smooth-tasting cup.


Image credit: https://hgtvhome.sndimg.com/

Extend the Life of Your Cut Flowers with Vinegar

When it comes to extending the life of your flowers, there are so many theories that exist. Such theories include the use of copper penny, lemon-lime soda, and aspirin. However, try adding a few tablespoons of white vinegar to the water and a dash of sugar, and you may be surprised to find your flowers lasting much longer.

Cleaning Kitchen with White Vinegar

Cleaning vinegar is a natural cleanser and degreaser. With the addition of a few drops of lemon essential oil, you can make your kitchen an all-natural cleaner. Add distilled white vinegar to water in spray bottles and add about ten drops of lemon oil for every one cup of the solution. Spray the cleaner on surfaces, let it stand for a few minutes, and wipe away.

Cleaning Kitchen with White Vinegar
Image credit: https://www.rd.com/

You can also add a few drops of olive oil into a cup of distilled vinegar, let it sit overnight, and then add that to your spray bottle in the morning. Rinse it with cold water.

Cleaning Floors with Vinegar

White vinegar is safe enough to use on most surfaces, but it does have a strong smell. The vinegar odor can be reduced by adding a few drops of lemon or tea tree essential oil to the water in your spray bottles. This mixture is safe enough to use on hardwood floors.

Cleaning Floors with Vinegar
Image credit: https://www.simplemost.com/

In addition, if you add some white vinegar to a bucket of warm water and mop the floors, you’ll be cleaning your floors and helping fight against allergens like dust mites at the same time.

Cleaning the Dishwasher

If your dishwasher smells less than fresh or doesn’t seem to clean your dishes as well as it once did, try adding 1/2 cup of vinegar to an empty dishwasher cycle to freshen it up. If your dishwasher has a rinse agent dispenser, fill it with white vinegar to help freshen the rinse water.

Adding white vinegar to your dishwasher also works as an eco-friendly alternative to using additional detergents for cleaning the dishes. Just run a wash cycle with some vinegar but skip adding any detergent like chlorine bleach. If you have a clogged and smelly sink, pour 1/4 cup of baking soda, add one cup of vinegar, and cover the drain tightly.

Use Vinegar as Fabric Softener

And you can use it as a fabric softener: Add 4 cups of vinegar to the rinse cycle instead of liquid fabric softener, or add half a cup when using a front-loading washing machine. After spraying vinegar on your fabric, wipe it down with a clean, damp cloth. You can use the same vinegar to clean a washer

Clean Windows with Vinegar

And it’s also good for cleaning windows. Mix one part vinegar with two parts water to make a multipurpose cleaner that can be used on windows, glass, and even mirrors without leaving behind streaks or smudges. This solution is perfect for cleaning car windows, too– remember to use it sparingly.

ll-Purpose Cleaning Solution

Vinegar is one of the world’s best all-purpose green cleaners with dozens of cleaning uses. Diluted vinegar on a soft, lint-free cloth is excellent for cleaning and polishing all kinds of surfaces, including Counters and other kitchen surfaces, Mirrors and windows, Bathrooms, Toilets, and Faucets.

After filling your plastic bag with equal parts water and vinegar, tape and leave it there for a day for vinegar to dissolve any lingering mineral deposits. You can also use distilled white vinegar to clean hardwood floors, carpet stains, and wood furniture, especially when combined with olive oil.

Clean Your Microwave with Vinegar

Fill a microwave-safe bowl with 1 cup of distilled vinegar and set it on high. Heat the vinegar for 2 minutes or until it starts to boil, then let it sit in the microwave, undisturbed for about 10 minutes to let it cool, then wipe away any food residue.

Clean Your Microwave with Vinegar
Image credit: https://imagesvc.meredithcorp.io/

Shine Up Silver with White Vinegar

Combine half a cup of distilled vinegar and eight oz. of water in a shallow bowl and add the silver, making sure it is completely submerged. Put on some rubber gloves and use an old toothbrush or scrubber to scrub off any grease gently. Rinse with warm water, then dry completely using a soft cloth.

You can also drop a tarnished silver in a baking dish to soak it with baking soda, sea salt, vinegar, and boiling water. Dry thoroughly with a dry cloth, then buff with a clean cloth.

FAQs on Uses for Vinegar

What is the difference between washing vinegar and cleaning vinegar?

Washing vinegar and cleaning vinegar are both white vinegar, and they contain the same percentage of acetic acid (5%). Therefore, it is safe to use either type of vinegar for all your household needs.

What does vinegar do in a laundry?

Vinegar contains acetic acid, meaning that it’s safe to use in both standard and high-efficiency washers.

Final Thought on Uses for Vinegar

As you can see, vinegar has so many uses which you can relate to almost all of your daily tasks. With vinegar, you wouldn’t need many products anymore. This versatile has a lot of uses, not only as an ingredient but also as a cleaning tool. Keep the environment green and clean by using vinegar for your daily tasks.


The post Incredible Uses For White Vinegar appeared first on Kitchen Infinity.

Did you miss our previous article…
https://chefbuano.com/?p=729

How To Smudge Your House

How To Smudge Your House

Sage smudge sticks are very easy to use. Light one end of the stick, let it burn for 10 minutes, and then blow out the flame. Smudging your house with sage is an ancient tradition that has been passed down through generations just like the feng shui tradition.

It’s a Native American tradition used to purify, cleanse and bless any space, including homes, offices, and cars. This process can be done weekly, but if you feel like there is negative energy lingering in your home, it should be done more frequently.

By burning sage regularly, you will remove all negativity from your life, giving you peace of mind. You can learn how to perform a smudging ceremony by following this simple guide.

What You’ll Need

If you’re new to smudging ceremonies, there are certain things you’ll need to complete the ritual. These include a white candle, incense, and a bundle of dried sage. Native Americans traditionally use an abalone shell as a holder for the smoldering herb, so you can use anything you have at home, such as an unused ashtray or a small bowl.

You can also find a sage kit online or in your local metaphysical shop if you’re getting started. If you’re sensitive to sage smoke, don’t fret, there’re plenty of options. You can use a coffee grinder to grind the dried sage or buy smudge sticks instead of loose sage. You can also dry orange peels if you’re in feng shui. You’ll also need a sage, a vessel for burning sage, a fire source, and a fanning tool.

How to Perform a Smudging Ceremony

Have an Exit strategy

Once you have gathered your supplies, gather your family and friends so everyone is present for the ritual. Banish negativity by playing soft music or singing songs that bring you to a sacred place. If you play music, make sure it’s soft and not something that might entice unwanted guests.


Image caption: https://www.thespruce.com/

Allow everyone to gather in a circle in your designated ceremony area. The circle will keep the energy contained when smudging is performed and protect both the space and your soul from any negativity coming in or going out while you smudge your home.

Make sure you have the window and door opened before lighting up the sage. The smudge stick should be lit in a fireproof container, such as a lighter or a match, and then walked around each wall of your home clockwise. Allow the smoke to flow into every room, including closets, bathrooms, and even under your doorways. Keep going around the house with it until no more smoke is rising from it.

Use Sage if You’re Not Following any Tradition

A number of Native American tribes and other cultures have their smudging ceremonies. And each one of the tribes has its tradition concerning the type of herbs they burn. The number of times it should be done and how much time should pass between one smudging ceremony and the next.

Sage is the most common choice, especially white sage although other forms of sage can be used as well. There are other types of smudging ceremonies, but this is the most common one. You should keep in mind that if you’re not following any specific tradition, then it’s best to stick with the white sage.

Set Your Intention and Say a Mantra

Said, you want to ask for protection. You can repeat a sacred word or phrase that has meaning to you. It could be the name of your spirit guide or God, or it may simply be an affirmation that reflects what you’re trying to protect yourself from.

Before lighting the sage, make sure you take some moment to determine what exactly you want to purify your home from. The more specific you are, the better your smudging rituals will be. After that, decide on a mantra or prayer you will say during your smudging.

Light the Sage and Start Smudging

To fire up your sage, hold a lighter under it for about five seconds or so, making sure to run the flame over every part of the bundle except for where you’re holding it. You can also use matches, but I find the lighter is much easier. After about 30 seconds or so, excess ash will start to fall away, and your bundle of sage will be a beautiful shade of green.

Light the Sage and Start Smudging
Image caption: https://www.thelist.com/

Once it’s completely ashen, take your smudge stick by the end you lit with and wave it gently back and forth over every surface in your home. If there are particular areas that scare you or emit negative energy, go ahead and concentrate your smudging there for a couple of minutes. Once you’re done with the house, be sure to wave it over yourself as well.

Know When to Smudge

When do you want to smudge? You can smudge after you’ve completed building your own home and now moving in. Or you can do it when staying in a hotel room. This will help you feel like you’re more at home. Smudging before guests arrive is another way to ensure that you protect your space and set the mood for company.

When someone in your family gets sick, it’s time to smudge. Sometimes illness can be passed on energetically. You can also smudge when you sense anger, tension, or discord among family members.

Consider Additional Rules Out of Respect

If you smudge a hotel room or a house that someone else owns, always ask permission. Unless you’re an invited guest in the home, be sure to ask before smudging. Different traditions also have different ways of preparing their participants.

Many elders might not have these strict rules but consider following them. For example, do not drink alcohol or take any drug 24 hours before or after smudging. Do not have sexual relations before or afterward, either. Also, make sure all participants are wearing clean clothes and that their hair is clean and combed out before starting the ceremony.

Failure to consider these traditions can weaken your spiritual being. Pregnant and menstruating women are also asked to leave during the ceremony. Smudging may look easy, but it requires practice and knowledge in order to successfully repeat that positive energy in your home. Remember, if you find you are having negative thoughts while smudging, stop and try again another day.

Pray Before You Begin Smudging Your House

Be sure that you are in the right mindset before you begin your smudging. Your mind should be pure and clean. Don’t carry anger or hurt into the ritual. Remember, this is about getting rid of bad energy and attracting good energy into your home, so do not bring any negative vibes to it. You can pray, meditate or remind yourself that you have a clear mind and heart before you even begin.

You can pray for your world’s creator, the spirits, or anything you feel comfortable with. You can also talk about your gratitude towards plants and God’s creation if you don’t want to pray. You can continue praying throughout the ceremony in silence or loud since the smoke will carry your prayers.

Place Your Dried Herbs in a Container or Bundle them Together

For the best results, follow the steps in order. You do not have to pray when you light or smudge your herbs, but this is when you should remember to love and be grateful towards your home and everyone who lives there.

Place Your Dried Herbs in a Container or Bundle them Together
Image caption: https://druidgarden.files.wordpress.com/

So, place your smudge stick or bundle of herbs in a natural container such as an abalone shell, wooden bowl, or clay dish. If you would like to add words to your prayer, place them underneath the arrangement of herbs. You can either lean a sign against it or tape it to the bottom of your container.

Burn Your Herbs to Produce Smoke, Not Fire

When you are ready, light your herbs on fire. If you used a bundle of dried flowers and leaves, it might take a little while for them to catch fire. Don’t panic! Just put them into the shell or dish, still lit side up, and let them smolder.

Burn Your Herbs to Produce Smoke, Not Fire
Image caption: https://cdn.lifehack.org/

You can leave them to burn on their own for a little while, then blow them off so the herbs can only produce smoke. If the smoke starts running out during the ceremony, feel free to relight them and put them back in the bowl.

Purify Each Participant by Fanning the Smoke Over Their Body

Take a deep breath, and start fanning the smoke in a clockwise direction over your body. You can either hold the shell up in one hand and fan with your other or tilt the shell to let the ashes drop out and use a feather or a cleansing plant like sage to move it around your body.

Make sure everyone in your room is purified by moving around slowly to get the smoke everywhere, especially taking care of sweeping it over each participant’s face. Many people like starting with the head and heart then moving the smoke downwards on their arms and legs. You may use any method that you want.

Waft the Smoke in Every Corner and Outside of Your Home

Begin by putting the shell down and fanning or blowing to spread the ashes. Then, pick up the shell again (be careful not to burn yourself!). Walk around your home in a clockwise direction, taking care to get to every corner. Gently waft the smoke into open windows.

Use feathers to push the smoke outside as you pass through an open window or door. This will ensure you get rid of negative energies in your home. You may walk clockwise or counterclockwise as you wish. As in most smudging ceremonies, different cultures and individuals follow different practices.

Close the Ceremony

When you arrive back at your door front, chant your final mantra or prayer. Visualize how your entire home is filled with warmth, light, happiness, and blessings. Then speak your intention for one last time before closing the ceremony. Do not smudge your pets because certain sage varieties are toxic to dogs and cats if you have pets in your house.

Let Your Ashes Cool Before Returning them to the Earth

It’s best not to return the ashes from your smudging ceremony back into nature until they have cooled off. You can keep them in a special container for a few days if you wish, but it is important that they don’t get mixed up with sand, soil, or garbage while still hot.

FAQs on How to Smudge Your house

How often should you smudge?

Some people smudge their homes daily, but it’s best to do so at least twice a year. Once before the New Year and once again around Beltane or Lammas is an excellent time. You can, of course, smudge your house as often as you like; don’t go overboard. Remember that your intention should always be clear when smudging. You can smudge when you feel weighed down by stress or worry.

What do you say when smudging your house?

What to say when smudging depends on several occasions. For example, if you’re smudging because you moved into a new house, ensure you cleanse your family. You can say words such as “fresh start,” “protection,” or “happy.” If you’re smudging because your family feels exhausted, you can say words such as “cleanse” and “clear.”

How do you cleanse your home?

There are many ways to cleanse your home. One common way is to use white sage, sweetgrass, cedar, or any other natural herb. You can buy bundles of these herbs at your nearest local metaphysical shop.

Final Thought on How to Smudge Your House

As you can see, smudging rituals are a beautiful technique to clear your space and welcome positive energy into your house. Also, treat this ritual with respect as it’s a sacred religious practice in some Native American tribes. If you’re not familiar with the ritual and the plant, it’s best to ask someone who practices this religion.


The post How To Smudge Your House appeared first on Kitchen Infinity.

Did you miss our previous article…
https://chefbuano.com/?p=723

How To Wash A Silk Pillowcase

How To Wash A Silk Pillowcase

Washing silk pillowcases is not as easy as you might think. Not only do they require special care, but also dry cleaning can be expensive and time-consuming. Luckily, there are some

simple steps to follow for washing a silk pillowcase at home. Follow these instructions to keep your silk pillows in tip-top shape and avoid the risk of ruining them with improper care. Here we go!

What You’ll Need

Mesh laundry bagWasher or sinkIronDrying rackDistilled white vinegarGentle detergentCold water

Washing a Silk Pillowcase by Your Hand

There’s always a way to hand washing your silk products. However, it will take time to do, and the results may not be as satisfactory as you would like. It’s best to ask a silk product professional for guidance if hand washing is your preferred method, although we encourage you to try it on your own first before taking such a big step. Here are some things to remember:


Image caption: https://www.thespruce.com/

Read the Label on Your Pillowcase to Check How it Should be Washed

Most silk products will come with care instructions that you should always keep in mind. The care label is always on the inside corner of the pillowcase. It would recommend hand washing your pillowcase. If there’s no care label attached to the pillowcase, then get it dry cleaned to be on the safe side.

Fill Your Basin with Cool Water and Detergent

Fill a basin with lukewarm water and add a little bit of gentle detergent. You can learn how to make homemade laundry detergent for this purpose. Mix the detergent well with your

hands before soaking it in the pillowcase. Use your fingers to rub the laundry detergent around all parts of the silk material, making sure it’s properly cleaned. Make sure you don’t use hot water, as this can cause the silk to shrink.

dd Some Drops of Detergent

If you want to make sure the pillowcase is clean, then add a few drops of detergent. Make sure it’s not too much, as this will cause the silk to become dry and rubbery because of leftover residue. 

Put in your hand and gently knead that into the silk pillowcase. Unlike how you do laundry or washing your silk in the machine washing, ensure you use less detergent. Excess detergent, even if it’s a gentle detergent, can break down your natural fiber.

Soak Your Pillowcase in the Basin Sink or Bucket for 5 Minutes

Just like the washing cycle, leave your pillowcase to soak for 5 minutes. This will allow the detergent to soften up dirt or oil that has settled into the material over time, causing it to look dirty and dull. 

Soak it in a bucket of lukewarm and laundry soap, then set the timer for 5 minutes. Don’t soak it for longer than 5 minutes, as this can damage your silk pillowcase. Swirl the silk gently while soaking but do not scrub or wring as this can damage silk fibers.

Drain Water and Laundry Soap from the Bucket or Basin Sink

Remove the silk from the water and laundry soap. Quickly remove any excess water by squeezing it with your hands. Make sure you do not wring the silk pillowcase as this can cause damage to its fibers.

Refill Your Bucket with Cool Water, White Vinegar, and Fabric Softener

After removing the excess water, refill your bucket with 3/4 white vinegar and 1/4 cup of fabric softener. Stir well to mix the contents. Make sure the fabric softener is safe for the silk before adding it to the mix. The white vinegar will remove excess soap and alkalinity while the fabric softener adds softness and shine to your pillow.

Rinse Your Pillowcase in Cold Water

Once you’ve properly washed and cleaned your pillowcase, finish off with cold rinse water. Do not soak your silk pillowcase in cold water, as this may result in shrinkage. Washing it in cold water will help you clear out all the soap and water, hence keeping your pillowcase clean.

Lay Your Pillowcase Flat on a Fresh Towel to Let it Dry

Once you’ve rinsed your silk pillowcase, lay it flat on a clean towel to dry. Use a fresh towel or rag as this will serve as your drying cloth. After laying the silk pillowcase flat on the new dried cloth, let it air dry before putting it back in place. Never hang your silk fibers in a clothesline to dry, and always dry them out of direct sunlight. Exposing your pillowcase to direct sunlight may cause the colors of your silk pillowcase to fade and deteriorate quickly.

How to Wash Silk in the Washing Machine

Washing your silk bedding in the washing machine is quite possible, but you must follow a specific washing procedure to preserve its silk fibers. Also, ensure you know the washing machine brands to avoid with your silk materials so you don’t end up incurring losses. 

How to Wash Silk in the Washing Machine
Image caption: https://lightsleeper.co.uk/

Check the Care Label

The label attached on the inside corner of your pillowcase should tell you whether it’s appropriate to machine wash your silk pillowcase. If it’s not, check the label attached to your silk bedding for washing instructions.

Wash Your Silk Separately from Other Fabrics

Avoid mixing your silk cloth with heavy fabrics, such as jeans or towels, because its fibers are much weaker. Remember to wash it separately from other delicate clothes. Make sure you wash your silk items alone because their fibers are very weak and could tangle with other fabrics.

Fill the Washing Machine with Suitable Temperature Water

Fill the washing machine with tepid water. The maximum water temperature that is safe for silk in a washing machine is around 40 degrees Celsius or 105 degrees Fahrenheit. Make sure you choose the most gentle cycle that the washing machine offers. If you choose a hotter cycle, you risk damaging your silk or causing it to shrink.

Put Your Pillowcase into a Mesh Laundry Bag

Pour the correct amount of silk-specific detergent into the washing machine, making sure you choose a gentle or delicate cycle. Close the mesh bag and put it inside the washer with your pillowcase. The laundry bag will help your silk stay separated from the other fabrics being washed, preventing it from developing pulls or tangling with other items such as the washing machine drums.

Use Mild Detergent

The silk-specific detergent you chose needs to mix with the water before it can spread out and get on your pillowcase. Avoid using harsh detergents such as bleach to protect your delicate fabric from getting damaged.

Put bleach in your washing machine by accident, and you risk ruining the color of your silk or dulling its sheen. If you need to bleach your clothes,  pre-soak the silk in a mixture of water and bleach before washing it to protect the fabric. You can skip the fabric softener and instead use white vinegar to give your pillowcase a fresh scent.

Use the Delicate Cycle

Add a mild laundry detergent and start up your washing machine using the most delicate setting the delicate cycle. If you have a front loader, lower its water level and increase the agitation speed to protect your silk from getting torn or wrinkled. Use cold water to prevent color bleeding and set the spin speed to its lowest level.

Let it Soak with Your Detergent

Unlike other fabrics, silk doesn’t let go of dirt and dust so easily. So to release as much grime as you can, let the pillowcase soak for about 15 minutes with lukewarm water before putting it in the washer. Put a few squirts of your mild detergent and white vinegar into the basin to soften up stains.

Leave the Pillowcase Resting Flat on a Clean Towel to Dry

Remove silk pillowcases from the washer and lay them flat on a clean towel. Leave it there to dry for another half-day before putting it away in your linen closet. Do not dry your silk fabric in direct sunlight, as this can cause yellowing and damage the silk fibers.

FAQs on How to Clean a Silk Pillowcase

How often should you wash a silk pillowcase?

Silk fabrics should be cleaned after every two weeks to maintain their freshness. Don’t skimp on this step if you want to keep your silk pillowcase looking well for a long time.

What detergent is safe for washing silk?

Powdered detergents are ideal for washing silk in the laundry. Since powdered detergents are more diluted compared to liquid ones, you can be sure that it’s gentle enough not to irritate the fabric.

Final Thought on How to Wash Your Silk Pillowcases

If you’re conscious about the appearance of your silk fabric, then it’s best to wash and dry them after every two weeks. You can also clean stains in your silk pillowcase by using cool water and spot stain removers.

Remember not to rub the fabric harshly when washing silk because it may cause damage to the material. With all these tips, you’ll have a clean pillowcase that will not only beautify your night but will serve you for a long time. Feel free to pin and share this article.


The post How To Wash A Silk Pillowcase appeared first on Kitchen Infinity.

Did you miss our previous article…
https://chefbuano.com/?p=719

How To Brighten A Dark Room

How To Brighten A Dark Room

If you have a darkroom in your home, it can make the whole place look smaller and more cramped. There are many ways to brighten a dark room, but they all require money or time that most of us don’t have. Here’s a list of ways you can brighten up your dark room without investing much time and money:

Place Your Mirrors Near Light Sources

Although it’s old advice, mirrors can expand your visual space and brighten your dark room. To use mirrors to their fullest potential, ensure that you place them near a light source, such as a window or floor lamp. Large mirrors reflect light and can do wonders for small rooms without windows. To get the best results, make sure your lamp emits ambient lighting.

Install Multiple Light Sources

Placing a lamp near a window isn’t the only way to bring light into your dark rooms. The web is filled with examples of how lights can be used to brighten up a room-so much so that it’s nearly impossible for a single light source to do all the work. If you have many dark corners in your room, install additional light sources. You can add a floor lamp or table lamp to start.


Image caption: https://hips.hearstapps.com/

dd Light Colors and Transparent Furniture to Dark Rooms

Light colors not only decorate your room but can also make dark rooms feel bigger, brighter, and more cheerful. While pastel hues are generally considered light, if you want your room to be brighter, it’s best to choose a lighter tone of the dominant color in the room-for example, if you have an orange room, add light yellow to brighten things up.

Transparent furniture is a great way to increase a dark room’s brightness, especially a small, dim room. Glass tables and shelves allow light from outside to flood in so you can have your cake and eat it too-a a well-lit room with an open layout. Also, a stylish, compact sofa in a lighter color like white, beige, and ivory can make your living room look and feel bigger and more spacious. If you find neutrals and metallic accents too moody, you can bring in a playful throw pillow. This will make your living room or bedroom feel casual without dressing it too much.

Cover Your Floor with Large, Bright Area Rug

An area rug is a quick and easy way to brighten up an otherwise drab room. A big, brightly colored shag rug instantly adds warmth and character to any space, making it the ideal choice for rooms that don’t see much natural light.

This will not only add some softness and texture to your floors but will make your floor glow. This is very important, especially if your dim space features dark floor cardboards. When choosing a color for your rug, think about choosing a rug that contrasts with your floor color. For example, if your floor is dark, choose a light-colored or white rug to brighten up the room.

Keep Your Windows Clean and Clear

A couple of hours washing your windows will brighten up any room, as dirty windows can darken a space by blocking out natural light. And don’t just clean your windows from the outside. Also, wipe those inside panes to ensure that there’s no film obstructing the light from reaching your room.

Make sure you deep clean your windows once a year to make them shine during the winter months. Remember that the less dirt, dust, and debris on your window, the more sunlight will shine through your room.

Introduce Light Fixtures

Overhead lighting in bathrooms isn’t always the most pleasant of spaces, so the addition of light fixtures can brighten up your space. Use single hang lamps above head height for functional lighting that adds interest to an otherwise dull room.

In that case, don’t rely so much on overhead lightings such as those from chandeliers or pendant lights. Instead, add some floor and table lamps to your dark bathroom to allow you enough lighting for grooming and even reading. Keep the light color cool so as not to create a warm atmosphere in an already hot space.

Go for Lighter Lampshades

Opt for lampshades that are made with a light material such as linen or cotton. While darker shades may make a small space seem even smaller, lighter shades will scatter the light and make your space look brighter. A lighter lampshade will help diffuse light without blocking its glow-like opaque shades.

Go for Light Wood Flooring

A dark floor is a great option for a small bathroom, but if you’re stuck with dark-colored tiles, think about replacing them with lighter ones. If your shower stalls and floors are already tiled in dark colors, freshen up the space by installing new light-colored finishing and caulk.

If possible, choose light wood flooring or a light stain that can hide chips and scratches. It will keep the look fresh and bright. If you don’t want to replace your flooring, you can always paint it.

Incorporate Metallic Touches

Make your drab and dreary space lively by adding shiny finishes to your home decor. Metallic touches work well in small bathrooms, especially if they’re used as an accent. Try using metallic tiles, showerheads and faucets, towel racks, light fixtures, and other decorative elements.

Metallic touches help in reflecting light irrespective of where they’re placed. Whether you express them through a light fixture, artwork, or decorative objects, using metallic elements is a great way to liven up dark and dull spaces.

Keep Minimalist on both Furniture and Light Fixtures

Minimalist furniture and light fixtures help in making a dark room brighter. When it comes to furniture, simple designs with clean lines work best in small spaces. Keep your bathroom minimalist by letting go of bulky items such as vanities, large cabinets, and massive furniture pieces.

To light up your room, you’ll need a low-key light fixture. This should give you good light, but you don’t want the light itself to be on your room’s focal point because of the dark color of your walls. For example, if you live in a small apartment with drab walls and want to brighten up your bathroom, install an overhead light that is sleek and simple; it should blend easily into your room’s design.

Avoid oversized furniture; instead, go for light furniture that lies low to the ground. Set a maximum height for your furniture and ensure that each set falls below the set height. Leave ample space between each piece of furniture and give it a careful look to ensure that the scale is right. You can take your time to learn how to arrange furniture and make your room look brighter and lovelier.

void Bringing in Too Much Wall Art

Before bringing in an interior designer, try to limit your decorative accessories because these designers can overdo the decoration. Even if you live in a large mansion and your room is struggling with lighting, try to limit your artwork, furniture, and other decorative accessories.

Even though you love contemporary art, consider that too many modern art pieces might look crowded or give an impression that the room is small. Instead of hanging up everything on the walls, use a wall gallery to create an artistic statement.

Paint the Ceiling Bright White

If you don’t have tall windows or the ceiling is too low, paint it white to make the room appear brighter. White ceilings are also easier to clean since they can reflect light, unlike darker colors that are more difficult to spot dirt on. Painting your ceiling with an eggshell or satin finish will boost your ceiling’s reflective properties.

Paint the Ceiling Bright White
Image caption: https://cdn.trendir.com/

Consider a Whiteout

If you want to bring in more light into your old room, grab your paint roller and a gallon of white paint, then start painting your walls. But don’t stop; paint everything white from floor to ceiling and even your home decor and furniture. Give your baskets and bed frames some shade, and you’ll love the outcome.

If you feel overwhelmed, you can assign someone to help you out. A too-white room can feel sterile and even a little cold, so make sure to add some character with a warm accent somewhere on your walls. This will not only make your dark room brighter but will also give it a subtle beauty.

Bring in Greenery

Make your room feel more spacious and lighter by bringing in greenery. The crisp white walls and splashes of color will brighten up your dark flooring and narrow space. When bringing natural plants, consider the size since the larger size is better as long as you use a white vessel.

This white vessel can visually bleed into your room and make it feel brighter. Since the plants take up space, they will help diffuse the light and make your dark space look bigger. Choose greenery that thrives in minimal light.

Limit Your Window Treatments

Make the most of natural light in your home. Avoid heavy draperies and window treatments that can block natural light. If you want to put something on the window, consider sheer drapes, blinds, and roman shades that will not take up your wall space. You can also consider opaque treatment to give you privacy while letting light into your room.

Consider a Glass Door

Swap your solid door out with a glass door. This is one of the permanent changes that can make a difference in your dark space. It will let in much more natural light and give the illusion of a bigger room. An exterior door will also allow more natural light into the room from outside, making a big difference. And if it’s an internal door, it will make your room feel more open and bright.

Consider a Glass Door
Image caption: https://assets.blog.hgtv.ca/

FAQs on How to Brighten a Dark Room

What colors make a room look brighter?

Colors that make a room look brighter include bright white, off-white, light grays, warm neutrals, and bright and bold colors.

How do you brighten a dark room without natural light?

You can brighten a dark room without natural light by using brighter textures, paints, and furniture.

What do you do when your room is too bright?

If your room is too bright, use darker woods as flooring or wall coverings to absorb some light.

Final Thought on How to Brighten a Dark Room

As you can see, brightening a dark can be a challenge and, at the same time, a good opportunity to add some drama and texture. It’s not easy to get more light into your dark room. It’s doable with some strategic design and planning.


The post How To Brighten A Dark Room appeared first on Kitchen Infinity.

Did you miss our previous article…
https://chefbuano.com/?p=704