
The post Top 15 Best Built-In Wine Cooler Reviews and Buying Guide in 2021 appeared first on Kitchen Infinity.
Did you miss our previous article…
https://chefbuano.com/?p=167
Home Renovation Journal
The post Top 15 Best Built-In Wine Cooler Reviews and Buying Guide in 2021 appeared first on Kitchen Infinity.
Did you miss our previous article…
https://chefbuano.com/?p=167
Cilantro is an herb that has a lot of benefits for your health, and you can grow it in your garden. However, there are some things that you need to know about the plant before growing it. It is also known as coriander or Chinese parsley.
You can use cilantro as part of many dishes like soups, salads, or even stir-fries. It has a very distinct smell which makes food taste better. But aside from its culinary uses, this herb also has other benefits, such as reducing stress and blood pressure levels while boosting memory and concentration.
And if you’re new to gardening, don’t worry because cilantro is a great plant to start with, especially if you have limited space since it only grows up to 12 inches tall. Plus, cilantro seeds are easy to find online, so all you’ll need after buying them would be some soil and sunlight. Here are how to successfully grow this wonderful herb:
Since cilantro can grow in almost any kind of soil, you could even plant them in pots and boxes. However, make sure not to plant them near dill or fennel since it will cause the cilantro plants to emit a scent similar to soap. Plus, if they’re planted near tomatoes, they may absorb some of the substances and flavor of tomatoes, which could alter their taste. Talking about tomatoes, you can learn how to prune your tomatoes and improve your yield.
The soil must be well-drained because too much water can cause cilantro to rot or grow mold. You can buy garden soil or make your own by mixing equal parts of potting soil with perlite and peat moss. If you decide to use seed pot and starter soil, it’s best to mix them with perlite and pots for better results. Don’t forget to test the soil pH and grow your cilantro in perfect soil.
Plant one to two seeds in a small pot and put them in warm weather. Sow seeds where they’ll have some shade because cilantro prefers light shade over the full sun. Once the cilantro sprouts, then you can transfer them to bigger pots.
Water your seeds with lukewarm water every week because they need moisture to germinate. You can expect them to sprout in 7-10 days when the weather is warm. However, if you don’t have good soil, your cilantro may grow mold or rot instead of sprouting. Keep the soil moist but don’t allow it to become waterlogged.
And if the soil dries before the seed germinates, move your plant to an area with little shade. Allow your plant to grow two inches tall. As soon as you see peat pots, give your seedlings some water.
Once your coriander is tall enough, you can move it to its home, which is the container. This herb does well in garden beds with organic and non-organic soil. They also do well in containers. Whether you choose organic soil or containers, make sure your cilantro plant will have a new home with sunny and lightly shaded.

Image caption: https://storage.googleapis.com/
If the area is too shaded, your cilantro plant may fail to produce healthy and hearty cilantro. Once you have your cilantro plant, make sure not to place it too close to other plants or objects, as coriander does not do well in crowded areas. Plant your cilantro 6 to 8 inches apart from each other.
Cilantro needs moist soil to develop its healthiest and most productive root system. Avoid applying fertilizers on young seedlings, but if you already have older cilantro plants, apply water-soluble fertilizer once or twice a month.
It takes three to four weeks for your cilantro seedlings to grow into cilantro plants. Once a week, you can cut a few inches from the plant’s stem to promote new growth and better flavor. It only takes 45 days from the time you plant your seeds to harvesting your herb.
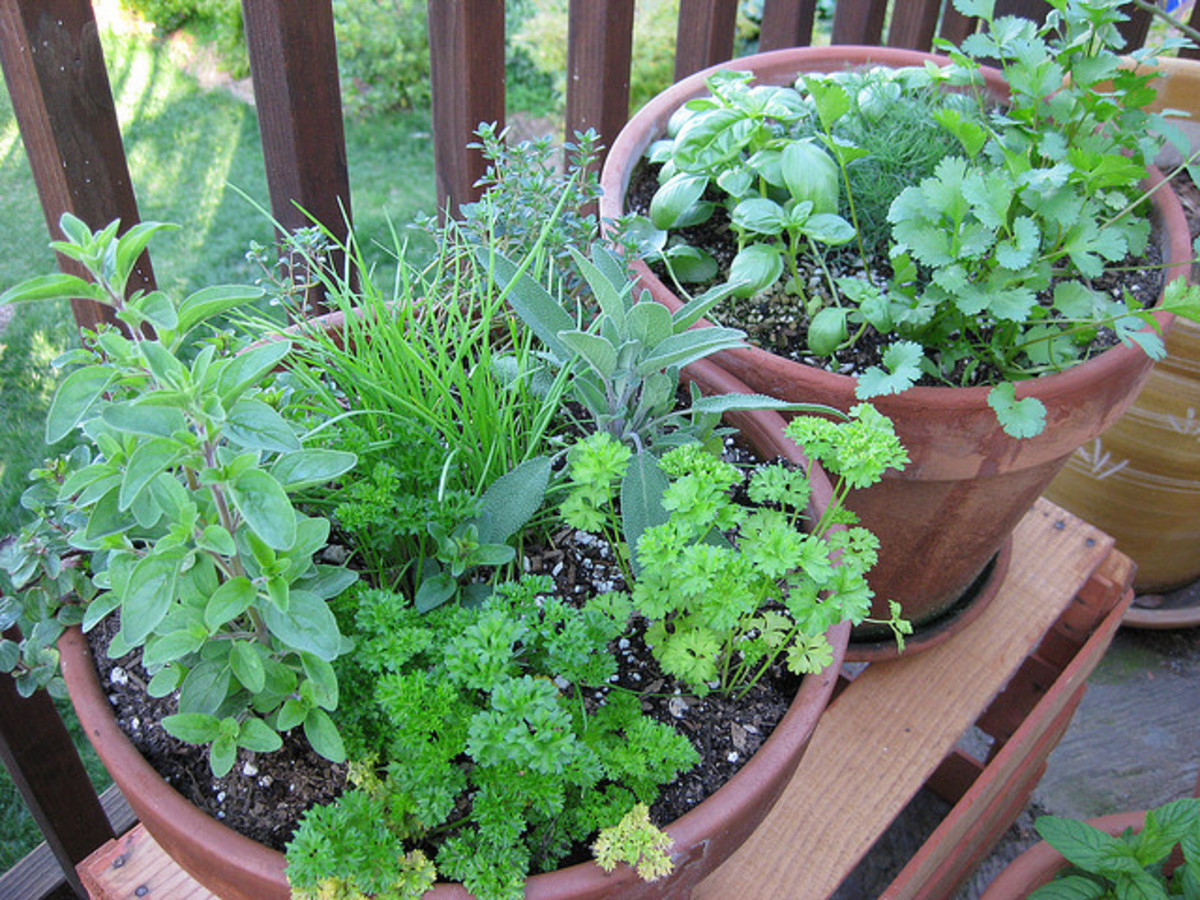
Image caption: https://images.saymedia-content.com/
There is no specific way of harvesting your cilantro, but most people prefer to use scissors when harvesting cilantro. Be sure to cut the stems off just above the surface of the soil, close enough that you are cutting into new growth. You can cut it as a whole or harvest leaves from the plant.
Cilantro requires some maintenance, even if it’s easy to grow. If you want to get the best results, then fertilize your plants with a water-soluble fertilizer. Make sure you don’t fertilize anything until the seedlings are at least two inches tall. If you want it to fill out, pinch back the leaves frequently.
Like with many other herbs, you can pinch out the main growing tips of your cilantro plant to produce a bushier plant. This will encourage new growth and make your plant lusher. When your plant reaches six to eight inches, you can harvest some of the leaves for use in food.
llow Your Cilantro to Spread Out
Once your cilantro plants flowers, it will produce seeds. This is the best time to cut off the flower heads since this will encourage lower branches to grow fruiting stems. This is important, especially if you’ll use cilantro frequently. The seed may die after seeding, so it’s good to have few extra plants on hand. Let one or two coriander seeds; then those seeds will self-sow in your garden.
You can harvest cilantro for up to six weeks. After six weeks, the number of leaves it produces will be significantly smaller, so you may want to let another plant take its place in your garden or pot. When harvesting, don’t take all of the leaves at once since this will leave your plant vulnerable to disease and pests.
Once you know how to grow cilantro, you need to know how to harvest cilantro as well. You can start to harvest leaves once the plants are around 6 inches tall. Harvest by cutting the outside leaves. Once you have harvested enough for a recipe, let those plants keep growing so they can produce more leaves for your next harvest.
Cilantro stems and leaves are very delicate; therefore, you should use them while still fresh at the end of your cooking. To store your plant for future use, place cilantro stems in a jar or glass of water and cover them with a plastic bag. Put it in the refrigerator for up to 3 days. Cilantro leaves do not store as well as stems, so you should avoid drying them since they will lose flavor.
You can also freeze the stems and leaves individually or in an ice cube tray. Cilantro’s peak growing season is during late spring and early summer months when your temperatures are steadily rising. Be sure to plant your cilantro in rich soil with nutritious compost, and do not skimp on the water since these little beauties are very sensitive.
Harvest cilantro leaves in the morning or evening when the plant is dry and fresh. Cut off 1/3 to 1/2 of your leaves when you are ready to cook with them. The faster they grow back, the better their flavor will be. And allowing them to flower will leave you with tasteless herbs.
Coriander seeds can be harvested when they’re young and green or wait until they turn brown. You can pick the green seeds directly from the plant or harvest brown seeds, then use a paper bag to hang the flower heads upside down.
Some people like their coriander spicier than others, so if you want seeds with a stronger flavor, leave the flowers on longer (or let them go to seed). If you’d rather have less.
Cilantro is an annual plant, meaning that you can plant it in succession to extend the cropping season. In mild climates, it can be planted all year long. When it comes to maintenance, it can be planted in neutral to acidic, well-drained soil. Keep it in moist soil but not waterlogged. Cilantro has few pest problems, including common aphids, leaf miners, whiteflies, and spider mites.
When you notice holes in the leaves caused by flies, lay down some powdered cumin around the base of the plant. This will repel most pests without harming your plant. If necessary, use neem oil or horticultural oil on the leaves.
Cilantro is susceptible to root rot, black rot, anthracnose, and gray mold. To avoid these diseases, use a 3-year rotation plan with each plant in its container. Keep the soil moist but let it dry out between watering.
The first step in learning how to grow cilantro is to plant the seeds. Use a soilless seed-starting mix and sow the seeds on the surface of the moist medium. Use your finger to make shallow rows and cover them with approximately 1/4 inch of soil. Keep the soil medium moist but not wet, and keep it at about 75 F degrees. It should take between 4-7 days for cilantro seeds to germinate.
Cilantro can be stored in airtight containers in the refrigerator for up to three weeks. This herb usually lasts longer when it’s frozen, so you may want to freeze them before they wilt or brown. You can also wrap fresh cilantro with a wet paper bag and store it in the refrigerator.
In summary, cilantro is a special herb with many health benefits. Cilantro tastes excellent in salads and soups or added to sandwiches and tacos. You can also use them as garnishes for desserts such as cupcakes and cakes. Finally, you may preserve them by freezing or drying them. If you do not like chopping cilantro, you can also use them in their dried form.
The post How to Grow Cilantro appeared first on Kitchen Infinity.
Did you miss our previous article…
https://chefbuano.com/?p=165
A sump pump is a mechanical device that removes water from basements, crawl spaces, and other low-lying areas of your home. If you have ever been in a situation where your house was flooded with water, then you know how important it is to prevent this disaster from happening again.
By installing a sump pump in your basement, crawl space, and yard, you can protect yourself against any flooding disasters that might occur during heavy rains or snowmelt. This guide will help you install a sump pump correctly to avoid future flooding problems at home.
Get your tools and materials together before you begin. You will need:
SledgehammerSubmersible sump pumpFlexible discharge hoseCementGravelHole saw drill bitFilter fabric
Choose the location you wish to place your sump pump. The pump should be placed in the lowest possible area where water tends to accumulate, for example, an outside yard near the house or inside your basement. The sump is just an inverted bowl that collects rainwater and snowmelt. Finding the location the water collects should be your priority to installing a sump pump.
If you notice water accumulation, dig a hole there. But digging a hole is easier said than done, especially when your basement floor is made of concrete. You can use a sledge or a jackhammer to dig through. Dig until the cavity fits the pump basin.
Lay down a tarp to protect your floor. Then put the basin on top of it upside-down. When choosing a place to install a sump pump, figure out a proper drainage system. The drainpipe must be large enough to accommodate the flow of water.
Place the basin on an upside-down bucket. Wrap the exterior base with a fabric filter, letting it go outside of the bucket. Remember that most effective sump pumps typically have to weep holes. Wrapping the exterior siding will prevent silt and other debris from clogging the holes.

Image caption: https://aquamasterplumbing.com/
After putting the fabric filter in place, attach a sump pump. The next step is cabling a power source to the pump. If you have a backup battery system for your sump pump, be sure that it can work together with your primary sump pump. Then connect the sump pump to the battery. Make sure to deal with power outages by having battery backup standby.
dd More Layers of Gravel & Sand
The layering process of gravel and sand is considered valuable in the filtering process. Continue adding layers of sand or gravel onto your fabric filter until they are at least 6 inches deep. This is the best sump pump setup you can have for draining water.
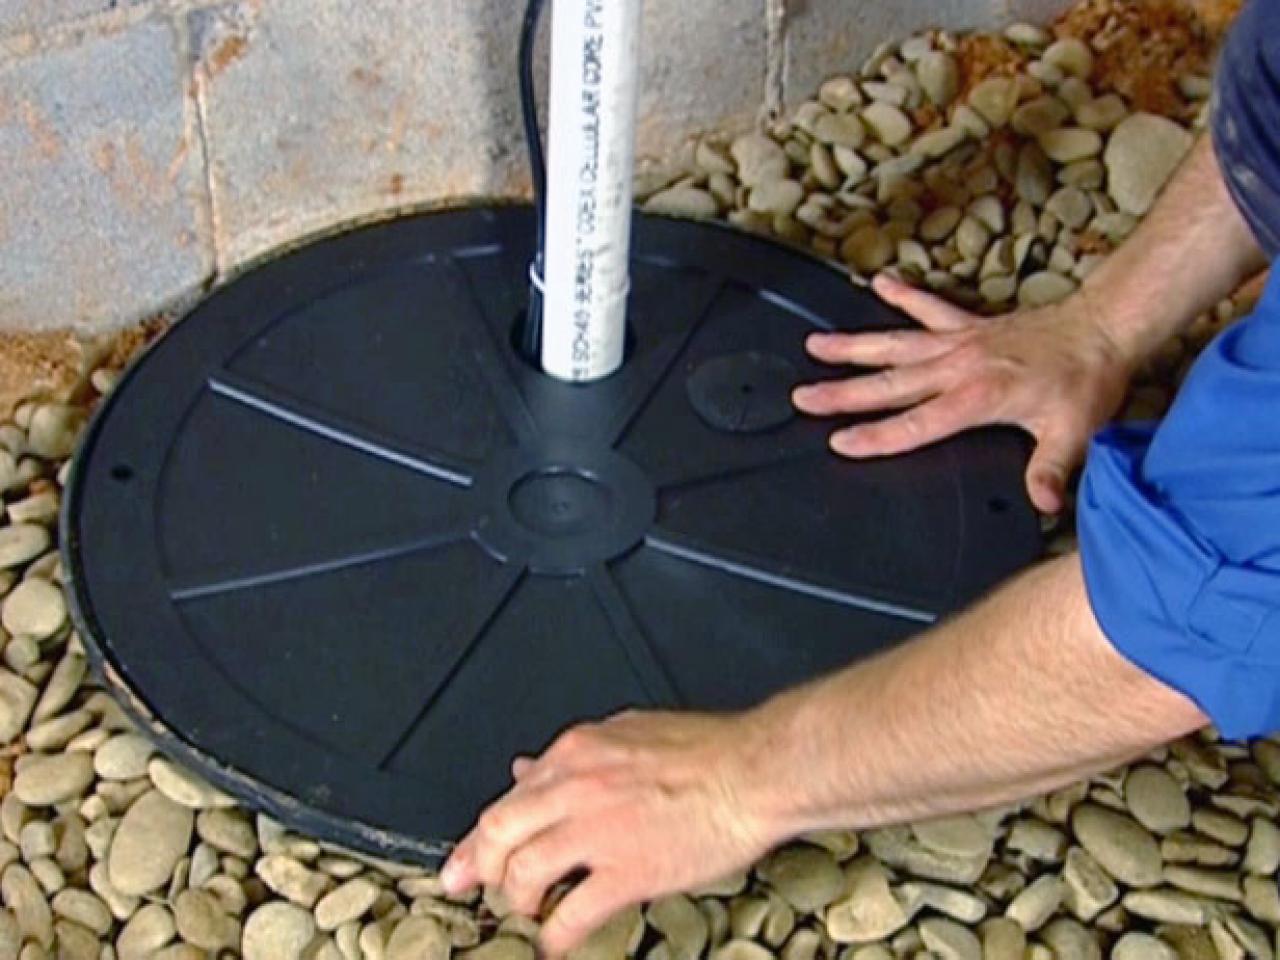
Image caption: https://diy.sndimg.com/
After that, lay a stone paver on top of the layer of gravel. This will be enough to keep the water flowing through the paver and underneath it by making an efficient channel.
ssemble the PVC Piping from the Sump Pump
PVC piping is the best type of pipe to use while installing a sump pump. Cut a piece of PVC pipe that will be long enough to reach the bottom of your wet well/storage tank. Assemble it on one end by screwing it with its elbow joint.
Even though the arrangement of this pipe will vary from home to home, its main function is to provide a path for the water to drain from the well. When drilling a hole through the rim joist and exterior siding, use a hole saw and then seal the rim joist caulk to prevent water leakage.
You can also opt to invest in regrading your yard to ensure that the water flows away from your home. If your well is near your foundation wall, you may want to consider using a protective shield of PVC on the inside of this wall to protect it from possible seepage. You may also run a drain line from your foundation walls to the yard. It’s important that you don’t run this into a storm drain or other bodies of water.
Use wire ties to attach a screen to the pipe that extends outdoors. A check valve can also be used; attach this with wire ties as well. A check valve allows water to flow in one direction and stops it from flowing back into your home. Place the pump into the sump and prepare it for use. If you attach a battery backup, make sure it’s always charged and ready to go in an emergency. Ensure you use a check valve that is made specifically for this purpose.
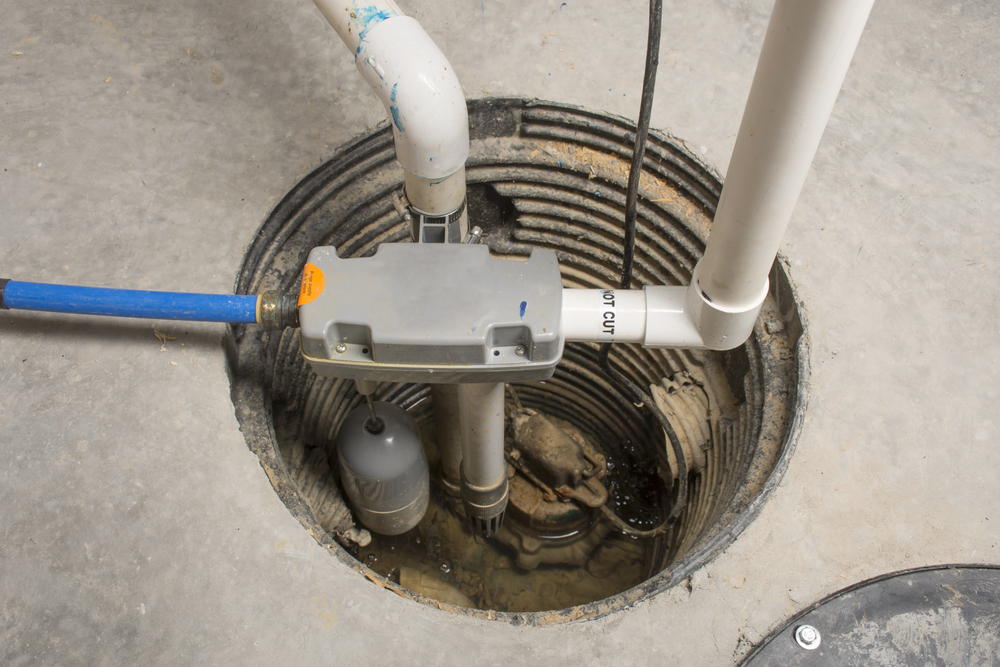
Image caption: https://www.snellheatingandair.com/
Attach the discharge pipe and remove the wire mesh cover. A check valve should be installed in line with the discharge pipe so that water can flow in one direction and out of the home but not back into it. The pump should sit below the level of the check valve.
Fill in the crevice around the sump basin with a new concrete mixture. It should be about 6 inches high all around the sides of the sump basin. Allow it to dry overnight, then place a layer of sand over the top so that the water will flow through it when it reaches the bottom of the sump. Make sure you learn how to pour concrete in cold weather so don’t have trouble with the curing process.
Place a bucket in the sump basin and fill it with water. Observe which way the floating pole moves, then adjust the float arm so that it turns on when the water level reaches this point. Make sure the float on the pump is not obstructed by any of the piping or drain hoses.
As water flows into the sump, the float should rise and activate the pump. If it does not, check to make sure the pump is plugged in and that there are no obstructions or kinks in any of the hoses.
A check valve expels water from the sump basin and is usually installed in the drain hose. The check valve should be placed after any backflow preventer you might have but before the discharge pipe. This allows water to leave the basin but not return when your pump shuts off.
It also acts as a pump motor protector as it helps to avoid on and off whenever there’s motor burnout. These valves come with hose clamps and couplings, with directional arrows engraved to avoid errors.
Before going any further, make sure you plug the pump into a power source and let it run for a minute. This allows your pump motor to properly prime itself with water so that when you hook up your system to water, there won’t be any air bubbles in the line. Ensure the sump by placing it in a corrugated tube and guiding the water overflow tube into it. This prevents excess water from entering your basement.
Sump pumps are built differently. The simplest ones are plugged into an outlet, while other models come with backup batteries that run the pump during a power outage. Once you have a sump pump, the trick is to get it installed properly.
The first step is to make sure that you tie the float down with a screw through its center hole and attach the plumber’s tape on the threads of galvanized screws for extra water resistance. Double-check that your power source has kicked on as well as the pump itself.
Sometimes you can install sump pumps to resolve exterior drainage issues. An exterior sump pump works the same as the interior by sucking water in and moving it. The only difference is that the unit has some additional components, including floats which sense when to turn on or off.
There are two different types of sump pumps. These include pedestal pumps and submersible pumps. Both have the same function, but the submersible pump will sit in a permanent position at the bottom of your sump pit. You may need special equipment to run electricity directly from the home’s circuit panel to this unit, so call a professional for advice.
A submersible pump is always installed into the sump pit, a hole located in either your basement or crawlspace. The pedestal variety is most often placed on the floor of this area.
Yes, as long as you have a basic knowledge of how to work with electricity and the location of your foundation drainpipe. The latter will need to be fitted with a bulkhead fitting for the proper installation of a sump pump.
As you can see, sump pump installation requires little more than a few basic tools and some knowledge of electrical and plumbing. It is important to ensure that the pump has enough power to lift the water high enough to prevent any backflow, which could cause basement flooding.
The post How to Install Sump Pumps appeared first on Kitchen Infinity.
Did you miss our previous article…
https://chefbuano.com/?p=163