How to Troubleshoot Your Clothes Dryer

How to Troubleshoot Your Clothes Dryer

Your clothes dryer is a very important appliance in your home. It helps you save money by drying the laundry at home instead of going to the Laundromat. However, there are times when it breaks down and stops working properly. 

Since most people don’t know how to fix their broken clothes dryers, they will buy a new one or take their laundry elsewhere for drying. You don’t have to do that as fixing the clothes dryer is as easy as how to do laundry itself. Below is how to troubleshoot your clothes dryer without calling the repairman or buying a new one. Let’s get started.

Tools and Materials

Voltage meterLong-handled bristle brushRigid dryer ventNew dryer fuseNew dryer power cordCotton swabRubbing alcoholNew dryer belt

Instructions

1. Check if the Dryer is Plugged In

Dryer problems happen because of power interruptions. Before you do any troubleshooting, make sure your dryer is plugged in. Check the voltage meter if there is electricity running through it.

If not, check the circuit breaker or fuse that provides energy to your dryer. Make sure that all electrical connections are tight and secure to avoid loose wiring. If you have an electric dryer, it runs on two circuits, including one for heating the element and one for the rest of the dryer.

So, if your dryer is getting hot but not drying, it could be that one of the two circuits is tripped. In this case, check the circuit breaker and reset the circuit as necessary. Also, learn how to install a dryer electric cord to avoid any electrical issues.

2. Make Sure Your Dryer is Not Overloaded

If you’re trying to dry a lot of clothes at once, your dryer might be too overloaded to function properly. In this case, try drying fewer items or use a larger dryer. Overloading the dryer can cause drying performance and noise issues when too much weight is inside the dryer.

When you squeeze too many clothes into your dryer, you decrease the airflow needed to dry clothes properly. Overloading also makes your dryer work harder, use more energy and increase drying time. Avoid filling your dryer drum more than three-quarters full.

3. Check the Breaker or Fuse

If your dryer is plugged in but won’t turn on, the power source is the first thing you want to check. It’s possible that the breaker has been tripped or the fuse needs to be replaced. Check the Breaker Box If you have an electric dryer, turn off the circuit with a tripped breaker switch and reset. 

If you have a blown thermal fuse, replace it with the same amperage and rating. Also, check the voltage in the outlet using a voltage meter and make sure your outlet is functioning properly. If it’s not functioning, call the electrician immediately.

If you have a gas dryer, make sure the pilot light is lit and that you have an adequate supply of gas if the dryer is fueled with liquid propane. Both electric and gas dryers require 240 volts to operate. And if the dryer power cords fail, check the voltage and replace it if needed.

4. Inspect the Fuse, Switch, and Belt

If you have a power outage or surge in your home, it’s possible that the thermal fuse in the dryer control panel is damaged. Dryers also require a door switch to engage for the appliance to work. However, these switches can break.


Image credit: https://upgradedhome.com/

You can get them coated with lint or use a cotton swab and a bit of rubbing alcohol to clean the contact areas. Check the rubber belt that connects the motor to the drum if your dryer heats up, but the drum doesn’t turn. If it’s loose or broken, replace it. It’s a good idea to inspect the fuse, switch, and belt before a service call.

The fuse is located on the dryer wall and is usually a small, round glass tube. If it’s blown, replace it with one of the same amperage and rating. The switch is located near the dryer door and is either a toggle or rocker switch. If it’s not working, replace it. 

The belt is located around the dryer’s drum, and if it’s broken, worn, or loose, it will need to be replaced. After getting the new belt, place it on the drum where the old belt had been and wind it onto the idler pulley and the motor pulley. 

5. Check and Clean the Temperature Sensor

If the sensor is dirty, it will not read the correct temperature, and your clothes will not dry properly. To clean it, unplug the dryer and remove the screws that hold the sensor in place. Clean it with a soft brush and replace it.

Check and Clean the Temperature Sensor
Image credit: https://fleetappliance.com/

Test the dryer to see if it’s working properly. If your dryer turns on and shuts off very quickly, the problem could be either the thermostat or thermal resistor. The thermal fuse blows and turns off the dryer to prevent overheating. 

Use a voltage meter to check the temperature sensor to determine if it’s working properly. Also, check the heating element and timer to be sure they’re receiving power. Check the user or repair manual.

6. Clean the Lint Trap

Clean the lint trap after every load of laundry to ensure your dryer is running properly and efficiently. A clogged lint trap can cause your clothes to take too long to dry. Hard lint buildup in the trap can cause your clothes to dry slowly, if not at all.

Clean the Lint Trap
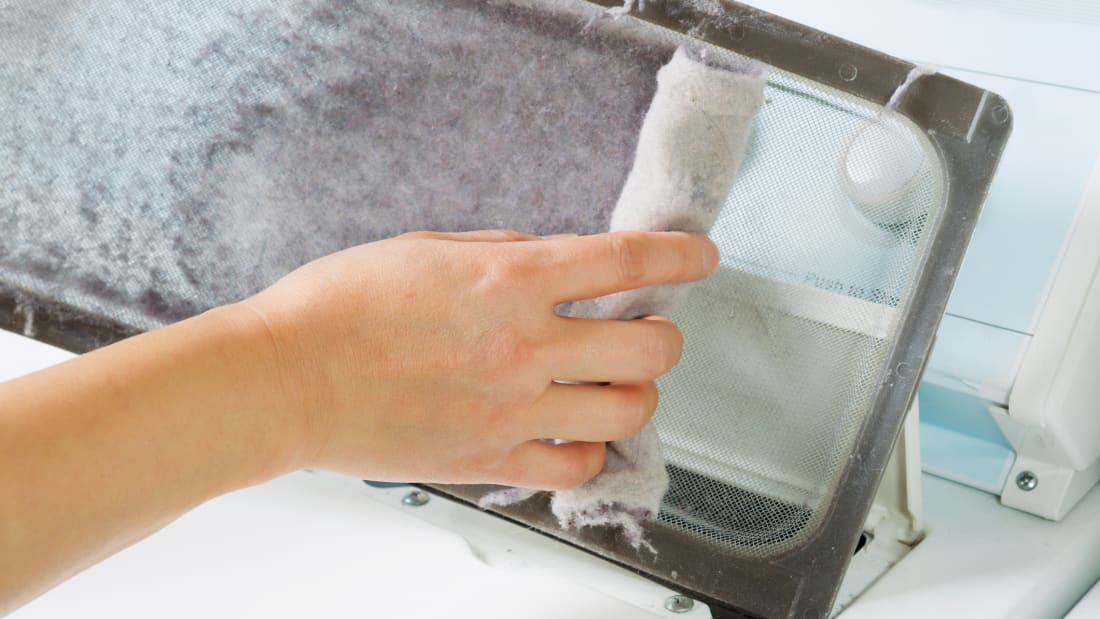
Image credit: https://images2.minutemediacdn.com/

If your lint filter is full, the air is not flowing freely, and your machine is forced to work longer than necessary. After emptying your lint filter, wash with warm soapy water and let dry completely to remove any residue from the dryer sheets. Use a bit of rubbing alcohol to clean the electronic moisture sensors. This will leave your dryer working more efficiently and prevent a possible fire.

7. Check the Air Vent and Ducts

The air vent and exhaust duct play a key role in the drying process. Make sure they are clear of any debris or obstructions. If you have pets, their hair can clog up the vents and ducts, resulting in a clothes dryer that does not work properly.

If your dryer vent system is kinked, clogged, or disconnected, use a long-handled bristle brush to clean out the dryer vent. The vent should be as short as possible between the machine and the outside exhaust vent to prevent clogs. If your venting system is long and you can’t reach the entire length with a brush, use a leaf blower to clean the system or hire a professional.

If you still have a flexible white plastic dryer hose, replace it because this is a fire trap waiting for a disaster. And that’s why new building codes require a rigid dryer vent. Make sure you check the outside vent as well.

Most of them are designed with a trap door that only opens when dryer air and lint are blown out. The trap door won’t open if the vent hood gets coated with lint, especially in high humid climates.

8. Make Sure the Dryer is in a Ventilated Space

Your dryer needs to be in a well-ventilated space so the hot air can escape. If the dryer is too close to a wall, the air won’t circulate, and your clothes will take longer to dry. In fact, if the back of the dryer is against a solid surface, it can cause the motor to overheat.

If you’re installing your dryer in a closet, make closet doors have ventilation openings at the top and the bottom of the door. The front of your clothes dryer requires a minimum of three inches of airspace, one inch on the sides. 

9. Check for the Heat Problem

If your clothes take too long to dry, first check the heat problem. The most common reason for clothes not drying is that the dryer isn’t getting hot enough. Hold your hand under the outside exhaust hood to check air movement. If the air movement is less than a hair dryer at high speed, clean the lint from the entire length of the system and exhaust hood.

The dryer isn’t heating if you can’t feel any air coming out. One way to test if the dryer is getting hot is to use a thermometer. Put the thermometer in the exhaust pipe and ensure it reads at least 130 degrees Fahrenheit. If it’s not reading that high, you need to troubleshoot your heat problem.

10. Check the Dryer Blower Wheel

Another common reason for the lack of heat is a blocked dryer blower wheel. This can happen if the lint screen isn’t cleaned often enough. To check if the blower wheel is blocked, open the dryer’s back panel and look at the blower wheel.

If it’s dirty, clean it with a vacuum cleaner. With the back panel open, check the blower wheel for cracks or obstructions that may be preventing it from spinning. To remove the blower wheel, open up the dryer by separating the top and front panels away from the main dryer cabinet. Pull the drum off the drum bearing to have full access to the motor and then unscrew the blower wheel from the motor.

11. Replace the Control Panel

If the dryer isn’t getting any power, you’ll need to replace the control panel. Before doing this, unplug the dryer and remove the back cover. During this step, you will find your thermal fuse, and its location will be dependent on where it is in your particular model of appliance. Read your owner’s manual for information about control panel components to order the correct replacement.

Replace the Control Panel
Image credit: https://i.ytimg.com/

FAQs on Troubleshooting Your Clothes Dryer

What is the common problem with dryers?

Excessive noise is the most common problem with dryers. A new drum belt can help eliminate some of the noise during operation, but there could be other problems if it doesn’t work.

How do I know my dryer isn’t working?

If you have no power, your dryer isn’t working. Begin troubleshooting by unplugging it and checking the power at your electrical outlet to be sure.

Does my dryer need an electrical reset?

If your dryer is making some noise but isn’t tumbling, you can check to see if the drum needs to be reset by pulling the lint out of the back of the machine where you would normally clean it. There’s a small red button on the motor that you can push with a paperclip or something similar to reset it.

Final Thought on How to Troubleshoot Your Clothes Dryer

As you can see, troubleshooting your clothes dryer can be easy if you know what to look for. If you don’t, it can be difficult and time-consuming to learn while trying different things that may or may not work.

Before getting a new dryer, make sure you try these troubleshooting methods, and if you have no clue where the problem might be coming from, don’t hesitate to call a professional.


The post How to Troubleshoot Your Clothes Dryer appeared first on Kitchen Infinity.

Did you miss our previous article…
https://chefbuano.com/?p=1163

8 Best Furniture Rental Companies

8 Best Furniture Rental Companies

Moving into a new home can be an exciting time, but it can also be stressful. You may not know where to start furnishing your new place, and you probably don’t have the money to buy furniture. Renting furniture is a great way to get what you need without spending too much money. 

Furniture rental companies offer everything from living room sets, bedroom suites, and dining tables so that you’ll always have what you need at an affordable price. The best part about renting furniture is that if something breaks or gets damaged, it’s no big deal because all of the furniture in question will be replaced with new pieces by your local rent-to-own company. 

So, if you’re looking to rent furniture for your apartment, here are the best furniture rental companies available:

1. Brook Furniture Rental

Brook furniture rental is the best furniture rental company out there because they offer everything you could need for home furnishings. With so many choices available in one place, it’s easy to see why Brook Furniture Rental is the top choice for so many people. Brook furniture rental consists of free professional design services, white glove delivery, and super-fast turnaround time. 

Customers can rent by item, room, or fast path to furnish an entire room. You can also choose from one, two, three, six, and twelve-month leases with significant discounts with a six and twelve-month agreement. Select the number of bedrooms, the level of furnishings you’re looking for, and choose from three pictures and three-color palettes to indicate what most closely matches your taste.

From there, the Brook will show you a sample package with items for the living, dining, and bedrooms with the option to swap out or add needed items before purchasing. Once you’ve signed a lease, Brook can deliver your furniture in as few as one or two business days, and if you’re unsatisfied with what you’ve chosen, the company also offers free returns or exchange within the first week.

2. Feather Furniture Rental Company

Feather is an excellent choice for big-city residents because it’s geared toward apartment living and small spaces. It’s available in all major metropolitan areas, such as New York City, Los Angeles, San Francisco, Houston, Dallas, Austin, Virginia, Maryland, and Washington DC. It also caters to those living in small spaces.


Image credit: https://content.fortune.com/

It’s the only rental company on this list that makes its rental furniture, and furniture is made from sustainable materials like FSC-certified wood and glues and stains with low VOCs. Feather’s plan includes one month, three-month leases, and annual membership. Rentals without membership are more expensive, making them smarter for staging and selling homes than for long-term use.

Feather furniture rental membership requires a high monthly minimum, making this service best for people who want to rent an entire apartment’s worth of furniture and not a few items. An annual membership might be a good option for roommates looking to split the furniture cost and don’t want the hassle of moving furniture when they find a new place to live.

Once the subscription period ends, customers can renew, swap out furniture or buy the items outright minus the rental fees already paid. Feather also offers discounted packages for bedrooms, living rooms, dining rooms, and home offices with the monthly cost of approximately $26 for dining room sets or full bedroom spreads, including a brand new mattress.

Opting for feather, you can renew your lease and swap your furniture for something else. Individual furniture pieces from well-known brands like West Elm are also available.

3. Cort Furniture Rental Company

Cort is a good example of companies that specializes in flexible leasing deals. The company offers furniture rental services for every room in the apartment with no hidden fees or additional charges. Besides, Cort allows customers to keep the items they rent even when their arrangement is over, which means you can save thousands of dollars on new furniture when moving out. 

Cort Furniture Rental Company
Image credit: https://onhavanastreet.com/

Cort has a wide variety of furniture and electronics offerings, making it the most accessible of the many furniture rental companies out there. Like many companies that offer this service, the longer the rental contract, the lower an item’s monthly rent. It allows renters to buy out items when their rental term is up.

Plus, the rental payment made on the item doesn’t necessarily go towards that payment, although Cort will sell the item at a discounted price. Cort furniture outlets are also an option for aspiring buyers, where they offer gently used pieces at steep discounts. This company also gives renters one week to decide if an item will work in their space once delivered.

If not, they’ll pick it up and replace it free of cost. The minimum rental term is one month, and the brand also has monthly minimums for rentals. If you’re using a debit card for payment, Cort requires a credit check and may also require a security deposit. Their services work well for students and military members who can choose from whole apartment decor packages.

4. CasaOne Furniture Rental Company

With over 4,000 items, CasaOne rents home, office, patio furniture, gym equipment, and holiday decor. In addition to mid-century style bedroom, kitchen, office, dining, and living room furniture, CasaOne also offers interior design services, home staging, gym equipment, and patio furnishing rentals. 

CasaOne Furniture Rental Company
Image credit: https://miro.medium.com/

They have one of the largest collections for furniture, thanks to the 4,000 items in their inventory. The company also provides rental options for seasonal decor, bedding, rugs, wall art, and picture frames. CasaOne also features brand name furniture rentals from West Elm and Article alongside offerings from brands with less name recognition that still deliver on style.

CasaOne services several metropolitan areas across the country. The price of items varies depending on the rental term, varying anywhere from 12 months. There is also a rent-to-own option. It also offers the opportunity to purchase the rental furniture by charging the retail amount minus the already paid rental fees.

The company also charges extra for early rental contract termination and furniture insurance. Still, it will deliver and assemble any rented items for no additional charge within three business days and also pick your rentals when you’re ready to move out.

5. Fernish Furniture Rental Company

Drawing its inspiration from mid-century and Scandinavian furniture design, Fernish provides premium and trendy rental options. Although Fernish is only available for customers in Los Angeles, Southern and Coastal Ventura County and Orange County, CA, Seattle, WA, and Dallas, Fort Worth, TX. This brand shows promise as a rental purveyor of on-trend furniture from the likes of CB2 and Floyd.

Fernish Furniture Rental Company
Image credit: https://www.treehugger.com/

About a week or two after placing an order, a team will deliver, assemble and arrange the furniture. If an item isn’t the customer’s preference, they’ll let Fernish know within three days, and the customer can swap it out at no additional cost. At the end of the rental term, a renter can renew, swap out items for free, or buy7 a piece of furniture by paying the difference between the total value and the rental amount that’s already paid. 

If you live near the Fernish service area and swap out their furniture every few years, this rental might be the right one for you. This brand offers durable furnishings that can be used repeatedly by replacing parts and uses an 11-step refurbishment and sanitization procedure that utilizes sustainably sourced materials.

6. Rent-A-Center

Rent-A-Center is one of the largest furniture rental companies in the United States. It offers furniture, appliances, and electronics for rent with no long-term contracts required. Customers can choose to pay weekly, biweekly or monthly installments, and all major credit cards are accepted.

Rent-A-Center
Image credit: https://images.barrons.com/

Rent-A-Center also offers a free delivery and set-up service. There are no long-term contracts, and it also offers the option to upgrade rental items at any time. It offers electronics, furniture, appliances, computers, smartphones, and home decor with locations nationwide. Renters can order online or visit local stores to pick out items, finalize details, set up payment plans, and arrange same-day delivery. 

The company also offers repairs and services for no additional cost during the lease term and includes upgrading products for free. If you want to buy items, they’ll offer a discount for paying off your balance early, and there are no long-term contracts, meaning that you can cancel or upgrade at any time.

7. Oliver

Oliver’s use-friendly website and interior design style quiz help get you started on finding the perfect pieces that fit your style. They have an extensive product range, including everything from bedding to lighting, with all prices indicated so you’ll know exactly what you’re spending.

The brand’s signature design quiz gives new furniture renters a jumping-off point with pre-designed rooms that can be tweaked to their liking. Once finished, the results are displayed with pieces that fit your style, rent price range, and more once finished. The site also offers access to complimentary design consultants who can help craft that perfect look. 

The brand offers three plans suitable to short and long-term renters, plus those looking to rent one. Pricing is set up so that the longer the rental term, the lower the monthly cost. There are no delivery, assembly, and set up fees for the beginning of a rental term, and subscribers to the brand’s long-term plans are allotted one free furniture swap. 

Subscribers to Oliver’s one-year upfront plan in which renters commit to a year’s worth of Oliver get a 10 percent discount on their rentals. Oliver is available in the Dallas Fort Worth metro area, Los Angeles, San Diego, and San Francisco.

8. Aaron’s

Aaron’s offers furniture, appliances, and electronics leasing through its Aaron’s Plus plan. Customers can choose to lease single items or an entire room of furniture. Delivery and set-up are free, with the exception of in-home entertainment installations. Customer service is available seven days a week. 

There is no early termination fee; however, customers must return the merchandise in good condition. This company also encourages you to shop by style, from casual to contemporary, so choosing what you like is simple. Offering packages, special deals, and sales, this national brand is a rent-owned chain. Not only can you own items once you complete your payment, but you can pay off your balance early.

The Everest brand rents furniture, appliances, electronics, computers, and more to consumers looking for cheap rentals with no credit check required. Everest is a great option if you are on a budget but still want quality products. Many vendors are partnered with the best furniture rental companies, so you have brand names you can trust at affordable prices.

Customers can also choose to purchase the items they rent through the company if they fall in love with them. If you’re looking for a more vintage vibe, then Everest offers interesting pieces for bedrooms, living rooms, and dining rooms that are new but look like you picked them at a hip second-hand store. This service is only offered in the New York City Area.

FAQS about Best Furniture Rental Companies

How do you choose the best furniture rental companies?

Opt for the one that showcases a variety of furniture styles and features additional offerings like home decor, electronics, and service in different country areas. For instance, CasaOne is chosen because it offers a wide range of items, including workout equipment. Feather is also a good choice because it’s tailor-made for city dwellers.

Who is furniture rental good for?

Furniture rental is good for individuals who might not want to coordinate moving their furniture. And it’s not ideal for individuals who may risk falling behind on payments.

Final Thought about Best Furniture Rental Companies

Best furniture rental companies often have amazing deals and discounts to help you save money on your decorating project. Be sure to check online and in-store for special offers before making your final decision. Furniture rental companies make it easy and affordable to get high-quality furniture for your home. 


The post 8 Best Furniture Rental Companies appeared first on Kitchen Infinity.

Did you miss our previous article…
https://chefbuano.com/?p=1096

19 Best Evergreen Flowering Plants to Grow

19 Best Evergreen Flowering Plants to Grow

You want to add some color and interest to your garden, but you’re not sure how. Consider planting evergreen flowering plants. Evergreen flower plants represent an important category in the garden, as they provide color and interest all year long when many other plants are dormant.

The good news is that there are many great options for evergreen flowers that will thrive in a variety of climates. This article will explore some of the best evergreen flowering plants that you can grow in your garden with less hassle.

1. Rhododendrons

Rhododendron flowers are an ideal choice when looking to add some color, as they come in a wide range of colors. They are typically blooming from April through July, with different varieties sending out flowers at slightly different times throughout the season. New varieties are cold tolerant but ensure they get dappled shade. 


Image credit: https://static.onecms.io/

Rhododendrons take a little time to establish themselves but, once established, can be expected to grow about 8 to 12 feet tall and wide. They come in many colors, including lavender, pink, a reddish hue, and white pop against glossy green foliage. They also have rose-pink flowers, thrive in full sun to partial shade, and prefer USDA hardiness zones 5 to 9.

2. Ninebark

Ninebark is a popular ground cover that provides gorgeous blooms in the spring and stunning foliage all season long. This native plant has elegant arching branches dotted with clusters of creamy white flowers in late spring. This hardy plant grows in USDA zones 2 to 9. This plant is fast-growing and can become quite large, so give it plenty of room or opt for dwarf varieties if you have a tight space.

Ninebark
Image credit: https://www.thespruce.com/

3. Choisya Flowering Shrub

Known for its intensely fragrant blooms, Choisya is a beautiful evergreen flowering shrub. This tough plant can handle hot, dry conditions and grows in zones 7 to 11. The showy white flowers of Choisya add a touch of elegance to any garden and are sure to catch the eye of passers-by.

Choisya Flowering Shrub
Image credit: https://upload.wikimedia.org/

Its glossy green leaves look good all year round, and the white, star-shaped flowers in late spring and early summer smell deliciously of orange blossom. It prefers a sunny, sheltered spot.

4. Deutzia Flowering Shrub

Deutzia is a popular flowering shrub for a good reason. It’s hardy, tolerant of poor soils and drought, and looks great all year round. The small white flowers appear in spring and are followed by a showy display of red berries in autumn.

It has mounded form with gracefully arching branches. Some types are low-growing and work well as a beautiful ground cover. Varieties to try to include Yuki Cherry Blossom and Nikko Blush. These are among the best early spring flowers to add to your garden.

5. Evergreen Abelia

Evergreen abelia is deer resistant and drought tolerant, and it puts up with pollution and thrives in windy or sloped sites. Its dark green leaves are so glossy that you can think that they’re coated with polyurethane. The early summer panicles of hot pink blossoms cover evergreen abelia, attracting hummingbirds and butterflies from two towns away. 

Evergreen Abelia
Image credit: https://www.nature-and-garden.com/

This plant can handle full sun to part shade, thrive in fertile, well-drained soil, and grow in USDA hardiness zones 8 to 11. The new types of this easy-to-grow shrub are more cold-hardy. Plant it alongside perennials, and the varieties to try include Sweet Emotion and pinky Bells.

6. Spirea

Spirea is a genus of around 25 deciduous and evergreen shrubs, most of which are native to Asia and North America. Many spireas make good hedge plants. This is a reliable bloomer that requires low maintenance. The new types maintain their mounded shape without pruning. 

Spirea
Image credit: https://images.ctfassets.net/

The long-lasting clusters of red, white, and pink flowers offer beautiful contrast against lime green, deep green, or gold foliage. It’s equally at home in mass plantings, as a low hedge or alongside perennials. It grows in USDA hardiness zones 3 to 8. The varieties you should try include Double Play, Candy Corn and Neon Flash.

7. Japanese Pittosporum

This beautiful evergreen shrub has glossy, dark green leaves with a bronze tint in winter. Late spring through early fall is covered in tiny white flowers that give way to purple-black berries. It’s easily pruned to any height and prefers full sun to part shade, medium moisture, and well-drained soil.

It grows in USDA hardiness zones 9 to 10. Japanese Pittosporum is one of the best blooming evergreen shrubs for milder climates and coastal locations. This is a low-maintenance option for hedges, foundation plantings, and privacy screens. The plants sport eye-catching dark green or green and white foliage plus small, intensely fragrant white flowers in the spring.

8. Lenten Rose

Lenten rose is one of the best-known and loved evergreen flowering plants. It’s a favorite for cottage gardens, naturalized areas, and woodland gardens. The blooms emerge late winter to early spring, before the leaves unfurl, and last for about six weeks. The plant grows 18 to 24 inches tall and wide with light green leaves. It prefers partial to full shade and grows in zones 4 to 9.

9. Creeping Phlox

Creeping phlox is a favorite evergreen flowering plant for ground cover as well as one of the best rock garden plants. The flowers emerge late winter/early spring, before the foliage unfurls, and last about six weeks. The plant grows 8 to 12 inches tall and spreads indefinitely by underground stems. It prefers full sun to partial shade and tolerates a wide range of soil conditions but grows best in zones 3 to 9 and bears tiny, needle-like leaves.

Creeping Phlox
Image credit: https://www.gardenia.net/

10. Laurustinus

Laurustinus is a favorite evergreen flowering plant for screens and hedges. It grows 8 to 12 feet tall and wide, with clusters of purple flowers in early summer; the fall foliage is golden yellow. It prefers full sun to partial shade and tolerates moist, well-drained soil size, and grows best in zones 8 to 10.

Apart from poor soils, it can also thrive under extreme conditions, such as coastal areas and roadside plantings. Its glossy leaves are the perfect backdrop for large, fragrant white flower clusters. It produces blue fruit, much to the delight of local wildlife.

11. Charity Oregon Grape

This is a truly evergreen shrub with bright green foliage and produces masses of yellow trumpet-like flowers in springtime. It is perfect for hedges, screens, or foundation plantings; it prefers well-drained soils and grows best in zones 4 to 9. The flowers are followed by blue-black fruits that birds enjoy. 

This plant prefers shade spots and looks good with contrasting foliage plants that thrive in the shade, such as elephant’s ear and epimedium. If you’re looking for a shrub border or exotic planting scheme, you’ve found it.

12. Rosemary

One of the most popular herbs in the world, rosemary, is a woody evergreen shrub that produces needle-like leaves and clusters of blue or white flowers. It is drought tolerant and prefers well-drained soils; it grows best in zones 8 to 10. Many varieties have small but colorful blue, purple or white blooms that attract pollinators.

Rosemary makes an excellent addition to herb gardens but can also be used in borders or rock gardens. You can even use rosemary as a tea to help calm the nervous system and help with mild memory problems, depression, headaches, and high blood pressure.

13. Evergreen Lavender

Evergreen lavender is a popular ground cover with a wonderful aroma producing gray-green foliage, which holds its scent until it flowers in late spring. This drought-tolerant plant grows in zones 5 to 9 and blooms with purple flowers. Lavender is a great addition to any garden, as it attracts pollinators, repels pests, and is deer resistant. It can be used in borders, containers, or rock gardens. Lavender also makes a great tea for relaxation.

14. Azalea

Azalea is a flowering shrub that grows in hardiness zones 5 to 8 and blooms with pink, purple or white flowers. It likes acidic soil and partial shade but grows in direct sunlight and drier conditions. New hybrids such as the fragrant Mt. Fuji’s increase hardiness, making them cold-tolerant than older varieties.

15. Crape Myrtle

Crape myrtle is a flowering shrub that grows in zones 7 to 9 and blooms with brightly colored flowers during the summer. It likes full sun but can also tolerate some shade. Crape myrtles need well-drained soil and like regular watering, especially during periods of drought.

Some types become small trees, while others are dwarf varieties that remain three to four feet tall and wide. The dwarf varieties include Berry Dazzle Dwarf and Midnight Magic.

16. Daphne

Daphne is a flowering plant that grows in zones 4 to 8 and can be used as ground cover or planted in containers. They require shade or partial shade and moist, well-drained soil. The fragrant flower blooms in winter and spring have colors that range from white to pink.

17. Hydrangea

Hydrangeas are a popular choice for both shade and sun gardens. They grow in zones 3 to 10, with some hardy varieties in zone 2. The flowers come in shades of white, pink, blue, and purple, with the color of the flower depending on the pH level of the soil. Sometimes it has bright flowers in summer, faded tones in fall, and papery dried blooms linger on the plant in winter.

Hydrangea
Image credit: https://www.almanac.com/

These shrubs are categorized into panicle, smooth, oakleaf, bigleaf, and mountain, with different needs. So read the plant description before buying. The varieties you should try out include Little Lime, Incrediball, Ruby Slippers, Cherry Explosion, and Tiny Tuff Stuff.

18. Candytuft

This low-growing perennial flowering plant is a great addition to rock gardens and borders, with mounds of bright white flowers in spring. Prune it to keep new evergreen leaves coming as these look better than old leaves. Grow it in zones 4 to 8 in full to partial sun.

19. Winter Heath

This is a spreading evergreen shrub with tiny pink flowers in late winter. It’s deer-resistant, making it a good choice for gardens where they are a problem. Grow it in zones 5 to 9 in full sun or partial shade. The flowers are made up of long-lasting sepals instead of short-lived petals. Their leaves are needle-like, and the heath family loves acidic soil.

FAQs about Best Evergreen Flowering Plants to Grow

What are some of the importance of these evergreen flowering plants?

They provide a great source of nectar for bees and other pollinating insects They can help stabilize soil, such as when planted around tree roots.

Final Thought on Best Evergreen Flowering Plants

As you can see, there are several evergreen flowering plants to add to your garden. You need to find the ones that will work best in your area and your gardening style. 


The post 19 Best Evergreen Flowering Plants to Grow appeared first on Kitchen Infinity.

Did you miss our previous article…
https://chefbuano.com/?p=1057

How To Get Rid Of Aphids

How To Get Rid Of Aphids

Aphids are not only annoying but they can also be harmful to your plants.

They can cause all sorts of problems like spreading plant diseases, making flowers shrivel up and die, or even destroying fruit on trees.

Getting rid of them is a difficult task, but luckily there are several natural remedies you can try that won’t require you to use pesticides. If those don’t work, then you might want to consider using stronger chemicals on your plants.

In this article, we’ll tell you everything you need to know about aphids – including how to get rid of them – so you can keep your plants healthy and aphid-free.

What are Aphids?

Aphids are small, soft-bodied insects that feed on the sap of plants.


Image Credit: http://gardendesign.com

Image Credit: http://gardendesign.com

They come in many different colors, including red, green, black, and white, and can be found all over the world.

Aphids can cause a lot of damage to plants by sucking the sap out of them which can lead to problems like stunted growth, distorted leaves, and even death.

How do I get rid of aphids?

Similar togetting rid of flies, there are a few ways you can get rid of aphids naturally without using pesticides. Keeping them away in the first place is much easier than killing them.

Here are some things you can do to help your plants stay aphid-free:

One way is to use insecticidal soap or neem oil. Insecticidal soap is a soap that kills insects by attacking their outer shell. Water plants sparingly. A good way to do this is by using a soaker hose instead of a sprinkler, as they let the water go straight onto the soil and through to the roots where it’s needed most.Don’t overfeed your plants. Aphids thrive on excess nitrogen from fertilizers which causes fast growth in plants. So make sure you’re only feeding your plants as much as they need. If you’re not sure how much food to give them, use an organic fertilizer like worm castings or compost tea every few weeks during active growth (spring and summer). Make sure your plants get enough sunlight. Sunlight is a naturally effective aphid repellent, so it makes sense that plants that don’t get enough won’t be able to fight them off. This means not over-planting and making sure your plants aren’t overcrowded in their pot.Another natural way of getting rid of aphids is using insecticidal soap or neem oil. Insecticidal soap attacks their outer shell while neem oil suffocates them.Finally, you can use a garden hose sprayer to blast the aphids right off your plant’s leaves. Aphids are tiny and light so they’ll blow away in the wind when sprayed with water. Just make sure you’re using water that is warm enough to dissolve the soap or neem oil you want to use.

Going for stronger measures

If natural methods don’t work, you might want to consider using stronger chemicals on your plants.

Pesticides and systemic insecticides are two options that can be effective in getting rid of aphids, but you should only use them if you have a serious infestation.

Measure to take if using insecticides:

Remove any affected plants from the area and discard them in the trash.Put on protective clothing, including long pants, a long-sleeved shirt, shoes and socks, and chemical-resistant gloves.Make sure to cover your hair, too.Mix the insecticide according to the instructions on the label.Spray the insecticide directly onto the aphids using a handheld sprayer.Reapply as needed, but be careful not to overuse or you could damage your plants.

If you’re considering using a systemic insecticide, it’s important to read the label carefully first and follow all of the instructions. Systemic insecticides are absorbed by the plant’s roots and then move throughout the plant, killing any aphids that are feeding on it.

They are a more effective treatment than contact insecticides, but they also come with a higher risk of harming your plants. Make sure you only use them if you really need to and always test a small area first to make sure the insecticide won’t harm your plants.

Also, be sure to read the label carefully before applying any pesticides or insecticides to your plants.

Other considerations to get rid of aphids

When getting rid of aphids, you should also take into account the environment and other living creatures in your garden.

Many natural predators of aphids, such as ladybugs and lacewings, can help keep populations under control. You can encourage these predators by planting flowers that attract them, like yarrow, cosmos, or dill.

Get Rid of Aphids on House Plants - BBC Gardeners' World Magazine

Image Credit: http://gardenersworld.com

You can also buy predatory insects from a garden center or online.

If you’re using a pesticide or systemic insecticide to get rid of aphids, make sure it won’t harm any of the predators in your garden.

And finally, always be careful when using any type of chemical in your garden. Follow all of the instructions carefully, wear protective clothing, and avoid getting the chemical on your skin or in your eyes.

How To Get Rid Of Aphids – FAQ

What are aphids?

Aphids are small, soft-bodied insects that typically measure 1/8 to 1/4 inch in length. They can be green, black, or red, and often have a pair of antennae protruding from their head. Aphids are sap-sucking pests that feed on the leaves of plants and can cause extensive damage to crops if left untreated.

What are some common methods for getting rid of aphids?

There are several different methods for getting rid of aphids, including physical removal, horticultural oil sprays, and insecticidal soap.

Physical removal is probably the simplest method for getting rid of aphids. This involves manually picking them off of the plants with your hands, or using a garden hose to spray them off.

Horticultural oil sprays are another option for getting rid of aphids. These sprays are made from plant-based oils and work by suffocating the insects. They can be used as a preventative measure or to treat an existing infestation.

Insecticidal soap is a chemical spray that is effective at killing aphids. It is made from potassium salts of fatty acids and works by breaking down the outer layer of the aphid’s exoskeleton. Insecticidal soap is safe to use on most plants, but should not be used on edible crops.

What if natural methods don’t work to get rid of aphids?

If you are unsuccessful at ridding your plants of aphids using these methods, there are a few other options available to you. One option is neem oil, which is an organic pesticide made from the seeds of the neem tree. This product is effective against aphids, but may not be safe for all types of plants or crops. 

Another option is the pyrethrum, which comes from chrysanthemums and kills aphids by disrupting their nervous system. Pyrethrum can be used on most plant varieties and crops, but it may need to be reapplied after heavy rainfall or watering of the plants. 

Finally, try an insecticidal soap spray with added rosemary oil; this may provide some extra protection against aphids, and rosemary oil has been shown to boost the effectiveness of insecticidal soap. It’s also good to know that these methods can be used toget rid of ants and other annoying creatures.

When is the best time to treat aphids?

There isn’t any one “best” time of year to treat for aphids; this will depend upon your climate, local plant species, and various other factors. One thing you can do is look at the plants that are infested with aphids (and plan on treating them), and see if they’ve ever been treated in the past. If they haven’t been treated before, then try treating them now while they are still small. That way, you have a better chance of successfully ridding them of their pesky invaders.

Final thoughts on how to get rid of aphids

Aphids can be a real nuisance in the garden, but there are many ways to get rid of them. Using natural methods, like providing enough sunlight and food, is often the best way to go. If those methods don’t work, you can try using insecticidal soap or neem oil. And if you need to, you can use a pesticide or systemic insecticide, but be careful to follow all of the instructions and take into consideration the environment and other living creatures in your garden. Happy gardening.

The post How To Get Rid Of Aphids appeared first on Kitchen Infinity.

Did you miss our previous article…
https://chefbuano.com/?p=1053

14 Best Home Renovation Apps

14 Best Home Renovation Apps

Home improvement projects can be a tedious process, with much planning and execution required. Besides being time-consuming, these projects can drain your energy if you decide to do it yourself. Fortunately, home renovation apps can help make the process a lot smoother.

Whether you’re a DIYer or a construction professional, these apps can make your project easier. From finding inspiration to getting expert advice, here are the best home renovation apps for every stage of your project.

1. Houzz Home Design and Remodel Ideas

If you’re a homeowner looking for a renovation idea, the best way to find inspiration is through photos of real homes. With its collection of more than 40 million images from 1,200 home design professionals and collectors worldwide, Houzz is your go-to place to search for the latest trends in interior design. Consider it your one-stop shop for all your home remodeling and interior design.


Image credit: https://i.insider.com/

The Houzz Home Design and Remodel app is one of the most versatile home renovation apps on the market. The app also offers a wealth of other features, including articles on home design trends, discussion forums, and the ability to contact professionals directly. It’s highly rated, free to use, is supported by all major operating systems, and has tens of millions of downloads.

Pros

It’s free to useAvailable in App Store, Google Play, and Amazon App StorePresence of 3D visualization feature4.8-star rating in the App Store and 4.6-star rating in Google Play

2. IKEA Place Home Renovation App

IKEA Place Home Renovation App is another free home renovation app worth checking out. This app offers 3D previews of furniture items, and it also allows the user to virtually place them within their homes. It’s very easy to use, supports all major operating systems, and has garnered excellent reviews on Google Play Store and Amazon App Store.

IKEA Place Home Renovation App
Image credit: https://techcrunch.com/

App users with IKEA Place can shop for IKEA furniture and use augmented reality technology to drop images of IKEA furniture into pictures of the home. Once you find something that you love, you can purchase it directly through the app or find a nearby store that has it in stock.

Pros

3D visualization featureEasy to usePresence of augmented reality technology

3. Photo Measures

It can be annoying to get to the hardware store only to find out that you’ve forgotten the notebook at home where you’re writing all your materials for your home renovation project. Not only is that, but even your measurements in that book. You’ll feel frustrated and drained.

However, if you’ve downloaded the Photo Measures app, you would have had all that information in the palm of your hand. All you need to do with this home renovation app is to take photos of your space, draw in your measurements and never worry about forgetting your supplies again.

4. The Home Design 3D App

This is a free home renovation app that has gained popularity. The 3D home design software shows you in real-time what it would look like if you added or removed certain objects from your space. This is also the perfect tool to help you design your entire home and is compatible with mobile phones, tablets, Macs, and PCs.

The Home Design 3D App
Image credit: https://cdn.cloudflare.steamstatic.com/

Designed by Anuman Interactive, this home renovation app was released to the public in 2011 with the company’s first iOS version. Today, this app is available in most app stores and is compatible with all mobile apps and laptops. You can design any part of your home using this app as it allows the user to create multiple floor plans in 2D and 3D, add furniture and decorative items of their designs.

You can also experience your home design using the 3D real-time visualizer. There are also features that allow you to share your design outside the app. This home remodeling app is free to download, and you can use a few basic features at no cost.

Pros

It doesn’t require an internet connectionSupports all devicesAvailable in App Store, Google Play, and Microsoft Store

Cons

No free version for PCsWorks best with iOS devices

5. iScape Home Remodeling App

This app has a very clean and simple user interface that is easy to use. Animations of all changes while designing are smooth and fast, making it enjoyable while building your dream home. The application also supports 3D rendering for outputting images and videos of the design.

If you don’t want to plan a new house but remodel an existing one, this app got you covered with a library of objects and materials to work with. Home renovation projects also don’t need to stay within the confines of your home. Instead, take your space to the next level by tackling a landscaping project, courtesy of the iScape app.

Pros

You can design your landscapeGreat for DYers and landscaping businessesSharing capabilitiesIt comes with a 4.6-star rating in the App Store

Cons

Only available for iOs devices

6. ProjectColor by the Home Depot

ProjectColor is an app by Home Depot that can select paint colors and coordinate them with other design elements in your home. The app has a library of more than 1,500 colors and allows you to save your favorites for future reference. You can also take pictures of rooms in your house to get a better idea of what different colors will look like.

You can also check which paint colors are popular and trending. You can also visualize how the paint will look in any part of your home and save your favorite paints or buy them. If you’re not ready to commit to a full can of paint, paint samples are available for purchase within the app. This app is free and is compatible with iOs and android services. But when it comes to painting, learn how to choose paint colors first before you proceed.

Pros

It’s free to useIn-home color visualizerAvailable for iOs and android services4.5-star rating in the App Store

Cons

2.7-star rating in Google Play

7. Palette Cam Home Renovation App Review

This app helps you visualize what you’re going to paint and allows you to share your photos with friends and family. The home renovation app also provides a way for you to share the images on social media and save or print them, which is useful if you want to show off your painting skills. This app is free but does contain ads.

The Palette Cam app will pull all the colors in any photo to create gorgeous color palettes you can use to inspire your next design project. Whether you’re looking to bring the beauty of the beach into your bathroom or the warm colors of a sunset into your hallway, the Palette Cam app is the right choice.

8. Vivid Home Wall Color Selection App

Updating your wall color can be a big project, but it doesn’t have to be with this app. With the Vivid Home Wall Color Selection App, you can take pictures of your home’s walls and experiment with different colors to see what will look best. This app is free to download and use.

However, choosing between Intense White and Benjamin Moore or Essential Gray by Sherwin William can be a daunting task. But thanks to vivid paint colors, you no longer need to go to the hardware store and pick up bundles of paint swatches. You can search by color or inspiration for paints by top brands like Benjamin Moore, Sherwin Williams, and Glidden.

9. Roomle 3D and AR Room Planner

Roomle 3D and AR Room Planner is another great app for home renovations. If you’re unsure where to start or want to see what your finished product could look like, this app is for you. Roomle 3D and AR Room Planner offer a virtual reality view of your rooms as you renovate them.

This comprehensive home remodeling app helps homeowners design floor plans and use augmented reality to populate existing floor plans with furniture. This app allows you to measure and draw rooms and create your scanned room floor plan.

10. Wayfair App

Wayfair App is a home improvement app for homeowners or renters looking to improve their space on a budget. The app offers interactive 3D models of furniture by room, so you can get the feel of what it would look like in your living room before you buy it. With new products being added daily, this is an awesome app for anyone who wants to remodel on a budget.

This is a great tool when you’re furniture shopping for your home renovation. And if you want to design the complete area of the house with brand new furniture, then you can use a room planner tool to create a 3D design of your place with the products you want until you find the perfect setup.

11. Angi Home Remodeling App

This app is perfect for homeowners looking to do a little remodeling on their own. It includes tips, videos, and how-to guides for various home improvement projects. You can also find local contractors through the app, which is super handy if you’re not comfortable doing the work yourself.

Get your home renovation dreams completed in a snap by downloading this Angi app, formerly known as Angie’s List, to hire contractors in your area.

12. iHandy Carpenter App

This is the perfect app for homeowners who want to improve their homes without hiring a contractor. This app has five tools, including a spirit leveler, stud finder, a plumb bob, and even a protractor. You can use the surface level and bubble level to flat surfaces and plumb bob to access vertical walls. The app can also give you an estimate on how much a job will cost and how long it may take.

13. Morpholio Board

Any interior designer using this app would instantly understand that interior designers designed it. This is a total industry game-changer. This glossy app lets interior designers layout mood boards, design ideas, and collages.

Morpholio Board
Image credit: https://images.adsttc.com/

This app offers you a chance to let your imagination run wild. It is so easy to use, so much fun, and will help you develop ideas when you are in the shower.

14. MagicPlan Home Floor Plan App

This app is a must-have if you’re in the home renovation business. It will help you with everything from creating floor plans to estimating the cost of your project and getting real-time feedback from contractors.

This app is perfect for anyone who wants to undertake a home renovation project but isn’t sure where to start. It takes all the guesswork out of the process and makes renovating your home a breeze. It comes with an estimated feature, meaning no manual calculations.

The magic app also comes with augmented reality and LiDAR scanning features that make visualization and measurements easier. It’s free to download, and you’ll get full access to all of its features for your first two projects at no cost.

FAQs about Best Home Renovation Apps

What are some of the functions of a home renovation app?

Home renovation apps offer a lot of functions. They can help you stay organized, create and design projects, shop for products, and even hire contractors.

Final Thought about the Best Home Renovation App

Home remodeling can make your head spin. It can be overwhelming to stay on top of everything, from choosing wall art to how to level wall hangings, to how to arrange furniture and which color palette to choose. So, why not make these renovation apps simplify your design life in a major way.


The post 14 Best Home Renovation Apps appeared first on Kitchen Infinity.

Did you miss our previous article…
https://chefbuano.com/?p=1025

Sanded vs. Unsanded Tile Grout: Basics, Pros, and Cons

Sanded vs. Unsanded Tile Grout: Basics, Pros, and Cons

When updating or building your own house, it’s important to opt for a great flooring option for your project. And that’s where tile grout comes in. Tile grout is the material that fills the space between tiles and helps to keep them in place.

It’s available in both sanded and unsanded varieties, and each has its own set of pros and cons. So, which type should you choose for your project? 

Let’s take a look at some of the most common types of sanded and unsanded tile grouts out there, plus their pros and cons. This will help you can make an informed decision about which one will work best for your needs.

What is Grout?

Grout is a thin mortar used to fill the joints between tiles. It is a mixture of cement, sand, and water applied with a grout float. In addition, grout is a dense, thick fluid made of water, cement, and sand. It also has other uses apart from sealing joints between tiles.


Image credit: https://networx.global.ssl.fastly.net/

Grout is also used as a reinforcement for existing structures and walls, used to fill voids. It’s also used to embed rebar masonry and even connect sections of concrete.

Factors to Consider Before Buying Grout Tile

Project Size

The size of the project will dictate the amount of grout you need to buy. If you are grouting a shower, you may only need a few pounds of grout because the space is small. Larger projects will require more grout. This is because grout comes in many forms and sized containers. You can get grout premade as a powder and in industrial-sized bags for extra-large projects.

Vertical or Horizontal Installations

Grout for vertical applications is often one color, while grout for horizontal installations is usually different colors. Vertical installation grouts are usually sanded or unsanded based on the application you will be using them for. You can also buy adhesive-backed backsplashes with integrated grout to make the process easier and cleaner.

In vertical applications, you’ll need a grout that can handle the tug and pull from the gravity, while in horizontal or floor grout, your grout doesn’t need to be thick or strong.

Tile Type and Size

Grout should also match the type of tile that you are using. For instance, you don’t want to use a soft, unsanded grout with large tiles as the grout will deteriorate over time and become prone to cracking.

Besides being larger than 1/8″, ceramic or porcelain tile is denser than glass, stone, or metal tiles. Even though they’re harder and denser than glass, stone and metal tiles still require sanded grout.

Colors of Grout

Sanded grout is also available in a variety of colors, whereas unsanded grout can only be white or beige. If you’re looking for a custom color, sanded grout is the way to go. Note that the most common grout color is gray. Grout also comes in many colors, including white, black, green, and even orange.

Some brands will also offer dyed grout where you can pick exact colors to match your decor or tiles.

pplication and Drying Time

Sanded grout is much thicker than unsanded, and as such, it takes longer to dry. While unsanded grout dries within four hours, sanded grout takes anywhere between 24 and 48 hours to fully cure or dry out.

This slow drying time means that sanded grout can be a hassle for contractors who need to get the job done and over with, but it also means that sanded grout is extremely durable. As such, sanded grout is more frequently used in commercial settings where durability is a must.

The Cost

Grout is not expensive, but you need to purchase large amounts of it based on the size of your project. The cost includes everything, ranging from the mixing pail, bucket or tray, coloring or special needs, and the application trowels, clean-up tools, equipment, and other items.

Grout Widths

Sanded grout is best for grout lines ranging from 1/8 inch to 1/2 inch. Grout lines of more than 1/2 are impractical and will crack and become unstable. And because unsanded can also be used for 1/8 inch lines, it’s recommended that you use sanded grout and not unsanded.

Unsanded grout is best for grout lines as wide as 1/8 inch and down to 1/6 inch. The unsanded grout is used in this application because the sanded grout won’t properly compact into thinner grout lines. On the other hand, unsanded grout will slump, crack, and not provide the proper fill.

Tile Surface Recommendations

Sanded grout is used for tile surfaces where scratching from the sand content in the tile grout won’t be a problem. If you’re looking regrout and lack much skills, then sanded grout is the way to go.However, unsanded grout is recommended for tile that is easily scratched such as natural stone, glass, certain porcelains and ceramics. The sand content in sanded tile may damage these surfaces. Abrasion from sanded tile is also not enough to scratch the tile surfaces.

Sanded vs. Unsanded Grout

Image credit:

These two types of grout may seem the same, but they are not. Unsanded grout is perfect for smaller projects or areas where less durability is needed. It is a blend of Portland cement, water, and sand that can be easily applied with a rubber grout float by pressing it into the joints.

On the other hand, sanded grout is a blend of Portland cement, water, sand, and lime. This type of grout is recommended for larger projects or areas that need more durability. The sand in the mixture helps to give it more strength and prevents it from cracking over time.

Sanded Grout

As mentioned earlier, sanded grout is a Portland cement-based grout with silica sand, inorganic aggregates, and chemicals. Sanded grout is best for creating wider grout lines.

Sanded Grout
Image credit: https://empire-s3-production.bobvila.com/

This makes it the best choice to consider for tiling applications because sand particles have the ability to lock with each other to form a sturdy joint. Sanded grout is also less expensive than unsanded grout as sand is a cheaper filler than polymers in unsanded grout. These fine particles increase grout stability, reduce shrinkage and offer better resistance to severe cracking of the grout.

Pros of Sanded Grout

It’s thicker than unsanded grout and is more durableLower cost compared to unsanded groutPresence of denser jointsAvailable in more color choicesPrevents shrinkage and cracking

Cons of Sanded Grout

Difficult to force into thin seamsMust be sealed with a pH-neutral, water-based, and penetrating sealerIt can damage smooth tilesIt cannot be used in joints less than 1/8 inch

Unsanded Grout

Also known as non sanded grout, unsanded grout is best for very thin grout lines from 1/8 down to 1/6 inch. Non sanded grout is easier to work with than sanded grout on vertical surfaces such as tile shower walls. The lack of silica aggregate in this grout works well with delicate tile surfaces such as ceramic tile and glass tile.

Unsanded Grout
Image credit: https://diy.sndimg.com/

Non sanded grout is not ideal for large grout lines because it will slump, crack and not fill properly in width more than 1/8 inch. The grout is smooth textured and best for highly polished stone like marble and vertical lines such as bathroom and shower walls.

Pros of Unsanded Grout

Suitable for vertical installation and clings well to vertical surfacesGrout sealing may not be required in some applicationsPreserves sensitive tile surfacesBest for small spaces less than 1/8 inch

Cons of Unsanded Grout

More costly than sanded groutSlumps when applied to wide seamsLess color choices than sanded grout

FAQs on Sanded vs. Unsanded Grout Tile

Why is sanded grout cheaper than unsanded grout?

Sanded grout is cheaper because it doesn’t need to be as dense as unsanded. In addition, the tiny spaces between tiles are usually filled with a material other than grout, such as epoxy or mortar mix.

Which one is best between traditional grout and epoxy grout?

Epoxy grout is used in areas that are continuously exposed to water. Traditional grout can be stained, while epoxy grouts feature a non-porous surface.

Final Thought on Sanded vs. Unsanded Tile Grout

When applying grout on your walls, floors, and even mosaics, you’ll need to grout. The type of grout you need, whether sanded or unsanded, will depend on the product and joint spacing you have. You need to ensure that you get the right grout for your application to hold the tiles and prevent issues like cracking. You should also learn how to regrout tile because you’ll need to do this later on.


The post Sanded vs. Unsanded Tile Grout: Basics, Pros, and Cons appeared first on Kitchen Infinity.

Did you miss our previous article…
https://chefbuano.com/?p=1017

How To Control Aphids On Indoor House Plants

How To Control Aphids On Indoor House Plants

Growing flowers and shrubs indoors has a lot of benefits, ranging from fresh air to improved home decor. However, the benefits can dwindle quickly when these houseplants are under attack by pests such as aphids. Aphids are small, sap-sucking insects that can cause a great deal of damage to plants.

They typically congregate on the undersides of leaves, feeding on plant sap. This can lead to reduced growth, wilting, and even leaf drop. Fortunately, there are several ways of controlling aphids on indoor plants. Keep reading.

What are Aphids?

These are small, soft-bodied insects that feed by sucking juices from plants. They are usually green or black and can be found on the undersides of leaves. Aphids can cause a great deal of damage to plants, leading to stunted growth and leaf drop. However, these insects move rather slowly, making indoor plants relatively easy aphid control.


Image credit: https://bdn-ss-hh.s3.amazonaws.com/

Identifying Aphids

Aphids are tiny insects that are nearly invisible to the naked eye. For instance, adult aphids are under ¼ inch and can be about any color from brown, red, and blue. Most aphid species can appear white, black, brown, grey, yellow, light green, and even pink.

Some may have a waxy or woolly coating. Adults are also wingless, but most species develop a winged form when populations become crowded to allow them to travel to other plants when food quality suffers.

What Do Aphids Do to Plants

Like most indoor plant pests, aphids feed on a houseplant by sucking the leaves, buds, and flowers sap. They like to cluster and feed on a plant’s new growth and flower buds, which can cause stunted growth, deformed leaves or flowers, yellow leaves, and leaf or bud drops. As aphids feed, they release a sticky substance, so you may notice the area around your plant is sticky before you even see tiny bugs on your plants.

What Do Aphids Do to Plants
Image credit: https://plantdoctor.co.nz/

phids Life Cycle

The life cycle of aphids is a bit different depending on the species. Some females give birth to live nymphs while others lay eggs. They multiply quickly, and the full life cycle can be as short as one week. The aphid eggs are super small, so you’ll never see them. 

Outside, their eggs survive the winter by attaching to woody growth. And in the spring, the eggs hatch into females. The females then give birth to a nymph without mating. Males are born in the fall and begin to mate with females to produce eggs in preparation for the long winter. 

There’s no winter indoors which can slow their reproduction, and female aphids can continue producing nymphs all year round without stopping. Thus, making the aphid population get out of hand in indoor plants.

Methods of Control

Tools and Materials

Small spray bottleSticky trapsCotton swabInsecticidal soapScissors or small pruning shearsNeem oilRubbing alcoholDish detergent and waterHomemade insect spray

Get Rid of Aphids With Insecticidal Soap

Insecticidal soaps can be bought at most garden centers. It comes in a concentrate, and you will need to mix it with water according to the directions on the bottle. It is important to follow the directions as too much soap can harm your plants.

Spray the plant leaves with the soap mixture, ensuring good coverage. Pay special attention to the undersides of the leaves where aphids like to hide. Do not spray plants in direct sunlight, as the soap can cause the leaves to burn. This method also works well on outdoor plants and helps get rid of aphids on tomato plants.

Alternatively, you can get rid of aphids on succulents and other houseplants using horticultural oil instead of dish soap. No matter the method you choose, make sure you combine the ingredients in a large bottle and shake until blended. If you know how to clean household leaves, this will be much easier.

Get Rid of Aphids With Neem Oil

Neem oil is a natural pesticide made from the seeds of neem trees. It has been used for centuries to control insects and viruses. Neem oil can be sprayed on plants as a natural remedy to kill aphids.

Get Rid of Aphids With Neem Oil
Image credit: https://finegardentips.com/

The one thing you should keep in mind is that it will also kill beneficial insects such as ladybugs and praying mantis, which may make your aphid problem worse if not used properly. Fill a spray bottle with one gallon of water and add two tablespoons of pure castile soap. Shake until blended. 

Then add one tablespoon of neem oil and shake again until blended. Spray on the infested plants every few days, making sure to coat the entire plant, especially the undersides of leaves.

Try Rubbing Alcohol

Aphids are attracted to the color yellow to use this to your advantage. Fill a spray bottle with one cup of rubbing alcohol and add two tablespoons of liquid dish soap. Spray infested plants every few days until the problem is solved. You will need to reapply after rain or watering plants because it washes away easily. 

This is a natural remedy for killing aphids in houseplants. Use a cotton swab and dab the rubbing alcohol directly onto the bugs. Before spraying the entire plant, be sure to test the solution on one leaf of the plant first to ensure it won’t damage your plant.

Eliminate Aphid Problem With Cayenne Pepper

If you’re not keen on using harsh chemicals or you want a more organic approach to getting rid of aphids, cayenne pepper may be the solution for you. Cayenne pepper contains a substance called capsaicin which is lethal to aphids.

Grind up one tablespoon of cayenne pepper using a mortar and pestle or a spice grinder to use this method. Then sprinkle the pepper on your plant, ensuring to get it under the leaves. Don’t worry if you don’t have this pepper. 

Instead, use a hot and chile hot pepper. All you need to do is add the pepper to the water in a small bowl or spray bottle, then soak the plant’s leaves with the base to keep out your indoor garden intruders for good.

Try Baking Soda and Canola Oil to Battle Plant Pests

Baking soda is a great way to kill any pests that like to suck the juice off your plants. To use, mix two tablespoons of baking soda with one tablespoon of canola oil. Put this mixture into a spray bottle and soak your plant’s leaves for five minutes. 

The oil covers the insects and breaks down their exoskeletons, leaving them exposed and more susceptible to toxins. On the other hand, the abrasive nature of baking soda wears down the bug’s outer shell, making it easy to remove from plants. 

There are also a number of other home remedies that you can use to get rid of aphids, such as using soapy water or horticultural oils. However, before using any of these methods, test them on a small area of the plant to make sure they are not harmful.

Use Houseplant Sticky Stakes for Flying Aphids

Another way to eliminate aphids is to use sticky stakes. These are small wooden stakes with a sticky material on the top that will trap the aphids when they land. You can buy them from most garden stores or online. Insert the stake into the soil next to the plant, and wait for the aphids to land.

If you see winged aphids on your houseplant, don’t fret. Instead, get some sticky houseplant traps and put a few around nearby houseplants to capture any winged aphid that might be flying around. Sticky traps can also catch fungus gnats, so don’t panic when you see lots of bugs in the trap; they might be fungus gnats. 

Many people have found that this is the most effective way to get rid of aphids on houseplants since it is simple and easy to use, plus you can catch a lot of aphids in one setting.

Cut Away Infested Areas

If the infestation is bad, you may find that it’s best to cut away any infested parts of your indoor houseplant. This way, you can kill off the aphids without them spreading. Be careful when cutting so you don’t damage or hurt nearby leaves and branches.

You might want to wear some gardening gloves while doing this. Moving the entire plant may also prove necessary when the whole plant is infested with aphids. Place infected plants in an isolated area such as a balcony or a room away from other plants.

Check for Other Household Pests

It’s also a good idea to check your other household plants for pests like spider mites, whiteflies, and scale insects. These pests can often travel from one plant to another, so it’s important to get rid of them before they take over. Aphids release a sweet, sticky substance known as honeydew, attracting other pests.

This watery substance looks like a little sooty mold on the leaves and is a huge draw for other insects, especially ants. So, it’s important to take care of any aphid infestation as soon as possible to prevent other pests from taking over. Also, learn how to get rid of ants because they can also be a danger to your plants.

FAQs on How to Control Aphids on Indoor Houseplants

How do indoor plants get aphids?

Aphids are easily brought indoors on infested plants. They also come attached to the clothing and through an open window by the wind.

Why do aphids keep coming back?

Aphids are attracted to plants with soft new growth. Thus, overwatering and over-fertilizing your plants may make them more enticing to aphid populations which may cause negative connotations to your plants.

Final Thought on How to Control Aphids on Indoor Houseplants

As you can see, there are numerous natural and commercial products from which to choose in your battle against aphids. Make sure you understand what attracts pests to your indoor garden, and you’ll easily be able to decide how to control aphids on indoor houseplants.


The post How To Control Aphids On Indoor House Plants appeared first on Kitchen Infinity.

Did you miss our previous article…
https://chefbuano.com/?p=1013

Removing Shoe Odors With Baking Soda

Removing Shoe Odors With Baking Soda

Shoe odors are caused by bacteria growing in moist, dark places. They can also be caused by sweat and oil from your skin that gets into the fibers in the shoes.

The great news is that baking soda is a great way to get rid of shoe odor – sometimes once and for all.

In this article, you will learn how to remove shoe odors from your home and shoes, along with other crucial tips to remember when it comes to getting rid of annoying odors in your home.


Image Credit: http://housewifehowtos.com

What the most common sources of shoe odors are

Shoes are often lined with materials that cause odors to build up during everyday use.

This buildup of sweat, bacteria, and oil is known as foot funk, shoe funk, or shoe odor.

Other sources of shoe odor include dirty shoes that have been worn without socks, smelly shoes that were never cleaned before being placed in storage, and smelly athletic gear that needs washing after heavy use.

How to remove shoe odors from your home and shoes

Baking soda will do the trick for most people when it comes time to clean out old stinky shoes or get rid of new stinky shoe smell.

There are several simple ways you can use baking soda to remove the funky smells from your shoes.

Simply sprinkle baking soda into the inside of your smelly shoes and lace them up as usual for a couple of days or until the stench is gone.

Another way to use baking soda to remove shoe odors is to make a thick paste with water and baking soda, apply it to any surfaces that have been affected by the odor, let it dry, then take a damp rag and wipe it away.

It’s also a good idea to place a small container of baking soda in your closet, gym bag, or other places where you store your shoes as this will help absorb any lingering foot funk.

When removing shoe odors from carpeting or hardwood floors, porous materials can be treated with a mixture of baking soda and water, or baking soda can be sprinkled on the carpet or floor and brushed with a broom.

Please note that this method will not work for concrete floors, most sealed wood floors, tile floors, linoleum tiles, vinyl tiles, varnished wood floors, granite countertops, etc., because baking soda cannot penetrate the surface to neutralize the odors from below. In other words, these surfaces would have to be stripped of their coating for the baking soda to get through to where it’s needed.

However, if you want to clean sticky grease off kitchen cabinets, then baking soda is the way to go.

How do I use baking soda for removing shoe odors? What do I need?

You’ll need a jar or container that’s big enough to hold the shoes you want to soak, baking soda, water, and an old towel. Then, follow these steps:

Step 1 – Fill your container halfway with lukewarm water Step 2 – Mix in 3 parts baking soda with 1 part water. For example, for every cup of water use 1/3 cup of baking soda or for every liter of water use 10 tablespoons (about 80 grams) of baking soda. Adding more baking soda will lead to better results but it could take longer to dry out.Step 3 – Soak your shoes in this mixture for at least 12 hours (for larger shoes like boots you may need even more time). Step 4 – After you’ve soaked your shoes for as long as needed, take them out and put them in a cool dry place to dry off. If you have a fan nearby set it to blow on low. This will speed up the process of drying your shoes and prevent any mildew from forming.Step 5 – Once your shoes are completely dry, sprinkle some baking soda inside them and leave overnight so that they can absorb any odors still left behind. You should do this before wearing your shoes again or putting them back into storage.

Why baking soda is the best way to get rid of shoe odor

Baking soda neutralizes odors naturally by absorbing unpleasant smells into itself where it then breaks down into inert components that are not likely to cause any further harm. This makes it much safer than other household cleaners which typically mask bad odors with artificial fragrances or kill bacteria with harsh chemicals like bleach or ammonia.

Using these types of cleaners often causes the stinky shoes you’re trying to get rid of to smell even worse and in some cases, the fumes can be harmful.

Baking soda is also a natural deodorizer so it will not only remove shoe odor but also any other odors that may be present in your home.

Tips for using baking soda in your closet, on carpeting, and hardwood floors

When cleaning your home with baking soda it’s important to keep these tips in mind.

Test an inconspicuous area before applying baking soda to a large surface

Applying baking soda to an inconspicuous area should be enough to test if it’s safe to move forward. In addition, this will also help you determine how long you should leave the baking soda on the surface before rinsing it off.

lways use a damp cloth when wiping away baking soda residue – dry surfaces can become scratched.

A damp cloth will help you remove any residue without scratching the surface. This is especially important when cleaning delicate surfaces like wood floors or furniture.

Never mix baking soda with other cleaners – this can create hazardous fumes.

When it comes to removing shoe odors using baking soda it’s always best to stick with just the baking soda and water. This is because other cleaners like bleach or ammonia can react with baking soda and create harmful fumes.

Keep in mind that baking soda may not be suitable for all surfaces

You should avoid using baking soda on marble, granite countertops, tile floors, varnished wood floors, painted walls, etc. If you do so, it can leave behind a dulling film or even etch the surface if left to sit too long before being washed away with water.  

Do not pour water onto baking soda if it is being used in shoes – this will damage the footwear.

Baking soda should always be used dry in shoes. If it gets wet, for example from a spilled liquid, the material will start to break down and eventually turn into a sticky mess that can damage your shoe.  

Baking soda can be harmful to pets

Put your pets away when using baking soda to clean as it can be harmful if ingested. Baking soda is not poisonous to pets but it can cause them to vomit or have diarrhea if they consume too much of it.

Removing Shoe Odors With Baking Soda – FAQ

Why should I use baking soda to remove shoe odors?

Baking soda can help you keep your stinky shoes smelling fresh. It’s the best way to deodorize and neutralize smells like those from your athletic shoes, footgear, and boots.

How to Clean White Shoes with Baking Soda | Arm & Hammer™

Image Credit: http://armandhammer.com

Is it safe to use baking soda in my shoes? 

Baking soda is a safe way to soak up any odor-causing bacteria or fungus which may be living in your sneaks. It’s also an all-natural remedy that has no side effects. However, if you happen to have any open cuts on your feet please refrain from using this method because of the risk of infection.

What if my shoes are wet?

If your shoes are wet, removing as much water as possible before using the baking soda is ideal. You can do this by using a shoe dryer, airing them out in the sun, or stuffing them with newspapers. Once your shoes are mostly dry, you can then proceed with the baking soda remedy.

Can I use this method for all types of shoes?

This method should work for all types of shoes, but if you have leather or suede shoes be careful not to soak them for too long. Baking soda can be harsh on these materials and may cause discoloration or damage.

Odors from sneakers, footgear, and boots can be a real nuisance. But with a little baking soda, these smells can be neutralized and removed in no time. Soak your shoes in a baking soda and water solution, or sprinkle some baking soda inside your shoes to help absorb any unwanted smells.

Baking soda can also be used tomake DIY laundry detergent so you can keep your clothes smelling fresh too.

Final thoughts on removing shoe odors with baking soda

In conclusion, using baking soda is the best way to deodorize and neutralize smells such as those from your athletic shoes, footgear, and boots. This safe solution can help you ensure your stinky shoes start smelling fresh.

The post Removing Shoe Odors With Baking Soda appeared first on Kitchen Infinity.

Did you miss our previous article…
https://chefbuano.com/?p=999

What is the Difference Between Cacti and Succulents?

What is the Difference Between Cacti and Succulents?

Succulents and cacti are popular houseplants, but it can be hard to know their differences as they almost look the same. Unfortunately, most people use the terms interchangeably when talking about these two types of plants. This can be confusing to those new to both of these plants.

Even though cacti and succulents may appear similar, they are actually different. While cacti fall in the category of succulents, there are many succulents that are not cacti. To help clear some confusion regarding cactus vs. succulents, we’ve put together a list of their top differences below. Keep reading!

What Are Succulents?

Succulents are a variety of plants that store water in their roots, leaves, and stems. This characteristic leads to increased drought tolerance. Succulent plants are very popular in home gardening because they require very low maintenance compared to other houseplants. 


Image credit: https://succulentplantcare.com/

Succulents are available in more than 60 varieties. Some succulent varieties include aloe, haworthia, sedum, sempervivum, and cacti. So, as you can see, most succulents don’t belong to the same plant family. They differ in their visual, genetic, and geographical features.

Characteristics of Succulents

They have an evolved leaf texture surface that quickly prevents the plant from losing water. Succulent plants exhibit growth patterns consistent with water preservation. They have slow and compact growth consistency with energy preservation, spherical and columnar growth with limited surface area to avoid exposure and evaporation.They have ribs and grooves that allow them to shrink during droughts and swell with water when there’s precipitation.The plant also has Crassulacean acid metabolism photosynthesis, which allows it to open its pores at night to reduce moisture loss and take in carbon dioxide needed for photosynthesis during the day. In some succulents, photosynthesis is conducted by their green stems.They have a shallow root system to allow the plant to absorb moisture at the surface of the soil during drought periods.Some succulents such as the leaves of purslane are edible and can be used in salads and the juice of aloe vera plants, which has several health benefits.The agave plant is also another non-cactus succulent that is edible and is used to make agave syrup and tequila. Other non-cactus succulents include the moss rose, purple ice plant, Angelina stonecrop, Flaming Katy, and Chocolate Drop stonecrop.Another feature distinguishing cacti and succulents is that non-cactus succulents are native to multiple regions of the world, while most cacti are native arid climates.Succulents enjoy the warmth and bright light, but you shouldn’t leave them in prolonged direct sun exposure and excess warmth. Despite their drought tolerance, they can get leaf burn from too much sun exposure.Overwatering a succulent is also a sure-fire way of seeing your plant die because of root rot. But that doesn’t mean that you should never water them. They need water but in excess as this will hurt the plant.

What Are Cacti?

Cacti display the same characteristics as succulents, such as water storage, shallow roots, fleshy stems, and waxy leaves. If you want rock garden plants that can survive all the hardship, try cacti. But there’s always something that sets them apart from other succulents. Maybe it can be their spines or something else.

What Are Cacti?
Image credit: https://cdn.britannica.com/

Features of Cactus

The big difference is that they don’t have leaves and branches but are full of spines. You can also find some cacti without spines. Spines are some of their important adaptation features to survive in arid deserts.Another distinguishing feature is the areoles. An areole is a small bump on the surface of a cactus. It can be light or dark and serves as the site where flowers, spines, and hair grow out. An areole is the most defining feature of the cactus. Therefore, if the plant has spines but no areoles, that’s not a cactus.They don’t have leaves and branches but a succulent stem that photosynthesizes and stores water. Some cacti stem look like pads and flattened segments. They include prickly pears and Christmas cacti. Their large, colorful flowers produce fruit.They also have a water preservation feature, including a shallow root system, grooved stems, slow-growth, and column-like or spherical columns. Most cacti are native to the arid desert, but a few varieties like prickly pear cactus have better tolerance to cold.

Major Differences Between Cacti and Succulents

Cactus Spines

Most cactus varieties produce spines that may be needle-like, bristly, hairy, and woolly. These spines perform several functions. They protect the water-rich flesh of cactus from thirsting animals. They also disrupt the airflow around the cactus stems to prevent excessive water loss, especially in drying desert winds. Each spine also provides a small shade for the plant.

Cactus Spines
Image credit: https://www.gardeningknowhow.com/

Cactus Areoles

Cactus areoles are the small, raised areas of a cactus’ skin from which spines and sometimes hairs grow. These areoles also produce new buds, flowers, and fruits. The arrangement of the areoles on a cactus helps to identify different species. Areole is the defining feature of cacti, which is not found in succulents.

Cactus Flowers

Cactus and succulents all bloom. However, cactus flowers are far larger, showy, and more complex than succulents. Cactus flowers resemble other flowers and are normally pink, yellow, orange, blue, or red. They may be produced singly or in clusters.

Cactus Flowers
Image credit: https://knpr.org/

Cactus Fruits

Even though both cactus and succulents flower, only cactus produce fruits. Cactus fruit is typically hard and dry or fleshy and juicy. Prickly pear fruit and dragon fruit are the most known fleshy cactus fruits edible to humans.

Cactus Flutes, Ribs, and Pleats

Cactus stems are usually cylindrical or spherical but may be flattened. The ribs of cacti provide an efficient means of water storage and help reduce the plant’s weight. Cactus stems contain many pleats that expand and contract easily as they absorb or release water.

Cacti and Succulent Similarities

Although people often use the terms succulents and cacti interchangeably, these houseplants have a slight similarity. All cacti are succulents, but not all succulents are cacti. You need to look into these similarities to understand how these plants are related. 

They both have spine presence and cylindrical shape. For example, some succulents also produce spiky thorns like euphorbia, a genus of succulents that is often confused with cactus due to these many thorns. Both plants can survive in both arid and semi-arid areas, thanks to their drought-tolerant features.

FAQs about the Difference Between Cacti and Succulents

Why do you need to differentiate between cactus and succulents?

Knowing how to identify a cactus vs. succulent can help you in keeping these plants’ requirements. Also, it’s good to know what you’re getting to avoid being tricked into buying something that’s not worth it. The blooming should also be a matter of concern.

Can you plant cacti and succulents together?

Yes, whether you want to plant a giant cactus or a small succulent, the way they’re potted means difference in failure and success. They’re both native to dry, low moisture environments.

They both require bright light, well-drained garden sites, and container potting soils. If you decide to plant them together, note that cacti need to be watered less often than other succulents.

Final Thought about the Difference Between Cacti and Succulents

There you have it! Apart from the differences in tolerance of direct sunlight and water requirements, keeping requirements for cacti and succulents are the same. Be sure to learn more about each of them before you get started. Make sure you familiarize yourself with the requirements specification of your variety to ensure you meet their requirements.


The post What is the Difference Between Cacti and Succulents? appeared first on Kitchen Infinity.

Did you miss our previous article…
https://chefbuano.com/?p=987

How To Sweep A Floor

How To Sweep A Floor

When it comes to home cleaning projects, sweeping floors is very important. Sweeping keeps your floors free from unsightly and unhygienic dust and debris. Sweeping a floor is an essential home task that many people do wrong.

Many people don’t realize that the way you sweep can make all the difference in keeping your floor clean. If you want to keep your home looking its best between mops or vacuums, consider these helpful hints when trying to effectively sweep a floor of any kind. Here’s how to sweep a floor.

Clear Away Obstructions and Messes

Start by decluttering a room you intend to sweep to remove any messy obstructions. Additionally, remove furniture, throw rugs, and many decorations that may get in your way while sweeping.

This is also a good opportunity to throw your rugs in the wash and dust any furniture. Doing this will prevent your throw rugs and furniture from getting your freshly cleaned floors dirty when you replace them.

Choose the Best Broom for Your Needs

There are a variety of brooms on the market these days, so it’s important to choose the right one for your specific needs. If you’re sweeping a hard floor, such as tile or linoleum, you’ll need a stiff broom that can effectively move dirt and debris. For smoother floors, opt for synthetic brooms.


Image credit: https://www.homestratosphere.com/

For rough texture floors, use natural fiber bristles. After deciding on the type of bristle you need, find a broom with angled bristles to get into corners and crevices. Lastly, pick a broom with a comfortable height handle that is not too heavy. 

Also, don’t forget a dustpan and a hand broom. A hand broom will help you sweep your debris pile into the dustbin. Use a dustpan with a razor thin lip to help you sweep up all the dust.

Pick a Sweeping Method

When it comes to sweeping, there are several ways you can go about it. You may start sweeping on the outer edges of a room by pushing and building a dirt pile at the center of the broom. 

Pick a Sweeping Method
Image credit: https://www.thespruce.com/

You can also start at one end of the room and keep the dirt pile close as you move about the floor or you can sweep a section at a time and put dirt piles in the trash can after completing each section. Make sure you choose a method and starting point that works best for you.

Start Sweeping in the Furthest Room

If you’re sweeping a floor for the first time, start in the furthest room from the entrance and work your way towards the front door. This will help keep all the dirt and dust in one area and make it easier to clean up.

Begin on a section of the floor that’s away from your body and gently drag the broom toward your body. You can use quick short motions or long sweeping motions to get the job done. Make sure you choose a sweeping style that fits your personal preference.

Clean Your Broom Periodically

It’s always best to take care of your tools, so make sure you clean your broom frequently. Dirt and dust will build upon the broom bristles over time so it’s important to remove buildup before it becomes a problem. You can wash or wipe off any loose dirt with water or use a brush to get at the harder-to-reach areas.

This is very important because as you sweep, your broom may accumulate dander, pet hair, and dust bunnies on the bristles. Turn your broom upside down and use your hand to remove the lint, pet hair, and other woozies from the bristles. If you’re still far from the collection point, take that fistful of fuzzy and dump it directly in your garbage can.

Dispose of the Dirt Pile

Now it’s time to get rid of that dirt pile. If you have a dustpan, this will be a breeze. Simply place the dust pan directly under the dirt pile, and using your other hand, flick the pile into the pan. If you don’t have a dustpan, no worries – just use your broom to push the pile over to a garbage can.

Wash Your Supplies and Put them Away

After sweeping your floors, the broom bristles will get dirty, especially if you have pet dander and human hair on your floor. Most of the time, your broom just needs a quick removal of build-up with your hand. As you clean your broom, don’t forget your brush and the dustpan.

Wash Your Supplies and Put them Away
Image credit: https://empire-s3-production.bobvila.com/

Use dish soap to wash things, and place them away in their rightful places. Don’t leave your broom standing up against the wall – this will cause it to lose its shape, weakening the bristles. Always store the broom with bristles upright and off the floor.

Use the Drawbridge Technique to Deal with Annoying Dustpan Lines

If you want to get crazy, you can use the drawbridge technique to deal with annoying dustpan lines. This is a two-person process that will make cleaning the floor much faster. One person sweeps the dirt and debris towards the dustpan while the other person uses their free hand to keep the pan open so nothing falls out. The person with the dustpan has to act like a drawbridge, keeping their hand on top of it while making sure nothing falls out.

This method is very important, especially if the dustpan you’re using has a lip that’s too thick to let dust and smaller pieces of debris pass over easily. You can also vacuum or wipe up dust lines that you’re having difficulty corralling with your broom.

FAQs about How to Sweep a Floor

Is it better to sweep or vacuum the floor?

Sweeping is a great way of cleaning floors of large debris. However, for hardwood floors, it’s better to vacuum to get rid of fine dust and particles that may miss, especially in the wood floor crevices.

What is the proper way of holding a broom?

When holding a broom, you should grip it about one-third of the way down from the top. This will give you the best balance and control when sweeping. Make sure you use both two hands to hold the broom.

Can I sweep up liquid spills?

No, sweeping liquid spills will only spread them around and make the mess bigger. Instead, use a mop or towel to soak up the liquid. Learn how to mop a floor to make cleaning spills easier.

How do you sweep without stirring up dust?

Use smaller, shorter strokes while holding the broom more parallel to the floor. This will help you avoid stirring up dust while sweeping.

Final Thought about how to Sweep a Floor

As you can see, sweeping the floor is not that difficult, but also not as easy as you thought. And by following these simple steps, your floor will be far cleaner than it would have been had you simply dragged the old broom across it.


The post How To Sweep A Floor appeared first on Kitchen Infinity.