Types of Under-Sink Shutoff Valves

Types of Under-Sink Shutoff Valves

Also known as fixture shut offs or stop valves, under-sink valves allow you to turn off the water to the sink without shutting it off to the whole house. The number and type of fixture shutoffs you choose will depend on how many fixtures there are and where they’re located.

The following guide will take you through different types of shut off valves that can help you identify what you have under your sink.

What is Shut off Valve?

Shut off valve is a valve that stops the flow of fluid in a plumbing system. This valve cuts off the water supply to a pipe once activated. However, shut off valves are not exclusive to plumbing systems.

They’re also used to regulate the flow of gasses. 

ngle Stop Valve

The Angle stop valve is the most popular of shut off valves, being used in over 75% of homes. The valve can be rotated around its main axis to cut-off water flow. The design of the angle stop valve allows it to rotate easily, but it also makes them prone to wear and more likely to leak.

Image credit: https://images.saymedia-content.com/

Also known as a compression valve, an angle stop valve is found on the pipe which exits the wall. It allows you to turn the water off to the specific toilet or faucet when replacing it without shutting all water off to the entire house. Angle stop valves are very durable and can last many years without issues. In addition, angle stop valves are generally found in either brass or chrome-plated finishes.

Straight Shut Off Valve

Straight stop valves are typically found when the water supply pipe comes out below the flow or cabinet. A straight stop valve keeps the water from traveling in the same direction where it came from before entering the valve.
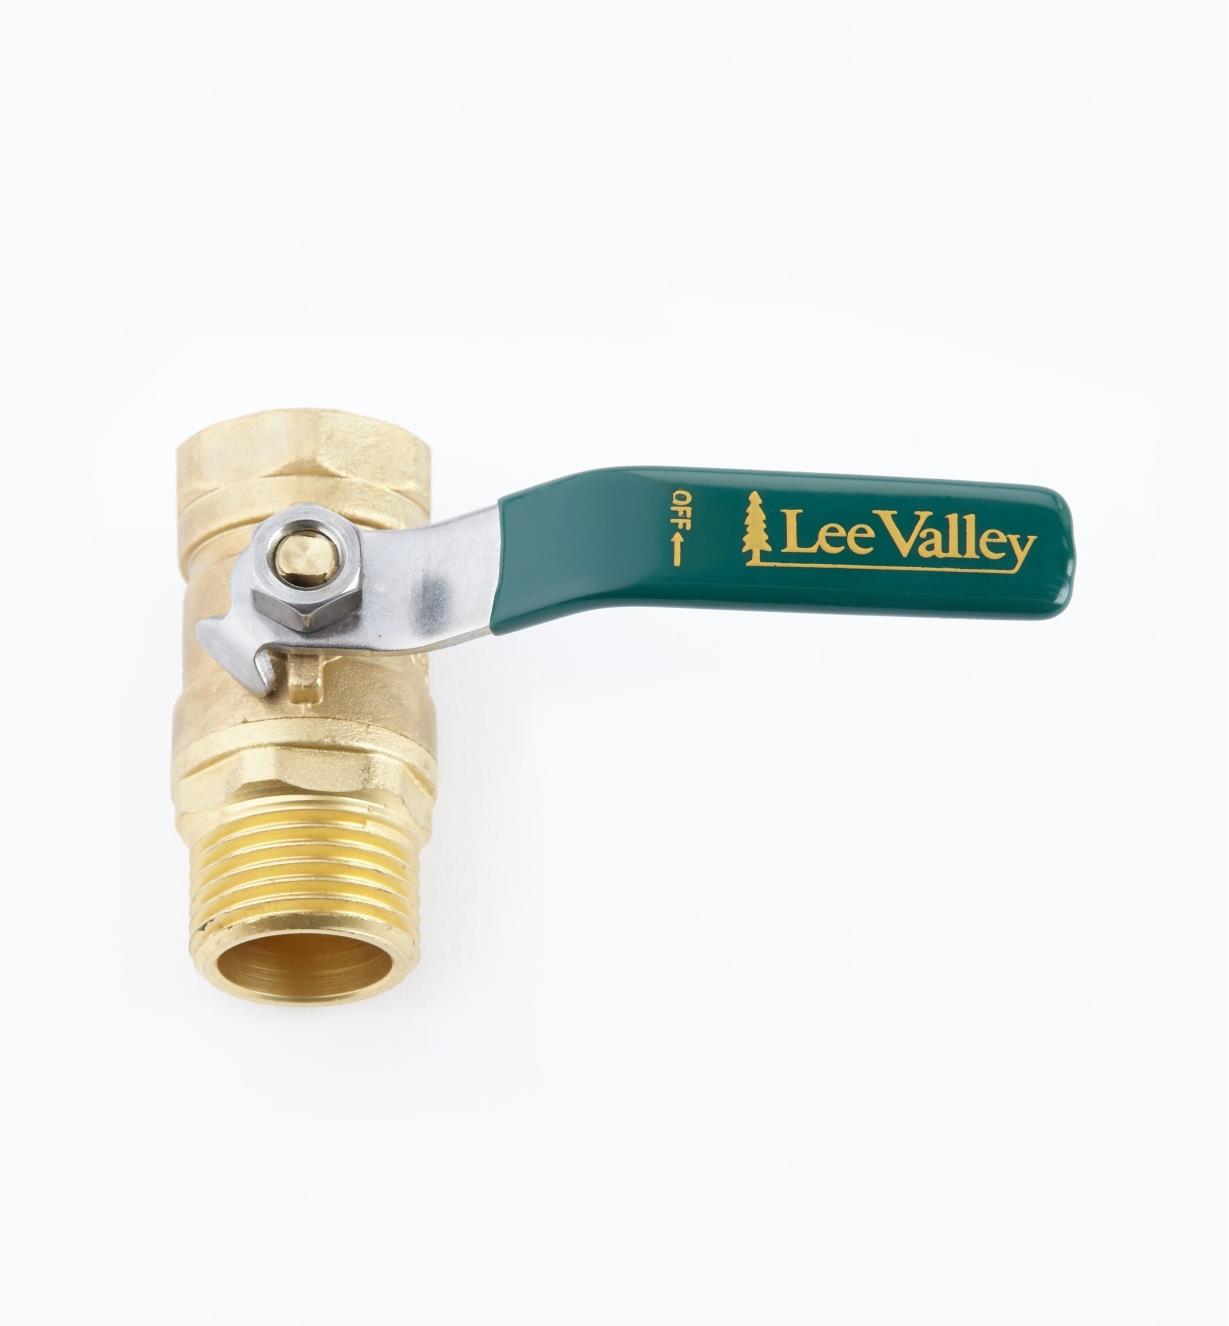
Straight Shut Off Valve
Image credit: https://assets.leevalley.com/

Straight stop valves have handles that point in the same direction as the valve, and handles are located in the middle of the valve body between the inlet and outlet ports. Similar to angle stop valves, a straight stop valve also allows you to turn off the water supply to one specific area. Also, you can do the replacements and maintenance on these appliances without shutting the water supply in the entire house.

Iron Pipe Stop Valve

Iron pipe stop valves are fitted with iron-pipe sized threads to thread a female inlet port. This type of under sink shut off valve can also be adapted to other pipes by using a male iron pipe adapter that can be fitted into plastic pipes or copper pipes.

Iron Pipe Stop Valve
Image credit: https://www.pvcfittingsonline.com/

This shut off valve can be screwed or unscrewed from the end of the water pipe. You’ll only need two pliers. One to hold the water line in place and the other to tighten the valve.

Copper Sweat Shut Off Valve

A copper sweat valve is usually at the end of copper pipe sections. They are threaded to screw into the end of the pipes. Sweat is a term used by plumbers for soldering. This type of shut off valve is known as copper sweat valve because it needs soldering to copper pipe, and it’s made of copper.
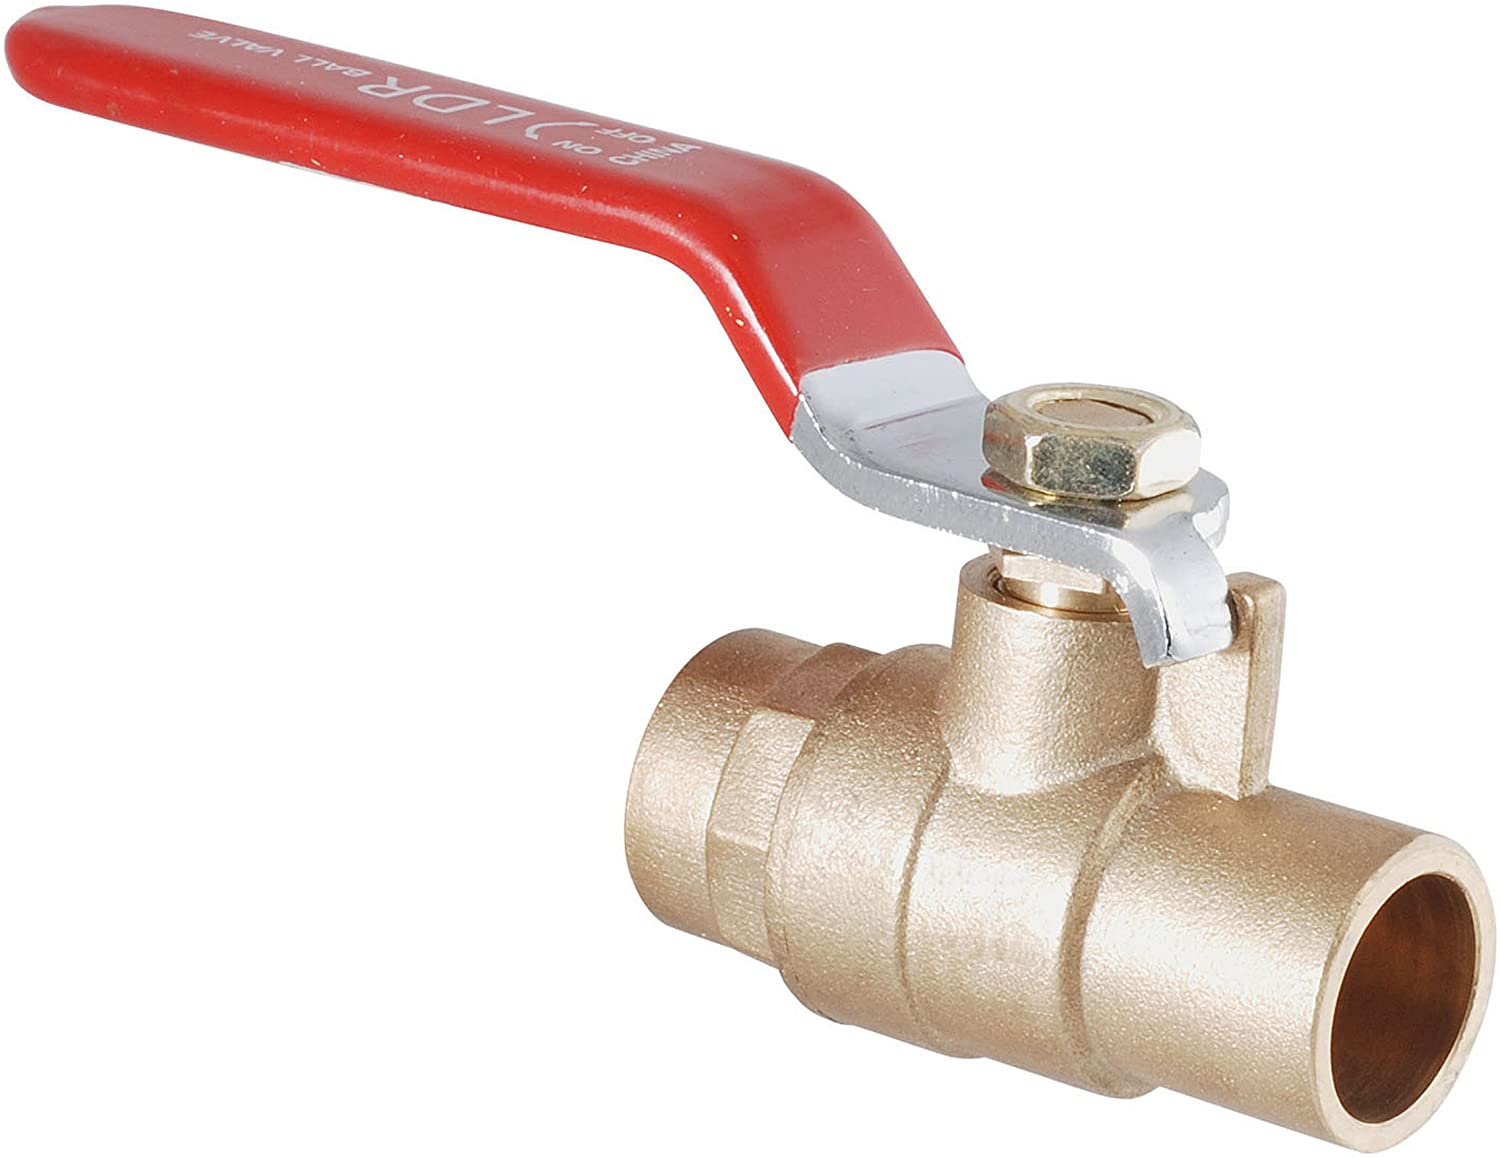
Copper Sweat Shut Off Valve
Image credit: https://m.media-amazon.com/

To install these copper pipes, you’ll need common household tools like emery cloth, solder, flux, and torch. The copper pipes are installed at the time of building construction. Professional plumbers prefer this permanent and low-cost solution because they last longer.

Push Fit Stop Valves

Push fit stop valves use a collet to grip the pipe. Also known as push on stop valves, these valves are inserted into the end of the pipe, and the pipe is pushed home so that the collet grips the pipe tightly. They consist of a rubber o ring and stainless steel locking teeth.

Push fit stop valves are easy to install and can be used with copper, PEX, and CPVC pipe. The valve grips onto the pipe with metal teeth and creates a watertight seal with a plastic o ring. The small CPVC is inserted inside its intake port, and cement used with CPVC often works with PVC.

However, the adhesive used on PVC doesn’t bond with CPVC. It’s kind of overwhelming learning about this at first, but once you grasp the idea, you can fit a CPVC stop valve to a pipe by yourself.

PEX Shutoff Valve

PEX Shutoff valves are an innovation to help with fitting a pipe. The one-way valve does not let anything in or out of the line. It’s great for reducing water backflow into your home, but it can’t reduce pressure or prevent scaling on the inside of the pipe.

PEX Shutoff Valve
Image credit: https://images.fineartamerica.com/

PEX shutoff valves are more expensive than copper or brass shutoff valves. This stop valve is often attached to pipes with crimp rings or clamp rings. A ring compression tool compresses the crimp ring against the outside of the pipe while a clamp ring tool squeezes a tab on one side of the ring.

The PEX stop valves can be removed, but you have to cut off the ring, which can cause damage to the pipe. This means that the pipe needs to be shorted to get a fresh section of pipe for the new valve.

CPVC Stop Valve

CPVC stop valves are one of the more expensive types of stop valves. CPVC stop valves are used in CPVC piping systems. CPVC stands for chlorinated polyvinyl chloride. They use a specific type of cement known as glue when installed. In addition, a CPVC valve can be used on PVC pipes. But PVC adhesive doesn’t bond well with CPVC material.
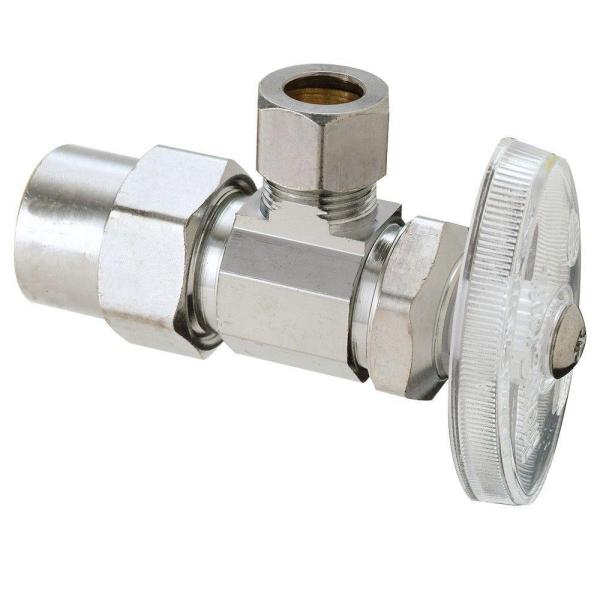
CPVC Stop Valve
Image credit: https://images.thdstatic.com/

Compression Shutoff Valve

A compression stop valve is used on copper pipes. It consists of a compression nut that squeezes a brass ring into the space between a water pipe and its body. Buildings with copper water pipes use compression stop valves with a compression intake port. This allows for more compression power and reduces the need for repairs.

Ball Valve

A ball valve is a type of stop valve that uses a ball to control water flow. The valve has a threaded body and nut that screws into the water pipe. This valve is quite large and features a lever handle. It’s commonly used in places where a quick turn-on is necessary, such as the main pipe.

You can open and close it fully with a simple quarter-turn of the lever. The internal ball will align with the pipe when the valve is open, allowing water to gush. The ball will rotate 90 degrees and completely block the hole when closed.

FAQs on Types of Under-Sink Shutoff Valves

Where is the shutoff valve located at home?

The main shutoff valve for the home is generally found on the perimeter of the house. A good place to look is where the water first enters your home. The smaller valves can also be found close to appliances and fixtures such as toilets or faucets.

Final Thought on Types of Under-Sink Shutoff Valves

Shutoff valves are an essential part of any plumbing system. They allow you to turn off the water supply to a particular area, which can come in handy when you need to make repairs or in an emergency. Also, if you’re experiencing low water pressure in your kitchen sink, the first place to check is the shut off valve. Installing these stop valves is an easy task if you know where they are and which type to use.


The post Types of Under-Sink Shutoff Valves appeared first on Kitchen Infinity.

Did you miss our previous article…
https://chefbuano.com/?p=1149
How to Grow Scallions

How to Grow Scallions

Scallions are fresh, fast, and fabulous in salads, stir-fries, and savory tarts. Also known as green onions or salad onions, scallions are harvested before they reach maturity and can be grown year-round indoors.

Fast-growing plants like lettuce that you plant directly in the ground get tall quickly but have a short harvest window of just a few weeks. Indoor onion plants grow slowly over several months with an even longer harvest window than outdoor varieties.

Scallions are also one of those crops that can be sown in late summer to give one of the earliest harvests next spring. Here’s how to grow scallions from seeds indoors, so you always have these tasty vegetables on hand for cooking or snacking.

What are Scallions?

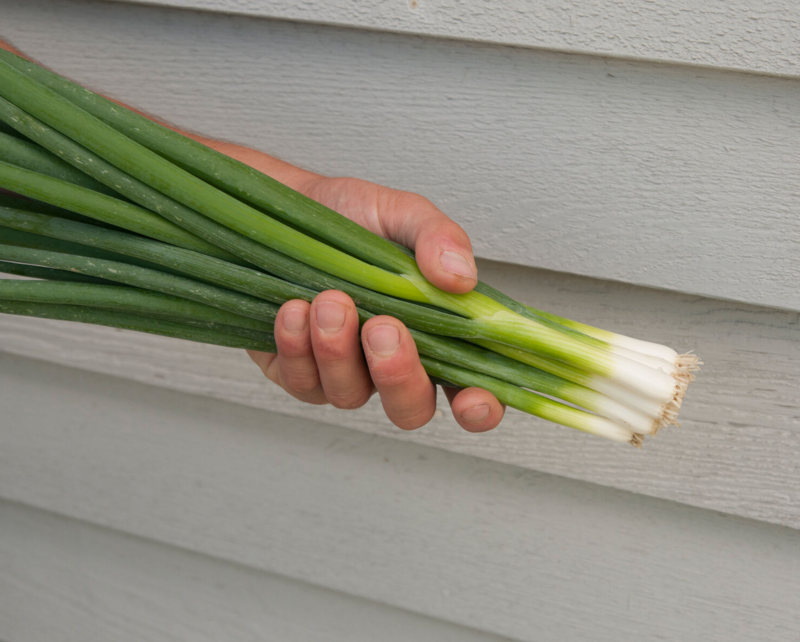
Allium fistulosum, also known as green onions, is called bunching onions or scallions.  Scallions are produced from specific cultivars of the bulbing onion and have a mild flavor.


Image credit: https://s3.amazonaws.com/

Green onions look similar to the traditional onion known as Allium cepa. They have tall, green stalks that are usually 1 to 2 feet tall. Scallions have slender white bulbs at their base that do not get large enough to form an onion.

Scallion Varieties to Try

There are several scallion varieties. These include:

Guardsman

Guardsman scallions are known for their slow bolting. They grow to about 20 inches tall and have green leaves that are blue-green at the base. The white bulb is slender, cylindrical, and has a mild flavor. This variety takes 50 days to grow, and it straddles the line between a spring onion and scallion for taste.

Evergreen White Bunching

Evergreen White Bunching is a green onion that grows best in the spring and fall. It has thick, blue-green leaves with white bulbs at its base. The plant grows up to 12 inches tall and keeps growing every 45 days until frost. This scallion takes around 60 days to grow from start to finish.

Nabechan

Nabechan is an oriental green onion that grows about 8 inches tall with white stalks and blue/green leaves. It takes around 60 days for these scallions to grow. It’s a Japanese variety prized for its flavor.

Nabechan
Image credit: https://www.activevista.com.au/

Tokyo Long White Bunching

Tokyo Long White Bunching is a white scallion that grows to about 12 inches tall. The leaves are long and slender, with a white bulb at the base. It takes around 90 days for these scallions to grow. This variety is also known as Welsh Onion or Scallion.

Red Beard

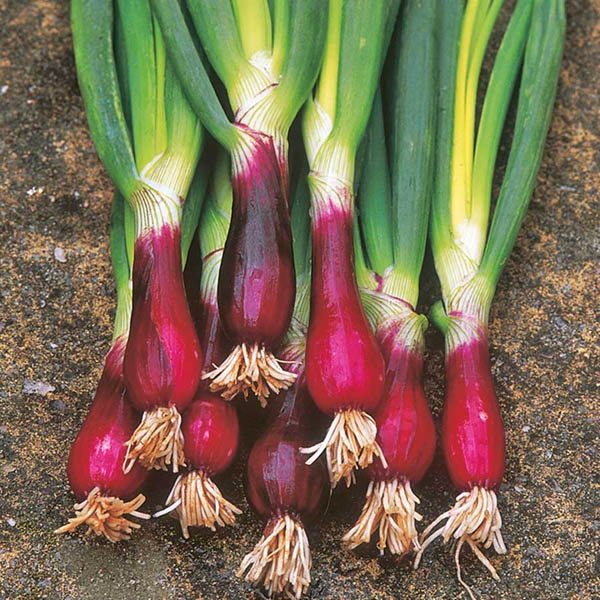
Red Beard is a red scallion that grows to about 12 inches tall. The leaves are long and slender, with a white bulb at the base. It takes around 90 days for these scallions to grow.

Red Beard
Image credit: https://www.australianseed.com/

How to Grow Scallions from Seed

You can plant seeds indoors about 8 to 10 weeks before your projected last frost date. You can also direct sow in the garden once the threat of frost has passed. Sow your seed about 1/4 inches deep. Other onions may have slow and poor germination. So, the most important element scallion seeds need is constant moisture, making starting them indoors a good choice.

How to Grow Scallions from Seed
Image credit: https://images.saymedia-content.com/

Seedlings emerge in one to two weeks. Once you have grown, thin the seedlings to about 2 inches apart. For a continual harvest, plant new crops every four weeks.

Potting and Repotting Scallions

Scallions can be grown in pots or containers on a sunny windowsill. Use well draining soil and organic potting mix when growing scallions in containers. Cover the seeds with a loose layer of soil and water them thoroughly. Make sure you keep the soil moist and not soaked.

Potting and Repotting Scallions
Image credit: https://imagesvc.meredithcorp.io/

If you want more instant gratification, then scraps and starts are two methods that are too quick for growing green onions. You’ll have scraps left over when you buy and use scallions from the grocery store. Get your container and rich potting soil. You can make your own compost to add some nutrients to the soil.

The scallions leave between three and four inches of the white bulb intact. Make 1/2 inch deep holes an inch apart in your container and drop the scrap in. Keep the soil moist and not soaked.

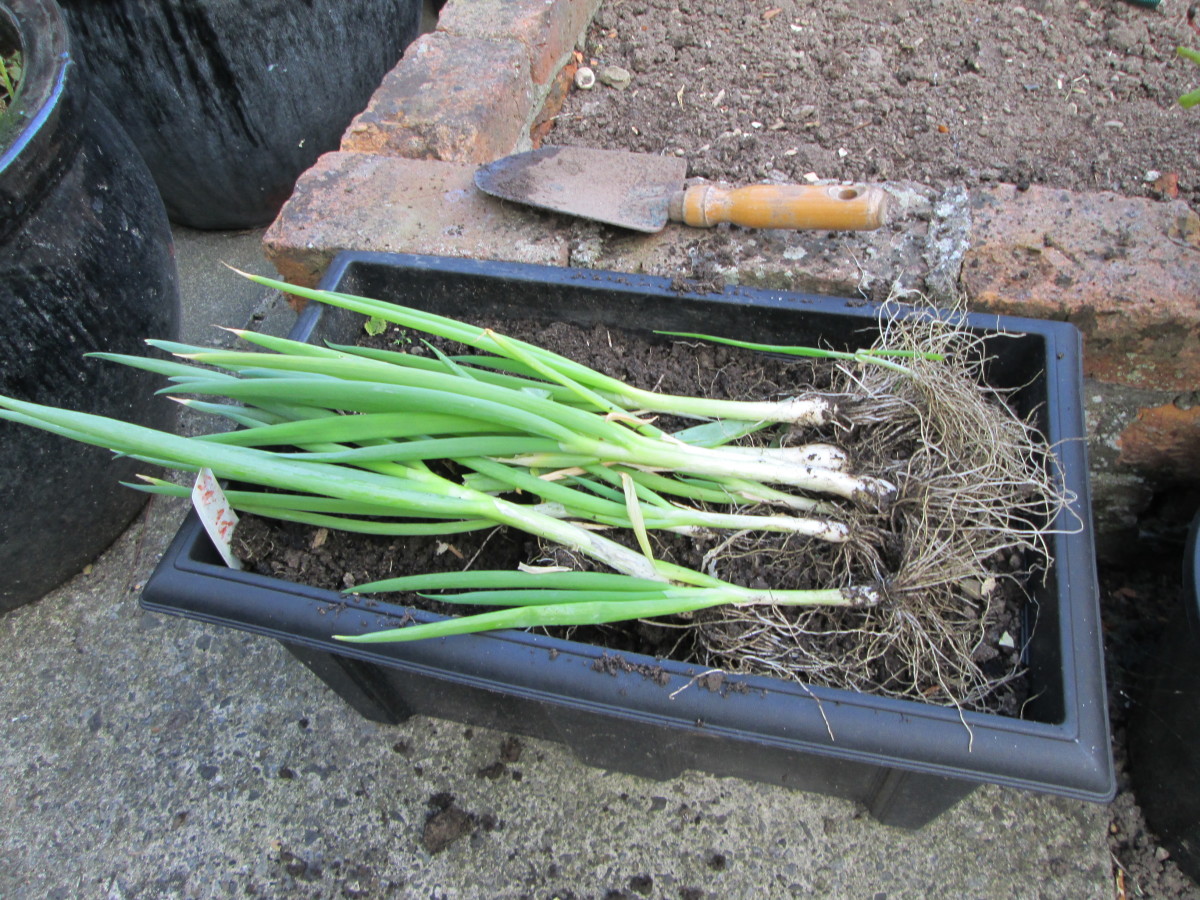
The final method of growing green onions is to get the starts from your local nursery. Take your starts off from the soil and gently shake off excess dirt so you can see the roots. Get a container and fill it with rich potting soil. Trim your roots back until they’re two or three inches long.

Your pot should be narrow and at least six inches deep. Make sure your container is in an area that will get direct sunlight. Keep the soil slightly moist and don’t overwater because this allows for decay and diseases. This way, you should be able to harvest and plant more scallions after every three weeks.

Scallions Care

Sun Exposure

Give your scallion plants at least six hours of direct sunlight per day. If you’re planting indoors, put them by a south-facing window. When planting outside, put them in an area that gets the most sunlight. Plant them in a partial shade if you don’t have that area.

Soil Requirement

Scallion plants prefer rich, sandy soil with sharp drainage and a slightly acidic to neutral soil pH. Amend your soil with organic matter to ensure good drainage. If you live in heavy clay soils, add sand or gravel to the mix. Consider doing some DIY soil tests to get the best for your scallions.

Fertilizing Green Onion

Fertilize green onions with a balanced fertilizer like 10-10-10 when you first plant them and again every four to six weeks. Fertilizer rich in nitrogen such as fish emulsion is ideal for green onions because it will provide the plants with a steady stream of nutrients over an extended period and keep them green and growing.

For a longer-term solution, use granular fertilizers released slowly into the soil. You can also top-dress with rich compost.

Watering Scallions

Scallion plants have a shallow root system, so regular watering is important. Keep the soil moist and do not let it dry out. While this may seem difficult in areas with long periods of hot, dry weather, you can greatly reduce the amount of time between watering by mulching with straw or pine bark nuggets. You can also try planting scallions in a raised bed to improve drainage and provide better access to water.

If you’re growing scallions in a container, make sure the pot has drainage holes and keep it evenly moist; they will likely need more frequent watering than they would get in your garden. A well drained soil also protects foliage from excess moisture, which can cause rot.

Temperature and Humidity

Allium cepa grows best when the air temperature is between 68°-78°F. If you’re growing scallions from seed, place a heat mat over your flats to ensure even soil temperatures around 45°F.

Ensure your flats get at least 6 hours of light each day for optimal germination rates and shoot growth. Scallion seeds do not mind humid conditions as long as they have good drainage to prevent rot and other diseases.

Pruning Scallion Plant

Most of the time, pruning is done by removing wilted leaves, which should be left until it’s time to pick them. If your green onion bolts to seed and you want to prevent seed drop, trim off the flower stalk. You may also experience leaf wilt during flowering.

Pruning Scallion Plant
Image credit: https://i.ytimg.com/

Once you notice that the flowers are fading, cut the stalk once it begins to droop and set it somewhere to allow the head to dry out and the seeds to drop out of the flower.

Propagating Scallion

One method of propagation is bulbs or sets. The best way to use sets is by planting them in late fall and overwintering them in the garden. In the spring, they’ll start pushing up new growth. You can also use nursery starts of Allium cepa and plant them to achieve the green onion stalks.

Remember that only Allium fistulosum will produce green tree onions without onion bulbs. True scallion has a milder flavor than A. cepa, which has a stronger onion flavor.

Harvesting and Storing Scallions

Harvesting

Start picking your spring onions once they reach a usable size. The best time to do this is when the bulbs are white and have a diameter about the size of the pencil, but even smaller sizes can be harvested.

You can dig up the whole plant if you plant to eat the mild white bulb or snip the stem off just above the soil level and allow it to continue growing. When growing traditional bulb onions as green onions, harvest the green leaves earlier and use them like scallion plants. 

Storing

Store your green onions in a partially filled jar in your fridge with enough moisture to keep the leaves from wilting. If you harvest stalks without bulbs, store the stalks wrapped in a paper towel in a plastic storage bag. You can also slice and refrigerate them in a plastic bag.

To freeze your onions, rinse them off and thoroughly pat or air dry them before freezing. Their texture will be a bit mushy when they thaw out, so it’s best to use them in cooked food rather than as a garnish. Dehydrating the stalks and grinding them into a powder is a great option for long-term storage if you have a dehydrator.

Common Pests and Plant Diseases

Pests

Thrips and aphids are common pests in onion crops and can be remedied by using a strong stream of water from a hose. If they persist, use insecticidal soap or neem oil or treat severe infestations with pyrethrin. Cutworms, onion maggots, onion nematodes, slugs, and allium leaf miners are also potential pests but can be dealt with by using prevention methods such as crop rotation or organic mulches.

You can also use a beer trap to trap slugs and snails. As long as the trap is deep as a pie pan, snails and slugs will be attracted to the beer’s aroma, which will be deep enough to drown them.

Diseases

Botrytis neck rot, purple blotch, and Fusarium basal rot are the most common onion diseases. They can be controlled by planting disease-resistant varieties and spacing plants properly. You can also remove infected plants and leaves, and use a fungicide.

White rot can also cause mold or rot at the base of the plant and yellowed, wilted leaves. If you notice the diseased plants, remove and dispose of them. Avoid planting Allium in that location for a couple of years. Practice crop rotation for the benefit of your plant’s health.

FAQs on How to Grow Scallions

Do green onions grow back every year?

These spring onions are biennial and can live for several seasons. They’ll come back after being cut down but won’t regrow if the bulbs die or are frozen.

Final Thought on How to Grow Scallions

As you can see, growing scallions is easy and can be done in almost any climate. With a little bit of care, you’ll have plenty of these delicious onions to enjoy all season long. So, what are you waiting for? Get started on your scallion garden today.


The post How to Grow Scallions appeared first on Kitchen Infinity.

Did you miss our previous article…
https://chefbuano.com/?p=1142

10 Elegant, Traditional Living Rooms

10 Elegant, Traditional Living Rooms

Thanks to their comfort, the traditional living room style has stood the test of time. However, decorating a traditional style living room can sometimes be hard. There are so many rules and regulations that you have to follow.

Many people don’t know what they should do with the furniture or how to decorate living rooms to achieve the perfect look. We created this guide for those who want to create an elegant, traditional living room but don’t know where to start. Here are 10 elegant traditional living rooms you can copy.

Go Gray in a Traditional Living Room- The Lighter Shade, the Better

When you think about elegant traditional living room colors, dark shades like maroon should be the last thing on your mind. Keep in mind that a lighter color is a sign of sophistication and wealth, so try to paint your walls in a shade of gray or white. You can also opt for some light blue or beige tones.


Image credit: https://st.hzcdn.com/

These colors will create a sense of openness and airiness in your living room. Gray is one of the most popular colors in any living room, but it can blend well in traditional living rooms. Pick some lighter hue with some grays and charcoals in your cushions and rugs for the floor.

Choose the Best Paint for Your Traditional Living Room

To choose paint colors for your room, opt for darker but muted paint colors like Benjamin Moore’s HC-146 Coventry Gray or Sherwin Williams SW6103 Spanish Cloth for an elegant, traditional look. These colors will give your room a rich and classic feel. If you want to add a pop of color, try painting an accent wall in a bolder hue. 

Choose the Best Paint for Your Traditional Living Room
Image credit: https://hips.hearstapps.com/

This can be a great way to show your personality in your traditional living space. A warm color scheme would also be perfect for your traditional living design, especially if you’re sticking religiously to the style.

So, opt for warm neutrals, purples, reds, and forest greens. In addition, bright white and cool gray tones can create a simple, clean backdrop for your more traditional furniture.

Breezy Plains and Prints, Lafayette Residence, San Francisco

This is one of the great examples of traditional living room ideas. The dark-walled living room is softened with large white windows, high ceilings, and a fireplace. The pairing solids in the comfortable sofas, armchairs, and rugs give the room a curated, comfortable feel.

Choose Striped Upholstery for Timeless Feel

Whether you choose chic, wide stripes, or rustic french ticking linens, striped fabrics are a brilliant choice when it comes to upholstery and window treatments in traditional rooms. They are inoffensive and easy to live with because they can stand the test of time and come in all manner of weaves, weights, and different colors to match your scheme.

Consider Contemporary Features

The key to a traditional living room that doesn’t feel stuffy is to add contemporary features. This could be a sleek fireplace, a minimalist coffee table, or even pops of color. The contemporary sofa and armchair contrast beautifully with the more traditional features like the rug and fireplace in this living room. 

Contemporary interiors feature sleek furniture and smooth lines. With these contemporary interiors, you won’t see a lot of tufting, piping, and patterns with contemporary pieces. The favored shape is rounded. You’ll see lots of coffee tables, lamps, and end tables in contemporary spaces.

You can use accessories such as candle holders, figurines, and other tabletop accents to keep it at a minimum. Other than traditional interiors, you can bring in wall art to bring that traditional feel.

Blue and White Glamor in a Living Room

For a more traditional living room, you can use dark paint colors and add dark accents such as chandeliers and even rugs. Use lighter colors like whites, grays, and yellows for contemporary spaces. You can add lots of light fixtures, such as track lights, to give off that contemporary vibe.

Blue and White Glamor in a Living Room
Image credit: https://i.pinimg.com/

You’ll also see hardwood floors in contemporary spaces, whereas traditional living rooms will have carpeting or rugs. Although you’ll see delicate armchairs in traditional living rooms, the emphasis when it comes to seating is on comfortable, sit-back, and relaxed pieces. Traditional roll arm or birch sofas are right at home more often when loaded with throw pillows to increase comfort.

High Ceiling Living Room

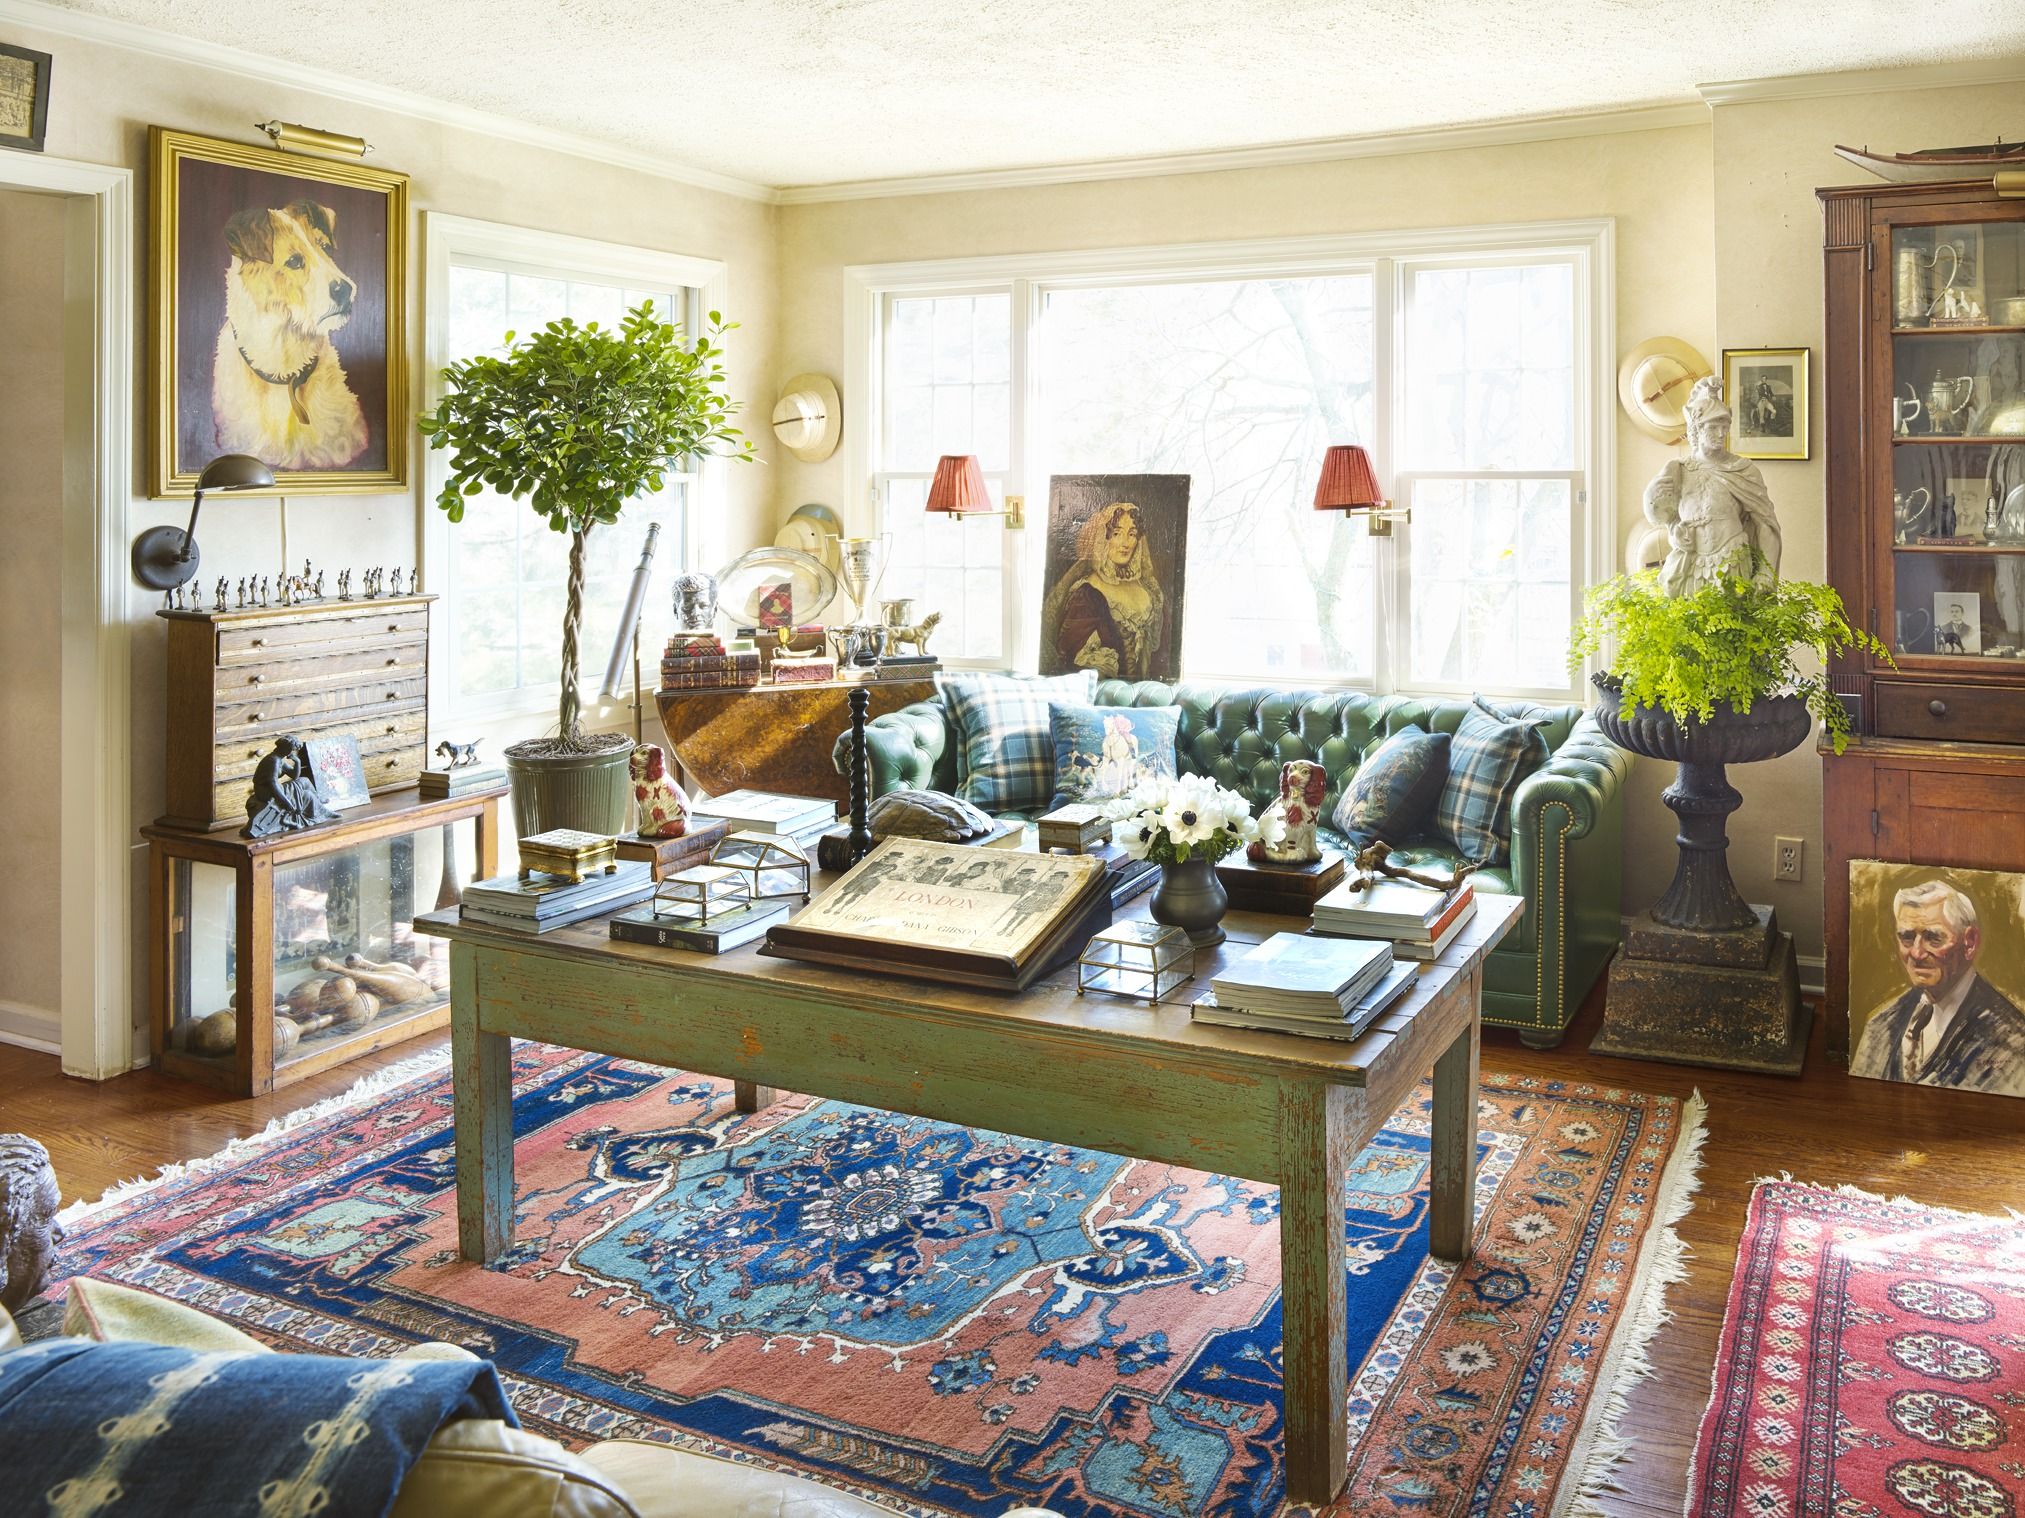
In traditional living rooms, you’ll often find more ornate details like crown molding and detailed woodworking. You’ll also see a lot of wallpaper, which can be used to create a luxurious or formal look. Rugs will usually be oriental or Persian, and flooring will be hardwood.

When it comes to furniture, a traditional living room will have a lot of dark wood pieces with upholstery in a neutral color. Traditional seating is made from leather, velvet, or tweed. There may be some tufting on the arms and back of sofas and chairs, as well as nailhead trim. Apart from tightly upholstered furniture, there will also be an iron lantern and architectural details to make the room look current.

Exposed Beams in a Living Room

Traditional living rooms will often have a large fireplace. You should avoid wallpaper with a busy pattern and choose something solid in color. If your furniture isn’t upholstered in a neutral color, you can add it yourself using slipcovers. 

Lighting has to be traditional or even antique in these kinds of living rooms. Chandeliers and sconces are perfect, and you can also use floor lamps with shades that match the walls. Area rugs are a must in traditional living rooms, and you should choose something with a very traditional pattern like oriental or Persian. Leave the modern patterns for other parts of your home.

When it comes to accessories, keep them simple and elegant. Traditional living rooms don’t need a lot of clutter, so choose a few select pieces and display them carefully. Think vases, figurines, paintings, ornaments, and even plants. If you want to create a cottage-style charm in your living room, consider a botanical theme.

The rustic wooden beam and spare furnishings of the cottage work well with botanical prints and indoor flowering plants. You can also create a timeless vintage-inspired appeal by including shabby chic. Shabby chic takes the antique pieces from the traditional to vintage-inspired appeal.

Hang Curtains in Archive Fabric Prints

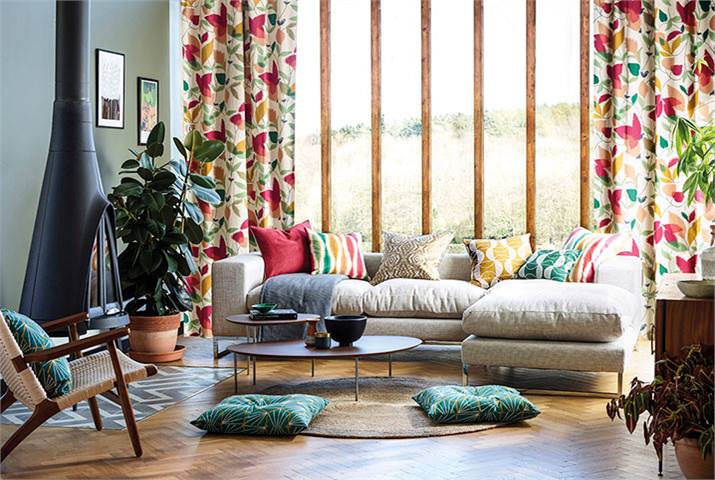
There are all sorts of window treatments to choose from but nothing says traditional style like classic floor to ceiling drapes. In that case, inject luxurious patterns and history into your living space using a rich archive of velvets, weaves, and embroideries. Traditional homes are often roomy with high ceilings and large windows, making it important to scale up.

Hang Curtains in Archive Fabric Prints
Image credit: https://www.freshideas.co.uk/

Choose large-scale patterns to get the proportion right, and don’t be afraid to match the same pattern on the walls and the curtains. Make sure your decoration pays respect to the past and lives today to enable them to work well with both traditional and contemporary furniture.

Furnish with Antique Pieces

One of the easiest ways to add traditional elegance to your home is by including antique furniture in your design scheme. Not only will you have unique pieces that are sure to impress guests, but you’ll also get the benefit of their classic style and craftsmanship. 

Fine crafted using traditional methods and boasting a quality of manufacture inimitable by many modern designs. Antique furniture makes a great choice for furnishing a traditional living room, whether you have a period property or looking to create a traditional look. 

When choosing antique furniture, consider the era it comes from so that you don’t accidentally choose too mismatched pieces or from different periods. A dated color scheme may also complement the look you’re going for. For example, a rich gold finish with dark wood tones may work well with a traditional style, while a gilded mirror will shine against a neutral-colored wall in an entryway. Also, go for items that will sit on open shelves without taking much space.

Fit Floor to Ceiling Bookshelves

No traditional living room is complete without floor-to-ceiling built-in bookshelves. Not only do they provide functional storage for all of your books, but they also add architectural interest to the room.

Consider having your carpenter build a custom design that perfectly fits your space. Or go for a vintage look by choosing wooden shelves and painting them a dark, contrasting color.

Decorate with Mirrors and Art

Mirrors and artwork make for great focal points in any room – but this is especially true in a traditional living room. Fill your walls with large-scale wall art either grouped or spread apart to create visual interest and conversation pieces. Plus, mirrors will bounce light around the room and make it feel larger.

Go All-Cream for a Luxurious Look

A traditional living space so sumptuous that it feels like a bedroom is not always a good idea, especially when you have kids and pets around. But if you want a living room with lots of luxury, then consider piling in the cream color. You can’t go wrong with the warmth that this color brings to a room. Plus, all cream-schemes will bring out all the different textures of your soft furnishings.

FAQS on Elegant, Traditional Living Room Ideas

What makes a room traditional?

Elegant shapes, refined textures are hallmarks of a traditional living room. Plus, a charmingly predictable sense of order makes traditional style one that’s always warm and charming. While decorating may change the trend, traditional living rooms will always be style.

What is the difference between a traditional and a classic living room?

The classic living room is more formal and elegant than the traditional style, meaning that modern pieces will elevate a space and give it a more formal, elegant vibe, while the traditional style will be a lot more relaxed and approachable.

Final Thought on Elegant, Traditional Living Rooms

As you can see, there’s no style that lends itself to elegance and sophistication better than the traditional style. In fact, traditional interior design has paved the way for several modern design styles you see today. If you want to give your home a classic and elegant look, traditional design is the way to go. You can even mix and match styles if you choose to. 


The post 10 Elegant, Traditional Living Rooms appeared first on Kitchen Infinity.

Did you miss our previous article…
https://chefbuano.com/?p=1136