The Easiest Fastest Way To Paint A House

The Easiest Fastest Way To Paint A House

Beautiful, fresh paint is the quickest way to make your house look new. But before you can enjoy that feeling of satisfaction, there are some steps you must take first.

In this article, we will discuss the easiest and fastest way to paint your house.

Get all the supplies you need

When learninghow to paint a house, one of the most important things to remember is to gather all of the supplies you will need before beginning. This includes items like primer, paint, a roller, a brush, and painter’s tape.

By having all of your supplies ready to go, you can minimize the time spent running back and forth between your house and the store.

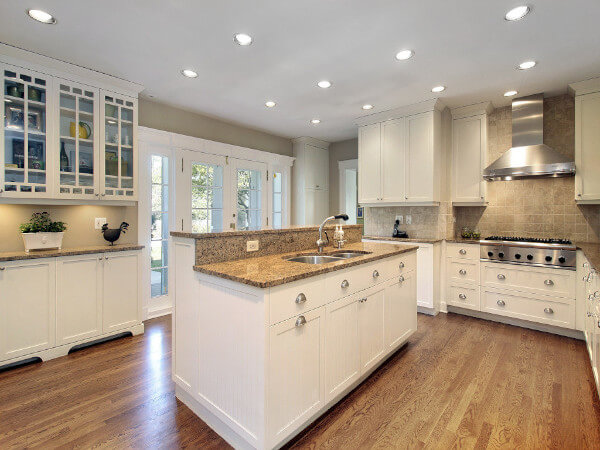
Cover furniture and other items

If you have any furniture or other items in the way, be sure to cover them up with newspapers, tarps, or old sheets. This will protect them from paint splatters and drips.

Furthermore, it’s a good idea to cover your floors with either drop cloths, tarps, or old sheets as well. This will help keep your floors clean and protected from paint drips.

Image Credit: http://houselogic.com

pply primer

Before painting your house, it’s important to apply a primer to the surface. Primer helps the paint stick to the surface of the house better and it also helps to prevent the paint from chipping and peeling over time.

Make sure to read the instructions on the primer canister carefully so that you know how to apply it correctly.

Use painter’s tape

If there are any areas of your house that you don’t want to be painted, use painter’s tape to mask them off. This will help prevent paint from getting on those areas.

Be sure to use plenty of painter’s tape and make sure that it is securely attached to the surface.

Paint one section at a time

When painting your house, it’s important to paint one section at a time and then let it dry for at least 24 hours before moving on to the next section. This will help ensure that the paint dries properly and doesn’t chip or peel.

If you try to paint too many sections at once, the paint might not have ample time to dry and this could lead to it chipping or peeling more easily.

Remove the tape carefully

After you’re finished painting, be sure to remove all of the painter’s tape as carefully as possible so as not to damage any of the paint underneath.

The last thing you want is for your paint job to look worse than before. By taking your time and removing the tape slowly, you can make sure that this doesn’t happen.

If there are areas of paint that got damaged by the tape, use a small brush and some extra paint to touch them up. Touching up areas like these will help ensure that your whole house looks great after painting it. With these steps in mind, you should be well on your way to painting your house.

Choosing your paint color

Wonderinghow to choose your paint color? The truth is that when it comes to choosing a paint color, there’s no one-size-fits-all answer. It all depends on your personal preference and the look you’re going for.

That being said, some tips can help make the process a little bit easier. The steps will help you narrow down the options and make a decision that you’ll be happy with.

1. Choose a light or dark color

When it comes to painting colors, one of the easiest ways to decide is to choose between light or dark shades. Light colors will make a room feel brighter and more spacious, while dark colors can give a room a more cozy and intimate feeling.

2. Consider your surroundings

Another thing to consider when choosing a paint color is your surroundings. If your walls are already colored a certain way, you’ll want to choose a complementary color so that they don’t clash.

3. Think about the mood you want to create

Think about the mood you want to create in the room. Do you want it to be calming and relaxing, or more energetic and fun? This can help you decide on the right paint color.

4. Decide between cool or warm colors

Cool colors are blues, greens, and purples, while warm colors are reds, oranges, and yellows. Cool colors are often seen as more calming, while warm colors can give a room a more energizing feeling.

5. Experiment with different shades

Once you’ve narrowed down your options, it’s always a good idea to experiment with different shades of the color you’ve chosen. This will help you find the perfect one for your space.

By following these simple steps, you’ll be able to choose the perfect paint color for your home.

Painting an exterior or interior house

Painting your house can make it look better and increase its value. However, choosing the right paint color is only half the battle. The other half is obviously the painting of the house.

If you’re painting your exterior house, there are a few things to keep in mind. First, you’ll need to make sure that the surface is clean and dry before you start painting. You’ll also need to use a primer to help the paint stick to the surface better.

7 Ways to Paint a House Fast | Ricciardi Brothers

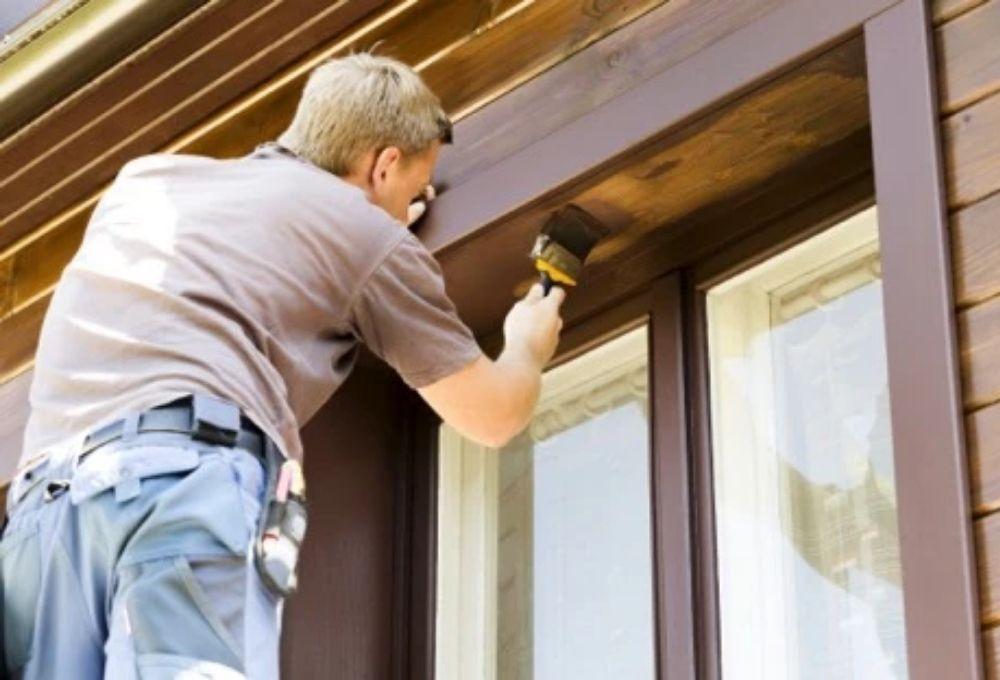
Image Credit: http://ricciardibrothers.com

Once you’ve done that, it’s time to start painting. Be sure to use long, even strokes and avoid painting over the same area more than once. This will help prevent paint from dripping and create a smooth, even finish.

Once you’re finished, allow the paint to dry for at least 48 hours before moving on to the next section.

If you’re painting your interior house, the process is a bit simpler. You’ll still need to make sure that the surface is clean and dry before you start painting, but you won’t need to use a primer.

Painting your interior house is a lot like painting your exterior house – you’ll want to use long, even strokes and avoid painting over the same area more than once.

Easiest Fastest Way To Paint A House – FAQ

What is the easiest way to paint a house?

The quickest and easiest way to paint a house is by using a sprayer. A sprayer will allow you to quickly and evenly cover the surface with paint.

Which is better, painting by brush or spraying?

Painting by brush will give you a more even finish than spraying; however, it will be much slower. Spraying will give you a less even finish than brushing, but it will be much faster.

Do I need any special equipment to use a sprayer?

No special equipment is needed to use a sprayer. You will, however, need to purchase a sprayer that is compatible with the type of paint you are using.

Can I use a sprayer to paint the inside of my house?

Yes, you can use a sprayer to paint the inside of your house. However, you will need to take precautions to avoid getting paint on surfaces that you do not want to be painted. For example, you will need to cover furniture and floors with plastic sheeting.

How long will it take me to paint my house using a sprayer?

It will usually take between two and four days to paint a house using a sprayer. The time required will vary depending on the size of the house and the type of paint being used.

Can I use a sprayer to paint trim or cabinets?

Yes, you can use a sprayer to paint trim or cabinets. However, you will need to take precautions to avoid getting paint on surfaces that you do not want to be painted. For example, you will need to cover furniture and floors with plastic sheeting.

What are the dangers of using a sprayer?

The main danger of using a sprayer is the possibility of getting paint in your eyes. You should always wear safety goggles when using a sprayer. You should also make sure to keep the area where you are spraying clear of people and pets.

Final Thoughts On The Easiest Fastest Way To Paint A House

In conclusion, there are a few things to keep in mind when painting your house. First, using a professional painter can save you time and hassle. Second, choosing the right paint color can make your house look great. Finally, using the right tools and techniques can make the job easier and faster. By following these tips, you can pain your house quickly and easily.

The post The Easiest Fastest Way To Paint A House appeared first on Kitchen Infinity.

Did you miss our previous article…
https://chefbuano.com/?p=1003

Removing Shoe Odors With Baking Soda

Removing Shoe Odors With Baking Soda

Shoe odors are caused by bacteria growing in moist, dark places. They can also be caused by sweat and oil from your skin that gets into the fibers in the shoes.

The great news is that baking soda is a great way to get rid of shoe odor – sometimes once and for all.

In this article, you will learn how to remove shoe odors from your home and shoes, along with other crucial tips to remember when it comes to getting rid of annoying odors in your home.


Image Credit: http://housewifehowtos.com

What the most common sources of shoe odors are

Shoes are often lined with materials that cause odors to build up during everyday use.

This buildup of sweat, bacteria, and oil is known as foot funk, shoe funk, or shoe odor.

Other sources of shoe odor include dirty shoes that have been worn without socks, smelly shoes that were never cleaned before being placed in storage, and smelly athletic gear that needs washing after heavy use.

How to remove shoe odors from your home and shoes

Baking soda will do the trick for most people when it comes time to clean out old stinky shoes or get rid of new stinky shoe smell.

There are several simple ways you can use baking soda to remove the funky smells from your shoes.

Simply sprinkle baking soda into the inside of your smelly shoes and lace them up as usual for a couple of days or until the stench is gone.

Another way to use baking soda to remove shoe odors is to make a thick paste with water and baking soda, apply it to any surfaces that have been affected by the odor, let it dry, then take a damp rag and wipe it away.

It’s also a good idea to place a small container of baking soda in your closet, gym bag, or other places where you store your shoes as this will help absorb any lingering foot funk.

When removing shoe odors from carpeting or hardwood floors, porous materials can be treated with a mixture of baking soda and water, or baking soda can be sprinkled on the carpet or floor and brushed with a broom.

Please note that this method will not work for concrete floors, most sealed wood floors, tile floors, linoleum tiles, vinyl tiles, varnished wood floors, granite countertops, etc., because baking soda cannot penetrate the surface to neutralize the odors from below. In other words, these surfaces would have to be stripped of their coating for the baking soda to get through to where it’s needed.

However, if you want to clean sticky grease off kitchen cabinets, then baking soda is the way to go.

How do I use baking soda for removing shoe odors? What do I need?

You’ll need a jar or container that’s big enough to hold the shoes you want to soak, baking soda, water, and an old towel. Then, follow these steps:

Step 1 – Fill your container halfway with lukewarm water Step 2 – Mix in 3 parts baking soda with 1 part water. For example, for every cup of water use 1/3 cup of baking soda or for every liter of water use 10 tablespoons (about 80 grams) of baking soda. Adding more baking soda will lead to better results but it could take longer to dry out.Step 3 – Soak your shoes in this mixture for at least 12 hours (for larger shoes like boots you may need even more time). Step 4 – After you’ve soaked your shoes for as long as needed, take them out and put them in a cool dry place to dry off. If you have a fan nearby set it to blow on low. This will speed up the process of drying your shoes and prevent any mildew from forming.Step 5 – Once your shoes are completely dry, sprinkle some baking soda inside them and leave overnight so that they can absorb any odors still left behind. You should do this before wearing your shoes again or putting them back into storage.

Why baking soda is the best way to get rid of shoe odor

Baking soda neutralizes odors naturally by absorbing unpleasant smells into itself where it then breaks down into inert components that are not likely to cause any further harm. This makes it much safer than other household cleaners which typically mask bad odors with artificial fragrances or kill bacteria with harsh chemicals like bleach or ammonia.

Using these types of cleaners often causes the stinky shoes you’re trying to get rid of to smell even worse and in some cases, the fumes can be harmful.

Baking soda is also a natural deodorizer so it will not only remove shoe odor but also any other odors that may be present in your home.

Tips for using baking soda in your closet, on carpeting, and hardwood floors

When cleaning your home with baking soda it’s important to keep these tips in mind.

Test an inconspicuous area before applying baking soda to a large surface

Applying baking soda to an inconspicuous area should be enough to test if it’s safe to move forward. In addition, this will also help you determine how long you should leave the baking soda on the surface before rinsing it off.

lways use a damp cloth when wiping away baking soda residue – dry surfaces can become scratched.

A damp cloth will help you remove any residue without scratching the surface. This is especially important when cleaning delicate surfaces like wood floors or furniture.

Never mix baking soda with other cleaners – this can create hazardous fumes.

When it comes to removing shoe odors using baking soda it’s always best to stick with just the baking soda and water. This is because other cleaners like bleach or ammonia can react with baking soda and create harmful fumes.

Keep in mind that baking soda may not be suitable for all surfaces

You should avoid using baking soda on marble, granite countertops, tile floors, varnished wood floors, painted walls, etc. If you do so, it can leave behind a dulling film or even etch the surface if left to sit too long before being washed away with water.  

Do not pour water onto baking soda if it is being used in shoes – this will damage the footwear.

Baking soda should always be used dry in shoes. If it gets wet, for example from a spilled liquid, the material will start to break down and eventually turn into a sticky mess that can damage your shoe.  

Baking soda can be harmful to pets

Put your pets away when using baking soda to clean as it can be harmful if ingested. Baking soda is not poisonous to pets but it can cause them to vomit or have diarrhea if they consume too much of it.

Removing Shoe Odors With Baking Soda – FAQ

Why should I use baking soda to remove shoe odors?

Baking soda can help you keep your stinky shoes smelling fresh. It’s the best way to deodorize and neutralize smells like those from your athletic shoes, footgear, and boots.

How to Clean White Shoes with Baking Soda | Arm & Hammer™

Image Credit: http://armandhammer.com

Is it safe to use baking soda in my shoes? 

Baking soda is a safe way to soak up any odor-causing bacteria or fungus which may be living in your sneaks. It’s also an all-natural remedy that has no side effects. However, if you happen to have any open cuts on your feet please refrain from using this method because of the risk of infection.

What if my shoes are wet?

If your shoes are wet, removing as much water as possible before using the baking soda is ideal. You can do this by using a shoe dryer, airing them out in the sun, or stuffing them with newspapers. Once your shoes are mostly dry, you can then proceed with the baking soda remedy.

Can I use this method for all types of shoes?

This method should work for all types of shoes, but if you have leather or suede shoes be careful not to soak them for too long. Baking soda can be harsh on these materials and may cause discoloration or damage.

Odors from sneakers, footgear, and boots can be a real nuisance. But with a little baking soda, these smells can be neutralized and removed in no time. Soak your shoes in a baking soda and water solution, or sprinkle some baking soda inside your shoes to help absorb any unwanted smells.

Baking soda can also be used tomake DIY laundry detergent so you can keep your clothes smelling fresh too.

Final thoughts on removing shoe odors with baking soda

In conclusion, using baking soda is the best way to deodorize and neutralize smells such as those from your athletic shoes, footgear, and boots. This safe solution can help you ensure your stinky shoes start smelling fresh.

The post Removing Shoe Odors With Baking Soda appeared first on Kitchen Infinity.

Did you miss our previous article…
https://chefbuano.com/?p=999

How To Remove Mold And Mildew

How To Remove Mold And Mildew

Mold and mildew can be a real problem for homeowners, especially if they’re not dealt with quickly.

Mold is notorious for growing in damp areas, such as bathrooms or basements that don’t have proper ventilation. Mildew grows where there is too much moisture present, such as on wet surfaces like windowsills or carpets.

In this article, we will discuss how to remove mold and mildew from your home.

What are mold and mildew?

The two types of mold and mildew work together to grow rapidly and cause health problems by releasing toxic spores into the air which can affect anyone who breathes them.

Image Credit: http://goldeagle.com

This combination can lead to symptoms such as coughing, sneezing, headaches, and difficulty breathing among other things. It’s important to take the issue seriously and eliminate it right away before it spreads any further.

If not, it can cause structural damage to the building and lead to costly repairs.

How do mold and mildew grow?

Mold needs three things to grow: darkness, food, and moisture. Mold spores are everywhere—inside your house or outside, in your plants or the soil. You might even have spores growing in areas of your home that you can’t see.

Mildew needs two of those things to grow: moisture and food. It feeds on a variety of organic materials, including plant sap, wood, paper, paint, and dust. Mildew can also grow on dirty fabrics.

How to clean mold and mildew

The best way to clean mold and mildew is by using a mixture of water and bleach. You can either use a spray bottle or a bucket.

Be sure to wear protective gear such as gloves and a mask while cleaning, especially if the area contains lead paint which can cause lead poisoning if not handled properly.

If the area is too large or the mold is too thick, you might want to consider hiring a professional to take care of it. Here are the steps involved when it comes togetting rid of mold

Clean off the mold or mildew with a solution of water and bleach

You can use a brush, cloth, or sponge soaked in the mixture and gently scrub away at the area.

It’s best to avoid using any chemicals that contain ammonia as this could increase your risk of breathing in harmful spores. Once you’ve finished cleaning, let it dry thoroughly before allowing anyone inside the area again.

Fill up the affected area with hydrogen peroxide then let it sit for 10 minutes before scrubbing it away You can fill up a bucket or spray bottle with hydrogen peroxide and apply it directly on top of the affected areas. Then leave everything alone for about ten minutes until you come back and scrub the surface clean. Use a fan to dry out the area after you clean it to prevent future growths

Now that the area is free of both mold and mildew, simply dry it thoroughly by sweeping or using a vacuum cleaner. Open up all doors and windows inside your home so that there is good ventilation throughout the house.

You can also use a fan for faster drying time if you don’t want to leave anything open overnight.

Be sure to wear gloves when cleaning anything that could contain lead paint, which can cause lead poisoning if not handled properly

Lead poisoning can be very serious depending on how much one has inhaled over an extended period. Make sure you’re wearing protective gear when cleaning any surfaces that might contain such paint.

Inspect the area for any signs of future growth and take steps to prevent it

Mold and mildew can grow back quickly if you’re not careful. Be sure to inspect the area regularly for any new growth and take measures to prevent it from happening again.

Mildew vs Mold – What's the difference? | Woodard

Image Credit: http://woodard247.com

This could include fixing any leaks in your home, increasing ventilation, or keeping surfaces clean and dry.

Other surfaces where mold and mildew might need to be removed

Mold and mildew can grow on a variety of surfaces both inside and outside your home. Here are some other areas where you might need to take action:

Basements: Basements are often damp and dark, making them the perfect place for mold and mildew to grow. Be sure to clean any spills or leaks as soon as they happen and increase ventilation by using a fan or opening up windows.Bathrooms: Mold and mildew can form on shower curtains, tile grout, caulking, and even the bathtub itself. Be sure to clean these areas regularly and keep them dry at all times.Sinks: Sink drains are a common place for mold and mildew to grow. Be sure to clean out your drain at least once every two weeks to keep it free of any buildup.Windows: Mold can form on window sills if they’re not cleaned regularly. Be sure to wipe down these areas with a bleach solution whenever you notice the growth of mold or mildew.Cooking surfaces: You might want to avoid using any wooden chopping boards, sponges, or brushes to prevent the growth of mold and mildew whenever you cook.Flooring: Many types of flooring can be affected by mold and mildew including linoleum, wood, and laminates.Vehicles: If left unattended for long periods, mold can grow underneath car seats which may lead to breathing problems.Clothes: Mold and mildew can form on clothing if they’re left to sit for too long without being laundered. Machine washable clothes should be washed after every few uses while non-washables should be cleaned with a solution of water and bleach then hung out in the sun to dry.Stucco: If you notice any areas of your stucco walls that are peeling or bubbling, then there’s a good chance they’re infected with mold. Be sure to scrape off the affected areas then apply an anti-fungal paint or primer directly onto the surface to prevent further growths.Cleaning stucco is a technical process and you should contact a professional if you aren’t sure how to handle it.– Wood: Both the inside and outside of your home’s wood walls need to be properly maintained for them to avoid any serious damage from mold growths. Be sure to inspect these areas regularly and treat them with a protective coating of paint or primer whenever they start showing signs of wear.

Removing mold and mildew from your home can be a bit of a daunting task, but it’s important to take action as soon as possible to prevent any long-term health problems.

Final thoughts on how to remove mold and mildew

In conclusion, removing the mold and mildew from inside your home is a necessary step to take if you want to keep yourself and others safe. Remember, mold and mildew can grow back quickly, so make sure to inspect the affected areas regularly for any new growths.

The post How To Remove Mold And Mildew appeared first on Kitchen Infinity.

Make galley kitchen work for you

Make galley kitchen work for you

If you’re living in a small space, with a limited kitchen area, some things can be done to make your galley kitchen work for you. 

Even though the problem with a galley style is typically the lack of storage and counter space, there are some innovative solutions out there for those looking to maximize their small spaces.

In this article, we will go through the basics of a galley kitchen, as well as give some useful tips on how to make it work for your needs.

What is a galley kitchen?

A galley is a narrow eating area that includes cabinets and counter space along both walls. There is no doorway to separate this type of kitchen from other spaces in the home. This layout typically spans between 6-8 feet in width.

Image Credit: http://housebeautiful.com

Galley kitchens are often found in apartments and small homes, due to the lack of space. If you’re living in a small space, with a limited kitchen area, some things can be done to make your galley kitchen work for you.

How to make your galley kitchen work for you

The following are some creative ways to make a galley kitchen work for you.

Maximize your counter space by using items that can be used as both decoration and function.

By maximizing your counter space you can make your galley kitchen feel less cramped. One way to do this is by using items that can be used as both decoration and function. 

Another way to maximize your counter space is by using trays or baskets to store utensils, pots, and pans, or other small appliances. This will help you keep your counters organized and free of clutter.

Storage baskets are also a great way to add color and interest to your kitchen décor. You can find baskets in a variety of materials, colors, and styles to match your specific needs and taste.

Organize your space in a small area

One of the best ways to make a galley kitchen work for you is by organizing your space. This means utilizing every inch of available counter and cabinet space.

One way to do this is by using stacking shelves or racks to store pots and pans, or other kitchen items. This will free up cabinet space, and make it easier to find what you need when you need it.

Another way to organize your space is by using a pegboard to hang utensils, pots, and pans, or other tools. This will keep them within easy reach and will help to declutter your counters.

There are many different ways to organize a small kitchen, so find the system that works best for you. By organizing your space, you’ll be able to make the most of your limited area.

You can also add baskets or trays to your counters. This will provide extra storage for utensils, spices, or other small items. Baskets and trays come in a variety of shapes and sizes, so you can find one that will fit your specific needs.

By adding storage to your kitchen, you’ll be able to keep everything organized and within easy reach.

This will make your life easier, and help to declutter your kitchen.

Remember that it’s important to find storage solutions that are functional for you. For example, if you don’t cook much at home, then adding a huge rack of spices might not be practical for you. Instead, perhaps opt for a small shelf or tray with storage options that are more tailored towards your needs.

dding color with paint or accents

Adding paint or other accents can help to brighten up a room, and make it appear larger. This is especially true in smaller kitchens where darker tones can make the space feel cramped and cluttered. If this applies to you, consider painting the walls white or another light color to create an inviting atmosphere.

You can also add color with accessories. For example, adding a brightly colored vase or bowl to your countertop can brighten up the space. You can also use colorful kitchen towels, placemats, or curtains to add personality to your kitchen.

By adding color in small doses, you’ll be able to make your galley kitchen feel more inviting and spacious.

Designing around appliances

When designing a galley kitchen, it’s important to keep the placement of appliances in mind. This means that the oven or stovetop should be placed against one wall, and the sink should be placed against another. This will help to maximize your workspace and make it easier to move around the kitchen.

If you’re not able to place the oven or stovetop against a wall, consider using an island or peninsula to create an extra workspace. This will also help to separate the cooking and eating areas in your kitchen.

By designing around your appliances, you’ll be able to make the most of your space and increase your efficiency while cooking.

Other factors to consider when working with a galley kitchen

The average kitchen size

Theaverage kitchen size in the U.S. is around 250 square feet (23 square meters), and even less in urban areas. So, if you’re looking for practical ways to make your galley kitchen work for you, then remember that there are always options available that others have made use of.

Researching interior design blogs or magazines can give you further ideas to create an organized and functional galley kitchen.

All in all, the size of your home shouldn’t determine how much clutter it has. 

The number of doors and windows

Kitchens with multiple exterior entrances or exits can make it difficult to design. You’ll need to choose a style that works for you, and also makes sense with the layout of your room. Also, consider how much natural light your kitchen gets before choosing a color scheme.

If you live in an older home, then there might be some obstacles along the way as well. For example, if your house was built decades ago, there’s a good chance that there are thick walls instead of doors where exterior entrances are located. 

24 Galley Kitchen Ideas - Photo of Cool Galley Kitchens | Apartment Therapy

Image Credit: http://apartmenttherapy.com

If this applies to you, keep in mind that you’ll have less storage space than someone who has exterior doorways on both sides of their kitchen.

Interior design plays a big part

If you want to make your kitchen feel more spacious, remember that theinterior design of your home also plays a huge role. Placing furniture in the right places can help to create an illusion of space. For example, using a small table instead of a large desk can help to open up a room.

Additionally, using light colors on the walls and ceilings can also make a room feel larger. So, if you’re struggling with cramped quarters in your galley kitchen, consider these simple tips to help make your space work for you.

Final thoughts on making galley kitchen work for you

In conclusion, working with a small kitchen can be challenging, but it’s doable with some creativity and organization. By utilizing these tips, you’ll be able to make your galley kitchen work for you. So don’t despair if your kitchen is on the smaller side – there are plenty of ways to make it functional and beautiful.


The post Make galley kitchen work for you appeared first on Kitchen Infinity.

Did you miss our previous article…
https://chefbuano.com/?p=992