How To Hang A Door

How To Hang A Door

You want to change the look of your home by a simple act such as replacing a door. But you don’t have time or money for a professional installation. Installing a new interior door can be simple once you know how to do it. The key is knowing what tools and materials are required and having the right safety gear on hand.

We’ll walk you through each step of the process so that hanging your doors will be easy as pie. No matter whether your project requires one or two doors, we’ve got all of the instructions, tips, and tricks it takes to get them hung safely and securely in no time at all.

Our guide includes everything from choosing hardware to cutting out holes for knobs and locks. And we even show you how to install decorative molding around your new door’s frame if desired. With our handy checklist at hand, there’s no reason why anyone should struggle with hanging doors ever again.

Required Tools and Materials

Sharp chiselScrewdriverUtility knifePencilHandsawTape measureDoor slabElectric or smoothing planeSpirit levelWooden Shims

Steps on How to Hang a door

Remove the Existing Door

If the old door has a transom, remove it from its hinges before you begin to hang your new door. If there’s an old lock in the way of your new slab, position the chisel where it meets the jamb and tap lightly with a hammer until you can knock out the plug by hand. Place wedges of wood underneath your old door to support the jamb while you work. 

Image caption: https://www.wcmanet.org/

Then unscrew it from its hinges and remove it from the opening. If your hinge is still in good condition, you can set them aside for reuse. Be careful not to damage the hinge recesses in the jamb while you remove it. Also, don’t hang a new door in an old door frame, or you’ll end up fixing a sagging door in the future. 

Measure the Space for Your New Door

Move on to measure the space for your new door. You can use a stud finder to locate the framing members to make sure that you can secure the hinges into place. Be sure that you center it evenly across the opening and between both jamb edges. 

The old door can also guide you, as you can lay it on the new one and mark where you’ll cut the new door with a pencil. You can work with someone to help you position the door in the door frame and level it.

Get the Floor Level

Take your spirit level and check to see if the threshold on your new door is level with the floor. You can use a pencil and mark the high and low points where needed. If the floor is finished but not leveled, then you’ll need to trim one of the door jambs. 

Use shims to position each door jamb evenly against the floor. Mark the shim at the point where the gap is big using a sharp pencil. Measure the thickness of the shim as that measurement is what you’ll need to cut off your door jamb from the opposite side. You can also learn how to level a floor so you avoid any such future problems when hagging a door.

Mark the Hinges

The hinges on a door are usually placed at 1/3 of the total height from the top. Mark the point around the edge of the door, as well as where you will want to hang your new hardware on both sides. Use a sharp pencil to mark clear lines on both the lining and the door.

Once you’ve marked all the hinge positions, remove your door from the lining, place it in the saddle, and wedge it. After that, hinge the side up, square all the pencil lines, and hinge it to the opposite side. Use a straight edge and level to ensure that your door is completely square and plumb. Use shims under either side of the hinges to adjust for deviations, then tack each hinge in place with nails only along the top line.

Place the hinge to mark its length on the door’s edge. Slide it up to the line and mark the first hole. Set your marking gauge up and scribe the width of the hinge into the door edge. Use a sharp Stanley knife to ensure your door won’t always close flush. You can repeat to ensure all hinges are positioned and set the gauge to the same thickness as the hinge between the door and the frame.

Chop the Hinges Out

Use a sharp chisel to chop your hinge horizontally from the top and bottom. Sand, the remaining pencil lines, then drill correct pilot holes for your screws. You can also use a mallet to cut around the perimeter of the hinge recesses you’ve marked. By placing your chisel at 45 degrees, make several cuts apart and to the depth you’ve marked across the wood grain. Put the flat side down, then use the chisel to pare away the wood as you position the hinges. Drill all the holes and ensure one screw gets into each hinge flap.

Trim the Bottom

This is where you’ll need an electric plane or circular saw. Only use them if you need to remove a lot of trims from the bottom. You can as well score your door with a sharp Stanley knife before cutting the bottom to the angle you have designed. This will prevent your door from tearing.

Hold the Door Steady

Now it’s time to attach your wooden blocks on the sides of your interior door to the wall. Place your door in the middle of the space and check the level. Use the spirit level to ensure that your door is even on both sides, then mark where you need to drill the wooden blocks into the wall. Make sure the jambs are resting on the blocks to maintain the correct height.

If the jambs aren’t in the correct position, cut or plane the door using a saw or a block plane. Check if the hinge side of the door is plumb by using the level. If the hinge side of the door is plumb, attach the blocks by hammering 2-inch, 15 nails through each block on the hinge side and into the wall. Check if the gap between the side of the door is even, then do the same for the blocks on the latch side.

Ensure Your New Door will Shut

Now that your door is held in place make sure it will close properly. All you need to do is take out the plug that holds the door slab, then open and close the door as you carefully watch the gaps. If the jambs aren’t in the correct position, cut or plane the door using a saw or a block plane.

If one part is hitting the door, stop first and make sure you adjust the door jamb before you proceed. Move the jamb from the top to the bottom until the problem is solved. If there’s no gap between top and bottom, use a belt sander or plane to create a small gap.

Place Shims Behind the Hinges

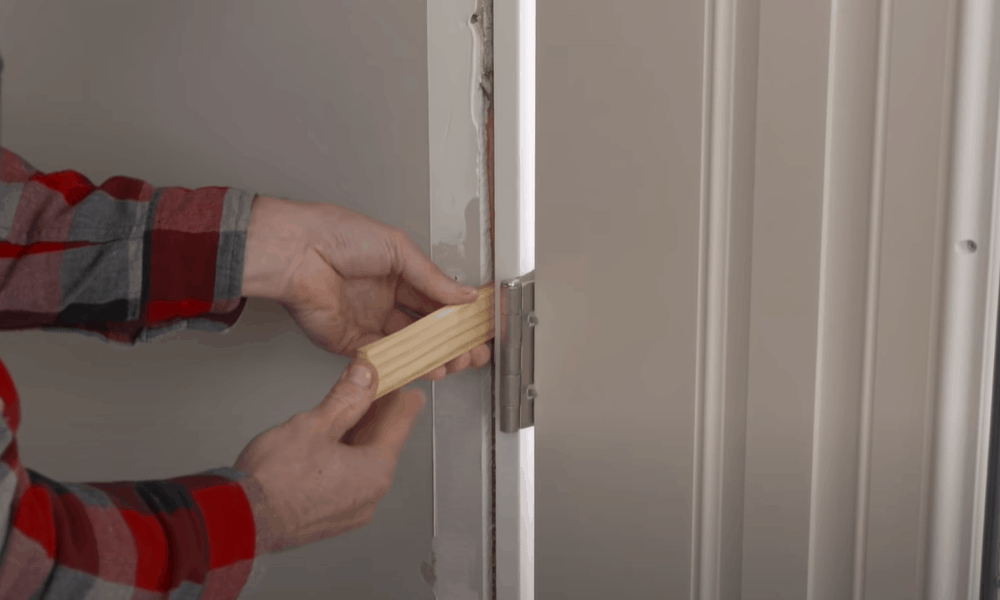
If the hinge is too close to the floor, you’ll have a hard time opening and closing them. To avoid this, put a shim behind each hinge. Your door may not stay open by itself because its hinges aren’t level with each other. You can solve this dilemma by popping out the cover on one of the hinges and moving it to a level that aligns with the other.
Place Shims Behind the Hinges
Image caption: https://www.wcmanet.org/wp-content

After unscrewing and removing the middle screw from each hinge, put a shim behind the hole. Then check your jamb door if it’s still level. If it’s not, add the shim until you get a level door. Check if your door jambs are level with the wall. Check the gap between the slab door and door jambs if they’re still even. Double-check to ensure the gap between the door stop and slab is also even. You don’t want to come back here to learn how to fix a misaligned door, right? That’s what will happen if you skip this step.

Screw the Hinges

Start with the hinge plate at the top of the door. Move to insert a screw into the hole nearest the bottom of the plate, then tighten it. Repeat the same way with the lowest hole on the hinge plate at the bottom of your door. Open and close your door to ensure it works properly. Once you’ve set the hinge at the top of the door, put a level on top of your slab door and make sure it is perfectly even. You may need to adjust the height of the hinge plates if one side doesn’t line up with the other.  

Mount the Latch and Doorknob

If your door frames have a strike plate, then measure how far it’s from the floor and measure the corresponding position of the door. You can also prevent your interior doors from slamming in high winds by enforcing the latch plate. All you have to do is to drill a bit and countersink a hole in the top corner of the space for the latch plate.

Make sure you position your hole away from the edge of the frame. You need to drill a hole in your door that matches the size of your latch plate. Then, position both pieces of wood together while you’re sure they’re level and mark exactly where you need to drill holes.

Remove the Blocks and Hang Your Door

Now that your door can open and close smoothly, the next step is to remove the blocks you have used to prop the door up. Follow the instructions that came with your door for this part of the installation. Use the nails and filler to cover any holes that you made.

Now, find out how to hang a door. Hold your door open on the wedges, and then screw the screw to the hinge using only one screw at each stage. Lift your interior door out of the clamp to give it a frame at a slight angle, then begin by screwing the top hinge to the lining.

FAQs on How to Hang a Door

Can you hang a door without a door frame?

Yes, it’s possible as long the frame is in good condition and not warped or worn out. The door frame doesn’t come with hardware attached; instead, you can either reuse the old frame hardware or replace it with new hardware in the new slab. But a pre-hung door comes set in a frame.

What is a pre-hung door?

The pre-hung door is the package of a door with its frame attached to it. You can hang the new slab on your existing door frame using three basic tools: drill, screwdriver, and hammer.

Can you hang a door on drywall?

Yes, but interior doors should be installed after the drywall is installed. This is because the drywall needs to be secured by nails if you intend to hang door slabs. If not, the door will not hold its weight and may eventually come crashing down, which can cause damage to its hardware, like hinges and screws. 

Hanging your door after installing the drywall will make your doors stay cleaner and prevent any scratches and dents on the door surface.

Final Thought on How to Hang a Door

Hanging a door by yourself is much easier, especially if you’re using wooden blocks to hold the door in position. You don’t need any additional support. So, it’s something you can do on your own. If you have any questions, don’t hesitate to leave a comment below, and we’ll get back to you as soon as possible.


The post How To Hang A Door appeared first on Kitchen Infinity.

Did you miss our previous article…
https://chefbuano.com/?p=739
11 Best Programmable Thermostats

11 Best Programmable Thermostats

With the increasing temperature and the rising energy costs, it is necessary to find a solution that can help you save money. The heating and cooling bills are the most expensive part of your utility bill. They account for 50% to 60% of your total monthly energy use, depending on where you live. 

You can save money by reducing how much heat or air conditioning is needed in any room. This doesn’t mean that you have to compromise on comfort. Programmable thermostats let you set temperatures according to a schedule so that the rooms are comfortable when they’re occupied while saving energy when they’re not being used. 

To save money on your utility bills, it is better to go for programmable thermostats instead of manual thermostats. But not all of them can provide the services you need. To help you choose the most suitable ones, we’ve compiled some of the best programmable thermostats to install in your home:

1. Honeywell Home Programmable Touchscreen Thermostat

This is one of the best programmable thermostats available in the market. It helps you save a lot of money on your utility bills as it features a technology called Smart Response Technology. This feature automatically calculates how long it will take to reach a certain temperature and switches off or turns on the heating or cooling systems for that particular period.


Image credit: https://www.ubuy.ke/

In addition to temperature, the Honeywell thermostat has a sleek square design with a large touch screen display. This screen shows indoor humidity percentage and time of the day using a cool-blue backlight that you can easily use anywhere in your room. 

The thermostat is capable of automatically sensing when your home needs cooling and heating based on your preference. The temperature range limits also allow you to set maximum and minimum temperatures so the auto schedules won’t go beyond your comfort level. It’s compatible with most two-stage HVAC systems.

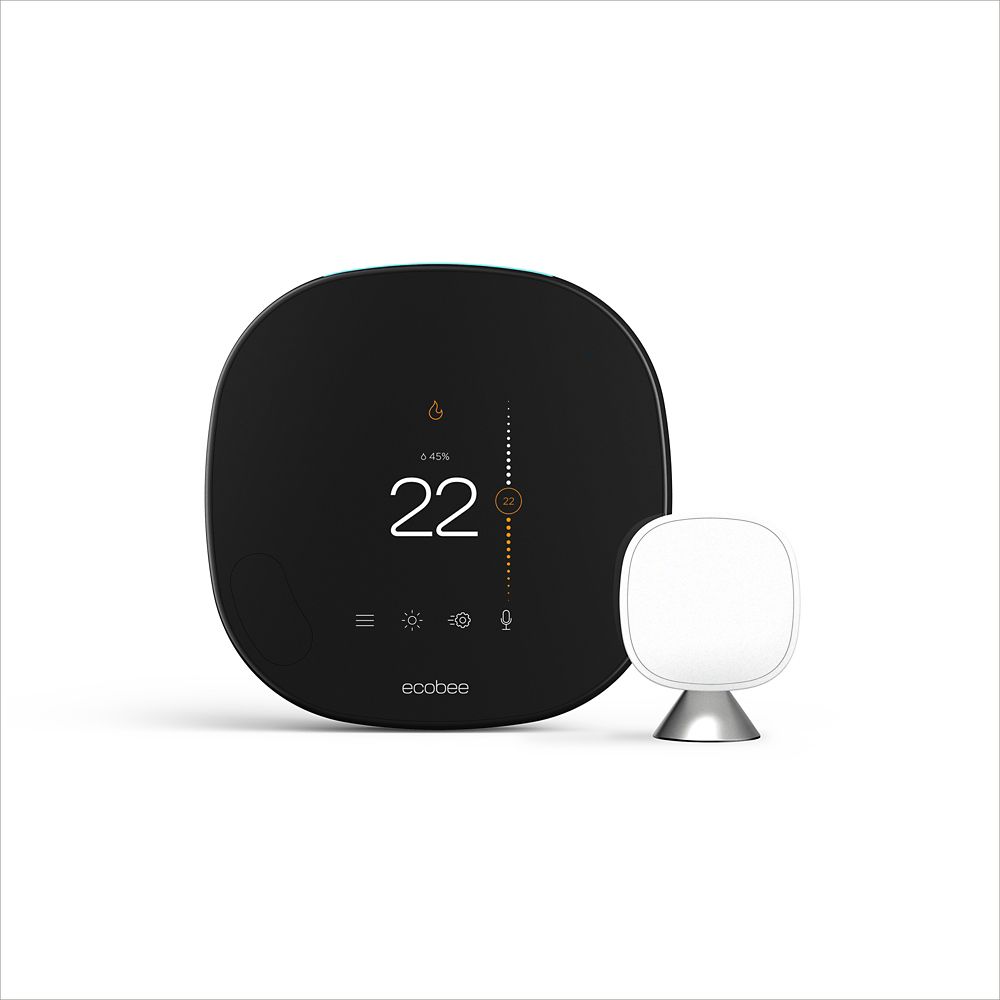
2. Ecobee SmartThermostat with Voice Control

The Ecobee thermostat is designed to respond to your voice commands. This shouldn’t be surprising, as it was built for Alexa users looking for a way to control their heating and cooling system hands-free. The device also has room sensors that monitor the temperature in multiple locations within the house to adjust each terminal unit. Its 24-hour programming abilities can save up to 23 percent annually on heating and cooling costs.

Ecobee SmartThermostat with Voice Control
Image credit: https://homedepot.scene7.com/

If you want a thermostat that you can control at the comfort of your couch, Ecobee is the right choice. Ecobee model also integrates with a smartphone, smartwatch, and other popular smart home products like Google Assistant, Apple Home Kit, and Samsung SmartThings.  

3. Mysa Smart Programmable Thermostat

It’s a smart thermostat made for music as it has Bluetooth technology that allows it to stream music. Mysa Smart Thermostat is an affordable, high-quality thermostat that is very easy to install. The user can control it through the app or by voice with Amazon Alexa or Google Assistant. It’s the best smart thermostat for apartments.

Mysa also comes with additional features like geo-tracking and scheduling, so you know when your energy-saving habits are kicking in during specific times of the day. Finding a smart thermostat with electric baseboard heating can be challenging, and one of the best options available in the Mysa Smart thermostat for electric baseboard heaters can be challenging.

It also works best with electric fan-forced heaters, and it requires one neutral or second live wire. You can set a schedule and track energy using the Mysa app. The app experience is similar to what you’ll find in other smart devices, which provides remote control of the system, geofencing options, and the ability to chart energy consumption. Mysa also plays nice with smart home assistants, including power extender Kit, Amazon Alexa, and Google Assistant.

4. Google Nest Learning Thermostat

The Google Nest Learning Thermostat is one of the best smart thermostats available. The device features a large display and good connectivity via Wi-Fi, giving you remote access to your heating and cooling system through an app. It works with some electric heaters, and it’s not compatible with geothermal or electric baseboard heaters. 

Google Nest Learning Thermostat
Image credit: https://richmedia.ca-richimage.com/

The best smart thermostat like Nest Thermostat can be controlled at the comfort of your smartphone. This gadget will also help you learn your schedule and the temperatures you like and automatically create a program that will help you save energy and stay comfortable. 

Its sleek circular design comes in various metal finishes and is compatible with 95 percent of heating and cooling systems. This thermostat is Wi-Fi enabled, meaning that you can adjust it from your smartphone, plus you can manually adjust it via the unit’s outer dial.

Thanks to its smart programming, it can save you up to 12% on heating costs and 15% on cooling costs. It can also show you your energy usage and insights on how much energy you’ve used and why on your phone. You may require professional installation to install the c wire if you don’t have one.

5. Honeywell Home Programmable Thermostat

This best smart thermostat works with Amazon Alexa, plus it provides push notifications when you’re away from home. It’s compatible with 95% of heating, and cooling systems, easy to install using the Honeywell Home app, and also allows for two-way communication so that your HVAC system can alert you when there are potential problems.

If you like a thermostat without smart features and touchscreens but still want something easy to work with, the Honeywell 5-2 Day Programmable Thermostat is a good choice. It doesn’t come with advanced features like geofencing or voice control, but it does help you control your heating and cooling system with simple programming options. 

The 5 to 2 programming allows you to have a different four-period schedule for the two weekend days, and the unit offers positive and negative one-degree temperature control. The thermostat is backlit for easy viewing. You should also note that it is only compatible with low-volt heating and cooling systems. It’s the best smart thermostat for multiple zones.

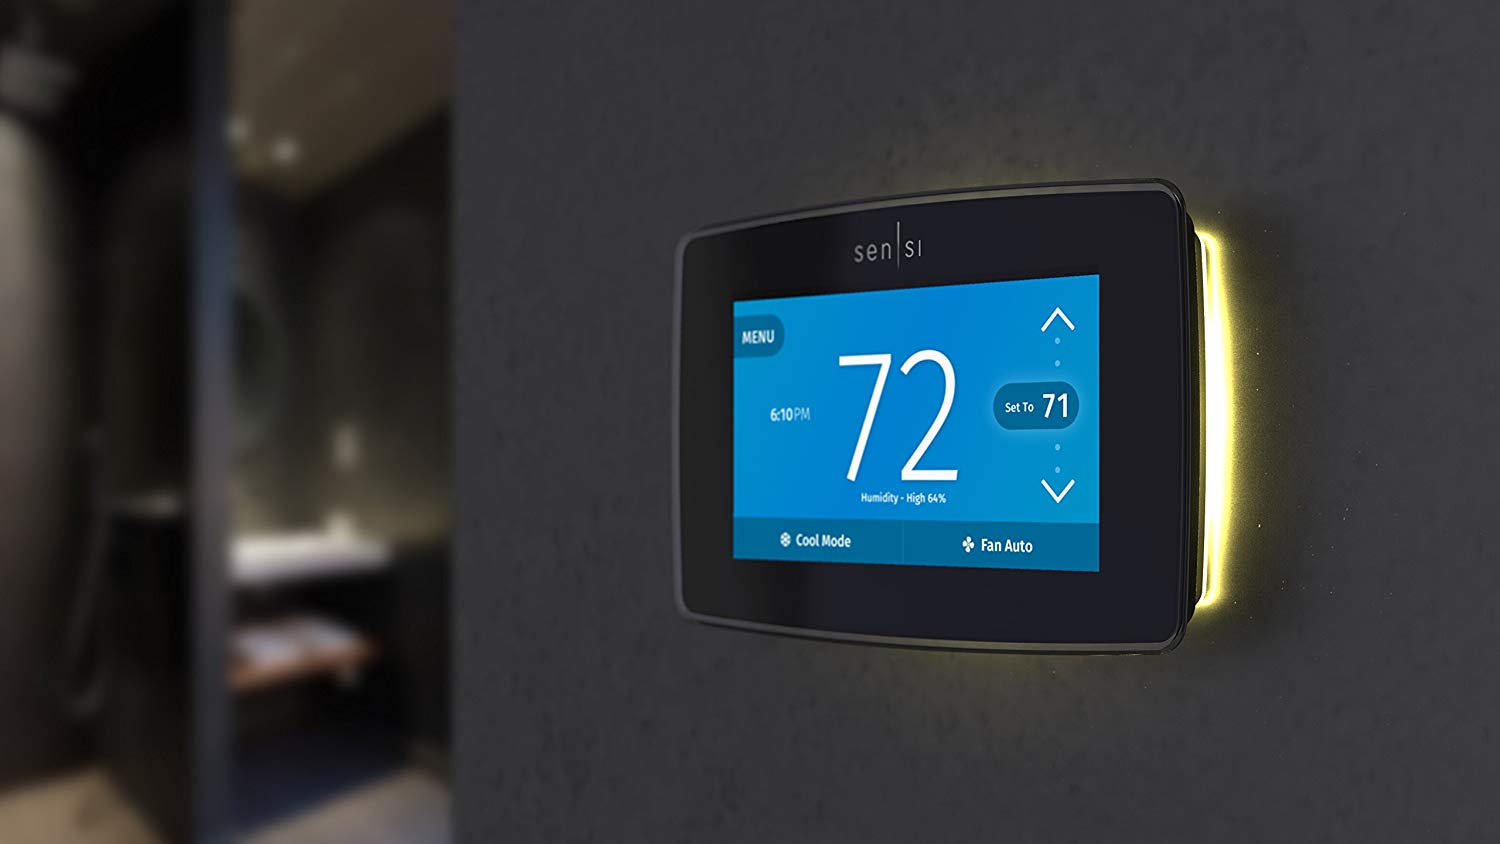
6. Emerson Sensi Touch Wi-Fi Smart Thermostat

If you’re looking for a unit that goes above and beyond, the Sensi Touch Wi-Fi Smart Thermostat deserves your attention. This device not only lets you control your HVAC system remotely but adds in some smart home capabilities as well.

Emerson Sensi Touch Wi-Fi Smart Thermostat
Image credit: https://i2.wp.com/www.automaticsmarthome.com

The Sensi Touch Wi-Fi Smart Thermostat works with Siri—ask your hub to set the temperature in your home. You can even control it when you’re not at home, thanks to geofencing capabilities. Like other units, this one also offers an auto-away mode that adjusts the temperature based on whether or not someone is there. 

This thermostat has a color LCD touchscreen and replaces your existing wall unit. Using wireless capabilities, it functions with iOS and Android devices. It also works with Amazon’s Alexa so that you can ask for the temperature via voice. 

Sensi touch offers advanced features such as flexible scheduling and geofencing, plus, it can save you up to 23 percent on HVAC energy usage. It is compatible with popular smart home platforms like Amazon Alexa and Google Assistant. It will also send you smart alerts if it detects extreme temperature and humidity levels in your home.

7. Orbit Clear Comfort Programmable

This thermostat is another option to consider. Orbit Clear Comfort is more than just a thermostat; it’s also an automatic system that allows you to customize heating and to cool for up to four areas in your home. This means that if you have separate zones or rooms in your home, you can control the temperature of each space separately.

Orbit Clear Comfort is also compatible with smart home platforms, including Apple Homekit and Nest. Like the other Orbit option, it will also send alerts if extreme temperature or humidity levels are detected in your home. This is a one-stage thermostat that works with gas, oil, and electric furnaces. 

You can also use it with HVAC systems,  central air conditioners, two hotwire systems, millivolt systems, and heat pump systems that do not have backup heat. However, it’s not designed for use with baseboard heaters and multi-stage heating and cooling systems. Its early start feature ensures your desired temperature is reached by the programmed time.

8. SunTouch Command Touchscreen Programmable Thermostat

The SunTouch digital thermostat is another option that includes a touchscreen display for easier use. This model also has a wide temperature range, works with all types of heating and cooling systems, and is compatible with a number of smart home platforms.

It syncs up to the Nest app so you can help save energy when you’re not at home. It also requires remote control. The SunTouch thermostat is designed for homes with insulation and offers precise temperature control (0.5 to 1 degree Fahrenheit) without experiencing any significant fluctuations in temperature. 

It’s rated to work between -4 degrees Fahrenheit and 122 degrees Fahrenheit, making this programmable thermostat an excellent choice for radiant flooring. It is easy to install if you have heated floors, and you can use it as a replacement for any floor heating thermostat that uses 10k sensor wire. It has a built-in GFCI for safety, and its SmartStart technology ensures your floor has reached the set temperature at your scheduled time.

9. King Programmable Electronic Line Voltage Thermostat

This thermostat has a large LED display that’s easy to read from across the room, and it has a backlight for nice, clear viewing. It should fit most standard electrical boxes, and it comes with a quick install guide. It can be programmed from one week to seven days, and you can choose between two start times per day or four start times per day.

It has a simple two-button control accessible when the cover is closed, keeping the programming buttons out of sight and away from curious children. It has a battery backup that protects the programmed settings from power outage resets.

10. Schluter Ditra Programmable Floor Heating Thermostat

Suppose you need to control the in-floor heating system to ensure that temperatures remain consistent and comfortable for all residents at your home or workplace. In that case, you need to install this programmable thermostat. This thermostat boasts a large touchscreen display that is easy to read and use.

A built-in floor temperature sensor and the display can indicate time, date, temperature, and whether the system is operating via manual setting. It has six different programming periods that allow the user to select the ideal temperature for the time of the day. This means warmer floors at night and in the early morning to help prevent freezing surfaces that can cause bare feet to coil.

11. Lux Products Programmable Thermostat

Installation is easy for this thermostat. You can start to program it in a matter of minutes, and it does not require a lot of effort or time. These thermostats come with a user manual that has clear instructions you can follow to set up your new device. Another great feature about the Lux Products Programmable Thermostat is that it can be installed by just about anyone.

It comes with an installation manual, and you can use this as a guide when installing the device. All of the materials you require for the installation will come with your purchase of the thermostat. It is easy to program, and since it has a large display screen, those who have vision problems will not have a hard time reading what is required.

While you are sleeping, you can set the device to turn off the heat or cool air so that your house won’t be too cold or hot when you wake up in the morning. If you are looking for a programmable but you’re not interested in any smartphone or smart home integration and remote control of the heating and cooling systems in your home, then this programmable thermostat may be the best choice for you.

What to Look for in a Programmable Thermostat

Ease of Installation

When you are ready to start, the first thing you will need to do is install the new programmable thermostat. With most modern devices, this means removing a few screws and wires from your old thermostat. New models come with helpful instructions and have features in their respective apps to help you connect thermostats to your HVAC system.

Scheduling Options

The next thing you should look for in a programmable thermostat is how easy it will be to program the devices. Many appliances these days have touch screens that allow you to select your schedule with your finger, but other models require you to cycle through each day of the week and power button up or down on each one.

Features and Settings

Many of the most advanced thermostats feature Wi-Fi connectivity and/or an accompanying smartphone app, allowing you to control your heat from anywhere with a cellular signal. Some models come with extra features such as humidity sensors, backup batteries, and more. These can all be nice additions to have, but they will likely only cost you extra money.

Price

As always, the price is a major factor in what you get for your money. Usually, more features or settings will come at a higher cost, while simpler models are typically less expensive.

Be sure to consider all the features you want before deciding if it’s worth spending extra on them or not. We’ve also reviewed some of the best programmable thermostats available under $100 that are nice picks for those looking to save money.

Smart Speaker Compatibility

When deciding on a thermostat, one of the most important things is making sure it’s compatible with your heat source. Most modern models are compatible with gas, oil, electric, or even heat pumps.

If you have a heat pump, you’ll most likely want to look for something compatible with it. Some speaker models are also compatible with Amazon Alexa or Google Home so keep that in mind when deciding on one that’s right for you.

esthetics

The aesthetics of the model are also important to consider. Although most thermostats require power and a C Wire, some models will work with an AA Battery while others have more unique designs that fit within your home’s décor.

FAQs on Best Programmable Thermostats

re programmable thermostats suitable for most homes?

Yes, programmable thermostats are compatible with most cooling and heating systems. 

Can you install programmable thermostats yourself?

Yes, especially if you’re replacing an old programmable thermostat with a similar model.

Final Thought on Best Programmable Thermostats

The type of programmable thermostat you choose will depend on the amount you’re willing to spend, plus the features you’re looking for. If you’re not tech-savvy, then you won’t need all the home integration and app connectivity. But whatever type you choose, it will help you cut down energy costs without sacrificing your comfort.


The post 11 Best Programmable Thermostats appeared first on Kitchen Infinity.

Did you miss our previous article…
https://chefbuano.com/?p=734

Incredible Uses For White Vinegar

Incredible Uses For White Vinegar

Everyone knows that vinegar is great for cooking, but did you know it has many other uses? Vinegar can be used around the home in lots of ways. The best part is that it’s inexpensive and readily available.

If you’re looking for a natural alternative to fabric softener, white vinegar is just the thing. This common household ingredient is inexpensive and easy to find in any grocery store. It’s also mild enough to cause skin reactions or discolor clothing as some detergents might.

Here are some great uses for vinegar around your home. You’ll save money by using less harsh chemicals.

Use White Vinegar to Kill Weeds

One of the best ways to kill weeds is by using white vinegar. Pour white vinegar directly onto the leaves of the plant you’re trying to get rid of. You can also use full-strength vinegar in spray bottles to kill weeds on sidewalks or driveways. Just be sure you don’t get any on your clothing, as it will stain. For best results, use vinegar on a day of dry, sunny weather.

Care for Your Home Pets with Vinegar

Pets such as dogs and cats are often bothered with itchy and scaly ears, especially if you have a dog with floppy ears like a retriever. Dilute white vinegar in equal parts water and use a cotton ball to clean the inside of your pet’s ears. You can also make a gentle shampoo by adding one or two tablespoons of vinegar to your pet’s bathwater to remove odors from its fur.

If you see unwanted cats creeping around your yard, spray or pour vinegar on the plants they like to use as a litter box, and they will move elsewhere.

Clean Your Coffee Maker with Vinegar

If you’re a coffee-lover, you know that once you’ve brewed a pot, the last thing you want to do is dump it down the drain. However, stale coffee can ruin your next pot-brewing experience. Run some vinegar through your coffee maker to remove the unwanted flavors of old coffee and put yourself on track for a smooth-tasting cup.


Image credit: https://hgtvhome.sndimg.com/

Extend the Life of Your Cut Flowers with Vinegar

When it comes to extending the life of your flowers, there are so many theories that exist. Such theories include the use of copper penny, lemon-lime soda, and aspirin. However, try adding a few tablespoons of white vinegar to the water and a dash of sugar, and you may be surprised to find your flowers lasting much longer.

Cleaning Kitchen with White Vinegar

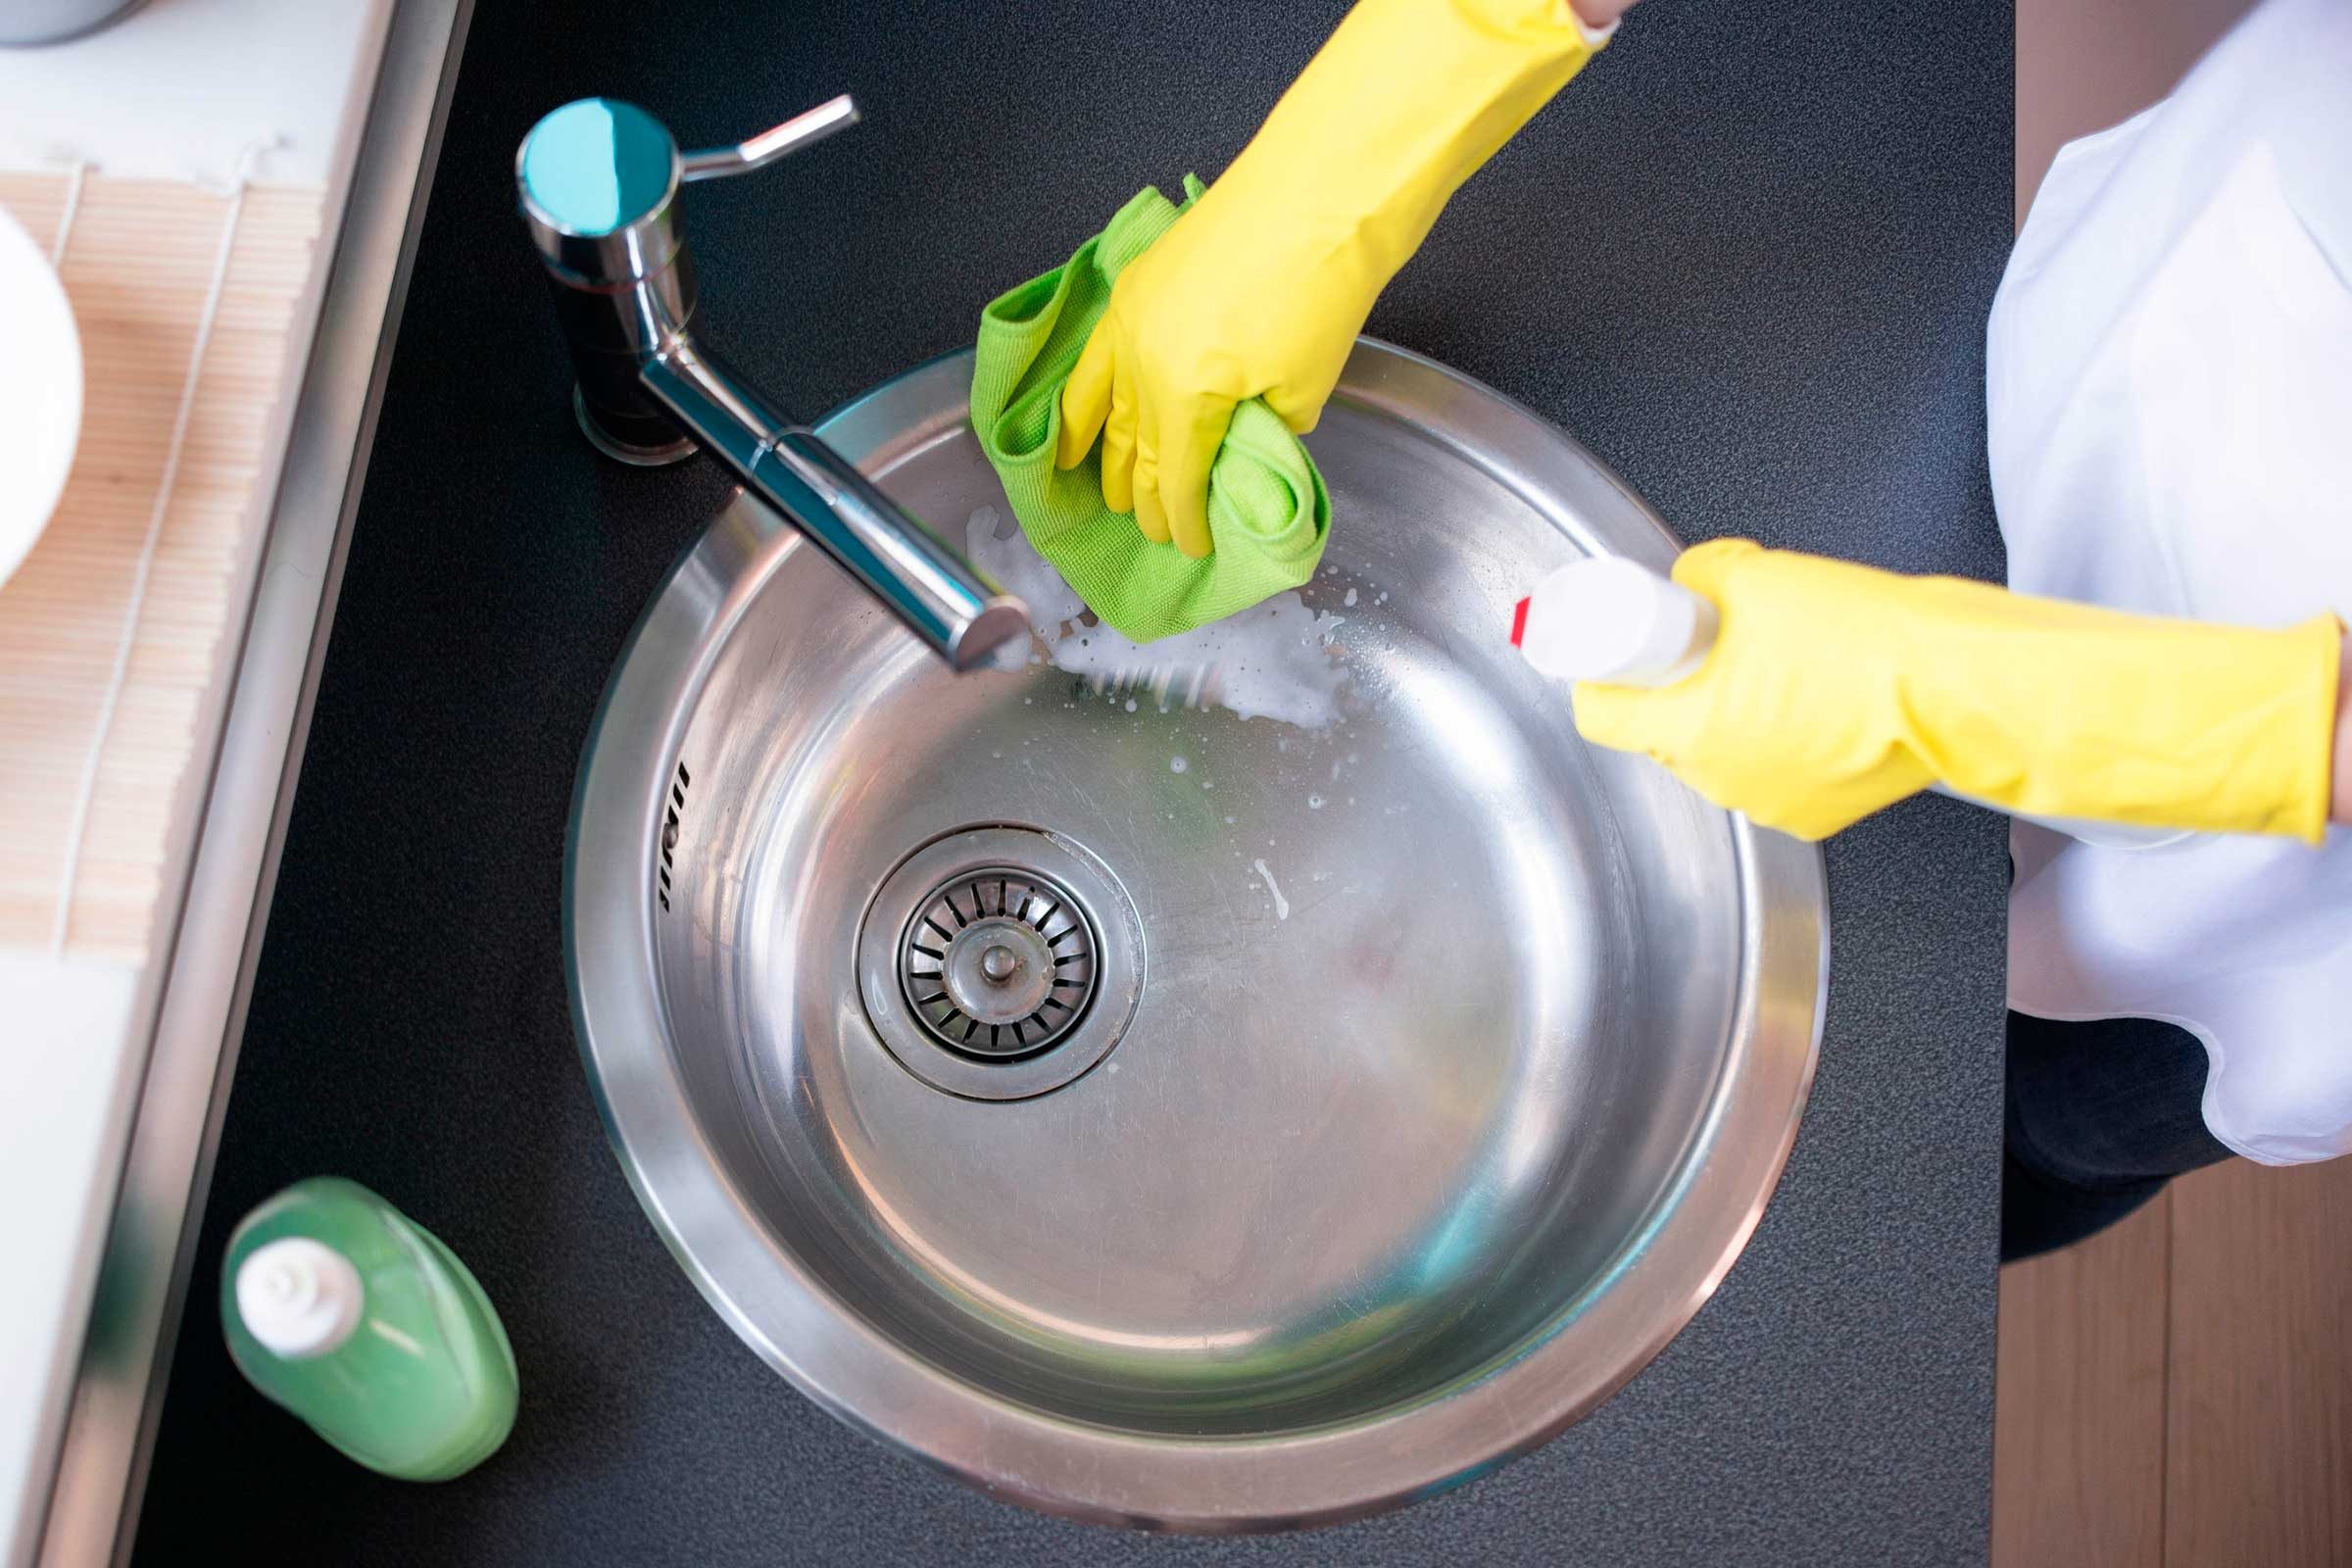
Cleaning vinegar is a natural cleanser and degreaser. With the addition of a few drops of lemon essential oil, you can make your kitchen an all-natural cleaner. Add distilled white vinegar to water in spray bottles and add about ten drops of lemon oil for every one cup of the solution. Spray the cleaner on surfaces, let it stand for a few minutes, and wipe away.

Cleaning Kitchen with White Vinegar
Image credit: https://www.rd.com/

You can also add a few drops of olive oil into a cup of distilled vinegar, let it sit overnight, and then add that to your spray bottle in the morning. Rinse it with cold water.

Cleaning Floors with Vinegar

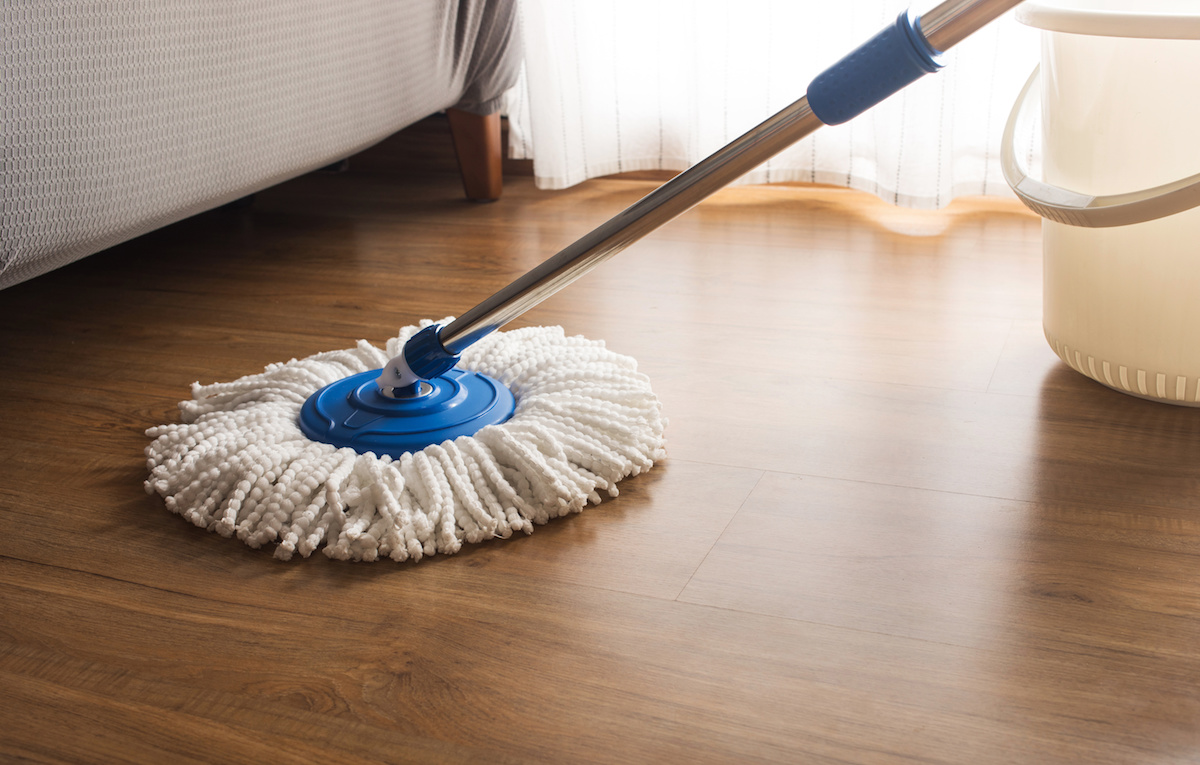
White vinegar is safe enough to use on most surfaces, but it does have a strong smell. The vinegar odor can be reduced by adding a few drops of lemon or tea tree essential oil to the water in your spray bottles. This mixture is safe enough to use on hardwood floors.

Cleaning Floors with Vinegar
Image credit: https://www.simplemost.com/

In addition, if you add some white vinegar to a bucket of warm water and mop the floors, you’ll be cleaning your floors and helping fight against allergens like dust mites at the same time.

Cleaning the Dishwasher

If your dishwasher smells less than fresh or doesn’t seem to clean your dishes as well as it once did, try adding 1/2 cup of vinegar to an empty dishwasher cycle to freshen it up. If your dishwasher has a rinse agent dispenser, fill it with white vinegar to help freshen the rinse water.

Adding white vinegar to your dishwasher also works as an eco-friendly alternative to using additional detergents for cleaning the dishes. Just run a wash cycle with some vinegar but skip adding any detergent like chlorine bleach. If you have a clogged and smelly sink, pour 1/4 cup of baking soda, add one cup of vinegar, and cover the drain tightly.

Use Vinegar as Fabric Softener

And you can use it as a fabric softener: Add 4 cups of vinegar to the rinse cycle instead of liquid fabric softener, or add half a cup when using a front-loading washing machine. After spraying vinegar on your fabric, wipe it down with a clean, damp cloth. You can use the same vinegar to clean a washer

Clean Windows with Vinegar

And it’s also good for cleaning windows. Mix one part vinegar with two parts water to make a multipurpose cleaner that can be used on windows, glass, and even mirrors without leaving behind streaks or smudges. This solution is perfect for cleaning car windows, too– remember to use it sparingly.

ll-Purpose Cleaning Solution

Vinegar is one of the world’s best all-purpose green cleaners with dozens of cleaning uses. Diluted vinegar on a soft, lint-free cloth is excellent for cleaning and polishing all kinds of surfaces, including Counters and other kitchen surfaces, Mirrors and windows, Bathrooms, Toilets, and Faucets.

After filling your plastic bag with equal parts water and vinegar, tape and leave it there for a day for vinegar to dissolve any lingering mineral deposits. You can also use distilled white vinegar to clean hardwood floors, carpet stains, and wood furniture, especially when combined with olive oil.

Clean Your Microwave with Vinegar

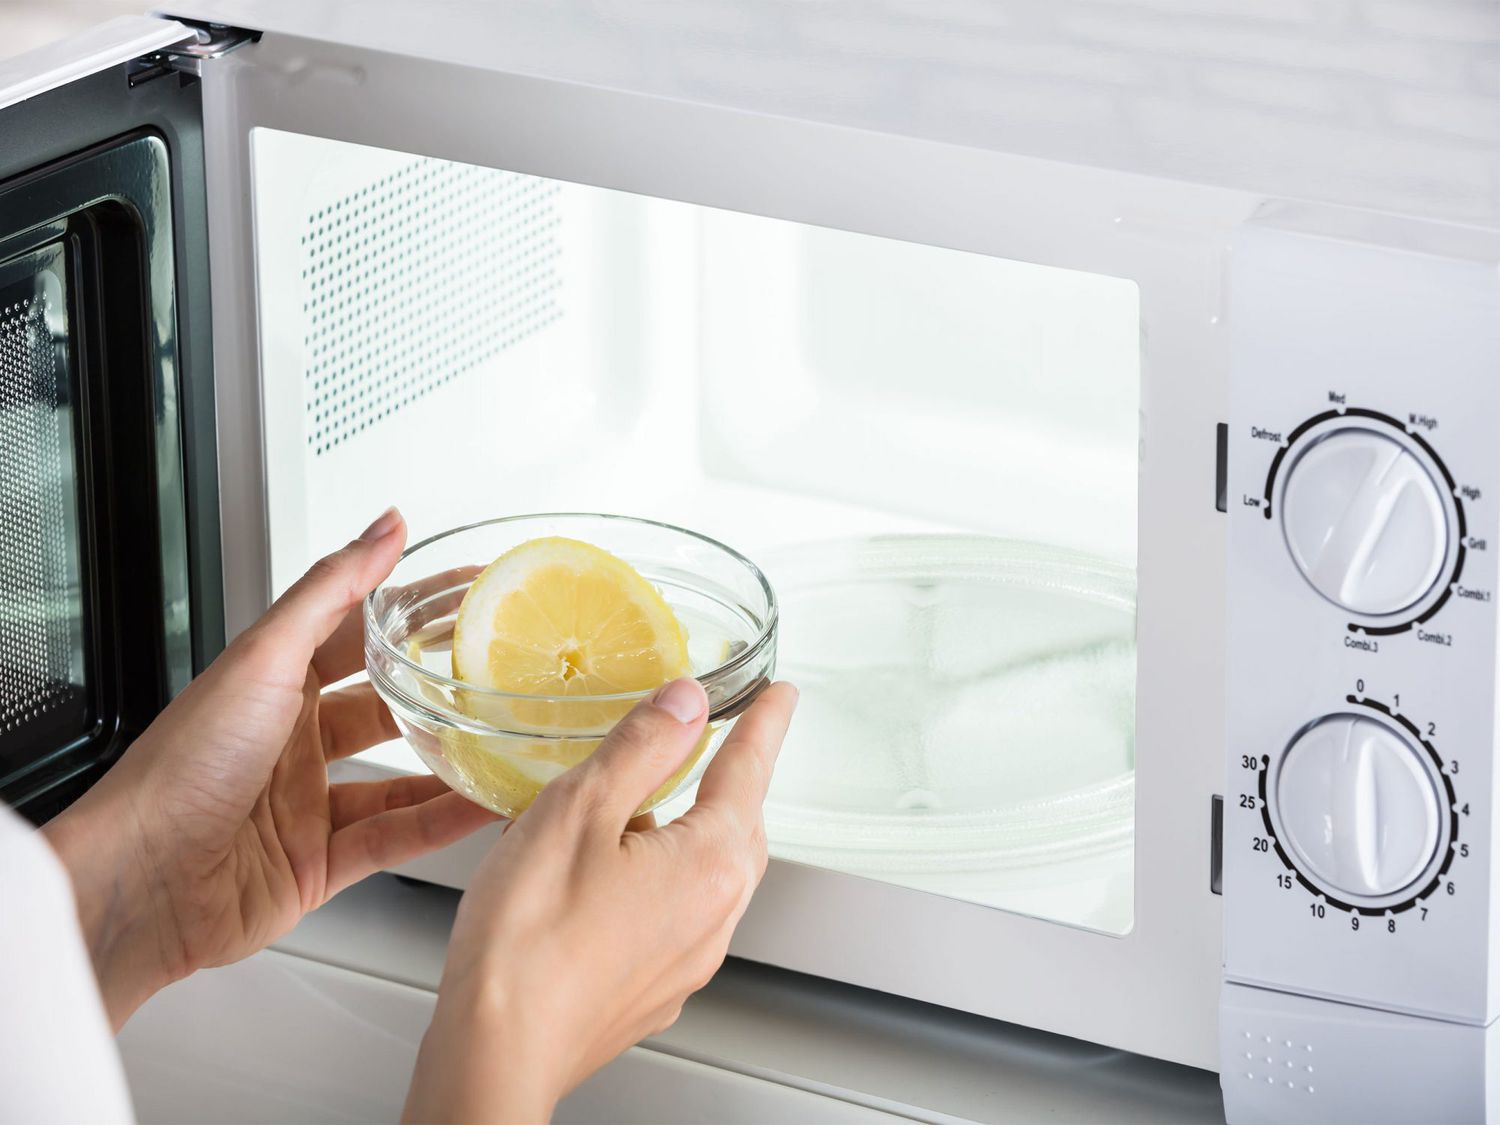
Fill a microwave-safe bowl with 1 cup of distilled vinegar and set it on high. Heat the vinegar for 2 minutes or until it starts to boil, then let it sit in the microwave, undisturbed for about 10 minutes to let it cool, then wipe away any food residue.

Clean Your Microwave with Vinegar
Image credit: https://imagesvc.meredithcorp.io/

Shine Up Silver with White Vinegar

Combine half a cup of distilled vinegar and eight oz. of water in a shallow bowl and add the silver, making sure it is completely submerged. Put on some rubber gloves and use an old toothbrush or scrubber to scrub off any grease gently. Rinse with warm water, then dry completely using a soft cloth.

You can also drop a tarnished silver in a baking dish to soak it with baking soda, sea salt, vinegar, and boiling water. Dry thoroughly with a dry cloth, then buff with a clean cloth.

FAQs on Uses for Vinegar

What is the difference between washing vinegar and cleaning vinegar?

Washing vinegar and cleaning vinegar are both white vinegar, and they contain the same percentage of acetic acid (5%). Therefore, it is safe to use either type of vinegar for all your household needs.

What does vinegar do in a laundry?

Vinegar contains acetic acid, meaning that it’s safe to use in both standard and high-efficiency washers.

Final Thought on Uses for Vinegar

As you can see, vinegar has so many uses which you can relate to almost all of your daily tasks. With vinegar, you wouldn’t need many products anymore. This versatile has a lot of uses, not only as an ingredient but also as a cleaning tool. Keep the environment green and clean by using vinegar for your daily tasks.


The post Incredible Uses For White Vinegar appeared first on Kitchen Infinity.

Did you miss our previous article…
https://chefbuano.com/?p=729