How To Smudge Your House

How To Smudge Your House

Sage smudge sticks are very easy to use. Light one end of the stick, let it burn for 10 minutes, and then blow out the flame. Smudging your house with sage is an ancient tradition that has been passed down through generations just like the feng shui tradition.

It’s a Native American tradition used to purify, cleanse and bless any space, including homes, offices, and cars. This process can be done weekly, but if you feel like there is negative energy lingering in your home, it should be done more frequently.

By burning sage regularly, you will remove all negativity from your life, giving you peace of mind. You can learn how to perform a smudging ceremony by following this simple guide.

What You’ll Need

If you’re new to smudging ceremonies, there are certain things you’ll need to complete the ritual. These include a white candle, incense, and a bundle of dried sage. Native Americans traditionally use an abalone shell as a holder for the smoldering herb, so you can use anything you have at home, such as an unused ashtray or a small bowl.

You can also find a sage kit online or in your local metaphysical shop if you’re getting started. If you’re sensitive to sage smoke, don’t fret, there’re plenty of options. You can use a coffee grinder to grind the dried sage or buy smudge sticks instead of loose sage. You can also dry orange peels if you’re in feng shui. You’ll also need a sage, a vessel for burning sage, a fire source, and a fanning tool.

How to Perform a Smudging Ceremony

Have an Exit strategy

Once you have gathered your supplies, gather your family and friends so everyone is present for the ritual. Banish negativity by playing soft music or singing songs that bring you to a sacred place. If you play music, make sure it’s soft and not something that might entice unwanted guests.


Image caption: https://www.thespruce.com/

Allow everyone to gather in a circle in your designated ceremony area. The circle will keep the energy contained when smudging is performed and protect both the space and your soul from any negativity coming in or going out while you smudge your home.

Make sure you have the window and door opened before lighting up the sage. The smudge stick should be lit in a fireproof container, such as a lighter or a match, and then walked around each wall of your home clockwise. Allow the smoke to flow into every room, including closets, bathrooms, and even under your doorways. Keep going around the house with it until no more smoke is rising from it.

Use Sage if You’re Not Following any Tradition

A number of Native American tribes and other cultures have their smudging ceremonies. And each one of the tribes has its tradition concerning the type of herbs they burn. The number of times it should be done and how much time should pass between one smudging ceremony and the next.

Sage is the most common choice, especially white sage although other forms of sage can be used as well. There are other types of smudging ceremonies, but this is the most common one. You should keep in mind that if you’re not following any specific tradition, then it’s best to stick with the white sage.

Set Your Intention and Say a Mantra

Said, you want to ask for protection. You can repeat a sacred word or phrase that has meaning to you. It could be the name of your spirit guide or God, or it may simply be an affirmation that reflects what you’re trying to protect yourself from.

Before lighting the sage, make sure you take some moment to determine what exactly you want to purify your home from. The more specific you are, the better your smudging rituals will be. After that, decide on a mantra or prayer you will say during your smudging.

Light the Sage and Start Smudging

To fire up your sage, hold a lighter under it for about five seconds or so, making sure to run the flame over every part of the bundle except for where you’re holding it. You can also use matches, but I find the lighter is much easier. After about 30 seconds or so, excess ash will start to fall away, and your bundle of sage will be a beautiful shade of green.

Light the Sage and Start Smudging
Image caption: https://www.thelist.com/

Once it’s completely ashen, take your smudge stick by the end you lit with and wave it gently back and forth over every surface in your home. If there are particular areas that scare you or emit negative energy, go ahead and concentrate your smudging there for a couple of minutes. Once you’re done with the house, be sure to wave it over yourself as well.

Know When to Smudge

When do you want to smudge? You can smudge after you’ve completed building your own home and now moving in. Or you can do it when staying in a hotel room. This will help you feel like you’re more at home. Smudging before guests arrive is another way to ensure that you protect your space and set the mood for company.

When someone in your family gets sick, it’s time to smudge. Sometimes illness can be passed on energetically. You can also smudge when you sense anger, tension, or discord among family members.

Consider Additional Rules Out of Respect

If you smudge a hotel room or a house that someone else owns, always ask permission. Unless you’re an invited guest in the home, be sure to ask before smudging. Different traditions also have different ways of preparing their participants.

Many elders might not have these strict rules but consider following them. For example, do not drink alcohol or take any drug 24 hours before or after smudging. Do not have sexual relations before or afterward, either. Also, make sure all participants are wearing clean clothes and that their hair is clean and combed out before starting the ceremony.

Failure to consider these traditions can weaken your spiritual being. Pregnant and menstruating women are also asked to leave during the ceremony. Smudging may look easy, but it requires practice and knowledge in order to successfully repeat that positive energy in your home. Remember, if you find you are having negative thoughts while smudging, stop and try again another day.

Pray Before You Begin Smudging Your House

Be sure that you are in the right mindset before you begin your smudging. Your mind should be pure and clean. Don’t carry anger or hurt into the ritual. Remember, this is about getting rid of bad energy and attracting good energy into your home, so do not bring any negative vibes to it. You can pray, meditate or remind yourself that you have a clear mind and heart before you even begin.

You can pray for your world’s creator, the spirits, or anything you feel comfortable with. You can also talk about your gratitude towards plants and God’s creation if you don’t want to pray. You can continue praying throughout the ceremony in silence or loud since the smoke will carry your prayers.

Place Your Dried Herbs in a Container or Bundle them Together

For the best results, follow the steps in order. You do not have to pray when you light or smudge your herbs, but this is when you should remember to love and be grateful towards your home and everyone who lives there.

Place Your Dried Herbs in a Container or Bundle them Together
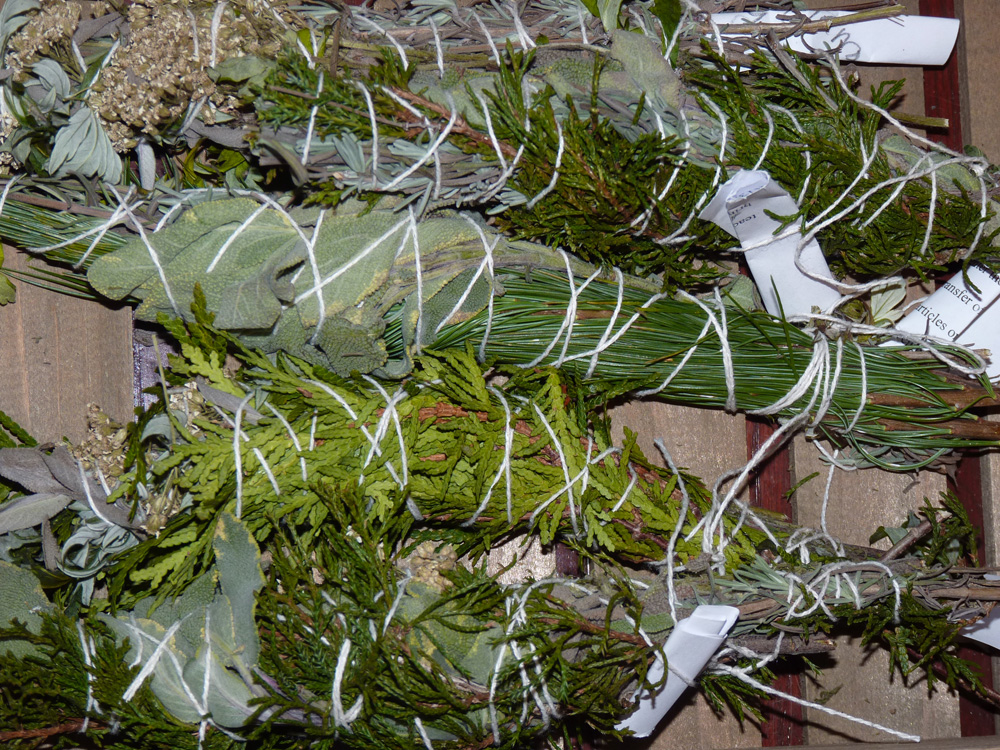
Image caption: https://druidgarden.files.wordpress.com/

So, place your smudge stick or bundle of herbs in a natural container such as an abalone shell, wooden bowl, or clay dish. If you would like to add words to your prayer, place them underneath the arrangement of herbs. You can either lean a sign against it or tape it to the bottom of your container.

Burn Your Herbs to Produce Smoke, Not Fire

When you are ready, light your herbs on fire. If you used a bundle of dried flowers and leaves, it might take a little while for them to catch fire. Don’t panic! Just put them into the shell or dish, still lit side up, and let them smolder.

Burn Your Herbs to Produce Smoke, Not Fire
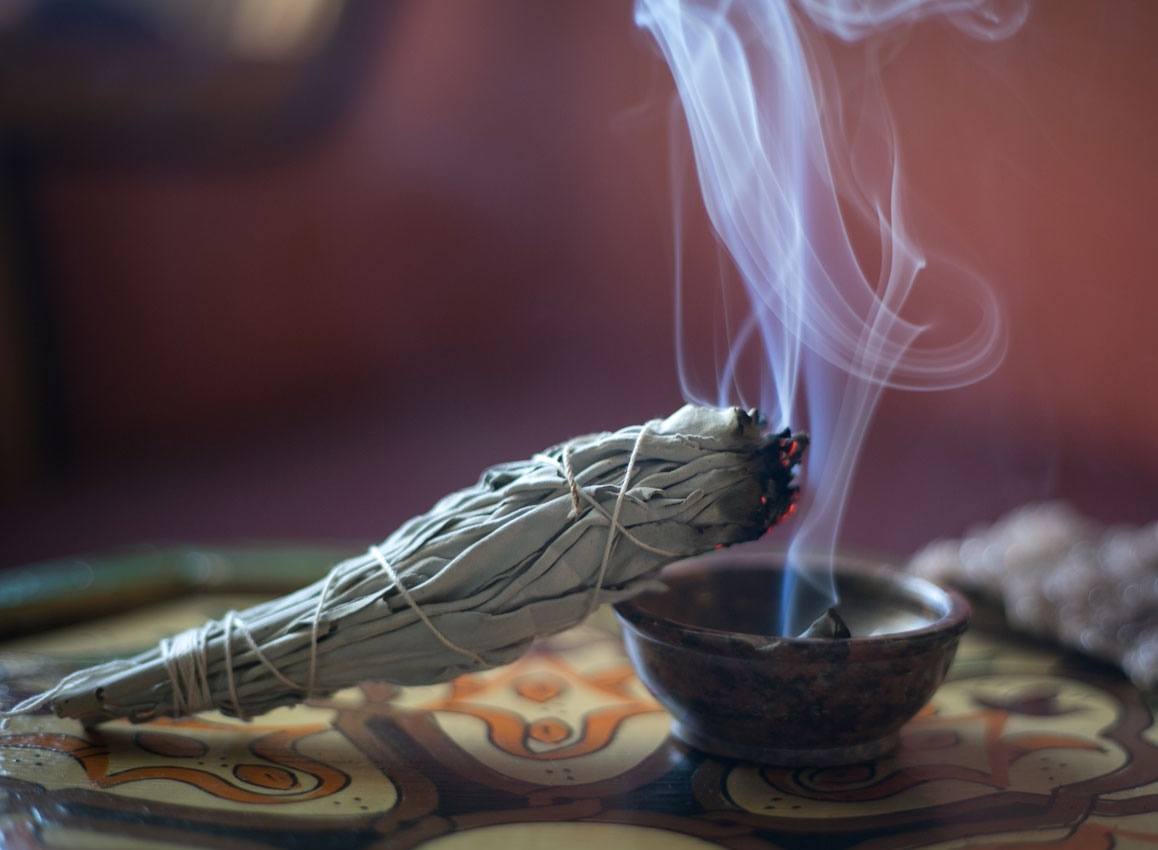
Image caption: https://cdn.lifehack.org/

You can leave them to burn on their own for a little while, then blow them off so the herbs can only produce smoke. If the smoke starts running out during the ceremony, feel free to relight them and put them back in the bowl.

Purify Each Participant by Fanning the Smoke Over Their Body

Take a deep breath, and start fanning the smoke in a clockwise direction over your body. You can either hold the shell up in one hand and fan with your other or tilt the shell to let the ashes drop out and use a feather or a cleansing plant like sage to move it around your body.

Make sure everyone in your room is purified by moving around slowly to get the smoke everywhere, especially taking care of sweeping it over each participant’s face. Many people like starting with the head and heart then moving the smoke downwards on their arms and legs. You may use any method that you want.

Waft the Smoke in Every Corner and Outside of Your Home

Begin by putting the shell down and fanning or blowing to spread the ashes. Then, pick up the shell again (be careful not to burn yourself!). Walk around your home in a clockwise direction, taking care to get to every corner. Gently waft the smoke into open windows.

Use feathers to push the smoke outside as you pass through an open window or door. This will ensure you get rid of negative energies in your home. You may walk clockwise or counterclockwise as you wish. As in most smudging ceremonies, different cultures and individuals follow different practices.

Close the Ceremony

When you arrive back at your door front, chant your final mantra or prayer. Visualize how your entire home is filled with warmth, light, happiness, and blessings. Then speak your intention for one last time before closing the ceremony. Do not smudge your pets because certain sage varieties are toxic to dogs and cats if you have pets in your house.

Let Your Ashes Cool Before Returning them to the Earth

It’s best not to return the ashes from your smudging ceremony back into nature until they have cooled off. You can keep them in a special container for a few days if you wish, but it is important that they don’t get mixed up with sand, soil, or garbage while still hot.

FAQs on How to Smudge Your house

How often should you smudge?

Some people smudge their homes daily, but it’s best to do so at least twice a year. Once before the New Year and once again around Beltane or Lammas is an excellent time. You can, of course, smudge your house as often as you like; don’t go overboard. Remember that your intention should always be clear when smudging. You can smudge when you feel weighed down by stress or worry.

What do you say when smudging your house?

What to say when smudging depends on several occasions. For example, if you’re smudging because you moved into a new house, ensure you cleanse your family. You can say words such as “fresh start,” “protection,” or “happy.” If you’re smudging because your family feels exhausted, you can say words such as “cleanse” and “clear.”

How do you cleanse your home?

There are many ways to cleanse your home. One common way is to use white sage, sweetgrass, cedar, or any other natural herb. You can buy bundles of these herbs at your nearest local metaphysical shop.

Final Thought on How to Smudge Your House

As you can see, smudging rituals are a beautiful technique to clear your space and welcome positive energy into your house. Also, treat this ritual with respect as it’s a sacred religious practice in some Native American tribes. If you’re not familiar with the ritual and the plant, it’s best to ask someone who practices this religion.


The post How To Smudge Your House appeared first on Kitchen Infinity.

Did you miss our previous article…
https://chefbuano.com/?p=723

How To Wash A Silk Pillowcase

How To Wash A Silk Pillowcase

Washing silk pillowcases is not as easy as you might think. Not only do they require special care, but also dry cleaning can be expensive and time-consuming. Luckily, there are some

simple steps to follow for washing a silk pillowcase at home. Follow these instructions to keep your silk pillows in tip-top shape and avoid the risk of ruining them with improper care. Here we go!

What You’ll Need

Mesh laundry bagWasher or sinkIronDrying rackDistilled white vinegarGentle detergentCold water

Washing a Silk Pillowcase by Your Hand

There’s always a way to hand washing your silk products. However, it will take time to do, and the results may not be as satisfactory as you would like. It’s best to ask a silk product professional for guidance if hand washing is your preferred method, although we encourage you to try it on your own first before taking such a big step. Here are some things to remember:


Image caption: https://www.thespruce.com/

Read the Label on Your Pillowcase to Check How it Should be Washed

Most silk products will come with care instructions that you should always keep in mind. The care label is always on the inside corner of the pillowcase. It would recommend hand washing your pillowcase. If there’s no care label attached to the pillowcase, then get it dry cleaned to be on the safe side.

Fill Your Basin with Cool Water and Detergent

Fill a basin with lukewarm water and add a little bit of gentle detergent. You can learn how to make homemade laundry detergent for this purpose. Mix the detergent well with your

hands before soaking it in the pillowcase. Use your fingers to rub the laundry detergent around all parts of the silk material, making sure it’s properly cleaned. Make sure you don’t use hot water, as this can cause the silk to shrink.

dd Some Drops of Detergent

If you want to make sure the pillowcase is clean, then add a few drops of detergent. Make sure it’s not too much, as this will cause the silk to become dry and rubbery because of leftover residue. 

Put in your hand and gently knead that into the silk pillowcase. Unlike how you do laundry or washing your silk in the machine washing, ensure you use less detergent. Excess detergent, even if it’s a gentle detergent, can break down your natural fiber.

Soak Your Pillowcase in the Basin Sink or Bucket for 5 Minutes

Just like the washing cycle, leave your pillowcase to soak for 5 minutes. This will allow the detergent to soften up dirt or oil that has settled into the material over time, causing it to look dirty and dull. 

Soak it in a bucket of lukewarm and laundry soap, then set the timer for 5 minutes. Don’t soak it for longer than 5 minutes, as this can damage your silk pillowcase. Swirl the silk gently while soaking but do not scrub or wring as this can damage silk fibers.

Drain Water and Laundry Soap from the Bucket or Basin Sink

Remove the silk from the water and laundry soap. Quickly remove any excess water by squeezing it with your hands. Make sure you do not wring the silk pillowcase as this can cause damage to its fibers.

Refill Your Bucket with Cool Water, White Vinegar, and Fabric Softener

After removing the excess water, refill your bucket with 3/4 white vinegar and 1/4 cup of fabric softener. Stir well to mix the contents. Make sure the fabric softener is safe for the silk before adding it to the mix. The white vinegar will remove excess soap and alkalinity while the fabric softener adds softness and shine to your pillow.

Rinse Your Pillowcase in Cold Water

Once you’ve properly washed and cleaned your pillowcase, finish off with cold rinse water. Do not soak your silk pillowcase in cold water, as this may result in shrinkage. Washing it in cold water will help you clear out all the soap and water, hence keeping your pillowcase clean.

Lay Your Pillowcase Flat on a Fresh Towel to Let it Dry

Once you’ve rinsed your silk pillowcase, lay it flat on a clean towel to dry. Use a fresh towel or rag as this will serve as your drying cloth. After laying the silk pillowcase flat on the new dried cloth, let it air dry before putting it back in place. Never hang your silk fibers in a clothesline to dry, and always dry them out of direct sunlight. Exposing your pillowcase to direct sunlight may cause the colors of your silk pillowcase to fade and deteriorate quickly.

How to Wash Silk in the Washing Machine

Washing your silk bedding in the washing machine is quite possible, but you must follow a specific washing procedure to preserve its silk fibers. Also, ensure you know the washing machine brands to avoid with your silk materials so you don’t end up incurring losses. 

How to Wash Silk in the Washing Machine
Image caption: https://lightsleeper.co.uk/

Check the Care Label

The label attached on the inside corner of your pillowcase should tell you whether it’s appropriate to machine wash your silk pillowcase. If it’s not, check the label attached to your silk bedding for washing instructions.

Wash Your Silk Separately from Other Fabrics

Avoid mixing your silk cloth with heavy fabrics, such as jeans or towels, because its fibers are much weaker. Remember to wash it separately from other delicate clothes. Make sure you wash your silk items alone because their fibers are very weak and could tangle with other fabrics.

Fill the Washing Machine with Suitable Temperature Water

Fill the washing machine with tepid water. The maximum water temperature that is safe for silk in a washing machine is around 40 degrees Celsius or 105 degrees Fahrenheit. Make sure you choose the most gentle cycle that the washing machine offers. If you choose a hotter cycle, you risk damaging your silk or causing it to shrink.

Put Your Pillowcase into a Mesh Laundry Bag

Pour the correct amount of silk-specific detergent into the washing machine, making sure you choose a gentle or delicate cycle. Close the mesh bag and put it inside the washer with your pillowcase. The laundry bag will help your silk stay separated from the other fabrics being washed, preventing it from developing pulls or tangling with other items such as the washing machine drums.

Use Mild Detergent

The silk-specific detergent you chose needs to mix with the water before it can spread out and get on your pillowcase. Avoid using harsh detergents such as bleach to protect your delicate fabric from getting damaged.

Put bleach in your washing machine by accident, and you risk ruining the color of your silk or dulling its sheen. If you need to bleach your clothes,  pre-soak the silk in a mixture of water and bleach before washing it to protect the fabric. You can skip the fabric softener and instead use white vinegar to give your pillowcase a fresh scent.

Use the Delicate Cycle

Add a mild laundry detergent and start up your washing machine using the most delicate setting the delicate cycle. If you have a front loader, lower its water level and increase the agitation speed to protect your silk from getting torn or wrinkled. Use cold water to prevent color bleeding and set the spin speed to its lowest level.

Let it Soak with Your Detergent

Unlike other fabrics, silk doesn’t let go of dirt and dust so easily. So to release as much grime as you can, let the pillowcase soak for about 15 minutes with lukewarm water before putting it in the washer. Put a few squirts of your mild detergent and white vinegar into the basin to soften up stains.

Leave the Pillowcase Resting Flat on a Clean Towel to Dry

Remove silk pillowcases from the washer and lay them flat on a clean towel. Leave it there to dry for another half-day before putting it away in your linen closet. Do not dry your silk fabric in direct sunlight, as this can cause yellowing and damage the silk fibers.

FAQs on How to Clean a Silk Pillowcase

How often should you wash a silk pillowcase?

Silk fabrics should be cleaned after every two weeks to maintain their freshness. Don’t skimp on this step if you want to keep your silk pillowcase looking well for a long time.

What detergent is safe for washing silk?

Powdered detergents are ideal for washing silk in the laundry. Since powdered detergents are more diluted compared to liquid ones, you can be sure that it’s gentle enough not to irritate the fabric.

Final Thought on How to Wash Your Silk Pillowcases

If you’re conscious about the appearance of your silk fabric, then it’s best to wash and dry them after every two weeks. You can also clean stains in your silk pillowcase by using cool water and spot stain removers.

Remember not to rub the fabric harshly when washing silk because it may cause damage to the material. With all these tips, you’ll have a clean pillowcase that will not only beautify your night but will serve you for a long time. Feel free to pin and share this article.


The post How To Wash A Silk Pillowcase appeared first on Kitchen Infinity.

Did you miss our previous article…
https://chefbuano.com/?p=719

How to Unstick and Fix a Broken Zipper

How to Unstick and Fix a Broken Zipper

Zippers are great for keeping your clothes closed, but they can also break down over time. A broken zipper can be an annoying problem that makes it difficult to wear favorite clothing items. Luckily, there are several ways to fix a stuck zipper without replacing it or throwing out the item of clothing. 

With a few tools and some creativity, you can fix zipper problems ranging from a stuck zipper, broken zippers, stuck zippers, and any other problem related to the zipper.

What You’ll Need

Strong threadBar of soapWD-40 lubricantSmall needle-nosed pliersHand sewing needleScissorsGraphite PencilSmall flathead screwdriver

How to Fix a Stuck Zipper

Use Graphite to Lubricate the Zipper

Use a graphite pencil to lubricate the zipper. Graphite is a dry lubricant that can act as an alternative to liquid lubricants like WD-40. To use graphite, put some on a cotton ball or paper towel and wipe it along the troublesome part of the zipper. Work the zipper up and down. Before moving on, wipe away any excess graphite, so it doesn’t get transferred to other clothing items when the zipper is closed.


Image credit: https://i.pinimg.com/

pply Laundry Soap and Wax

When the graphite pencil doesn’t work, don’t add more graphite; instead, add a dab of laundry soap to your stuck zipper. The soap will add an extra level of lubrication that will help unstick the zipper. 

Apply Laundry Soap and Wax
Image credit: https://www.shared.com/

You can also use lubricating substances such as chapstick and lip balm to fix your zipper. If you don’t have any on hand, try a little unscented block of paraffin wax from a candle instead. If you’re worried about these lubricants staining your fabric, you can turn to petroleum jelly. 

Add a fingertip’s worth of petroleum jelly to the teeth of the zipper and gently rub it in – but only on the side facing your clothing or fabric. This will add a little extra oomph to the graphite’s powers and make sure that your clothes stay stain-free.

Wash Your Item and Add More Lubricant

After the zipper seems to be moving more smoothly, you’ll probably want to clean your clothing or bag. Wash it as directed on the tag and add a little lubricant right after or while it’s still wet. This way, just like chapstick on a zipper, the petroleum jelly will transfer itself from the fabric itself to the zipper.

How to Fix a Broken Zipper

Remove the Zipper Stop

For you to get the slider back on track, you’ll need to remove the zipper’s stop at the top. You can gently pull it off with your fingers and put a new one on if necessary after you have fixed the slider. 

Remove the Zipper Stop
Image credit: https://i.ytimg.com/

On the other hand, you can use pliers to get a good grip by prying off the zipper’s bottom stop or the little band of metal or plastic at the bottom of the zipper teeth. Use the pliers to slightly stretch the openings of the metal stoppers and wiggle them free. You can also use a flathead screwdriver if you don’t have pliers.

Position the Zipper Pull

Before you try to fix a broken zipper, look at it from the front and determine which way it should move. The stoppers that hold the pull open should face away from each other when the slider is fully closed. You might have to loosen or remove clothing from one side of the zipper if you can’t see a difference between closed and half-closed.

Once you’ve removed the metal or plastic, stop, use the pull tab to move the zipper slider back and forth. If it doesn’t move easily, spray the zipper with a lubricant. Lubricants can make an old zipper function like new, but they won’t work if the teeth are worn out or bent.

djust the Slider and Rearrange the Teeth

Realign the zipper teeth so that they all mesh smoothly. If you can’t mesh them, mark the spot where there is a problem aligning the teeth. After that, reposition the zipper pull by moving the slider to that spot.

Thread the Sewing Needle

Using your sewing machine, thread the sewing needle with heavy-duty thread and tie a knot at the tail of the thread. If your zipper doesn’t have teeth on both sides, you’ll need to sew it with two separate needles.

To keep the stitches as small as possible, move slowly. Insert one threaded needle into each stitch along the length of the zipper. Remove the sewing from the machine, leaving about an inch of thread on each side.

Create a New Zipper Stop

Pull the thread up through the zipper, leaving the knot on the top surface. Add another zigzag stitch to secure the stop. You can make six or seven stitches across the bottom of the zipper where you’ve removed the old zipper stop to create a new zipper stop made out of the thread.

Zippers With Teeth on Both Sides

Replace the slider by repositioning it over both sides of the original tape. Using a sewing machine, move slowly and sew a few stitches along each side to create a new zipper stop between the teeth. Pinch the metal stop on the same side as the old slider with needle nose pliers or tweezers. 

Use one hand to hold it steady while pulling the slider off with your other hand. Slide the new replacement slider onto both sides of the tape before pinching and removing any excess tape. Make sure that each piece of tape is flush against its neighbor when you are done.

Take Off the Bottom Stop to Repair the Missing Teeth

To deal with the missing bottom teeth, you have to remove the old bottom stop. Hold your cloth firmly and pull the stops off. After that, remove the tack at the base of the zipper using a seam ripper. This is very important because you need to fix all the zipper’s teeth before your zipper works correctly.

Repair Above Damaged Teeth

You can also replace a zipper slider above one of the damaged teeth. This is perfect for when you cannot find replacement teeth at the same size as your other teeth or if it’s too much work to re-sew over the existing holes. Use this method only when there are no missing teeth below the location of the break.

Pinching the zipper tape on either side of the break with a pair of pliers will hold it in place while you work. Unzip your zipper all the way to expose the teeth. Thread the needle with about an inch of thread and tie a knot on each end of the thread.

 Sew each stitch between two teeth, removing any slack in your thread after each pull. Make sure you whipstitch the lower part of the zipper teeth to keep the zipper from gaping open.

Use Paper Clip

A paper clip can be used in lieu of a needle and thread. While it won’t look quite as nice, this method is easier and faster than the sewing method and will probably work in a pinch when you don’t have a needle and thread handy.

Use a Key Ring to Secure Slipping Pants Zipper Pull

Slipping pants zippers are one of the frustrating types of zipper problems. To create a temporary fix, salvage it by attaching a key ring onto your zipper pull. Feed one end of the key ring through the hole in the tab and attach it with another small key ring or paper clip.

How to Prevent Your Zipper from Breaking Again

Don’t Yank it

The best way to avoid breaking your zipper is to ensure you apply too much force to it as you use it. Instead, use steady and consistent pulls to guide the sliders up and down the teeth instead of using sharp, jerky movements.

Keep it Clean

Keeping your zipper clean will ensure that the slider doesn’t get stuck on grime or any strands of fabric that might accumulate in its teeth. If your zipper gets jammed up with gunk, you’re much more likely to yank at it and cause it to break.

Make Sure the Zip is Not Under Too Much Pressure

If you’re fastening a bag that’s overflowing or jeans that are too small, the entire zip will buckle when there is too much pressure pulling the teeth apart.

FAQs on How to Unstick and Fix a Broken Zipper

How do you lubricate a zipper?

Before you pull the zipper down, lightly lubricate it with a bit of wax or bar soap to make sure the slider moves smoothly. Another good idea is to zip up your jacket after applying some beeswax to it.

How do you fix a stuck tooth on a metal zipper?

To solve the problem with one broken tooth in a metal zipper, try remedying it with a pair of pliers and rocking the tooth back and forth while pulling on the zipper.

Final Thought on How to Unstick and Fix a Broken Zipper

As you can see, unsticking and fixing a broken zipper can be achieved in a number of ways, and you don’t need to take your jacket and pants to a store for expensive repairs. With the right tools and items, you can always go back to using them again with no hassles.


The post How to Unstick and Fix a Broken Zipper appeared first on Kitchen Infinity.

Did you miss our previous article…
https://chefbuano.com/?p=714

Four Easy Do-It-Yourself Soil Tests

Four Easy Do-It-Yourself Soil Tests

Soil is the foundation of your garden. Knowing what makes up your soil and how to amend it is an important part of successful gardening.  Unfortunately, many people don’t know how to test their soil’s pH or even begin. 

Well, if you’re like most gardeners, you don’t have the time or money to get a professional test done on your soil. So how can you be sure your plant selections are going to thrive in your yards? That’s where these simple DIY tests come into play. 

The following easy do-it-yourself tests will give you a good start on knowing your soil’s strengths and weaknesses. The results from the tests will give you an idea as to whether or not professionals should do more testing before any changes are made based on this information alone. Let’s get started!

The Squeeze Test

This test is based on the premise that soil with good texture will form a ball in your hand and fall apart when lightly squeezed. Be ready to get your hands when testing your soils using this method. In this soil test, soils are classified as clay soils, sandy soils, and loamy soils.


Image credit: https://bdn-ss-hh.s3.amazonaws.com/

Clay soil is nutrient-rich but slow draining, while sand is quick draining but has trouble retaining nutrients and moisture. Loam soil is considered the ideal soil because it retains moisture and nutrients while draining well. In the squeeze test, you’ll need a handful of moist soil from your garden or from near plants that are growing well. 

Be sure to use only a small amount from around the tops of plants. Avoid collecting soil from dry areas around plant roots, which could be hot and baked, as this can damage the organism living in the soil. In the squeeze test, the soil should form a lump that holds together well but can break apart easily by hand. This result shows it is loam soil, which is ideal for plant growth. 

Sandy soil will remain crumbly and may be difficult to squeeze together in your hand, while clay soil will form a hard lump and crumble when squeezed. For slow-draining clay, you can break up the soil with mulches and drainage aids like perlite and vermiculite. 

The Puddle Test

Drainage is another important aspect of your soil that you must consider because it allows water to pass quickly without pooling. If your soil has poor drainage, it can cause root rot to your plants. Culinary herbs are the main culprit of root rot due to their shallow root system. 

The Puddle Test
Image credit: https://greywateraction.org/

The puddle test is the best way to check soil drainage. Take a handful of moist soil and roll it into a ball in your hand. Then, drop the ball into a bucket filled with water. If your soil sinks, you have good drainage. If not, drill some holes in your garden beds at least 6 inches deep before planting your herbs. 

If the water takes more than four hours to drain, then you have poor drainage. Fortunately, you can amend this by mixing some organic matter, such as peat moss or compost, into the soil around your herb plants.

The Vinegar and Baking Soda Test

Soil acidity, alkalinity, and soil pH are very important elements to the soil. Some plants will thrive better in more basic soil or acidic soil. But soil that is too extreme can also be a problem. It can prevent them from getting nutrients. 

The Vinegar and Baking Soda Test
Image credit: https://www.theseedcollection.com.au/

To find out the pH of your soil, put a teaspoonful of soil in a small glass jar and add half a teaspoon of distilled white vinegar. Put on the cap tightly and shake well for about one minute. Let it sit for another five minutes to see if there are any bubbles that appear on the surface.

If it fizzes, you have alkaline soil with higher pH, which you can remedy by using a fertilizer rich in sulfur and acidifying nitrogen. Some plants can tolerate alkaline soil, while others like parsnips and peanuts will do well in the sweet soil. If your soil doesn’t fizz after the vinegar test, add distilled water to another container with the same amount of soil and add half a teaspoon of salt.

Stir occasionally for 15 minutes and see if there are any noticeable changes. If you see the particles change, your soil has acidic properties, meaning that you have sodium chloride in your garden, which can be harmful to plants, so be sure to use compost with neutral pH to reduce the risk.

If your soil doesn’t change its properties, you have a neutral pH, meaning adding compost is beneficial for the plants. Learn how to make compost so you can add it to the soil. A pH of 7 means that the soil has an alkaline nature – there are more nutrients available to your plants, and they do not tend to die as often as those growing in acidic soils, so be sure to use only fertilizers with a pH of 5-7.

So, by doing this simple test, you will be able to quickly determine your soil’s pH, which is especially important if you plan on growing any plants that do not tolerate acidic or alkaline soils, such as most vegetables. You will also discover whether or not the soil has any organic matter in it. The more organic matter, the better because if there is none, you will need to take some time to break down any hard dirt clods before planting, which can be difficult for novices.

The Cabbage and Wire Test

Soil that is too compact will inhibit root growth, choke off available water, and prevent worms and other vital soil critters from moving freely. To test soil compaction, plug a wire flag vertically into the soil. Mark the depth at which the wire bends.

Make sure the wire bends where it cannot be pushed down straight. You can easily push the wire down a foot or more. Don’t let it bend because the more it bends, the more it becomes compacted. You remedy compaction by amending your soil organic material, aerating organic materials, and avoiding walking on the wet soil in your plots.

When it comes to the cabbage test, you can purchase a home testing kit or use a more advanced DIY test using red cabbage. Red cabbage contains a pigment known as flavin that dissolves in water and will turn red in acidic solution and greenish-yellow in basic solution. 

Allow one tablespoon of soil from your garden to dry on a white saucer, then bring one cup of distilled water to boil in a pot with a lid. Add two cups of chopped red cabbage into the boiling water. Cover and boil until the water turns dark purple. 

Make sure you wet the soil and sit for some minutes, then tip the saucer to allow water to run to the side. If the soil turns blue or green, it’s alkaline, and it turns red, then the soil is acidic.

The Peanut Butter Jar Soil Test for Sand, Silt, and Clay

This is a very easy test. Fill a jar halfway with soil, then fill the rest of the way with water. The amount of water needed will vary depending on your jar size, so it’s best to start empty and add water until the jar is two-thirds full. Put in one teaspoon of dish soap and shake vigorously for 30 seconds. 

The soap will suspend the particles to see how many there are and what kind they are. The jar should be enough to do about a cup of soil. If not, use another jar and combine the results. Calculate the percentage of silt, sand, and clay, which should add up to 100 percent. 

Healthy soil will consist of 20 percent clay, 40 percent silt, and 40 percent sand. If you have sandy soil, you can remedy this by adding humus, aged manure, peat moss, and sawdust with some extra nitrogen. For silt soil, add coarse sand, gravel, compost, and well-rotted horse manure. If you have clay soil, coarse sand, and not beach sand, plus compost and peat moss will work well.

FAQs on 4 Easy Do-It-Yourself Soil Test

re home soil test kits accurate?

Yes, but you have to follow the directions carefully and take several samples from different garden areas or lawns.

How much soil should I get for a soil test?

In general, take at least a cup of dry soil from each spot. However, if there is not enough soil in any one spot to fill a 1-cup measure, take a 1/2 cup from two different spots.

Is it expensive to get a soil test done professionally?

A local extension agent can perform a low-cost or free soil pH test for you, but you would have to go in person to their office and pick up the report. It may be worth your time, though.

Final Thought on Four Easy Do-It-Yourself Soil Tests

When considering what your soil needs for the plants to thrive, it’s good to consider a complete report from your cooperative extension. However, carrying this simple test can help you understand what your soil may be lacking. Then you can take the next step toward creating a healthy garden.


The post Four Easy Do-It-Yourself Soil Tests appeared first on Kitchen Infinity.

Did you miss our previous article…
https://chefbuano.com/?p=709