How to Apply Polyurethane for Floors

How to Apply Polyurethane for Floors

Wood floors are beautiful, but they can get damaged easily. This is why you should know how to apply polyurethane to floors correctly. Polyurethane is a very important part of the flooring process because it protects your hardwood from scratches and other damages.

But if you don’t apply it correctly, your efforts will be useless. If you want to learn everything about this topic, keep reading our article.

Follow this step-by-step guide on how to apply polyurethane for floors correctly using the right products and tools. This way, you can be sure that your hardwood flooring will look great with minimal effort on your part.

What You’ll Need

Mineral spiritsWhite vinegarContainer or canNatural bristle brushOil-based polyurethaneWater-based polyurethaneBreathing and synthetic protectionPainter’s tapePaint tray and linersVacuum machineSander machineCutting padMixing stickRoller padGrit sandpaperSteel woolClean clothsPolyurethanePaint brush

Choose the Type of Polyurethane

You can choose water-based polyurethane if your floors are natural color or oil-based polyurethane if your floor has been stained or finished. Water-based polyurethane is the way to go if you’re hoping to complete the project within one day. Oil-based polyurethane tends to be less expensive than water-based, but it takes more prep work and time to complete the job.

Water-based polyurethane looks milky and dries to a clear finish, while oil-based adds a deeper hue to the existing color of the floor. Oil-based also has a strong odor and takes longer to dry.

Make Sure You Have a Well-Ventilated Working Area

One of the most important steps to follow when applying polyurethane is to have a well-ventilated working area. If you plan on applying several coats, it’s best to use a room with a large open window and a fan. Put on proper protective equipment before applying polyurethane.

Make sure your windows are open and use window fans to circulate fresh air throughout the room. Open your doors to allow the smell of polyurethane to escape

Prepare the Floor by Sanding

Lightly sand down rough surface on your wood floor. Sanding down your hardwood flooring is very important because it gives the new coat of polyurethane a nice smooth surface that will allow the finish to adhere. Sweep and mop your floors before sanding; you don’t want sawdust in between coats.
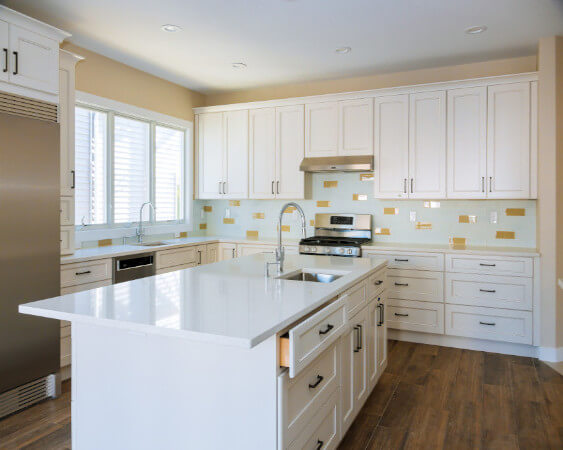

Image caption: https://www.thespruce.com/

If possible, try not to use a hose or power washer to clean your floor as it can damage wood grain and cause water damage to a floor. You might not even know it is damaged. Allow the wood flooring to dry before continuing. Start sanding while considering the condition of your floor.

Rent a sanding machine and use the machine’s user manual to guide you. If your floors are severely damaged, and you want to change the color completely, sand down the wood to bare wood. 

On the other hand, you can screen and recoat with polyurethane without sanding down the flooring, but make sure you remove any glue or residue left on the floors. Wipe down your room with a tack cloth to pick up sawdust. Allow your hardwood to dry completely while sanding.

Vacuum Your Floor

The sanding process can kick up a lot of sawdust, so start this step by using a shop vacuum cleaner to carefully suck up the debris. Use a vacuum machine to clean all the dust and unwanted particles from the floor. Carefully clean all corners so that small objects like hair and cotton balls don’t cause a problem later.

Cleaning is very important as it will leave you with a beautiful topcoat. So, after vacuuming, use white vinegar and water to wipe down your floor. Remember to turn on the fan to let the room dry quickly. This will enable your wooden floor to become stronger and more flexible.

Make sure you clean all the edges and corners properly, as this is a major part of the wooden floor. Make sure you use a white vinegar and water solution and also a mop. Don’t forget to wear your gloves while using this product.

Once it’s clean, use a dry cloth to wipe down all remnants of cleaners on your floor. You can then use a hairdryer to make sure there’s no moisture left on the floor. If you’re applying water-based polyurethane, make sure you stain your wooden flooring before applying the polyurethane.

Wipe Down the Surface by Mineral Spirits

After vacuuming, use mineral spirits or paint thinner to wipe down the surface. Apply it with a lint-free cloth, let this dry completely and make sure there are no streaks left behind on your flooring. This will remove all the remaining debris and dust.

Make sure you wipe the entire floor as you pay much attention to cracks and crevices to remove all oil and dust particles. After wiping, allow it to dry fully before coating it with polyurethane. You can find mineral spirits in the paint-and-primer section of home improvement stores, hardware stores, and superstores in your area.

Protect Your Baseboards with Masking Tape

If you have wooden baseboards in your home, make sure to protect them from the overspray of polyurethane when painting your floor with masking tape. This tape will help keep any polyurethane from getting on the baseboards when projecting it onto the floor’s surface. To stick the tape to the wall, just run a wet rag along the surface.

Mix Your Polyurethane

Mixing your polyurethane will help you achieve a durable coating. You can use a big jar or can to get your polyurethane liquid in one container. Pouring all your liquid in one container will help them mix better than in separate containers.

Use a stirrer or paint stick to remove all lumps of polyurethane before application. A stick will help you get all the layers, so there aren’t any shades of color on your floor. Keep stirring until your entire mixture is even and smooth. Your container should also be large enough to be able to mix it without spilling or making a mess.

After all, you wouldn’t want to run out of liquid before applying the liquid in your entire room. When you’re done mixing, shake your can of polyurethane, then pour it on a paint tray.

pplying the Polyurethane

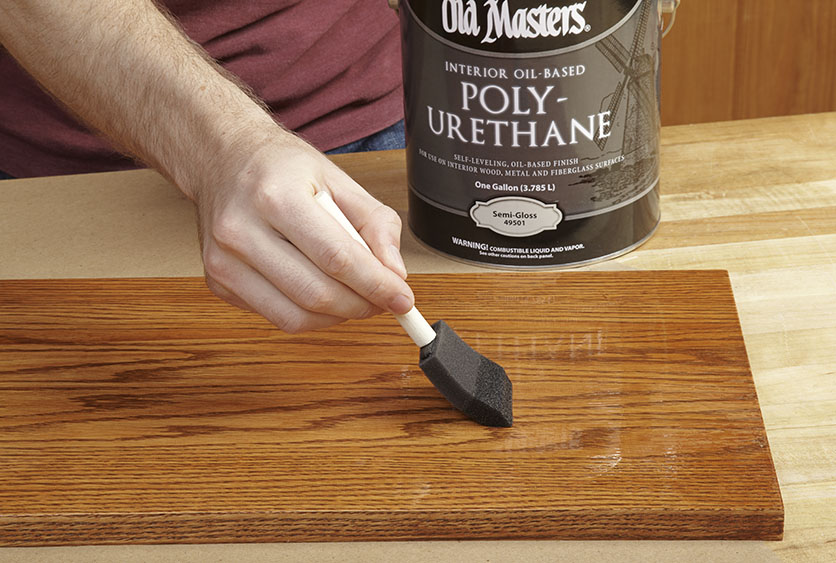
Apply the first coat using a paint brush or painter’s pad. You can also use a bristle brush but not lambswool applicator or foam pads. These tools leave it hard to remove streaks, so be sure to use a good brush when applying polyurethane. Don’t make your layers too thick; they should be about 1/16 of an inch or less.

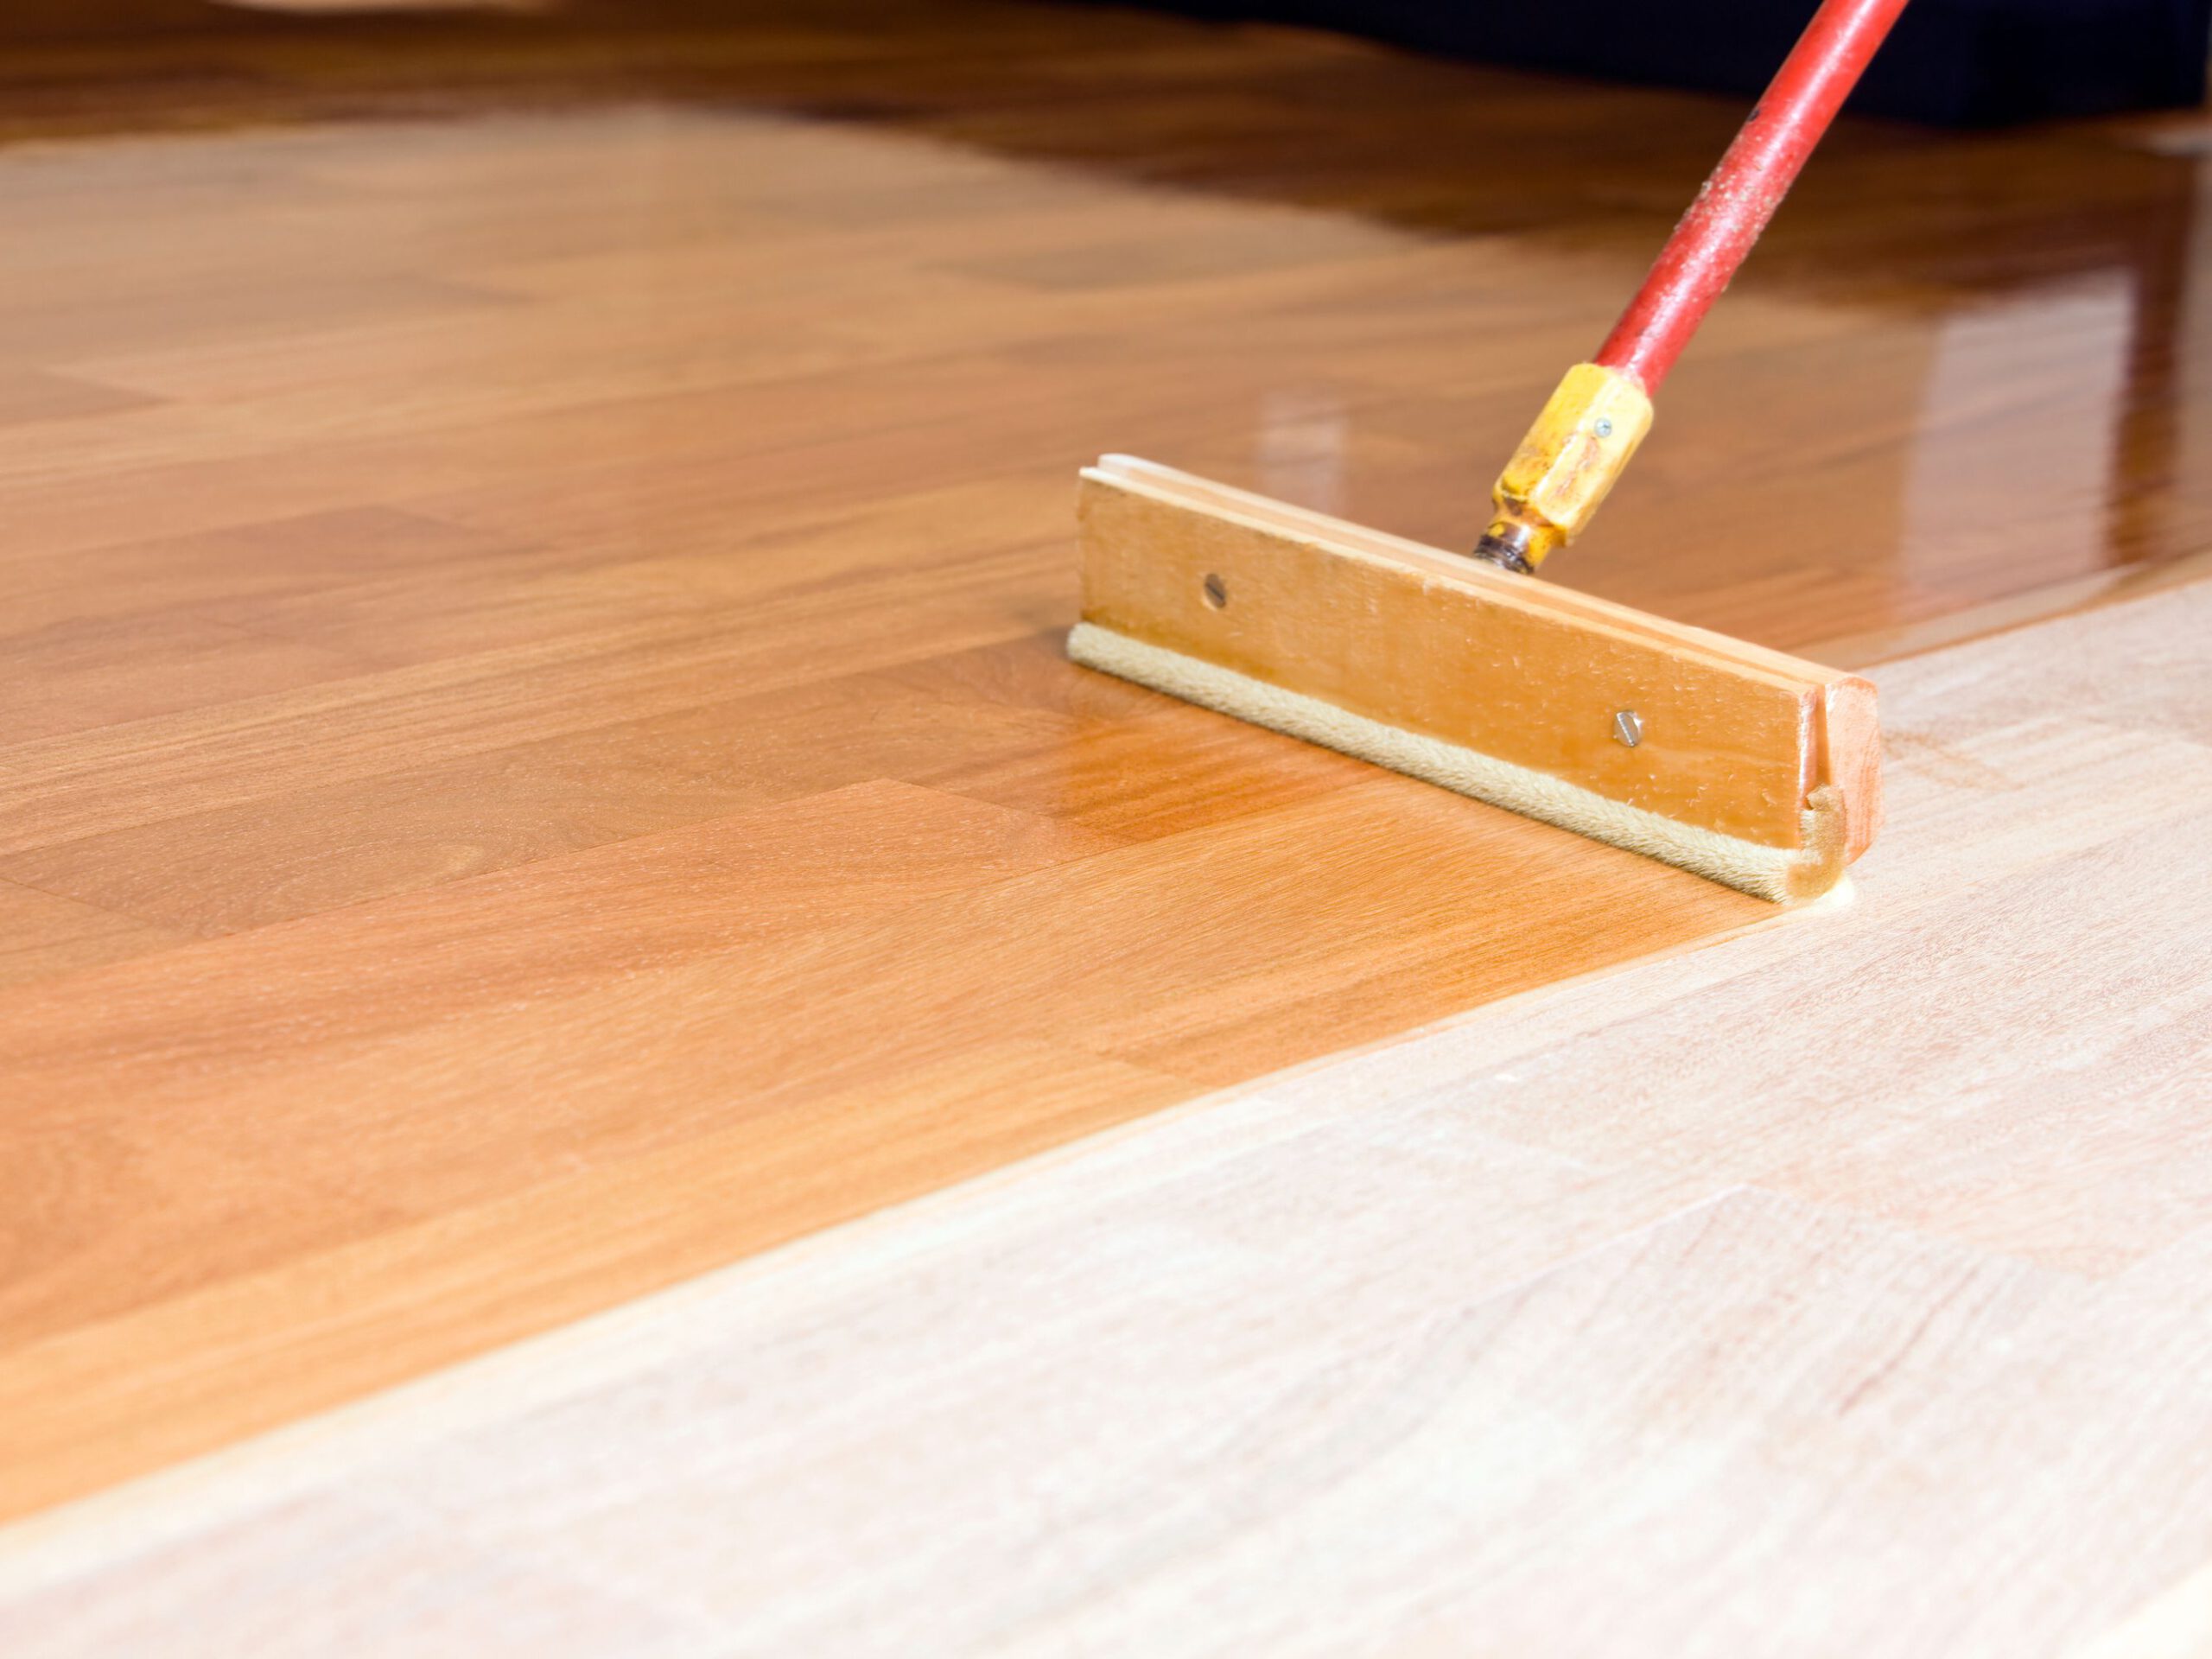
Use a bristle brush to coat all the corners and edges of your floor. You can use a very thin, light coat on these areas to ensure that they dry correctly and don’t form water bubbles. After that, use an applicator pad or roller pad to brush your polyurethane onto the rest of your floor. This should be a medium to heavy coat, but again, not too thick.

When applying polyurethane with an applicator pad, go in small sections, covering about four to six square feet at a time. You can use one hand for rolling and another for turning the pad over. This process has the potential to become very messy, so you should have something to wipe your hands off as you go.

pply the Second and Third coat

Let the floor dry overnight, then fill in any missed spots with a second coat of polyurethane the next day. Water-based polyurethane products are not as thick as oil-based polyurethane products, and they take less time to dry than oil-based polyurethane.
Apply the Second and Third coat
Image caption: https://static.woodmagazine.com/

So, give it 3-4 hours to dry before applying the next coat. If you want to use an oil-based product, you’ll need to wait one week between coats. After your first coat is fully dried, softly sand the entire floor with 220-grit sandpaper for a smooth finish.

Before applying the second coat, use liquid white vinegar to wipe down the floor. It’s also important to clean your wooden floors before you apply the second coat. Follow the same steps as with your first coat to apply the second coat.

The last thing you want to do is put on too much polyurethane, which will leave oily patches that will be impossible to clean up without damaging your flooring. So apply it sparingly and take your time. One good coat should do the trick for most floors, but you may need to go over certain problem areas twice to achieve a consistent finish.

Let your wood floor sit for three to four hours before sanding and cleaning the surface. Paint the final coat, the third coat, and leave your floor dry for three to four hours to get the prolific finish.

Use Abrasive Pad to Even Out the Surface

To create an even finish and to help with the drying process, it is advisable to rub the polyurethane with a piece of coarse sandpaper or steel wool. This will give you a smoother surface and ensure that your finished product has an attractive sheen.

Recoat the Finish and Let it Dry for 24 Hours

Avoid walking on your floor for 24 hours after applying the final coat. Wait until the polyurethane dries before walking in. Don’t replace your furniture for at least three days, and wait for one week before replacing your rugs and carpets. This will make your floor fully cure.
Recoat the Finish and Let it Dry for 24 Hours
Image caption: https://www.thesprucecrafts.com/

Clean the Floor

Clean up any spills immediately with a damp cloth to prevent stains from setting into the finish. Always use an approved cleaner on your floor, as well as a mop or dry rag to clean it. Avoid using water if possible, as this will create marks and streaks.

FAQS on How to Apply Polyurethane for Floors

What is the best applicator for polyurethane on floors?

Polyurethane is applied with a brush, paint roller, or spraying. Brush application gives an even finish and is recommended for small areas of less than 150 square feet. Rollers are easier to handle on smooth surfaces, while spraying requires more skill but can get into hard-to-reach corners.

How often do I need to apply polyurethane?

Recoating your floor with polyurethane depends on many factors: traffic and use, frequency of cleaning, and how long you wait between coats. Most floors need refinishing every year or two. The first coat should be applied as soon as the old finish has dried thoroughly. 

Final Thought on How to Apply Polyurethane for Floors

Polyurethane coating is an extremely useful liquid to improve the durability of your surface. A perfectly wooden floor also makes a home a comfortable place to live in. Make sure you follow the steps mentioned above correctly because using incorrect steps can waste time and money.

Follow this guide on applying polyurethane on hardwood floors to complete your flooring project in the right manner. It is always better to use all available resources before starting with any home improvement activity.


The post How to Apply Polyurethane for Floors appeared first on Kitchen Infinity.

Did you miss our previous article…
https://chefbuano.com/?p=676
Travertine Flooring Review: Pros and Cons

Travertine Flooring Review: Pros and Cons

You want to add luxury and timeless beauty to your home, but you don’t have the budget for expensive marble or granite. Travertine is an affordable alternative that can give any room in your house a luxurious look with the durability of the stone. It’s perfect for kitchens, bathrooms, living rooms, and more. 

And because it comes in so many different colors, you can easily find one that fits your style perfectly. While it is true that travertine has a timeless appeal, this natural stone does have some drawbacks. It’s not without flaws in terms of maintenance and installation. If you’re still interested in learning more about travertine flooring pros and cons, then keep reading.

What is Travertine Flooring?

Travertine is a natural stone that is deposited by geothermally heated hot springs. It’s considered a type of limestone that forms due to the rapid precipitation of calcium carbonate. Travertine comes in a variety of earth tone colors, including tans, browns, rust, and beige hues.


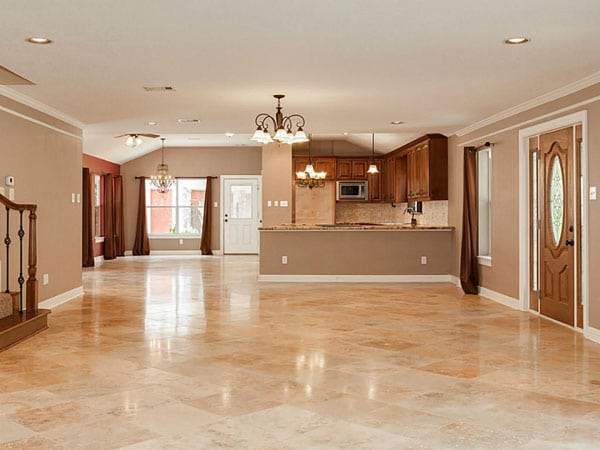
Image credit: https://kleanstone.com/

It’s a very durable stone and easier to care for than other natural stones. Plus, its heavy and porous surface requires you to seal the surface regularly. If you’re looking for a natural stone flooring solution that won’t break the bank, then travertine may be right up your alley. 

This versatile material is available in dozens of beautiful shades, shapes, and sizes, so there are plenty of options to choose from when creating your custom design.

Pros and Cons of Travertine Tile

Natural stone is a material that can have both advantages and disadvantages. And travertine limestone falls under this category. As much as it has benefits, this stone also has some drawbacks. 

Travertine Tile Pros

Travertine Flooring is Available in Various Designs and Color Schemes

One of the best advantages of travertine is the diversity of color schemes and designs it allows. Travertine flooring is available in a rich variety of colors, ranging from ivory to beige to gold and deep-reddish brown.  This flooring material’s subtle color blends and its natural veining make it easy to create one-of-a-kind patterns and designs you’re looking for.

You can choose from its four different finishes, ranging from matte honed, tumbled, brushed, and polished. The most popular choice is the honed finish with a smooth and natural-looking while the rougher brushed, and tumbled finishes provide textural finishes.

Travertine is Environmentally-Friendly Flooring Material

Travertine is a natural stone that combines silica, calcium, and magnesium. You can add a healthy and environmentally-friendly touch to your home decor if you choose travertine flooring. In fact, the manufacturing technology of travertine requires less water usage and emits fewer greenhouse gases into the environment. 

This process also creates minimal waste in landfills or does not cause harmful air or water pollution. The use of limestone also dates to ancient architecture in Rome when they would use Aqua Traiana, a pure water source, to create the smooth white-colored marble stones. It’s more eco-friendly than laminates. Natural stone tile can also be reused or repurposed.

Travertine is Durable and can Last Long if Properly Maintained

Travertine tiles are very durable; these durable stones are both water and moisture-resistant. All you need to do is to give them proper care. They won’t crack easily if you handle them with care, enabling you to keep the good condition of your home for long years.

Travertine adds another value: your house will look new, courtesy of the travertine tiles. Travertine floors, countertops, and pavers are very robust and can easily survive the test of time. When you look at some of the ancient places where travertine was used, you’ll see how this natural stone has stood the taste of time by lasting for a very long time. 

The hardness rating of flooring travertine is compared to that of marble flooring, so it’s suitable for heavy foot traffic areas. Since this material is a natural stone, it might have holes in it. These holes might get bigger and deeper in time, thus ruining your flooring. Make sure you give your travertine flooring proper care for it to last long.

Having ceramic tiles or granite in your kitchen and luxury vinyl in your bathroom may look nice, but travertine floor throughout your home can increase its value. Travertine can outlast other natural stones as long as you maintain it.

Travertine Tiles are Resilient

These tiles can tolerate extreme weather fluctuations, thus making them suited for both indoor and outdoor installations. You can install travertine pavers for your garden pathway, pool, and retaining wall of your house without worrying about the scorching heat that can damage your travertine.

It Has a Naturally Non-Slippery Texture

The non-slippery nature of travertine makes it suitable for installation in swimming pools, bathrooms, showers, flowers, and on pool decks. It has holes and pits due to its porous surface, making it rough and not slippery in an unsealed and unpolished state.

Replacing Travertine Tile is Quite Easy

Even though flooring material is durable, accidents can still happen after a few years of use. This way, it can get damaged or ruined. However, you don’t need to fret if you have damaged travertine. With several travertine variations, it’s possible to find not the same but the one similar to travertine stone. 

You can replace travertine tiles with new ones with matching tones or colors. In fact, no one would be able to notice the difference. You can also invest in a few travertine tiles just in case your tile gets damaged.

The Color Variation in Travertine Makes Each Tile Unique and Beautiful

The natural colors of travertine stone range from grey veining to rusty red with white veins and light brownish tones with cream, beige and orange tones. A single tile may have a layer upon layer of pastel colors and various patterns like stripes and veins.

Cons of Travertine Tile Flooring

It Can Get Damaged from Weather and Sun Exposure

Travertine is a very soft stone. It tends to wear away over time and can easily get damaged by weather and sun exposure. You need to be careful while using chemicals for cleaning purposes because they might corrode the calcium deposits in the tile, which will give out discolorations. 

You should avoid using travertine in your garden or on your back patio because it doesn’t hold well outdoors under constant moisture conditions.

Travertine is a Porous Material

Travertine is a porous material, meaning it will need to be sealed. Make sure you seal your travertine with a high-quality sealer before grouting it. This will prevent the grout from seeping into the surface and causing discoloration or colored dyes to appear on your floor. 

Failure to seal may attract mildew after experiencing some staining. You also need to consider how often your travertine is exposed to moisture and cleaning products before sealing. 

Travertine Tiles are Highly Reactive to Acidic Substance

A major disadvantage of this flooring material is the sensitivity towards acidic substances such as alcohol, vinegar, coffee, and orange juice. Suppose you accidentally spill orange or lemon juice on the travertine tiles. In that case, you risk having a permanent stain because the acidic solvent will react with the calcium carbonate of the stone.

So, be careful while using these tiles, especially if you have small kids around. Also, give it a second thought before using travertine tile to decorate your restaurant and kitchen countertops.

Travertine Tiles Tend to be Heavier

If you’re looking for an easy and quick installation process, travertine tiles might not be the right option for you. These tiles naturally tend to be heavy. Therefore, it would be difficult and time-consuming to install them. You should also be concerned about the transportation of these tiles from the store you buy them to your house. Their transportation cost might be a bit more expensive than other flooring materials.

Travertine Requires Maintenance and Care

This tile might be considered durable and resilient but doesn’t mean that it doesn’t require extensive maintenance. Unlike how you mob your flooring options such as granite, ceramic tile, porcelain tile, and vinyl, travertine requires much attention. This attention is what gives it the beauty and everlasting sense of elegance.

If unsealed and unpolished, this material is susceptible to damage because of the fear of its porous structure that absorbs spills in its holes and pits. That’s why it’s important to seal your tile to prolong its life. It’s recommended to use a penetrating sealer, especially when pets are active around food preparation surfaces.

Travertine is Only Available in Neutral Tones

Travertine is a type of limestone, and limestone is naturally white. That means that you cannot find travertine in bright or funky colors. Its tones and shades are limited to beige, white, cream, and tans. It’s also light in color because of the white calcium carbonate. 

You can’t find travertine in any colors and shades apart from the neutral and earthy tones. If you’re looking for brighter colors, opt for other materials such as marble, granite, and slate.

Travertine Tile Finishes

Polished Travertine Tile

Polished stone is commonly available in a polished finish. Polished travertine tiles make the stone look shiny and glossy, like a mirror. A surface of polished tiles traps small particles of dirt, making it difficult for you to clean.

Polished Travertine Tile
Image credit: https://cdn.shopify.com/

Honed Travertine Tile

This travertine tile is matte polished tile and is used mostly in flooring. It looks like classic travertine tile, but it’s not shiny or glossy.

Tumbled Travertine Tile

Tumbled travertine tiles have a textured and matte look. Tumbled travertine has a more antiqued appearance, making it a darling to indoor decorations. Tumbled tiles are also used in bathrooms and near pool decks because of the non-slippery surface.

Brushed Travertine Tile

This is a finish travertine tile shared with engineered and hardwood flooring. While it’s not hand-scraped, these tiles are finished in a fashion that leaves the surface rougher than other finishes.

Travertine vs. Porcelain Tiles

Many porcelain tiles today do a good job of mimicking natural stone, including travertine. The appearance of travertine-porcelain is not exactly like natural stone, but it’s close to the look of polished and honed travertine. Stone-look porcelain is less expensive as the average can cost $7 to $10 per square foot for professional installation, but it can be half price if you install it yourself.

Travertine Flooring Installation

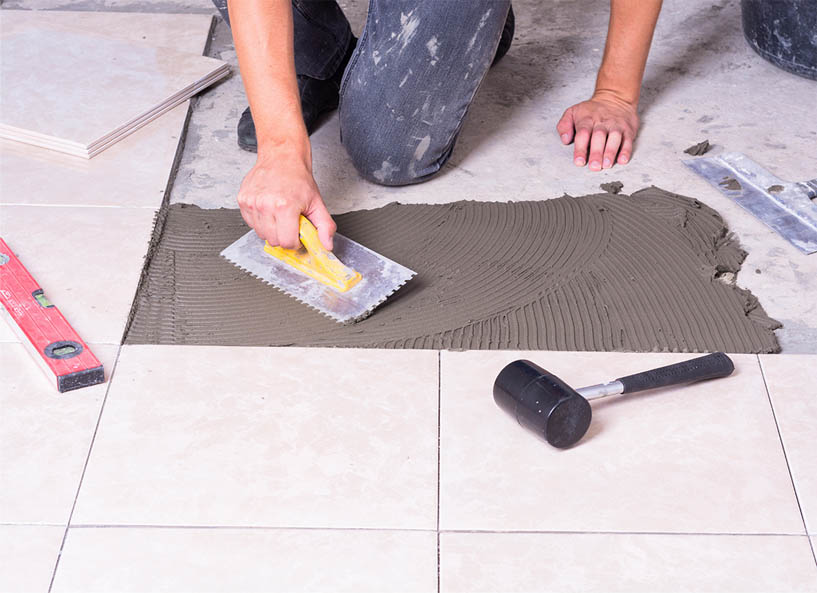
Like other natural stones, you can install travertine tile the same way as ceramic tile. Apply a layer of cement board underlayment on the subfloor, then lay the stone tiles with a thin-set adhesive. And lastly, fill the joints with grout, and you’re done.

Travertine Flooring Installation
Image credit: https://cdn.msisurfaces.com/

FAQs on Travertine Flooring Review

Is travertine a good choice for flooring?

Yes, travertine is a good choice for flooring because it’s durable and luxurious compared to other floor materials such as marble and granite.

re travertine floors outdated?

The travertine floor is not outdated, even though many people believe so. These flooring materials are increasingly used in construction projects, thanks to their durability and long-lasting beauty.

Final Thought on Travertine Flooring Review: Pros and Cons

That’s all! If you’re looking for a natural stone that can add some coziness and beauty to your floors, then travertine tile is the ideal choice. But if you want a low-maintenance floor surface, then try other materials, especially if you have small kids and pets around.


The post Travertine Flooring Review: Pros and Cons appeared first on Kitchen Infinity.

Did you miss our previous article…
https://chefbuano.com/?p=671

Vegetable Gardening in a Small Space

Vegetable Gardening in a Small Space

Growing your vegetables is a great way to save money and get healthy farm produce. But finding the time or space for a large vegetable garden can be hard. A small veggie garden doesn’t have to be boring. You can create an amazing-looking vegetable garden in just about any size yard or patio area with some creativity, plus rich, fertile soil and adequate water. 

By growing your food in a small space garden all year long, you’ll save money while getting some exercise and enjoying nature. This article will show how to grow veggies even if you live in an apartment or condo with limited garden space. It includes information on what types of plants do well in small spaces and techniques for maximizing the available area so that more crops can be grown there.

Grow Vegetables in Containers

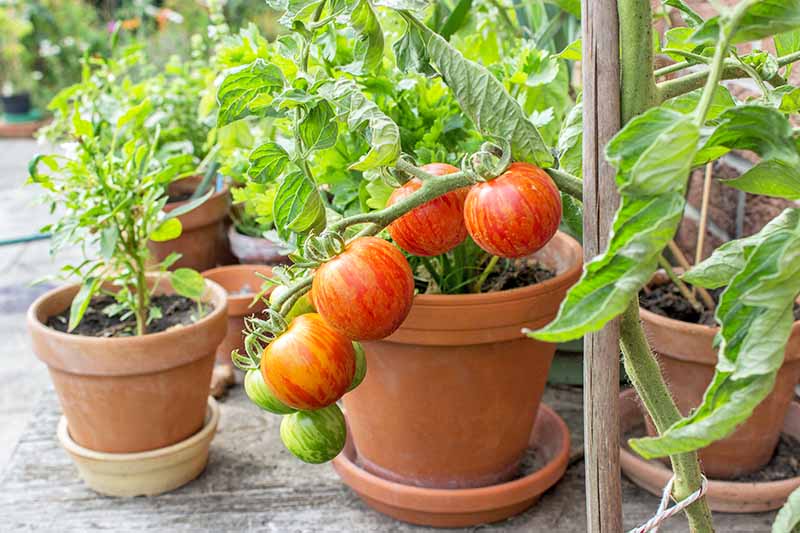
A great way to grow vegetables in a limited space is by using containers that can be moved around as needed. Try growing them in containers filled with potting soil if you don’t have a patio, porch, balcony, yard, or driveway area for garden beds and rows of crops. It’s important to use a good quality potting mix, not dirt from the yard.


Image credit: https://www.backyardgardenlover.com/

The potting soil mix will make sure the plants get enough air circulation and drainage, so they don’t get root rot or other fungal diseases. If growing on the ground is not an option due to poor soil, lack of sun, and space limitations, containers are the best alternative. When growing edibles in these containers, choose patio or dwarf varieties and shallow-rooted plants such as lettuce, garlic, radishes, and leeks.

In containers, you use anything that holds soil, from fabric grow bags to old metal wash buckets, as long as you provide good drainage. Container plants also need good water, so do not leave them dry out completely. Fertilize your containers during the growing season by using organic fertilizer such as liquid kelp. Grow your tomatoes, peppers, and basil from seed using your large container.

Choose Compact Varieties

If you must have giant vegetables like beefsteak tomatoes or a row of sweet corn, then the space for growing other vegetables in your small vegetable garden will be limited. Fortunately, you can choose varieties that are bred to grow in small spaces. 

Any plant with the name patio, pixie, tiny, compact, and baby and dwarf in the name is a good bet. If a plant is bred to be small, it doesn’t mean that the fruits will be small or less yield. The labeling of seeds and seedlings will indicate the mature size of the plant varieties. 

There is an area set aside for growing vegetables, fruits, and herbs in the traditional approach, but in small gardens, this isn’t possible. So, try growing edible and ornamental plants together. Planting flowers and vegetables together will make it harder for pests to hone in on specific crops. 

An abundance of blooms will also ensure there are always beneficial insects on hand to pollinate flowering vegetables and all types of fruit. Also, include edible flowers such as borage, nasturtiums, lavender, calendula, chives, and thyme. 

Don’t forget to create a pollinator-friendly garden by planting ground cover. Try growing fennel or dill with your vegetables. The scents of these plants will attract bees or butterflies, which are also beneficial for pollination purposes.

Use Vertical Space

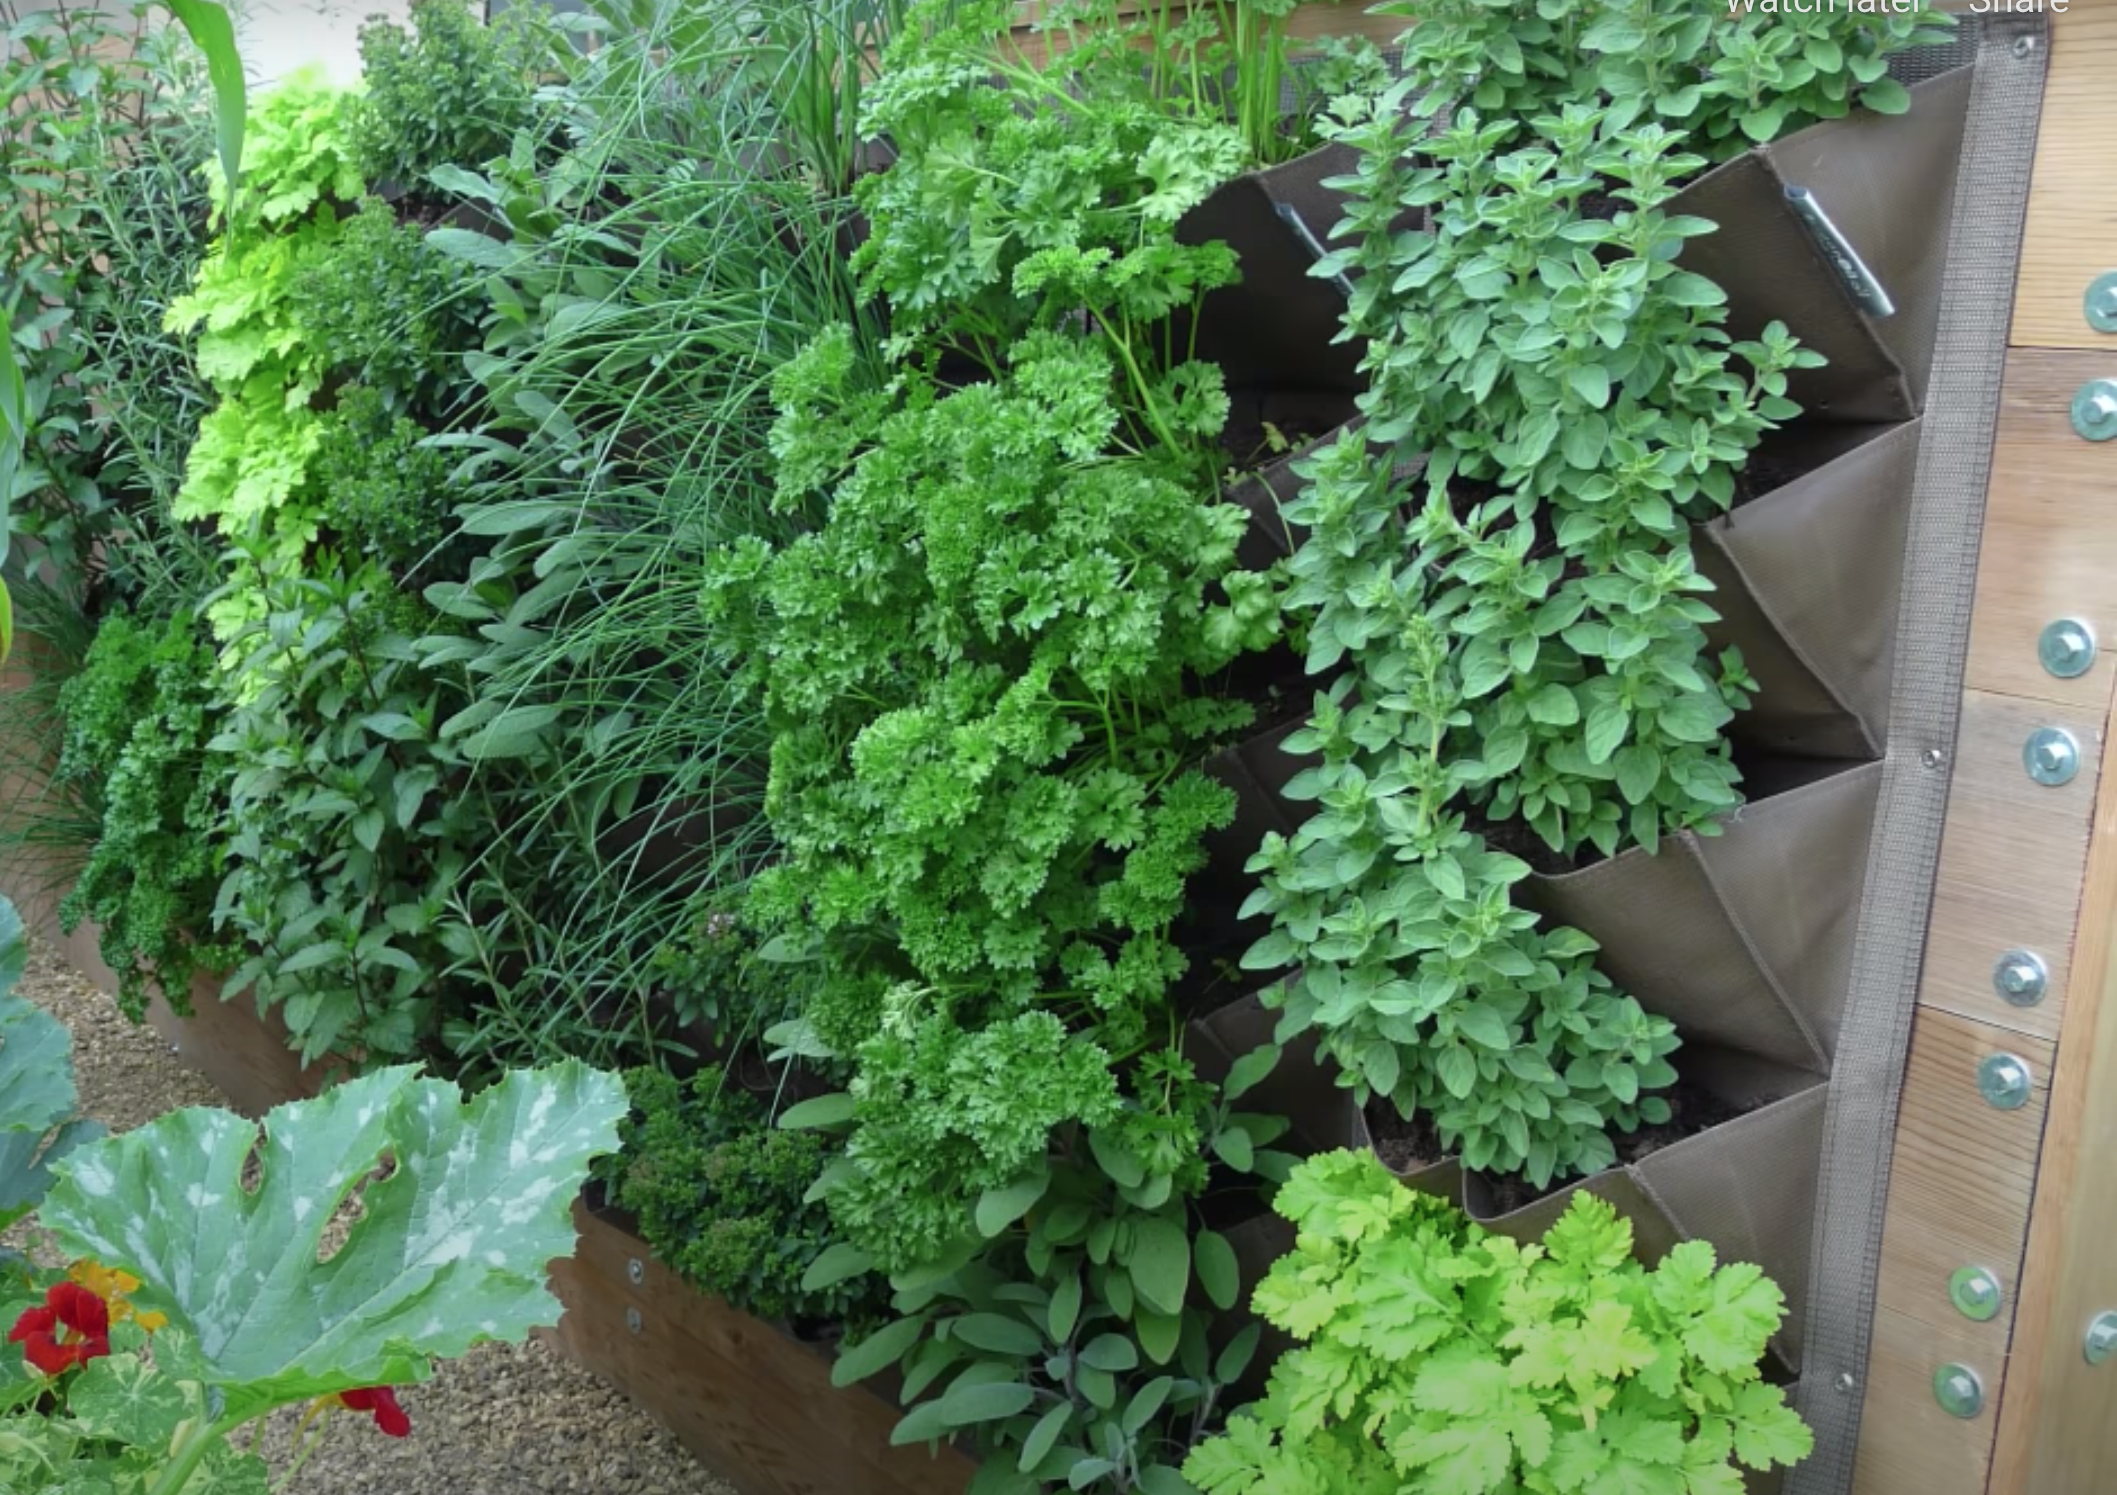
A small garden doesn’t have to mean a lack of vegetables. Try growing vegetables vertically on walls, fences, or railings. The tying string between two sturdy stakes is an effective way of growing runner beans or peas. Plant climbing varieties of cucumbers, tomato plants, and different types of squash are at the base of fixed support for them to grow up along.

Use Vertical Space
Image credit: https://www.almanac.com/

 A rose arbor, trellis, or even a clothesline can be put to good use in the garden by growing beans up it. This frees up ground space and will save you money on buying plant supports. So if you don’t want to grow a variety of vegetables in your small garden, look for compact varieties and vining crops that you can grow vertically on support structures. 

You can also opt for pole beans instead of bush beans. Vining cucumbers can also take up less space despite their nature. Growing your vegetables vertically won’t only save space but will also create structure and visual interest.

Grow High-Value Crops Vertically

If you only have a small space to grow in, you want to make sure that the vegetables you plant are of high value. Try growing more expensive crops like heirloom tomatoes or leafy greens instead of radishes or onions. By doing this, you can fit more plants into the same amount of space and increase your profits.

Make sure you maximize your small space by growing small amounts of different crops that offer big rewards like salad leaves, leafy greens, fresh herbs, and chili plants. Give your crops some space to enable them to get high density by using a high nutrient moisture-retentive soil mixture. 

Make sure that you choose vegetables that are suitable for your climate and grow well in containers. You can use different pots such as rectangular plastic tubs, large buckets, or circular half barrels to place plants on top of each other and maximize space and yield. 

Choose compact varieties that are suitable for growing this way and arrange them to maximize your visual impact. You can also use hanging baskets to catch that valuable sunlight.

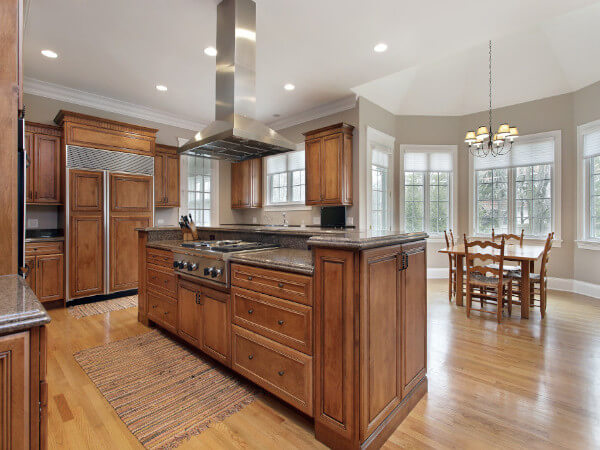
Position Your Small Vegetable Garden Near the Kitchen

It is important to consider the best place to put your small vegetable garden. The most convenient location for harvesting would be near the kitchen entrance, so you don’t have to carry them far when it’s time to store them in the fridge. Select vegetables suitable for growing indoors, such as cherry tomatoes and baby carrots, which can fit nicely in small spaces.

Position Your Small Vegetable Garden Near the Kitchen
Image credit: https://st.hzcdn.com/

Most small vegetable crops are annuals. They have a very short timescale and need to grow rapidly. And to enhance their performance, they need a lot of help and plenty of food to fuel their growing process, and that’s only possible in full sun. This small vegetable garden idea allows you to place your crops near the kitchen for ease of use, and you can also pay close attention to pests and diseases.

Plant Your Vegetables in Pots

To have a successful vegetable patch indoors, you need to install it in containers. There are different kinds of pots that you can use for this purpose, such as flower pots and barrels. You should find a wide variety in your local garden store or supermarket, one that has good drainage holes in the bottom.

Plant Your Vegetables in Pots
Image credit: https://gardenerspath.com/

Organic soil is the best option because regular soil or compost can get dirty quickly. If you use a regular potting mix, your containers will need to be turned over regularly so that all of the dirt is mixed up with the new material being added each time. 

Use tubs, pots, hanging baskets, and troughs to grow vegetables and herbs. Potted edibles and other container gardening ideas are convenient for small vegetable gardens using a patio and a court space. You can use your large container to plant flowers and a range of crops, including salad leaves and chilies, which are decorative and practical.

Regular harvesting of your plant leaves, such as lettuce and chard, will help prevent crowding. Both your crops and containers should be compatible with the growth of the plants.

Consider Companion Planting

There are some vegetables that work well together. For instance, basil can help control tomato plant pests and fertilize with its nitrogen content. Dill attracts the predators of aphids, ladybirds, and hoverflies to your small garden. 

Companion touted plants not only prevent pest infestation but also help conserve space. Shade-loving flowers and plants can also benefit when planted next to taller plants. Other leafy greens and basil hate hot afternoons and will thrive when grown next to tomatoes.

Lettuce will also keep on producing all summer when taller plants shade them. You can plant early harvested vegetables such as spinach, radishes, and peas with slow-growing crops such as broccoli, root vegetables, and peppers.

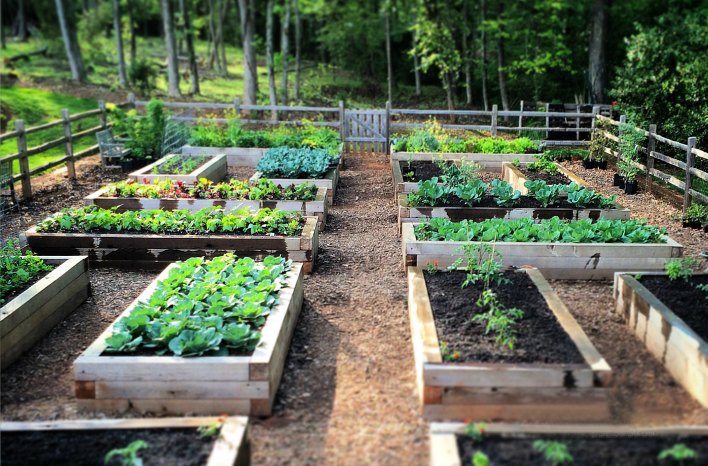
Build a Raised Bed Vegetable Garden

Raised beds are a very popular way of growing edibles in a small vegetable garden. You can also design your raised beds using various companion planting techniques. 

Build a Raised Bed Vegetable Garden
Image credit: https://site.extension.uga.edu/

Plant garlic, leeks, and onions together with beans snap peas, and corn for a high-yielding low maintenance combo of vegetables. You can use brick, wood, and sleepers to frame your bed. Make sure you fill your beds with good quality soil and then add your vegetables or fruits.

Plant a Small Vegetable Garden amongst Flowers

Growing vegetables in a small vegetable garden require creative thinking. If you don’t have much room for a full-sized vegetable garden, grow veggies among flowers. Vegetable and fruit plants can blend attractively beside other plants. Some flower bed winners would do well with most vegetables like carrots, spinach, tomatoes, and beans. 

Transplant your young seedlings of cauliflowers into the bed prepared to plant flowers. Once they mature, the heads of the cauliflower are protected from sunlight due to the foliage of the surrounding flowers. With its pretty daisy-like flower blooms, this plant will shade your vegetables very well, which makes it perfect for carrots and spinach.

Grow Vegetables in Window Boxes

You can also grow vegetables in window boxes that you’ve hung near your windows. Vegetables like lettuce, peas, and beans will yield a bountiful harvest provided they get enough sunlight and water. Tomatoes and peppers do well when placed next to the kitchen window for this reason; you’ll always see them when inside the house and be reminded to care for them.

If you grow vegetables in boxes, you will find that they need more frequent watering than vegetables planted outside the house. The reason for this is that soil in boxes heats up faster and dries out quicker. You can try covering the bottom of your window box with enough bags of brown peat moss to allow the soil in your box to retain more moisture. 

An advantage of growing vegetables in boxes is that you can move them around, placing them where they will get full sun and thus ripen faster. A disadvantage of raising your vegetables indoors is that they produce a smaller yield than those grown outside the house. For this reason, it is best to start your plants in the house and transplant them outdoors once they are large enough.

Succession Planting

Succession planting is useful for any planting technique, whether it is a large or small vegetable garden. But it is most valuable when you have limited garden space. It means reseeding quick-growing garden crops from two to three weeks during the growing season. It’s useful for plants such as zucchini, beans, and lettuce.

Small-Space Vegetable that Grows and Produce Well

Pole Beans and Peas

Start your peas on trellis in early spring, and they’ll provide you with fresh peas as well as a nice crop of fertilizer for early-season flowers and vegetables. In the fall, plant your pole beans in large clumps or groups instead of rows. This will allow them to take advantage of any heat retained from the summer; they will produce a crop before the cold weather sets in again.

Tomatoes

Tomatoes are very popular in gardens, but they require a lot of room that the average gardener may not have. Cherry tomatoes are often grown on plants that can be planted alongside regular vegetable crops. Smaller varieties work very well for container gardening; some good choices are determinate tomatoes, beefsteak, and green tomatoes. Make sure you learn how to prune tomatoes for better yields.

Salad Greens

These are among the easiest vegetables to grow. You can even grow them indoors in your kitchen. The key is finding a good fertilizer that will not be too strong for your baby greens and giving them enough nutrition to mature into full-size heads of lettuce, spinach, or other salad crops.

FAQs on Vegetable Gardening in a Small Space

What kinds of vegetables can be grown indoors?

Certain kinds can be grown indoors, such as carrots and tomatoes, though you should first research to see if they will grow well in a container. Also, mint is easy to grow and can help cleanse any containers you use for your indoor garden.

What do you need to learn before starting a vegetable garden?

You should investigate the needs and requirements of your chosen veggies and decide on your space and what equipment you need beforehand.

How much water is required per day for growing vegetables in pots?

Vegetables grown in pots will require more frequent watering than those grown in the ground. Be prepared to water your plants at least twice a day if they are grown in pots, and make sure you allow them to drain.

Final Thought on Small Space Vegetable Garden

Growing vegetables in a small space is possible, but you need to be more creative than planting in a large yard. If you’re growing your vegetables, it is important that you know what works best for the type of vegetables that you want to grow and pay attention to their sunlight and water needs. Your site location should also have adequate sunlight, access to water sources, and has rich, fertile soil.


The post Vegetable Gardening in a Small Space appeared first on Kitchen Infinity.

Did you miss our previous article…
https://chefbuano.com/?p=665