Few things are as satisfying as knowing your home is clean. But with so many different products on the market, it can be difficult to determine which ones work. If you go for store-bought mopping supplies, they can be costly and contain harsh chemicals that may irritate your skin and eyes. But if you use common household items, you can clean and sanitize your floors for a fraction of the price.

In this article, we’ll cover the basics of how to mop your floors using supplies you already have around the house. Here’s all you need to know. 

Easy homemade mopping solutions

Follow these steps to learn how to mop a floor using simple household items.


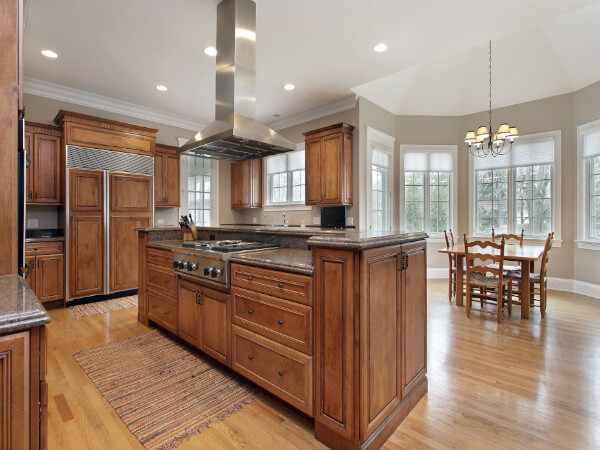
Image Credit: http://realsimple.com

1. Fill a bucket with water and dish soap

Your first step is to fill a clean, empty bucket with warm water. The size of the bucket depends on how big your room is, but generally, one gallon of water should be plenty. You also want to mix in some dish soap to help remove dirt and grime from the floors.  

Add about ½ cup to 1 cup of dish soap depending on the size of your bucket full of water.        

2. Add vinegar to the bucket

Next, add ¼ cup or so of white distilled vinegar into the mixture to disinfect your floor while you mop it. As vinegar can be very strong, only use this much rather than increasing it. This will ensure that your house smells pleasant and fresh rather than like a salad.

3. Dip your mop in the bucket

After you’ve created your cleaning solution, grab a mop out of your closet. You can use any type except for swiffer wet-jet mops because they are disposable. Dunk the mop head into the water/soap mixture until it’s completely saturated, then wring it out over the bucket to remove excess moisture.    

4. Mop your floors

Mop the floors by dipping your mop in the soapy mixture, wringing it out over the bucket, then moving on to another section of the floor until you’ve mopped all of it. Once you’ve dipped your mop in the bucket, wring out any excess moisture by squeezing it between your fingers. With a clean water/soap mixture on the mop head, start mopping your floor by pushing forward with your feet and pulling back with your hands. Do this repeatedly across the entire floor until you’ve covered every section of it.

5. Rinse off your mop after every few sections of the floor are cleaned

Before starting another section of the floor, rinse off the mop head to remove any leftover dirt or debris then dip it into the cleaning solution once again for additional cleansing power.     

6. Put away your supplies when finished

Once you’ve finished mopping all areas of a given room, put your supplies away. Wash out the bucket with warm water and dish soap, wring out the mop head, hang it up to dry, and store the cleaning solution in a container or jar.

Voila. You have clean floors that are free of bacteria without spending too much money on expensive commercial products. Follow this simple how-to guide when you’re ready to deep-clean your floors with only what you have at home.

Disinfecting other household items

You can also use household supplies to clean other surfaces inside your home. For example, you can disinfect your toilet, bathtub, sink, and tub with this method if desired.

Simply add the same amount of water, dish soap, and vinegar into a spray bottle and shake it well. Then use it to wipe down your toilet, tub, or shower walls and clean out your sink.

This mixture will kill most household germs and make your bathroom free of harmful bacteria. It’s also non-toxic so there’s no need to worry about chemical residue left on surfaces after cleaning them for hours with harsh chemicals such as bleach.

There are plenty more uses for common household items that can help you stay healthy while keeping costs low. For example, using lemons and baking soda to clean your toilet bowl can cut back on harsh chemicals while eliminating germs. You can also make your homemade wood cleaner with vinegar, lemon juice, olive oil, and water by following this easy guide. 

How to disinfect carpets

Carpets are another source of germs and dirt in your home. Since they can be difficult to clean with a vacuum, you’ll want to know how to disinfect your carpets so that this area of your house is germ-free.

When you’re ready to deep-clean the carpets in your living room or bedrooms, fill up a spray bottle with water and dish soap then shake it well. Then use it to wipe down each section of carpet and soak up any stains and dirt left behind by children playing on the floor or pets sleeping on it.

Once you’ve sprayed down each section of carpet, start at one end of it and pull back on top with a towel while pushing forward on the bottom with your feet. This will help you pick up most of the dirt and debris out of the carpet.

After you’ve pushed forward and pulled back over every section of carpet, use a separate towel to wipe up any remaining moisture or stains then vacuum each area to finish your deep-cleaning task.  

Tips and tricks to keeping your home clean

Some more tips and tricks that can help you clean your home for cheap without sacrificing quality. For example, you can use a dryer sheet to clean fingerprints off your windows and mirrors.

Simply use a clean cloth or soft paper towel to pick up the static from the dryer sheet then wipe down the area in question. The static will attract any dirt, grime, or fingerprints on your window so that they lift right off without too much scrubbing.

Another money-saving tip is knowing how to clean vinyl flooring. For example, you can use white vinegar and water in a spray bottle filled with 2 tablespoons of dish soap and 1 cup of vinegar for sparkling floors throughout your home. You can also add lemon juice, baking soda, and hot pepper sauce to the same mixture for a customized version that kills germs while also giving your floors a fresh scent.

The best part is knowing how to make safe cleaning products at home. This way you can save money every week by not buying commercial cleaners and keeping harmful chemicals out of reach from children or pets.

For example, vinegar mixed with lemon juice and water forms an effective homemade window cleaner that cuts through grime like magic. You can also use a hair conditioner as furniture polish to keep wood looking shiny without any harsh chemicals.

Easy Homemade Mopping Solutions – FAQ

What do I use to mop?

You can use a simple microfiber cloth or you could just as easily use an old T-shirt that has been cut into smaller pieces. There are also purpose-built mops available from your local supermarket/hardware store.

How should I clean the floor?

Generally speaking, people will buy a standard product to mist onto their floors and then wipe it up with a damp cloth or mop. The main benefit of this is being able to see where you have already cleaned so you don’t miss any areas. This type of solution may contain chemicals that could be harmful if ingested by pets or small children, so be sure to read the label before using them on surfaces that others will be walking on.

How often should I clean my floor?

This will depend on the amount of traffic your floors get as well as which type of flooring you have. For high traffic areas or those made from more porous materials such as timber, tile, or vinyl, it would be a good idea to mop weekly. For low traffic areas and those with sealed surfaces (e.g.: lino), you may only need to mop once or twice a month. When in doubt, always follow the manufacturer’s instructions on the product label for cleaning advice specific to your particular brand/type of flooring. Most people find that they don’t even need to purchase any special products – just use some warm water and add a few drops of their favorite essential oil (optional).

Homemade Mopping Solution
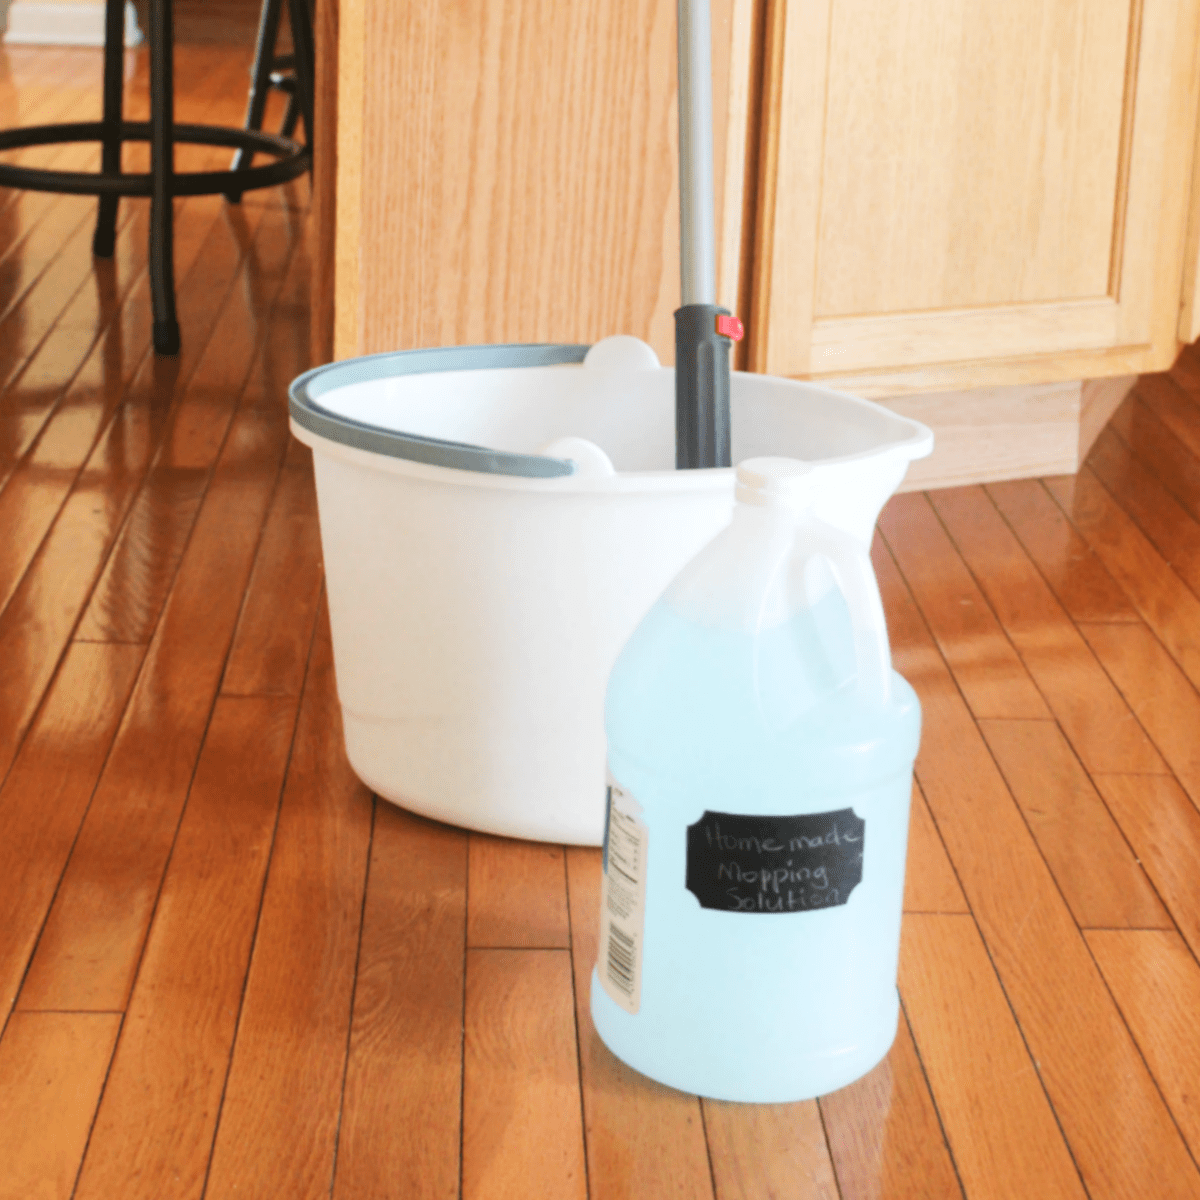
Image Credit: http://athomewithzan.com

Final thoughts on easy homemade mopping solutions

In conclusion, you now know that baking soda and vinegar are great cleaners and work well for mopping. The combination of these two will ensure a deep clean and keep your floors fresh.

Having a consistently clean house is a joy to live in for yourself and others that share the same space so always do your best to keep the place spick and span.

The post appeared first on Kitchen Infinity.

Did you miss our previous article…
https://chefbuano.com/?p=619

How To Grow Horseradish

How To Grow Horseradish

Horseradish is a hardy perennial plant that can be grown in many areas. It’s also very easy to grow, so everyone should have it in their garden. This plant does require some special care and attention. If you want to add horseradish to your garden, you must learn how to take good care of it.

We’ll cover how to grow, harvest, store and use your own fresh homemade horseradish sauce.

How to Plant Horseradish

The roots need a long growing season to produce large roots. Plant horseradish in full sun, although it will also tolerate partial shade. Grow horseradish in well-drained soil and ensure you remove stones and lumps that might cause the roots to split. To plant horseradish sets, dig a hole about 1 foot deep with plenty of compost mixed in. Drop one set into the hole and backfill with your potting mixture.

Horseradish grows in cool weather, so for the best flavor, plant it after the last anticipated frost date for your area. Set the crowns at the soil for spacing and planting, then plant horseradish roots in a shallow hole or trench at least 12 inches apart. Slice the horseradish root cuttings at a 30-degree angle, then fill the trench until the wide end of the horseradish root is covered. 


Image credit: https://cdn.harvesttotable.com/You should space horseradish roots 24 to 36 inches apart. Other plants such as potatoes and yams are the companion plants you should plant with horseradish. Make sure you choose a container that will allow horseradish roots to grow at least 24 to 30 inches deep.

Horseradish Care

Light

Horseradish plants tolerate full fun and partial shade. However, too much shade or more heat won’t be good. They should receive at least six hours of direct sunlight a day. Locate the beds with exposure to full sun, moist but well-drained soil, and protection from strong winds.

Water Horseradish Care

Horseradish requires consistent watering, moist soil, and cool weather. However, don’t overwater it, or you can get moldy or woody roots with weak flavor. You should water the plant daily with about 1 inch of water to keep the soil moist, not wet. Weed growth can hinder light penetration in summer, so weed out excess growth as hot weather approaches.

Soil Care for Horseradish

To get the most out of your horseradish crop, it’s very important that you select a planting site with rich soil. Horseradish grows well in most types of soil but prefers a moist, loamy texture. After you’ve plowed up the area for cultivation, add a generous amount of manure or organic compost to enrich the soil. Also, make sure you test the soil pH and ensure it’s neutral because horseradish thrives in slightly alkaline conditions.

Temperature and Humidity

Horseradish thrives in cool weather. Horseradish grows well in temperatures ranging from 45-75 degrees and requires a humidity level of at least 70%. But humidity won’t be an issue if its soil moisture needs are met and good airflow around the plant.

Fertilizer

Fertilize your horseradish during planting time and after every four weeks. You can make compost to use for this, use compost tea, or a commercial 10-10-10 vegetable fertilizer and ensure you follow the product’s instructions.

Pruning Your Horseradish

Horseradish won’t need pruning if you grow it as a food crop. But if you plan to use the root for medicinal purposes, cut back the top of the plant after harvesting in April or May, depending on your climate zone. The greenery will rejuvenate after this type of pruning and continue its life cycle.

Protecting Your Horseradish from Pests and Diseases

Keep your horseradish healthy by keeping it weed-free and applying mulch over the soil after planting. Horseradish has few pest or disease problems, but if you see insects eating the plant’s leaves, be sure to treat them immediately because this could spread to nearby plants.

Propagating Horseradish

The most common way of propagating horseradish plants is by saving root cuttings. This isn’t only an inexpensive way of creating new plants, but it will allow you to use excess roots you don’t eat.

Propagating Horseradish
Image credit: https://www.gardeningknowhow.com/

How to Harvest Horseradish

When it comes to horseradish harvest, these plants take one year to mature. In warmer climates, it may take a little longer, but most gardeners start harvesting their roots in the fall of the first year. Be sure to harvest them before they go to seed.

If you plant them in the early spring, wait until the following early spring to harvest them. They’ll take roughly 140 days to harvest. They’ll develop well during the late summer months. Avoid harvesting horseradish until late fall or early winter, even if the harvesting time has passed.

How to Harvest Horseradish
Image credit: https://mnprairieroots.files.wordpress.com/When harvesting horseradish, loosen the soil around it. You can use a garden shovel or a garden fork to carefully dig up the horseradish roots. It’s important to harvest horseradish before the first frost of winter

How to Store Horse Radish

Once harvested, store horseradish in an airtight container. Make sure you clean the roots under running water and scrub any dirt before storing them. Allow the roots to dry before you store them. Store horseradish in damp sand in the root cellar in a dark area. If you want to use it immediately, keep a small supply of roots in a perforated plastic bag in the refrigerator for a couple of months.

Recommended Varieties

The common horseradish Armoracia rusticana is not the only variety available. There are also some varieties, including common horseradish and bohemian horseradish. A common horseradish has broad, crinkled leaves with superior root quality but is more susceptible to disease. 

On the other hand, bohemian horseradish has narrower, smoother leaves and is more disease-resistant. It has a slightly lower root quality. Plus, there’s wasabi, also known as Japanese horseradish. Wasabi and horseradish come from one family. They both have juicy flavors, even though they’re distinct. Wasabi leaves are also not long like horseradish leaves.

Preparing Horseradish

Freshly grated horseradish emits fumes that irritate eyes and noses. Wash horseradish roots, but do not scrub or peel them since the skin helps prevent enzymes in the root from turning to mush when grated. Rinse off any dirt after washing with cold water. Peel three to four sections of the root, then cut into half-inch chunks and drop them in your blender or food processor. Add a quarter cup of cold water and a bit of crushed ice and grind to a fine texture.

Making Horseradish Sauce

Mix your grated horseradish sauce with white vinegar or lemon juice, salt, sugar, and crushed ice to get a thick paste that won’t separate when you put it on your food. For mild horseradish, add the vinegar immediately after grinding.

Cooking with Horseradish

Horseradish is known as a classic accompaniment to hot and cold roast beef. However, there are still other ways to use the inimitable flavor of homemade horseradish. You can blend it with yogurt and sour cream to make a raw sauce that pairs well with seafood, such as shrimp and oysters. 

You can also mix your horseradish with sugar and lemon juice for a sweet and sour sauce to accompany boiled or fried fish. Horseradish also makes an excellent marinade for beef before cooking. When you make roast beef sandwiches using horseradish, spread it on both pieces of the bread. When using it in hot dishes, add it before serving because cooking will destroy its flavors.

FAQS on How to Grow Horseradish

Can you plant horseradish from the grocery store?

Gardeners used to grow horseradish from plants and root cuttings in the spring or fall. Finding seeds is very difficult, but you’ll find roots at farmer’s markets, supermarkets, and retail and mail-order stores.

re horseradish leaves edible?

Yes, the leaves can be eaten raw or cooked, although they can be poisonous in rare circumstances.

Final Thought on How to Grow Horseradish

As you can see, horseradish is packed with a lot of benefits. It’s also easy to grow, although harvesting is difficult to work. The first step should be familiarizing yourself with what this plant looks like so you know when to harvest it.

The post How To Grow Horseradish appeared first on Kitchen Infinity.

Did you miss our previous article…
https://chefbuano.com/?p=615

25 Best Plants for Rock Gardens

25 Best Plants for Rock Gardens

Do you have a rocky landscape and are looking for something to grow there?  Consider growing perennial plants that can withstand your soil and harsh conditions. Rock garden plants are non-demanding plants that can grow easily in your rocky landscape.

These plants are also drought-tolerant, and any poor soil conditions or extreme heat won’t stop them from making a colorful splash in your rock garden. As long as there’s good drainage, these plants will thrive and elevate the hardscape look provided by gravels and rocks. Take a look at these best rock garden plants.

1. Rock Cress

Rock cress is an evergreen perennial that grows to just 12 inches high. It makes a nice edging plant with narrow leaves and blooms in late winter through spring. Its clusters of pink or white flowers make this creeper plant beautify any rock garden.


Image credit: https://www.gardenia.net/

Both full sun and partial shade are accepted by rock cress, but well-draining soil is highly needed. It can be grown in any soil type except for water-logged conditions. Rock cress is also a hardy plant that matches rock garden aesthetics and requirements.

2. Thrift

Thrift is also known as sea pink, native to the coast of Great Britain. This evergreen perennial grows 1 foot high with grassy green foliage and flowers that last for a long time. It can be planted in a rock garden due to its small size. 

This is a low-maintenance plant that you don’t need to worry about much. Like other perennials, this sea pink plant prefers well-drained soil because poor drainage can cause rot issues.

3. Blue Fescue Grass

Blue fescue is ornamental grass and is suitable for rock gardens and small spaces. This grass type can trail or cover the ground, making it a perfect choice to spread around rocks of any size. It produces its best foliage in full sun but can also tolerate a little shade.

4. Creeping Phlox

This plant produces clusters of small flowers which are pink in color. The creeping phlox can grow in rock crevices with minimum maintenance. It is a perfect ground cover if you have an area that gets at least four to five hours of sun each day. It grows well in sandy soil and can tolerate heat and drought better than some other phlox species.

Creeping Phlox
Image credit: https://gardenerspath.com/

5. Sedum Autumn Joy

This versatile perennial is perfect for your rock garden. They’re drought tolerant and adapt well to full sun and part shade, which means they’re suitable for any area of your yard or garden. It blooms bright yellow flowers in late summer through mid-fall fall and does best in well-draining soil. With its height and density, sedum autumn joy is a suitable substitute for shrub.

Sedum Autumn Joy
image credit: https://www.almanac.com/

6. Russian Sage

This fragrant flower is a good choice for rock gardens and other low-maintenance garden beds. It tolerates drought and heat well and forms blue, white, or purple flowers from mid to late summer. The fragrant leaves emit a strong scent as they warm in the sun, making them a great addition to outdoor spaces.

Russian Sage
Image credit: https://www.thespruce.com/

7. Red Creeping Thyme

Another beautiful choice for rock gardens, this low-growing plant is hardy, drought-tolerant, and spreads out to create a nice ground cover. The flowers are pink in the summer, with their leaves being evergreen. 

Red Creeping Thyme
Image credit: https://kiwinurseries.com/

It tolerates heavy rainfall well but doesn’t do so hot in dry conditions. With its delicate greenery and fragrant pink blooms, red creeping thyme can be tucked among pavers and along walkways to add beauty and repel weeds.

8. Soapwort

This plant grows to about 8 inches and bears pink flowers. It is extremely drought tolerant and does well in the sun or shade but doesn’t work well in wet conditions. The flowers of soapwort resemble the look of phlox blossoms. They are usually small and produce a sweet fragrance. In terms of lower color, these alpine gardens bloom in shades of pink and white, and the green foliage can have some tinges of blue.

9. Thyme

Thyme can be a great decorative accent to any rock garden. It’s recommended to use thyme to cover more specific areas like an empty corner. But if you want to cover the entire ground, don’t worry because you can still find thyme varieties for the job. Thyme herbs have bright green foliage and light purple flowers. You can also use their aromatic properties to season your food.

10. Irish Moss

If you want to add a splash of lively green into your rock garden, then consider this lush groundcover. Irish moss thrives in full sun but can also tolerate intense heat. It requires regular watering, so plant it in a location that is easy to reach with water and remove it because the plant can also suffer from overwatering.

11. Prickly Pear Cactus

Prickly pear cacti are low-growing perennials, so place them in the rock garden to give it a unique look. It is an excellent plant for containers since it can’t survive cold temperatures and won’t require much maintenance. Prickly pear cactus also have pines on the leaves, so take care while planting them in your garden.

Prickly Pear Cactus
Image credit: https://upload.wikimedia.org/

12. Ice Plant

Ice plant, also known as glacier plant, is an evergreen perennial that will remind you of glaciers found in the mountain. It can be used to make low hedges or walls due to its compact structure. You should remember that an ice plant requires full sun, making it perfect for rock gardens. This compact plant is also heat and drought-tolerant but will die if it doesn’t have good drainage.

13. Purple Fountain Grass

If you want your garden to make a statement, plant this perennial plant as a focal piece in your rock garden. This ornamental grass grows best in full sun but can also tolerate little shade. You can use it as a standalone specimen plant or plant it as groupings for greater impact. With its low-maintenance and non-invasive, this perennial flower will continue to wow gardeners for many years to come.

14. Snow-in-Summer

If you want to have low-maintenance flowers and come back every year, plant the Snow-in-Summer perennial flower. It’s a small shrub with white blooms which can give off a mystical vibe to your garden. The plant will grow 1 to 3 feet tall so that it won’t take up too much ground space in your garden. 

Snow-in-Summer
Image credit: https://www.gardeningknowhow.com/

It gets its name from its pristine white flowers that bloom in early summer and blanket the ground like a snowfall. It’s a low-growing plant and can thrive in poor rocky and sandy soil as long as the drainage is good.

15. Hens and Chicks

This succulent plant comes in different varieties like the Hens and Chicks Rough, which has red and yellow flowers. It blooms from early summer until the first frost. The plant only grows 4 to 8 inches tall, so it’s perfect for small spaces, rock gardens, or even ground cover. 

Hens and Chicks
Image credit: https://www.gardeningknowhow.com/

This plant doesn’t need a lot of water to grow, making it ideal for rocky soil. This plant is also a flowering plant and is a great addition to the garden anytime because of the leaves’ red, pink, and purple highlights.

16. Candytuft

Candytuft blooms in mid-spring with showy flowers and is commonly used in rock gardens or as edging.  Its petals form a pretty pattern, and the flowers have an unpleasant aroma. Plant the seeds in early spring. It is best to group about three or four plants or use them as edging. 

It has bright yellow flowers that are very attractive to bees, butterflies, hummingbirds, and other pollinators. Like most golden glow families, this plant needs little watering because it’s adapted to dry soils. The flower blooms in early spring and summer.

17. Geranium Shepherds Warning

It blooms in late spring to late summer and is easy to grow from seed. It does well in either normal or clay soil but will tolerate drought. They look good when planted with other flowers, herbs, and vegetables. With its pretty pink flowers, it can be used in most border garden areas or containers. 

18. Dragon’s Blood Stonecrop

Dragon’s blood stonecrop is a small rock garden plant classified under creepers. It can tolerate some drought and shallow rocky soil. This plant can spread up to four inches and will bloom from late spring to early summer. If planted under the sun, it has purplish stems and leaves with red flowers. It’s a great rock garden plant that should be cultivated for its easy care and unique look.

19. Lavender

If you want to add a sweet fragrance to your rock garden, this is the best choice. Lavender is a small herb plant that grows from two to three feet. It has narrow leaves and flowers growing on the top of the stalk. Lavender loves sunshine and will bloom in summer.

Lavender
Image credit: https://www.gardenia.net/

Lavender is suited for hot weather and poor soil, making it ideal for rocky landscapes. It grows well on its own and can also do well when grown with other shrubs and ornamental grasses. It requires a good amount of sun exposure and medium moisture, plus well-drained soil.

20. Ajuga Black Scallop

Ajuga Black Scallop with green leaves and fragrant blue flowers has an interesting texture. It is a low-growing plant that spreads to form clumps of foliage that are very effective for ground cover. The dark scalloped edges on the green leaves are eye-catching, especially when set against the light lavender-colored flowers.

 Ajuga Black Scallop is a hardy plant that requires bright sunlight and moist to dry soils. It will do best in USDA zones 4 to 9 but can be grown perennial even in colder regions by protecting the roots with mulch during winter months. This low-maintenance plant flowers from mid-spring until fall and do not require deadheading.

21. Lamb’s Ear

Lamb’s ear is an herbaceous plant grown more for its ornamental value than for culinary purposes. This plant is very easy to grow and thrives in full sun or part shade. Lamb’s ear has silvery gray leaves that are quite soft to the touch.

Lamb’s ear requires moist soil but can be easily grown in poor soils by adding compost before planting. Its tolerance for drought and poor soil also makes it a good rock garden plant. You also need to learn how to care for and control lamb’s ear for it to grow well.

22. Rugosa Rose

Rugose rose is native to East Asia and bears small, white flowers in the summer. This plant requires full sun but can tolerate light shade. Rugosa rose has grey-green leaves that turn reddish-orange during the fall months. 

The blooms are edible and resemble miniature cabbage roses. Good air circulation and avoiding wet soil are what this rocky plant needs to remain healthy. Annual pruning is also needed to keep this shrub in a pleasing shape.

23. Columbine

Columbine is an herbaceous perennial plant native to Western Europe, North America, and western mountainous regions of Asia. Columbines can grow in any rocky environment and thrive with full sun exposure to partial shade and medium moisture.

It produces beautiful blooms in blue, purple, white, or yellow coloration. It spreads easily from seed, so cutting and removing the seed heads following bloom will help keep it in the garden.

24. Euphorbia

Euphorbia leaf plants are a genus of flowering plants with about 2,000 species. Euphorbia plants prefer rocky and dry environments, thriving in full sun exposure to partial shade and drought resistance. 

If you live in warm climates, this type of plant can be used in landscapes, including desert rocks. Euphorbia, like cacti, can store water in its leaves or stems for days when there’s no rain or moisture; it will take care of itself even without you.

25. Alyssum 

Alyssum is a genus of low-growing, often branching subshrubs native to the rocky mountainous regions in the Northern Hemisphere. Alyssum flowers are mostly white or pink, with four or five petals that may resemble daisies.

However, this type of plant does not need sun exposure and can survive drought conditions. As a ground cover, it can serve to prevent soil erosion. This plant is also appreciated for its subtle-like honey fragrance.

FAQS on Best Plants for Rock Gardens

Can you plant roses in a rock garden?

Yes, roses can be planted in rocky gardens as long as you make some amendments before planting because of the poor nutrients and less water in rocky landscapes. For them to grow well, you must learn basic care such as how to prune roses

Final Thought on Best Plants for Rock Gardens

As you can see, many types of plants can be included in a rock garden. It depends on the look that you want to achieve and your personal preferences. For example, if you love blooming flowers, there is a wide array of plants for a rock garden that will bloom in different seasons. As much as possible, it is best to choose low-maintenance plants.

Finally, it is very helpful to find out what kind of soil or substrate your specific plants need. With that knowledge, you will be able to choose the best plants for rock gardens.


The post 25 Best Plants for Rock Gardens appeared first on Kitchen Infinity.

Did you miss our previous article…
https://chefbuano.com/?p=608

Popular Campanula Species

Popular Campanula Species

If you are looking for a perennial plant that is easy to grow and will provide beautiful flowers in your garden, then bellflowers might be the right choice for you. Bellflowers or campanula are perfect plants because they can grow in different soil types and withstand drought conditions. 

Campanula is one of the most popular perennial plants for gardens, but it can be hard to find good information about them online.  The problem with bellflowers is that they are often mistaken for other types of flowers. This makes it difficult to identify which species you want and how to care for them.

We’ve created this guide because we love growing bellflowers in our garden. It will help you pick the right plant, grow it well and have a beautiful flower show all summer long.

Bellflower Species

Bellflowers are available in shades of blue, lilac, pink, purple, and white. Depending on the species, the flowers are cup shaped, saucer shaped, star shaped, or bell-shaped. They’re planted in the summer and the bloom time is from late spring through early autumn. 

These flowers also perform best in well-drained neutral pH and medium moisture. Give this plant full sun in the North and partial shade in the south. There are over 500 species of the campanula genus. Some are annual or biennial. 

The most common species are Canterbury bells, also known as campanula medium. Campanula medium is a biennial species. Keep on reading!

Dalmatian Bellflower

Also known as campanula portenschlagiana, it is found in Central and Eastern Europe. It’s one of the species that is easy to grow at home. It makes a good edging plant along the walkway. It’s an effective ground cover, thanks to how it spreads via underground rhizomes. 


Image credit: https://www.gardenia.net/

This perennial flowering can be short-lived if you plant in poor drainage. The flowers are purplish or bluish, and it opens from a bell to star shape at full bloom. This bellflower is perfect for rock gardens, cascading over walls and raised beds.

Campanula Poscharskyana or Serbian Bellflower

It has layers of narrow, pointed leaves and taller stems topped by ornamental flowers. Serbian bellflowers are purple-blue bellflowers with yellow centers that open into star shapes in full bloom. The plant grows 3 feet tall, making it ideal for borders or at the edge of woodlands. Its lilac-blue flowers start bell-shaped but later open to star-shaped. It has oval to heart-shaped leaves.

Bluebell or Campanula Rotundifolia

Bluebells of Scotland is a low-growing perennial, alpine bellflower that produces dainty purple-blue hanging flowers on thin, wiry stems. It takes the shape of a rosette. Its light blue flowers are bell-shaped and nod to the ground.

Bluebell or Campanula Rotundifolia
Image credit: https://images.unsplash.com/

Campanula Lactiflora or Milky Bellflower

Campanula lactiflora is a lovely perennial plant having upright stems and shades of pale blue and white. A native to the Caucasus Mountains, it has delicate bell-shaped flowers that look like small blue pom-poms growing on slender stems up to 24 inches tall. 

The bellflower is also called the ‘milky bellflower’ as the whole plant except for the flower turning milky white if touched with a bare hand. Milky bellflower doesn’t perform in hot weather, making it not a suitable choice for the south. It thrives in plant hardiness zones 5-9 and is a perfect taller perennial for the back of your border garden.

Clustered Bellflower

Clustered bellflower is a good choice for the front of the border since it has longer-lasting flowers throughout summer. It can reach up to 36 inches high and works well with shorter perennials but pairs well with taller plants that contrast the slender stems. It’s also called Campanula glomerata.

It has a long blooming period from late spring into summer. It thrives in plant hardiness zones 3-9. You can plant it in full sun but may need partial shade in the hot areas.  Clustered bellflower is mostly used in perennial flower beds, cottage gardens, and as a cut flower.

driatic Bellflower or Campanula Garganica

This is a perennial plant that grows in the Italian Alps. It is a low-growing flowering plant with light blue-violet flowers that have a darker center. The Adriatic bellflower blooms from mid-spring to early autumn with solitary blue flowers on strong stems.

Adriatic Bellflower or Campanula Garganica
Image credit: https://i.etsystatic.com/

The plant has some cultivars such as Adriatica Blue, Blue Waterfall, and Avalanche Blue. The Adriatic bellflower may grow from 16 to 24 inches tall with a spread as wide as 18 inches. Plant it in sandy or well drained loamy soil. It’s is an excellent choice for a rock garden, border, or edging along a walkway.

Italian Bellflower or Campanula Isophylla

This is a species of campanula from Italy and is grown as an annual in colder regions globally. It’s also called Star of Bethlehem or Falling Stars. This flower is easy to grow if the soil is consistently moist and not wet or muddy. Italian bellflower blooms continuously during summer time into autumn, with its flowers covering the majority of foliage.

Italian Bellflower or Campanula Isophylla
Image credit: http://www.plantsrescue.com/

Carpathian Bellflower or Campanula Carpatica

This is a beautiful campanula species from southeastern Europe, and it’s easy to grow in most areas. It has pale blue or white cup-shaped flowers that face upwards. 

Italian bellflower and Carpathian bellflower are both members of the genus campanula. They’re both tall, hardy perennials making them excellent for use in flower gardens. Taller cultivars with lovely white or pale blue flowers appear in most gardening centers during springtime, so you would want to sow your seeds about three weeks before the last frost date.

It’s easy to grow and grows best in full sun locations in plant hardiness zones 3-9. It’s mostly used as a flowering ground cover edging plant and a filler in a container garden.

Spanish Bellflower or Campanula Primulifolia

The Spanish bellflower is native to southern Europe. It has nice little star-shaped lavender flowers from late spring to mid-summer. This flower is not only known as a perennial but is a sun-loving flower. It’s easy to grow and adapt well in different soils, but it does not perform too well in desert regions because of insufficient rainfall.  

The flower blooms first at the bottom and works its way up the flowering stem. This contrasting-looking flower has a very little scent but looks stunning when it blooms against green foliage. You can start it in early spring, and they’ll be blooming by late spring.

Chimney Bellflower

Chimney bellflower is also known as campanula pyramidalis. This is one of the tallest campanulas, with flower blooms reaching up to 24 inches. The bell-shaped flowers are big, with vines growing up to 1 foot or so. It needs regular watering, but not too much rain during the summer. 

This is an upright plant that grows well in the sun to partial shade conditions. Flowers first appear at the bottom and then move their way up along the stem.

Creeping or Rampion Bellflower

Rampion bellflower is also known as campanula rapunculoides. They’re very popular bellflowers, but you can avoid planting them because of their invasive nature. Before planting, make sure you check with your local county extension regarding its status in your area. 

It’s very difficult to eradicate, thanks to its long taproots. It also spreads via rhizomes like the dalmatian bellflower, but it is much taller than a dalmatian. While it is considered invasive, it’s highly admired because of its lavender-blue flowers, which grows up one side of the stem.

Campanula Takesimana

Campanula takesimana is also called Korean bellflower. This bellflower bears clumps of many long, slightly arching leaves and tall stalks that end in spike-like clusters of showy bell-shaped flowers. 

The plant reaches up to 40 centimeters (16 inches) high (roughly 1 meter). It has dark green, glossy leaves up to 5 centimeters (2 inches) long. The Korean bellflower is native to Korea, Japan, and China.

Peach Leaved Bellflower

The Peach-leaved Bellflower is a species of campanula whose botanical name is Campanula persicifolia. Although native to southern and central Europe, it has become naturalized in Britain and is now included as one of the British Isles’ most wanted plants by the Wild Flower Society. 

It’s an elegant, medium-height perennial with purple or white flowers. Its dainty flowers are perched on showy stems with fine skinny foliage that looks like mini peach leaves.

ppachian Bellflower or Campanula Divaricata

It is a short, sturdy bellflower that produces small bluish-purple bellflowers in late summer. Campanula divaricata or Appalachian Bellflower has the tallest flower spike of any campanula native to North America.

It grows in wooded areas and mountains from southern New England west to Michigan and south to Georgia, Alabama, Mississippi, and Louisiana. In Tennessee, it is typically found in the higher elevations of East Tennessee and the middle to upper elevations in the mountains.

Spotted Bellflower or Campanula Punctata

Campanula is another Siberian native that is an upright plant that grows in clumps. Its bell shaped flowers can be either white or pink. It’s more sensitive to the heat of summer than other types of campanula but can survive at lower elevations. It blooms in June and July.

Campanula Trachelium or Nettle Leaved Bellflower

This native of the Mediterranean area prefers light shade and moist, well-drained soil. It produces blue-violet bell shaped flowers with fringed petals on hairy stalks. The leaves are heart-shaped and toothed.

Campanula Medium or Canterbury Bells

This native of the British Isles is very hardy and grows well in dry, free-draining soil and wet locations. It has light blue to white bell shaped flowers on upright stalks. This is the most common campanula species in flower gardens of North America and Europe.

FAQS on Popular Campanula Species

Do bellflowers come back every year?

Yes, bellflowers come back every year and spread easily to form a nice ground cover. 

What is campanula?

Campanula is a genus of roughly 500 species and several subspecies distributed across the temperature and subtropical regions of the northern hemisphere. The species include annual, biennial, and perennial plants that vary in habit from dwarf arctic and alpine species.

Final Thought on Popular Campanula Species

Finally, with 500 species of campanula, you can grow campanulas in most gardening situations and landscapes. They make perfect rock gardens, border subjects, or groundcovers for dry conditions.


The post Popular Campanula Species appeared first on Kitchen Infinity.

Did you miss our previous article…
https://chefbuano.com/?p=603