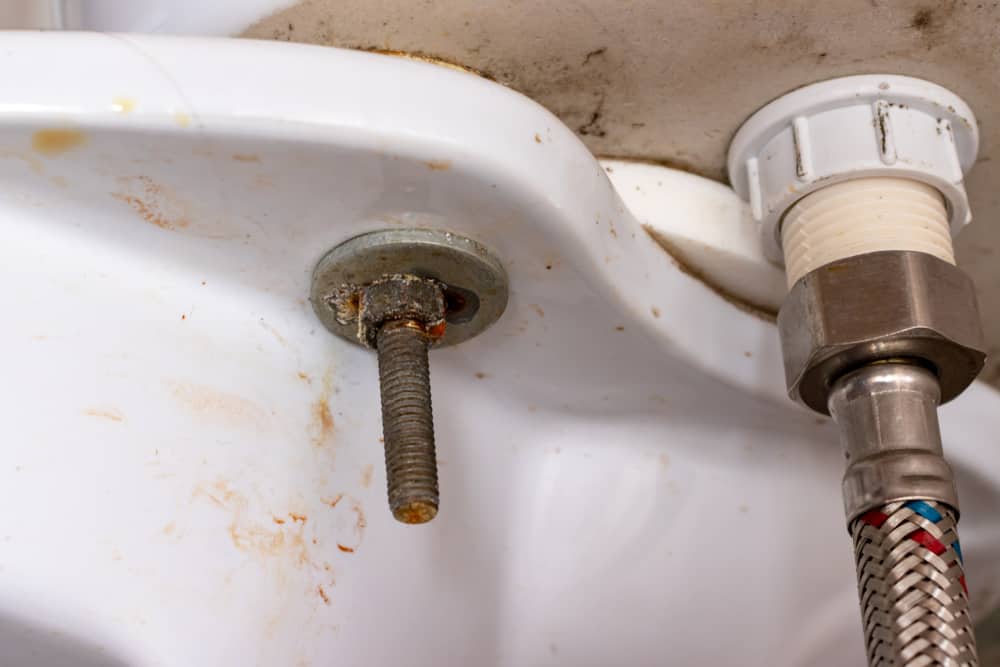
How To Install A Dryer Electrical Cord

How To Install A Dryer Electrical Cord

You have a new dryer, but the cord is not attached. Installing an electrical cord on your dryer can be complicated if you don’t know what you’re doing. It’s also dangerous because it involves working with electricity. If you are not careful, you could get shocked or even start a fire in your home.

This guide will show you how to install a four-prong power cord onto any electric clothes dryer so that it is safe and ready for use. We’ll walk through all of the steps required to complete this project safely and easily so that anyone can do it without any trouble at all.

What You’ll Need

Phillips screwdriverNut driver or socket wrenchAdjustable pliersStrain relief fitting for4 prong cordUL-listed, 30 amp, and 4 prong dryer cord

Here’s how the process goes.

Disconnect all Electrical Power to the Dryer From the Circuit Breaker

Turn off all power to your dryer at the home’s main electrical panel. Make sure you disconnect electrical from your dryer’s wire connection box. Getting into contact with 240 volts can be dangerous.

Remove Cover Plate for Electrical Connections

After unplugging your dryer from the electrical, remove the metal plate covering your cord’s wiring connection. Locate the electrical cover plate at the back of your dryer, then use a screwdriver or nut driver to remove it. This will expose the wiring terminal block for your dryer. This step is pretty easy if you already know simple electric work such as how to wire an outlet


Image caption: https://diy.sndimg.com/

Remove the Strain-Relief Fitting

Remove the screws on the strain-relief fitting. These screws secure the cord to the back panel of the dryer. Remove the strain by separating the two halves of the fitting and pull them out of the hole one at a time.

Disconnect the Old Prong Cord

Disconnect your old 3-prong cord by removing the three screws that secure it to the wiring terminal block. Pull your old cord off of the terminal block and through the strain-relief fitting. The two outer terminals are hot terminals, while the center is a neutral terminal.

Separate the Dryer’s Neutral From the Ground

Disconnect your dryer’s neutral wire from the ground screw to change your wiring configuration from 3 prong to 4 prong. If you have a white wire coming from inside your dryer and connecting to the ground screw, remove it, then connect it to the neutral terminal on your dryer’s terminal block. If there is a short white wire or metal tab connected to your neutral terminal on the wiring block and ground screw, remove the wire or tab from the ground screw.

Install the New Cord

Next, connect the new four-prong cord by inserting the loose wire end through the hole in your dryer’s back panel. Start by connecting the green wire to the ground screw, followed by black cord wire. Next, connect the red wire to your dryer’s terminal block neutral wire, which should be marked “White” or have a white line on the insulation near it.

The hot terminals are interchangeable, so each can be connected to either of the two terminal block screw terminals. After attaching both hot cord wires, use a small Phillips head screwdriver to tighten down the hot screws.
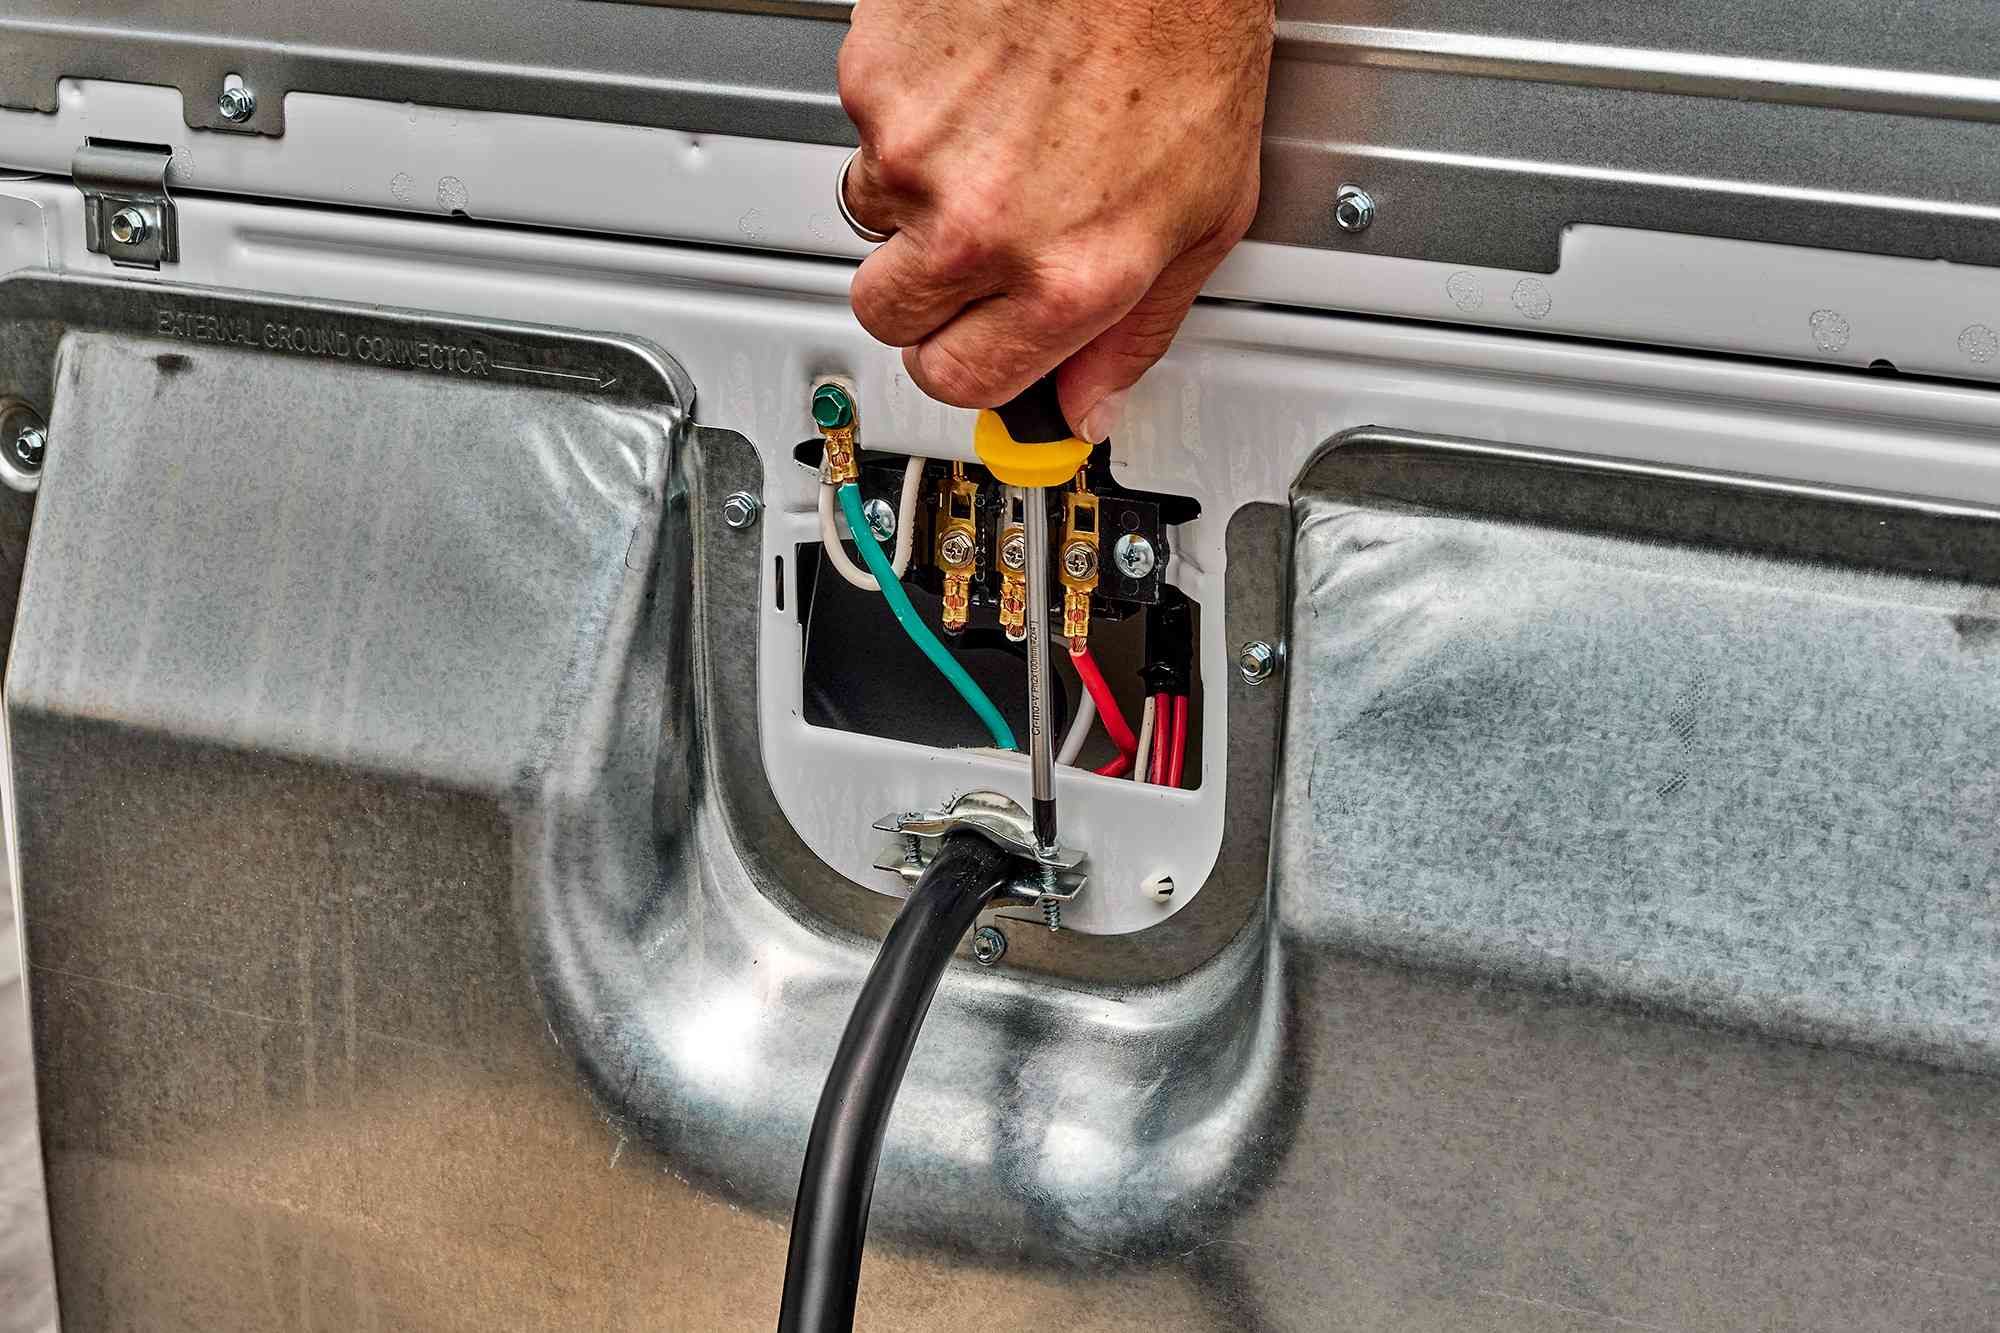
Install the New Cord
Image caption: https://www.thespruce.com/

Secure the New Cord by Attaching the Strain-Relief Fitting

After connecting your new cord, proceed to install a new strain-relief fitting. Begin by removing the original strain relief, making sure to save the nut and bolt. Use a sharp utility knife to cut through both wires within 1/4 inch of the new strain-relief fitting. Strip back approximately 1 inch of insulation from each wire. Form each wire into a U-shape so they will fit around your new strain relief mounting.
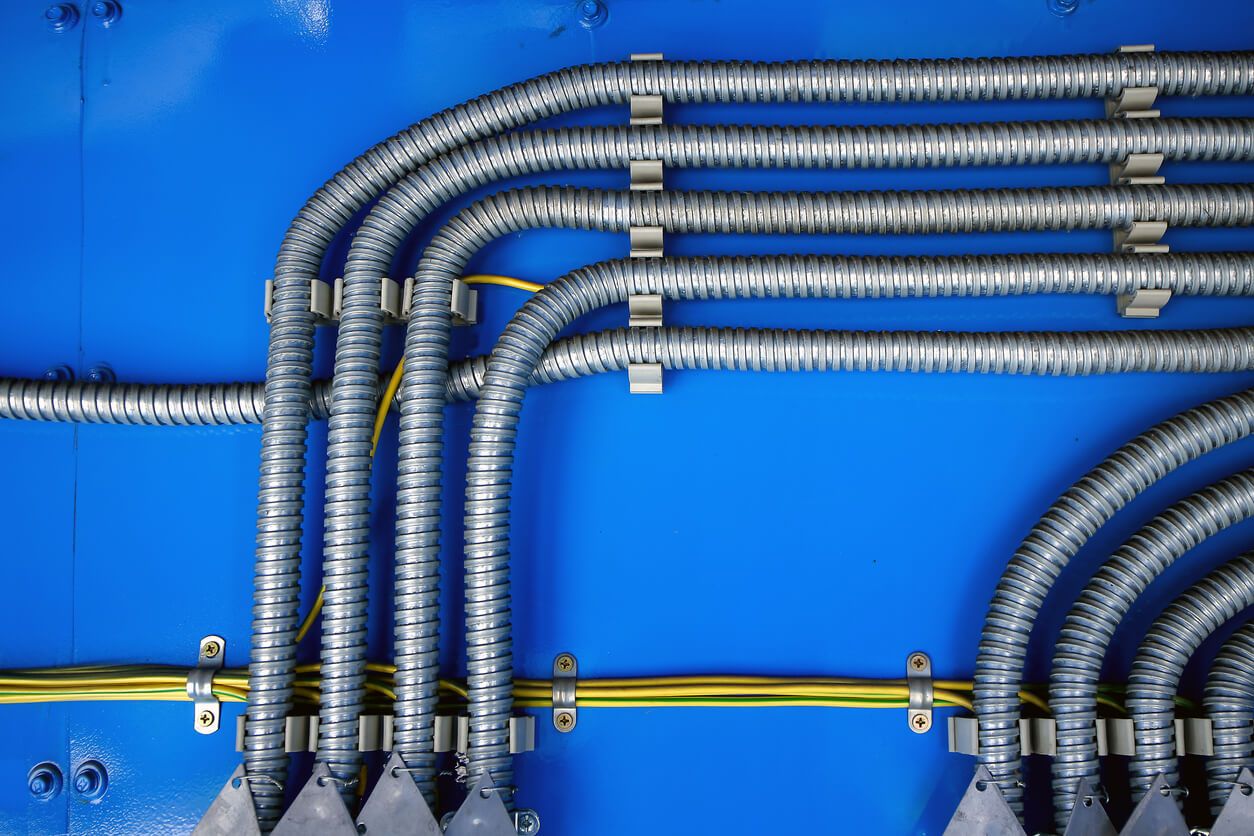
Secure the New Cord by Attaching the Strain-Relief Fitting
Image caption: https://aerosusa.com/wp-content

After that, use fitting screws to squeeze the two halves together. You can also use pliers to tighten down the hot screws. Remember that your old strain-relief fitting won’t work with your new four wire cord. So, make sure you don’t use a strain-relief fitting that won’t fit your new cord.

Reinstall the Dryer’s Electrical Cover Plate

Using screws, reinstall back your electrical cover plate. Remember to attach the wires from the dryer to their matching terminals in your junction box. Make sure you test your new dryer for proper operation by checking its control knobs to confirm that everything is in the off position.

Run your dryer for minutes to ascertain that everything is okay after plugging the dryer back in. To be extra careful, always unplug your dryer after every loading. Make sure you connect your vent duct if removed before using it to dry your clothes.

FAQs on How to Install a Dryer Electrical Cord

How do you hook up a 3 prong dryer cord?

You can hook up a 3 prong dryer cord by attaching the ground wire to the grounding screw of the panel box. Attach one prong on the neutral line to the neutral terminal in your panel box while attaching the third prong to one hot or live terminal.

How safe is a 3 prong dryer cord?

A 3 prong dryer cord is not safe at all. It is hazardous to your safety. It is always best to use a 4 prong dryer cord. 

How do you install an electric dryer cord?

To properly install an electric dryer cord, remove the old cord and replace it with a new one of the same length and gauge. Do not replace any other system components like the outlet receptacle or circuit breakers.

Can you do electrical work yourself?

No, you can’t do electrical work yourself unless you’re qualified electrical personnel. You’ll need an electrical contractor to help you with the light commercial electrical wiring. You must ensure you include the cost of the contractor in your electric projects’ costs

Final Thought on How to Install a Dryer Cord

As you can see, installing a prong dryer cord is a very simple process and one you can do yourself. However, you need to be careful when handling any electrical work as injuries and damages can happen at any time, even if you’re not the one installing the new cord.


The post How To Install A Dryer Electrical Cord appeared first on Kitchen Infinity.

Did you miss our previous article…
https://chefbuano.com/?p=562

How to Properly Set a Toilet to Prevent Leaks

How to Properly Set a Toilet to Prevent Leaks

The toilet is one of the most important pieces of equipment in your home. A leaky toilet can cause a lot of damage to your bathroom, floors, and even walls. Having a leaky toilet is not something you want to have. You can spend hundreds of dollars on water bills and repairs. 

A toilet leaking can be difficult to identify because the water may come from different parts of the tank or bowl. If you are having problems with your toilet, there are some easy ways to find out where the leaks are coming from and how to stop them quickly. 

When replacing the existing toilet after, ensure there’re good seals to prevent leaks. Fixing a leaky toilet isn’t hard once you know what causes it and how to fix it fast. Just follow these few simple steps.

Signs of Toilet Leaking 

Here are some of the reasons why your toilet might be leaking from the base:

The Tee Bolts Need to be Tightened

The bolts that keep your toilet fastened to the floor are known as tee bolts. Older homes have low-quality tees, which may cause toilets to leak. If these bolts loosen, the toilet will rock, causing the seal formed by the wax ring to break. Overtightening the bolts can also lead to toilet leaks because the flange bolt can affect the wax ring’s ability to create a tight seal.

The Wax Ring Needs to be Replaced

The wax ring is a doughnut-shaped seal that fits around the bottom of your toilet. It protects the floor from leakage and damage caused by the constant weight and pressure of the toilet. Unfortunately, this can wear down over time and cause toilets to leak, especially around old toilets where you might not have properly set the tee bolts in place.

Loose Water Supply Line

If there’s a loose water supply line, you’ll notice the leaking at the base. Check where the supply line connects to the tank and ensure the nut and rubber are sealed tightly. 

Water is Condensing on the Toilet and Dripping Down

If there’s water condensing on the outside of the toilet and dripping down, you’ll need to check if your wax ring is damaged or missing. You should also inspect for possible cracks and holes at the base and around the toilet.

Tools and Materials to Set Toilet

Adjustable wrenchScrewdriverBathroom cleanerCleaning cloths such as terry cloth and microfiber towelsToilet repair kitSilicone caulkRubber glovesHacksawUtility knife or putty knifeToilet wax ringToilet bolts

Steps to Stop Your Toilet from Leaking

Shut Off Water Supply

Start by turning off the water supply to the toilet tank. Most baths come with a small supply shutoff valve extending from the wall below the tank. If the shut-off valve is new, you can use your hand to operate it or use pliers to gently turn it off position.


Image credit: https://www.lifesavvy.com/

Flush Out Toilet Water

Flush the toilet to remove excess water before you begin the repairs. Remove the lid and place it in a safer place where it won’t be dropped or damaged. Make sure the supply valve is in an off position before flushing and emptying your tank. Make sure that no new water enters through the fill valve in the corner of the tank. If water continues entering through the fill valve, then your meter and disconnect the supply line from the bottom tank.

Unscrew and Tighten the Tee Bolts

Remove the plastic bolt caps from the flange bolts in the corners of your toilet tank. Unscrew these closet bolts with a large pair of adjustable pliers or an adjustable wrench by turning them counterclockwise. Pull up on the tank so that it rests in front of its original position, exposing the floor flange beneath it. 

Unscrew and Tighten the Tee Bolts
Image credit: https://upgradedhome.com/

There will be only one bolt on either side of the base of the toilet. Tightening your toilet against the floor will ensure the wax ring that seals the toilet drain outlet will be compressed. If the closet bolts are already tight, remove and reinstall the toilet to install a new wax ring and new bolts.

Remove the Toilet

If the closet bolts are already tight, remove and reinstall the toilet to install a new wax ring and new bolts. Learn how to remove the toilet properly before you proceed. Make sure you shut off water to your toilet before you start disconnecting. The shutoff valve is located on the left side of the toilet near the water supply tube and the water valve tailpiece.

Remove the Toilet
Image credit: https://i.ytimg.com/

Grab the toilet bowl with both hands, lift and walk it around to remove it from the flange and drain pipe. Take extra care when removing a heavy toilet. They are easily dropped after disconnecting the water supply lines.

Scrape Off Previous Wax Ring

The toilet is always mounted to the flange with a round wax seal. So, scrape off all the wax residue from the flange using a paint scraper or putty knife. Also, scrape off the wax that could have remained on the bottom side of the base of the toilet.

Even though a new wax ring might show a nice, clean appearance, the old wax ring will be discolored and flattened. Get everything as clean as possible by using a rag to wipe down the underside of the toilet base and the floor flange. 

Level the Toilet

A toilet is leveled by adjusting the height of the floor bolts underneath the bowl. However, this process depends on whether or not you are installing a new wax ring. Confirm if the toilet base is stable and level it from rocking it side to side and back to front.

If it doesn’t sit correctly, it will rock and leak over time. But you can correct it by using slip toilet shims between the base and the floor to stop rocking before bolting it down. The location and the number of slip toilet shims you’ll need depend on the toilet and the floor. Once your toilet stops rocking, you can bolt it down with a nut and washer on each closet bolt.

Install New Bolts into Flange

When you are installing the toilet, replace any old toilet bolts with new ones. A bolt breaks easily if it’s rusted or corroded. If you’re installing a new wax ring, coat the bolts with grease or soap to make it easy for them to slide into the flange. Remove the plastic covers from the base of your toilet before tightening the bolts.

After positioning the toilet bolts into the correct height of holes, push down on the ring to ensure it’s firm and tighten the bolts. When you feel or hear a pop, lift off and use a screwdriver to cinch up the nut that is visible from below. You don’t want it super tight, just firm enough that there won’t be any toilet leak over time.

Install New Wax Ring & Bolt

With the bolts in place and tightened, it’s time to install a new wax ring. Be sure it fully covers the flange, as old rings can slip during use and cause problems. If you don’t have enough space around the base of the toilet or there is no extra space above the surface of your finish, call a plumber.

If you decide to do it yourself, look for a helper because the toilet is very heavy. With a helper, tip the toilet back to an upright position on the cardboard sheet.

Reinstall the Toilet

You can sit or kneel on the toilet bowl rim to lift your toilet carefully and place it back over the drain to allow the tee bolts to slip through the bolt holes. Line up the back of the bowl and flange with the large rubber washer and nut. Make sure it’s sitting level and tighten all nuts and bolts once you’ve checked that.

Press your toilet down to the wax ring and rock it gently so that it settles into any space that might have been left from the previous installation. Recheck your bolts and nuts to make sure they’re all snug but not too tight.

Connect the Water Line

Reconnect the water supply tube to the fill valve and turn the water back on. Allow the tank to fill until the tank valve shuts off. Flush and repeat to ensure the flange seal is working.

Caulk Your Toilet’s Base

Put on plastic caps and caulk the surrounding base of your toilet. Caulking will not only secure your toilet to the floor but will solidify your work. It will also prevent water from other sources from entering the base of your toilet and causing complications such as mold and unpleasant smells.

Choose silicone-based, tile, or bathroom caulk, as these will prevent condensation and moisture from seeping into the caulk and causing mold. Use masking tape to block areas where you don’t want to caulk. Leave the caulk to dry for several hours before use. Use a solvent and a rag to clean up any excess caulk.

FAQs on How to Properly Set a Toilet to Prevent Leaks

How should a toilet flange sit on the floor?

The toilet flange should be on top of the floor, meaning the bottom of the edge needs to be on the same plane as the toilet.

How do you ensure your toilet doesn’t leak?

Open your valve and flush it severally to ascertain if the water is draining properly. Once you deem it does, use the plumber’s putty to create a seal between the flange and floor.

Final Thought on How to Properly Set a Toilet to Prevent Leaks

As you can see, toilet leaks can cause several problems; therefore, fixing them immediately will save you money on your water in the long run.  To prevent these problems, you need to know how to properly set a toilet on the floor to prevent these leaks and enjoy peace of mind.


The post How to Properly Set a Toilet to Prevent Leaks appeared first on Kitchen Infinity.

Did you miss our previous article…
https://chefbuano.com/?p=557

Pick Your Perfect Front Door Color with Feng Shui

Pick Your Perfect Front Door Color with Feng Shui

The front door is the first thing that people see when they come to your home. It’s the main portal for people and air to enter your home. It’s called the mouth of qi or universal life force energy in Feng Shui.

If you have a boring, old-looking front door, it can make visitors feel uncomfortable and unwelcome in your home. The front door can greatly influence your health as well. You don’t need to spend thousands of dollars on a new front door or replace the existing one with an expensive designer model.

Instead, repainting your house’s front entranceway with Feng Shui colors will do wonders for how welcoming it feels. Feng Shui is an ancient Chinese practice that offers guidelines on how to live in harmony with nature. Pay close attention to colors that will work well with the exterior of your home, plus what direction is your front door facing. Here are some of the best colors to choose from.

Get Noticed with Red Front Door Color

According to Feng Shui, the most powerful and most auspicious color you can use for your front door is red. Red Feng shui front door colors will help create a certain vibrancy around your home and make it stand out from similar-looking homes. It’s also the color of fire, which will attract prosperity and success.


Image credit: https://imagesvc.meredithcorp.io/

Red also protects and transforms negative energy. If you have a south-facing front door, then paint red to make it visible from the streets and attract good energy and opportunities. This color is related to the Li family according to the Feng Shui Energy Map.

Humble and Solid Black Color Front Door

This Feng Shui front door color is the best color to use on your portico or entrance hall if you have a north-facing entrance door. The Feng Shui element here is the water element, which symbolizes depth and wisdom. Black also helps enhance power and authority, so this color is perfect if you’re looking to increase any of these qualities in your life.

This is a very good Feng Shui for three compass directions that love the water element, i.e, north, southeast, and east. Black can also be a supportive color for building friendships and relationships.

Consider a Happy and Vibrant Blue Color Front Door Feng Shui

If the front door of your home happens to be west-facing or north-facing, then consider this Feng Shui front door color. The Feng Shui element here is the wood element, representing wisdom and knowledge. Feng Shui blue color also relates to good fortune, making it an excellent choice if you’re looking for it to enter your life. Blue is also considered a good Feng Shui color for your door.

Consider a Happy and Vibrant Blue Color Front Door Feng Shui
Image credit: https://www.thespruce.com/

Brighten Up Your Front Door with Yellow Feng Shui

If your front door is south-facing or east-facing, then a yellow color would be a great choice. Yellow represents the fire element which brings warmth and happiness to a home. It also symbolizes intelligence and balance, so if you’re looking for these qualities in your life, consider painting your front door yellow. It’s one of the Feng Shui front door colors that support grounding and stability.

Bring Joy with White Feng Shui Front Door Color

A white or off-white front door Feng Shui color is a good choice if your front door faces toward the north, northwest, west, or southwest. This represents the metal element in Feng Shui, which represents cleanliness and purity. Paint your front door with white to invite metal element qualities such as joy, communication, and precision.

Bring Joy with White Feng Shui Front Door Color
Image credit: https://www.thespruce.com/

Stabilize Your Home with Earthy Browns Front Door Color

Brown door color is a good match for homes with a north-facing front door. Brown and other neutral earthy colors are connected to the earth element and are used to balance, stabilize and nurture inhabitants in your home. Brown represents stability in Feng Shui, so painting your front door brown will bring these same qualities to your life. Brown helps to support your home’s balance, nurture you and your family, plus stabilize your home.

Paint Your Front Door Green to Improve Growth and Abundance

Green is a great color for a front door as it enhances the wood element. This Feng Shui element represents growth and prosperity, so painting your front door green will help to increase these qualities within your life. Painting your door this color will also stimulate money-making opportunities, bring love into your home and encourage abundance in all areas of your life.

Gray for Helpful People and Helpful Situations

 According to Feng Shui, gray is the color that attracts helpful people and helpful situations into your life. Gray gives you a feeling of well-being and safety, especially if you suffer from depression.

Gray for Helpful People and Helpful Situations
Image credit: https://www.thespruce.com/

Painting your front door grey will attract advisers, mentors, and guides who are supportive in preventing financial mistakes. This repetitive frequency will create an energy of security within your home and encourage you to proceed with your decisions without feeling apprehensive.

Charming Front Door in a Fresh Turquoise Blue Color

When your front door is painted turquoise blue, you will find that this brings with it an energy of spontaneity and fun that encourages new beginnings. This color can be very intuitive, creating peace and harmony in your life, so you keep calm even when things around you are not. It’s playful and innocent front door color with excellent Feng Shui energy for a north-facing door.

The Sweet and Inviting Blue-Green Color Front Door

The best choice is a soft blue-green front door color when you want to encourage serenity, peace, and harmony in your persona. This color will open up opportunities while still maintaining serenity in an otherwise fast-paced world.

FAQs on Feng Shui Front Door Colors

How do you choose Feng Shui front door colors?

Use the compass direction or compass app to choose the front door color Feng Shui. The direction of the front door is the starting point for Feng Shui color selection. Find out the direction of the door, then look for the corresponding colors and elements. Also, pay attention to the exterior details that you can’t change.

Final Thought on How to Pick Your Perfect Front Color with Feng Shui

There you go! A fun and simple way to attract and bring positive energy is to repaint your home with these Feng Shui front door colors. These Feng Shui door colors will also help boost your home’s curb appeal. It’s the best home improvement project you can ever carry out.


The post Pick Your Perfect Front Door Color with Feng Shui appeared first on Kitchen Infinity.

Did you miss our previous article…
https://chefbuano.com/?p=551