Get A Flawless Paint Job With A Tack Cloth

Get A Flawless Paint Job With A Tack Cloth

A tack cloth is a type of absorbent material that’s used to remove excess dust, dirt, and contaminants from the surface before painting.

In this article, you will learn when and why you should use a tack cloth before painting, the benefits of using a tack cloth before painting, and other uses for it. Let’s dive deep into this topic. 


Image Credit: http://thespruce.com

What is a tack cloth and why do you need one?

Tack cloths are designed to pick up particles that might otherwise be left behind by an ordinary rag or brush and create bumps in your paint job.

Before applying any type of paint, you should always use a tack cloth to remove excess dust or dirt and other contaminants from the surface and then let it dry for at least an hour or two before painting. This is especially important with latex paints because leftover residue can cause the finish to be lumpy and bumpy when dried, which is unattractive.

Because lint is not absorbent like fibers but instead picks up particles by static electricity (just like cling wrap), tack cloths won’t leave behind any foreign objects such as lint or hair on the surface that can become embedded in your new paint job. Instead, they will remove all types of dust loose dirt attached to wood, metal, or your drywall.

Where are tack cloths most useful?

Tack cloths can be used on almost any material before painting, but they are especially useful on the following:

Bare wood and metal – tack cloths will remove most of the dust that has built up over time without disturbing loose dirt or grime that could become embedded in your paint job. Drywall – tack cloths will wipe away any dust particles attached to it with static electricity before you apply primer and paint so the walls don’t need to be washed and left to dry for several hours or even overnight as is usually required with latex paints. Cabinets, doors, and fixtures – although not 100% necessary if these surfaces have already been cleaned very thoroughly, tack cloths can be used to pick up any dust particles left behind during the cleaning process.

Tip: If you are using both a tack cloth and a lint-free cloth, always use the tack cloth first before using your lint-free cloth. This will save you money because after one or two uses, tack cloths become worn out and ineffective at removing excess dust from surfaces that need to be painted.

Painting a wall with a tack cloth

Painting a wall is probably the most common use for a tack cloth. When using one, you should always apply your base coat paint first before applying any topcoats.

1. Test your room’s humidity levels


To determine how long you need to leave the surface after wiping it down with a tack cloth and before painting, take note of the humidity in your room by checking the reading on an indoor humidity monitor.

Most paints recommend waiting at least 24 hours when the room’s humidity level is above 50%. If you don’t follow this recommendation, the latex-based paints might begin to dry too soon due to evaporation inside the bottle or can lead to imperfections in your paint job.

If this doesn’t work for you, try something else that will keep you from rushing your paint job. You can also try painting in a different room or cover the floor with drop cloths to help control the humidity level in your room.

2.Wipe down surfaces

Wipe down all areas of wood, metal, and drywall with a tack cloth to remove any dust particles added overtime before applying primer or paint. This is especially important if you are using latex paints because any leftover residue attached to the wall by static electricity may cause bumps when dried – which are totally unattractive.

3. Leave it on for an hour

Leave tack cloth on all surfaces for at least an hour after wiping them with it before applying primer or paint. Some people claim that leaving tack cloths on longer is better, but this isn’t necessary unless you are trying to remove dried paint that is already on there.

4. If it still looks dusty, uses a lint-free cloth instead

If it takes more than an hour for your surfaces to look clean after wiping them down with tack cloth, try using another new one or even lint-free rags made of cotton or synthetic fibers so you won’t have any problems removing the dust again while painting. Always remember to wipe surfaces with lint-free rags first before applying primer or paint.

5. Use latex-based primers and paints

When painting walls in rooms where humidity levels are high (above 50%), always apply extremely thin coats of latex base coat paint first before applying any topcoats or you will have problems with bumps and other annoying imperfections in your paint job.

6. Use a top coat

When applying any topcoats, such as varnish, polyurethane, lacquer, etc., only coat the surface with just one thin layer to avoid any bumps that may appear. If you apply more than one coat of topcoat and allow it to dry between coats (before recoating), make sure it has completely dried before continuing otherwise these imperfections may begin to form on your surfaces. 

How to make tack cloths at home

When painting your house, it’s easy to make your tack cloth by using a few simple items you probably already have in your household. For this process, you will need:

A clean, lint-free rag (100% cotton preferred)Mineral spiritsPainters tape

Make sure that the paint on walls is completely dry before attempting to remove dust from them with a tack cloth because it may leave moisture stains that are difficult or impossible to get rid of. If it does happen, try recoating topcoats over ugly watermarks. Using mineral spirits is necessary when creating homemade tack cloths because they contain smaller molecules that will be able to seep into the surface easier. These small molecules create weak hydrogen bonds with larger, oilier molecules in dust and dirt, which will be removed when applied with a rag.

Pour enough mineral spirits into a small glass or plastic container to completely saturate your rag. Drop your rag inside and let it soak for about an hour before removing it from the solution carefully without squeezing out any excess liquid. Wring out excess moisture – place the lint-free rag over a paper towel and use both hands to firmly squeeze it tightly until the excess fluid has been absorbed into the paper towel underneath. The more water that’s left inside, the less effective your tack cloth will be so make sure not to leave any behind because it will just create tiny water beads that will cause problems for your paint job later on. Hang dry rag – fold up the paper towel and gently press down against it to remove any excess moisture from within before hanging it somewhere it can dry out completely. To make sure you won’t accidentally drop any of the solutions onto a surface where they shouldn’t be, place an old cookie sheet or pan underneath. You should also make sure there’s no heat source nearby because heat will degrade the integrity of tack cloths quickly. Let your rag dry out for a minimum of one hour, but preferably overnight depending on humidity levels in your household. If this is not possible, then let it sit on a countertop or another flat surface to speed up the process.

Once your rag has dried out completely, you should notice that the moisture from mineral spirits has made it excessively sticky. Although this is great for wiping down surfaces because dust will stick to them easily, there’s a risk of accidentally dropping tiny pieces of lint onto newly painted walls so always take extra precautions when using homemade tack cloths.

It’s also best you apply top coats with thicker, more viscous materials like polyurethane or varnish so they have fewer chances of running off the side of vertical surfaces due to gravity. To avoid having problems with bumps or bubbles in your paint job, only coat surfaces once with thin layers and allow each layer to dry before applying another one. If you need to touch up a spot where you used tack cloth, make sure to wait until your paint is completely cured before doing anything or it may get pulled up easily.
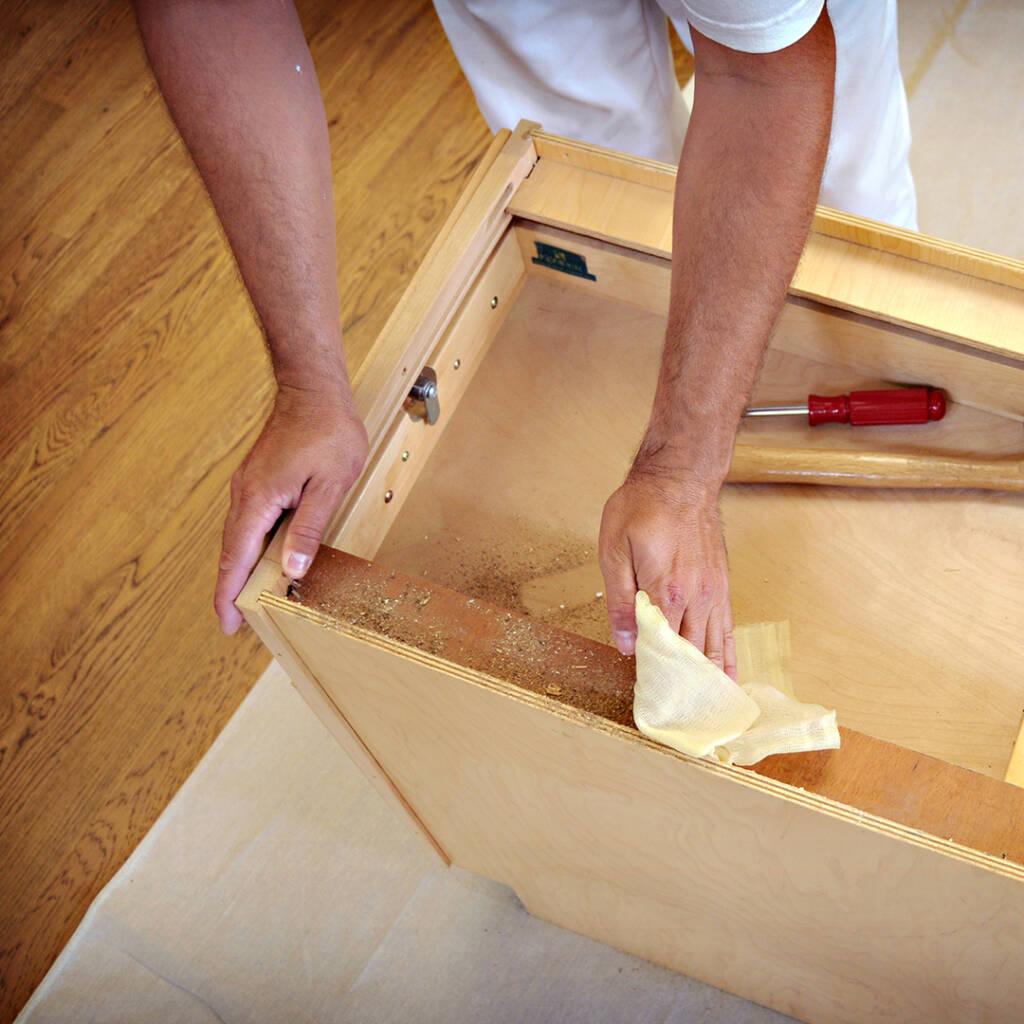
How to use a tack cloth
Image Credit: http://trimaco.com

Final thoughts on how to get a flawless paint job with a tack cloth

In conclusion, the best way to get a flawless paint job is to use the right tools for the job. In this particular case, the best tool is the tack cloth. A tack cloth will do an amazing job of removing particles and getting all the lint off your item before painting it. Overall, I would recommend using a tack cloth for anyone that wants their paint job to be clean and last longer.

The post Get A Flawless Paint Job With A Tack Cloth appeared first on Kitchen Infinity.

Outdoor Kitchen Designs

Outdoor Kitchen Designs

It’s been said that the kitchen is the heart of a home. These days, with more and more people living in apartments or small homes, it can also serve as a gathering place for friends and family.

But while you may have all the space you need inside your house to cook up dinner, grilling out on your porch or patio just doesn’t have the same appeal. Fortunately, there are plenty of outdoor kitchen designs to choose from.

In this article, we will walk you through the six steps to plan your outdoor kitchen. Let’s dive deep into this topic. 

Outdoor kitchen designs

Learning how to build an outdoor kitchen is a great way to upgrade a backyard. It adds a lot of value and it is better for socializing while preparing fresh food. Outdoor kitchens are made from different materials, but the most common one is stone or brick because they look natural in an outdoor setting.


Image Credit: http://brownjordanoutdoorkitchens.com

In addition, bricks can be easily stacked together without mortar to form a good structure for your kitchen. The other material option is wood, which often requires fasteners or metal supports so that it does not get damaged from weather conditions over time. Stones and bricks have been used as building materials since ancient times because they’re easy to use and provide a lot of advantages compared to other materials such as wood and plastic.

Also, they require low maintenance and add value to your home.

Material options for building your Outdoor Kitchen

The following are some materials that you can use for your outdoor kitchen design.

1. Stone

Stone is often used to build outdoor kitchens because it can withstand weather conditions over time. It also adds a natural look and feel to the space where you’ll be setting up your kitchen. By choosing stone, you don’t need to worry about the costs of maintaining them because they can last for decades without requiring much work.

2. Wood

When it comes to building your outdoor kitchen in your backyard, choosing wood is another popular option. Compared to stone or brick, wood is easier to maintain and doesn’t require frequent treatment. If you’re wondering about do-it-yourself outdoor kitchens, then this material should be considered right away because there are lots of tutorials available online that show how it’s done. 

Wood is also lighter than other materials such as bricks or stones so it won’t cost too much in additional labor fees either when moving them around during construction. While wooden exterior designs look great with rustic home designs, make sure to choose the right kind of wood that won’t get damaged after a few months because they require additional treatment.

3. Metal

Outdoor kitchens made from metal are good for entertaining guests because they provide a unique surface to cook on and sit around while enjoying drinks. It is always best to use stainless steel whenever possible so you can avoid rusty surfaces in the future which would be difficult to clean up. Although it’s not as easy to modify something made from metal when compared with other materials such as stone or brick, it does have great benefits for being durable and low maintenance at the same time.

4. Plastic

If you’re wondering how much an outdoor kitchen costs, then plastic should be considered because it is the most affordable option on this list. It is often chosen because it can be purchased in insulation panels which are lightweight and easy to install without much work required. However, plastic only lasts for a couple of years especially if you don’t take proper care of it each year during the winter months when snow might pile up on top of it.

5. Glass

If you’re worried about how to build an outdoor kitchen without hiring too much help then picking glass could be your best bet. It provides a different look compared to traditional stone or brick designs because it’s transparent and shiny. Compared to other materials that require assembling, glass outdoor kitchens are already assembled at the factory so they’re ready for installation. If you decide to pick this design, make sure to maintain it regularly, or else it might get corroded and discolored which could be difficult to clean.

The choice of material depends on where you live and how much time and effort you wish to put into maintaining it. It is also good to keep in mind that the materials with the most spectacular appearance are usually more expensive so you may have to compromise your budget to achieve the look that you want.

Decide on appliances that are best for you

There are lots of appliances that you can include in your outdoor kitchen design.

1. Cooking and baking appliances

The most common cooking and baking appliances found in an outdoor kitchen space would be the oven, stovetop, and refrigerator. If you’re wondering how to build a barbeque grill then these three appliances will suit well for preparing meals as well as activities such as dining and entertaining guests later on. When choosing your preferred outdoor kitchen design, just make sure that these appliances provide stability by being attached to the ground so they don’t tip over during harsh weather conditions. Make sure to choose units with stainless steel or cast iron surfaces because those materials can withstand heat but also require low maintenance care over time.

2. Drinks and beverage appliances

You may also want to include other beverages and drink appliances such as blenders, cocktail shakers, wine coolers, or dispensers based on your needs. If you’re planning to entertain guests who like to drink at the same time as they dine, then installing appliances such as these can make this activity more enjoyable for everyone involved. These appliances should be hidden inside cabinets or closets so they don’t spoil the exterior appearance of your outdoor kitchen design.

3. Other appliances

There are lots of other appliances that can come in handy in an outdoor kitchen space depending on how you would like it to function and the number of people who would benefit from it throughout the year. For example, microwaves usually only heat your food so it’s not very useful during winter but a solar oven can be an excellent choice when you want something that requires less maintenance and works well with nature. Another possibility is to install a barbecue pit which has the advantage of being highly efficient for grilling large quantities of meat at once although there need to be ventilation points included in between for burning off the smoke.

4. Refrigerated drawers

This type of appliance is more common indoors but you can find it in modern outdoor kitchens as well. A refrigerated drawer provides lots of extra space aside from your regular refrigerator because it won’t get hot outside during summertime. This makes it perfect for items such as ice cream, frozen fruits, vegetables, and even beverages if they are kept in proper conditions.

5. Icemakers

If you don’t have enough room for a refrigerator with a separate ice maker then you can also opt for a built-in ice maker which would provide ice cubes regularly without extra energy consumption. Aside from providing beverages, the best part about ice is that it’s used to cool down warm drinks and other dishes while also being used as a serving piece on its own.

Consider Layout

The way your outdoor kitchen is designed depends on how you will use it throughout the year so it’s not recommended to make these decisions too quickly without thinking things through thoroughly first. If you plan on grilling regularly then you may want to add a grilling station in between other appliances such as the refrigerator and stovetop. However, if you’re planning on hosting larger events then the best option would be to include a separate dining space or an outdoor bar located near your cooking and baking appliances. This would mean that food and drinks can easily be transferred over all at once without extra effort.

Planning

If you’re unsure about how your outdoor kitchen design should look in terms of style and functionality, then it’s best to seek advice from an expert who can guide you through this process to get the most out of your experience. There are even services online that provide virtual reality tours featuring different concepts for modern outdoor kitchens including their layout plans so it’s a good idea to browse through their many options whenever you have the time to see what matches your tastes and preferences best.

Maintenance Tips

Grills, stoves, refrigerators and other appliances included in an outdoor kitchen design can be quite hardy but they do need proper care for them to function properly over time. You should clean these devices from time to time especially if you see rust developing on any of the metallic parts as this usually indicates that it’s affecting other components as well. In case grilling is done regularly throughout the year at your place then you might want to consider cleaning after each use so food particles don’t stick around until next time which could cause long-term problems with smoke being produced every time it’s used again.

Building a beach house kitchen

A beach house kitchen design is one of the most popular exterior kitchen designs in many parts of the world because it’s considered to be a great way to make an outdoor space more functional while also providing lots of extra storage space for your favorite dishes.

There are even ready-to-install models available online which you can order and have installed within a few days if you are in a rush. 

L-Shaped Outdoor Kitchen Design Inspiration
Image Credit: http://danver.com

There are many ways you can build your beach house kitchen with minimal effort including using wooden cabinets underneath the countertop that double as seating when placed around a center island or table.

Final thoughts on outdoor kitchen designs

In conclusion, having an outdoor kitchen in your backyard can be very beneficial. Not only does it add value to your home, but it will also become a great place for family and friends to gather.

If you are thinking about building or remodeling your current outdoor kitchen then I hope this article has given you some good ideas on how to get started. The great thing is that no matter what design of kitchen you choose there are so many styles and finishing possibilities.

The post Outdoor Kitchen Designs appeared first on Kitchen Infinity.

Did you miss our previous article…
https://chefbuano.com/?p=260

Easy Homemade Mopping Solutions

Easy Homemade Mopping Solutions

Few things are as satisfying as knowing your home is clean. But with so many different products on the market, it can be difficult to determine which ones work. If you go for store-bought mopping supplies, they can be costly and contain harsh chemicals that may irritate your skin and eyes. But if you use common household items, you can clean and sanitize your floors for a fraction of the price.

In this article, we’ll cover the basics of how to mop your floors using supplies you already have around the house. Here’s all you need to know. 

Easy homemade mopping solutions

Follow these steps to learn how to mop a floor using simple household items.


Image Credit: http://realsimple.com

1. Fill a bucket with water and dish soap

Your first step is to fill a clean, empty bucket with warm water. The size of the bucket depends on how big your room is, but generally, one gallon of water should be plenty. You also want to mix in some dish soap to help remove dirt and grime from the floors.  

Add about ½ cup to 1 cup of dish soap depending on the size of your bucket full of water.        

2. Add vinegar to the bucket

Next, add ¼ cup or so of white distilled vinegar into the mixture to disinfect your floor while you mop it. As vinegar can be very strong, only use this much rather than increasing it. This will ensure that your house smells pleasant and fresh rather than like a salad.

3. Dip your mop in the bucket

After you’ve created your cleaning solution, grab a mop out of your closet. You can use any type except for swiffer wet-jet mops because they are disposable. Dunk the mop head into the water/soap mixture until it’s completely saturated, then wring it out over the bucket to remove excess moisture.    

4. Mop your floors

Mop the floors by dipping your mop in the soapy mixture, wringing it out over the bucket, then moving on to another section of the floor until you’ve mopped all of it. Once you’ve dipped your mop in the bucket, wring out any excess moisture by squeezing it between your fingers. With a clean water/soap mixture on the mop head, start mopping your floor by pushing forward with your feet and pulling back with your hands. Do this repeatedly across the entire floor until you’ve covered every section of it.

5. Rinse off your mop after every few sections of the floor are cleaned

Before starting another section of the floor, rinse off the mop head to remove any leftover dirt or debris then dip it into the cleaning solution once again for additional cleansing power.     

6. Put away your supplies when finished

Once you’ve finished mopping all areas of a given room, put your supplies away. Wash out the bucket with warm water and dish soap, wring out the mop head, hang it up to dry, and store the cleaning solution in a container or jar.

Voila. You have clean floors that are free of bacteria without spending too much money on expensive commercial products. Follow this simple how-to guide when you’re ready to deep-clean your floors with only what you have at home.

Disinfecting other household items

You can also use household supplies to clean other surfaces inside your home. For example, you can disinfect your toilet, bathtub, sink, and tub with this method if desired.

Simply add the same amount of water, dish soap, and vinegar into a spray bottle and shake it well. Then use it to wipe down your toilet, tub, or shower walls and clean out your sink.

This mixture will kill most household germs and make your bathroom free of harmful bacteria. It’s also non-toxic so there’s no need to worry about chemical residue left on surfaces after cleaning them for hours with harsh chemicals such as bleach.

There are plenty more uses for common household items that can help you stay healthy while keeping costs low. For example, using lemons and baking soda to clean your toilet bowl can cut back on harsh chemicals while eliminating germs. You can also make your homemade wood cleaner with vinegar, lemon juice, olive oil, and water by following this easy guide. 

How to disinfect carpets

Carpets are another source of germs and dirt in your home. Since they can be difficult to clean with a vacuum, you’ll want to know how to disinfect your carpets so that this area of your house is germ-free.

When you’re ready to deep-clean the carpets in your living room or bedrooms, fill up a spray bottle with water and dish soap then shake it well. Then use it to wipe down each section of carpet and soak up any stains and dirt left behind by children playing on the floor or pets sleeping on it.

Once you’ve sprayed down each section of carpet, start at one end of it and pull back on top with a towel while pushing forward on the bottom with your feet. This will help you pick up most of the dirt and debris out of the carpet.

After you’ve pushed forward and pulled back over every section of carpet, use a separate towel to wipe up any remaining moisture or stains then vacuum each area to finish your deep-cleaning task.  

Tips and tricks to keeping your home clean

Some more tips and tricks that can help you clean your home for cheap without sacrificing quality. For example, you can use a dryer sheet to clean fingerprints off your windows and mirrors.

Simply use a clean cloth or soft paper towel to pick up the static from the dryer sheet then wipe down the area in question. The static will attract any dirt, grime, or fingerprints on your window so that they lift right off without too much scrubbing.

Another money-saving tip is knowing how to clean vinyl flooring. For example, you can use white vinegar and water in a spray bottle filled with 2 tablespoons of dish soap and 1 cup of vinegar for sparkling floors throughout your home. You can also add lemon juice, baking soda, and hot pepper sauce to the same mixture for a customized version that kills germs while also giving your floors a fresh scent.

The best part is knowing how to make safe cleaning products at home. This way you can save money every week by not buying commercial cleaners and keeping harmful chemicals out of reach from children or pets.

For example, vinegar mixed with lemon juice and water forms an effective homemade window cleaner that cuts through grime like magic. You can also use a hair conditioner as furniture polish to keep wood looking shiny without any harsh chemicals.

Easy Homemade Mopping Solutions – FAQ

What do I use to mop?

You can use a simple microfiber cloth or you could just as easily use an old T-shirt that has been cut into smaller pieces. There are also purpose-built mops available from your local supermarket/hardware store.

How should I clean the floor?

Generally speaking, people will buy a standard product to mist onto their floors and then wipe it up with a damp cloth or mop. The main benefit of this is being able to see where you have already cleaned so you don’t miss any areas. This type of solution may contain chemicals that could be harmful if ingested by pets or small children, so be sure to read the label before using them on surfaces that others will be walking on.

How often should I clean my floor?

This will depend on the amount of traffic your floors get as well as which type of flooring you have. For high traffic areas or those made from more porous materials such as timber, tile, or vinyl, it would be a good idea to mop weekly. For low traffic areas and those with sealed surfaces (e.g.: lino), you may only need to mop once or twice a month. When in doubt, always follow the manufacturer’s instructions on the product label for cleaning advice specific to your particular brand/type of flooring. Most people find that they don’t even need to purchase any special products – just use some warm water and add a few drops of their favorite essential oil (optional).

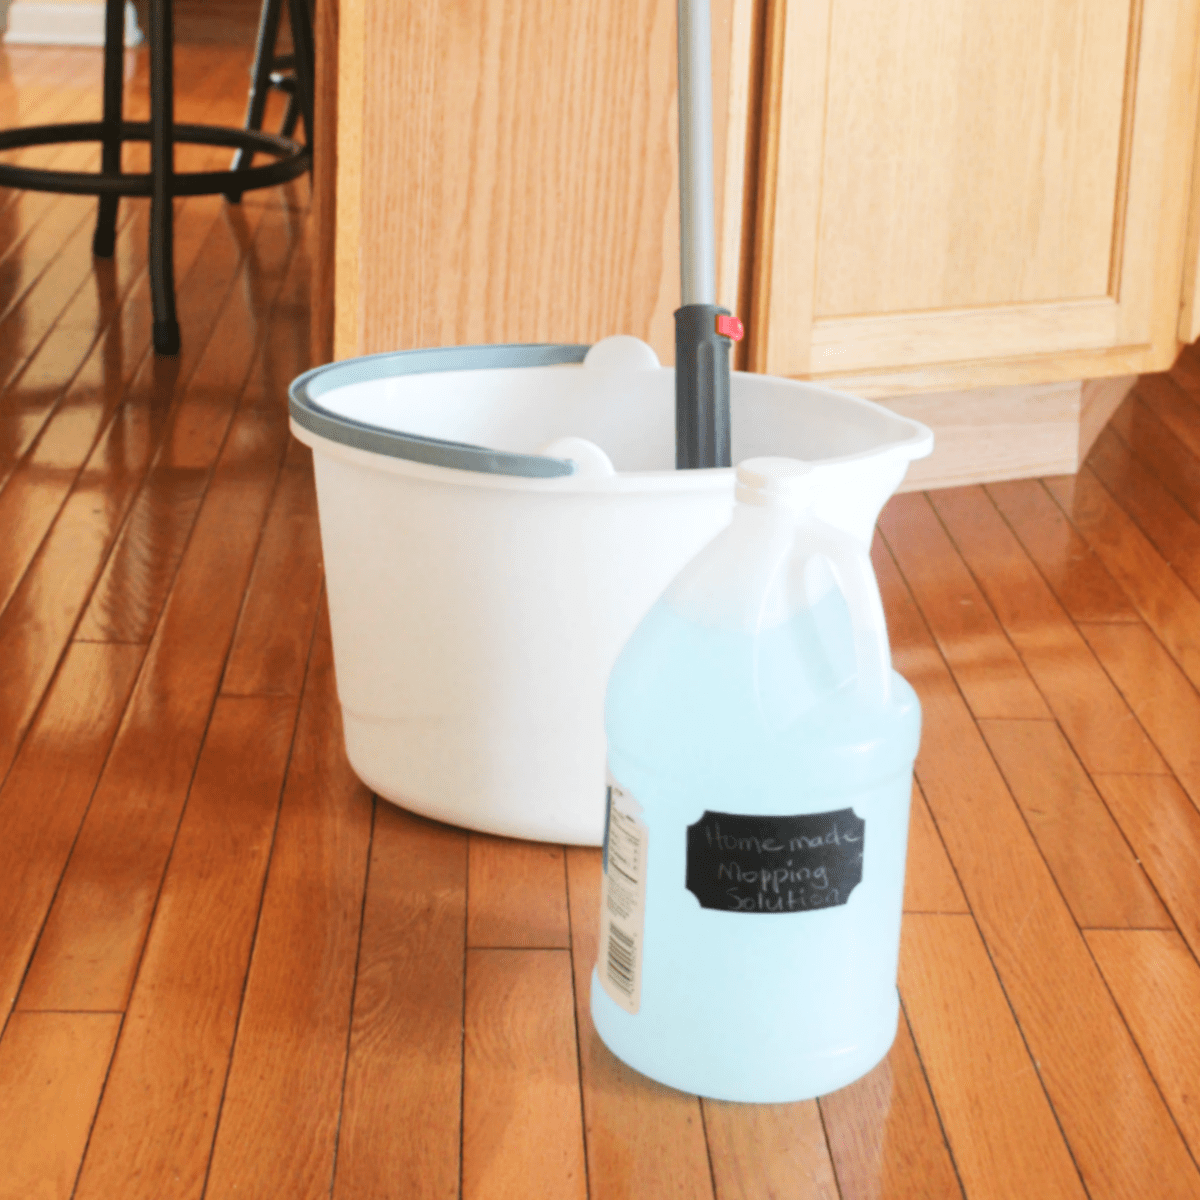
Homemade Mopping Solution
Image Credit: http://athomewithzan.com

Final thoughts on easy homemade mopping solutions

In conclusion, you now know that baking soda and vinegar are great cleaners and work well for mopping. The combination of these two will ensure a deep clean and keep your floors fresh.

Having a consistently clean house is a joy to live in for yourself and others that share the same space so always do your best to keep the place spick and span.

The post Easy Homemade Mopping Solutions appeared first on Kitchen Infinity.