Small Shower

Many people frown at the idea of having to make use of a small shower. They imagine that they will be limited when cleaning themselves after a day of work and that they won’t be able to have any storage at all when it comes to their shampoo and other cleaning products. However, this might not always be the case. 

In this article, we will explore how to make your small shower inviting and luxurious, rather than cramped and peculiar. We’ll also look at some tips on how to keep this small space organized and easy to clean. Let’s dive deep into this topic. 


Image Credit: http://bhg.com

Floor plan of the shower

Small showers are great for saving space, but you have to be careful of the layout. If you plan your shower right, it can be both spacious and easy to clean (have a look at the best walk-in shower ideas for more information).

The best way to do this is by maximizing the amount of wall space you have available.

You’ll also want to make sure that the showerhead is at an accessible height for everyone in your household. A good rule of thumb is that if someone has trouble reaching something on a shelf 6 inches off the ground, they’re going to have even more trouble with a small shower head that is much higher above them.

Keeping this in mind maximizes your storage space and makes cleaning easier while keeping all members of your family happy with their showers.

ccessories for small showers

You can take several steps to make your shower feel more spacious and luxurious. Adding items like a bench or hooks will give you more places to sit or place your towels, which makes the space feel less cramped.

A well-lit shower is also important for opening up the space. Placing light sources high on the wall gives the illusion of depth in a small shower.  

Keeping your shower clean

Since showers are wet spaces that need regular cleaning, there are some concerns to keep in mind when designing a small one. 

The first is not to make permanent changes that require costly repairs to make it easier to clean. For example, avoid using decorative tiles that require a specific grout width.

Another good way to streamline your cleaning is by using shower curtains and liners that can easily be removed from the hooks or rod. This allows you to take them down, rinse them off, dry them, and put them back up without ever having to touch the walls of your shower if it isn’t necessary.

Use the walls of the shower as storage by installing shelves or hooks

If you’re worried about there not being enough storage space, don’t forget that the walls of your shower are a great place to put shelves or hooks. These give you more places to put shampoo bottles and other items without taking up much room.

Of course, if your shower is very small, it might be difficult to fit things like shampoo bottles on these shelves. In this case, try using wall-mounted caddies that can hold several different items at once and hooking baskets onto the doors.

Keep in mind though that if you hang too many items next to each other they might start knocking into each other and warp or fall off their hangers entirely.

Install a top-mounted shelf

Another way to create more storage space in a small shower is to install a top-mounted shelf that stretches across the width of it.

These shelves are also great for keeping out shampoo bottles and other bottles from falling into the tub if you have children or pets running around your bathroom while someone else is showering. It might be a little difficult to keep larger items like loofahs or washcloths on this type of shelf, but they’re perfect for everyday essentials.

If there isn’t enough wall space around your drain to install one of these shelves, an alternative is installing the kind that hangs over the side of the tub. This gives you even more storage space without needing as much wall area.

Mix it up with different textures and types of tiles

Using different textures and types of tiles in your shower instead of the same type all over can make it feel larger. For example, you could use ceramic tiles on one side and natural stone tiles on the other. You’ll want to avoid using tiles that are small or thin since this will make your shower look like a miniature version of itself rather than normal-sized.

Keep the hardware minimal

Keep all knobs, valves, showerheads, and other hardware as streamlined as possible with no extra parts that stick out too far into the room. This will keep your bathroom looking modern and spacious with little effort required.  

If you’re concerned about making sure things don’t fall off when they get wet, use ones that are sealed or small enough to fit in your hand comfortably.

Whatever you do, don’t underestimate how big of a difference little changes can make in the appearance of your bathroom. If it looks like there isn’t enough room for everything you want to put in it, adding just one or two more things can be just what you need to give it that luxurious feel.

Feature wall

If possible create a focal point on one of the walls by installing a feature wall with an interesting pattern, color, or texture. 

This will draw attention away from the fact that the space is small and make it look bigger than if all four corners were equally visible. 

Some people also like covering their whole shower area with this material, but it probably wouldn’t look as good with the whole room because there isn’t much room to work with.

Use light colors

Filling your bathroom with light colors will make it look larger than if you used dark colors, even if there’s no actual size difference between them. You don’t have to go for a completely white or off-white color either; using different shades of similar colors like pale blue and pale green can also achieve the same effect since they’re all still considered “light” without looking too harsh.

This goes for tiles on your walls and floor as well as paint colors. If the only shade of tile that you like comes in a darker color, try using grout that is the same color as the tile to make it look brighter.

Practical Small Shower Ideas
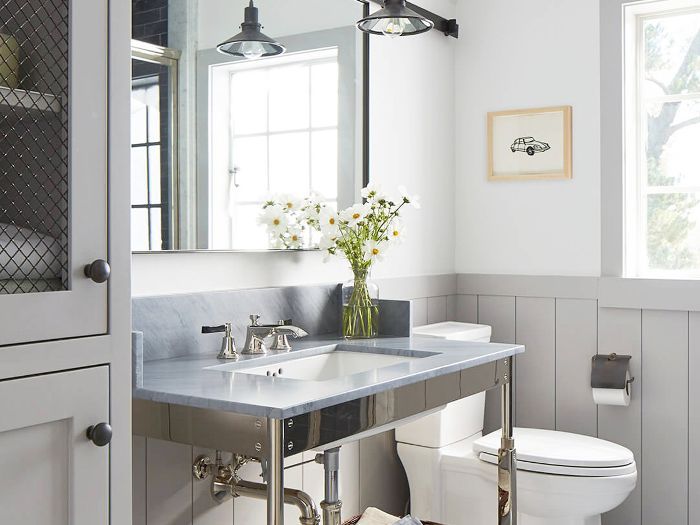
Image Credit: http://mydomaine.com

Opt for a slanted ceiling

Low ceilings tend to appear less spacious than tall ones, so if you have the choice, having a slanted one will balance out all of your other features and give off a more luxurious appearance overall.

One way to get this look without hiring an expensive contractor is by literally slanting one corner of your ceiling yourself or with help from someone else. This way only half of it needs to be done, which keeps costs lower while still achieving the same effect.

The goal isn’t necessarily to have a completely flat ceiling, just a slightly lower one in certain areas. You could even add some decorative finishing touches around the corners to make it look even better.

Final thoughts on having a small shower

In conclusion, make sure the layout of your shower is as practical as possible and use textures, colors, and materials that will make it look larger than it is.

By using these tips you’ll be able to improve the area’s appearance without having to spend ridiculous amounts of time or money making those improvements.

Finally, if you’re interested in learning more about great shower ideas, you can continue reading and learn how to install a DIY walk-in shower successfully.

The post Small Shower appeared first on Kitchen Infinity.

Did you miss our previous article…
https://chefbuano.com/?p=161

How To Wash A Down Comforter

Trying to keep your down comforter clean can be a pain, but it doesn’t have to be. With a little know-how, you can make your down comforter look as good as new.

In this article, we’ll teach you how to wash a down comforter in your home washing machine, and we also include some helpful drying tips. Let’s dive deep into this topic. 

Washing your down comforter

Follow these steps to get your comforter completely dry in time for use.


Image Credit: http://thespruce.com

Step 1: Take the comforter out of your bed.

Remove your down comforter from your duvet cover and put it inside a large wash bag, such as a pillow protector. This will keep your duvet from being damaged while washing. If you don’t have a wash bag, you can just use a regular cotton laundry bag or even an old pillowcase—any fabric that will prevent your comforter from coming into direct contact with the agitator in the machine.

Step 2: Wash on a gentle cycle

Make sure to choose “gentle” or “hand wash” when you set up the wash cycle. This is important because putting it through a wash cycle with high speed or high heat can damage your down comforter. You’re just trying to get it clean, so just separate the feathers and distribute them evenly without ripping or tearing your down comforter’s which is not so easy to do with high heat settings. This is also important to consider when doing your laundry and specific types of materials are involved.

Step 3: Dry on low heat

Make sure to dry your down comforter on low heat, so you don’t set any stains that are difficult to remove. High heat may cause the down to clump together and, as a result, it will take much longer for your comforter to dry completely.

You could end up inviting mold and mildew into your down comforter, making it impossible to remove.

Step 4: Shake off excess water

Be sure to shake out the remaining water from your down comforter when the spin cycle is complete. Doing this will help speed up the drying process by removing any moisture in the down. This way, you can “breathe” rather than staying wet for a long time.

Step 5: Dry in a sunny place

If you’ve got a sunroof or patio window, lay your comforter flat across a portion of it until all of the water from inside has been removed. This saves you from having to use a dryer, which could damage the down by causing it to clump together. The sun’s rays will naturally separate the feathers in your comforter and help it to dry faster.

You can also use a drying rack or even your balcony rail to dry your comforter. Make sure there is plenty of airflow going through it as it could dry too much if you choose this method.

If you don’t have a lot of time, another option is to take your duvet cover and comforter into a laundry room with an indoor clothesline and hang them up to air dry. It’s fast and efficient—just make sure your down comforter isn’t in contact with any heat source while it’s still wet, such as the metal bars along the length of the clothesline or those on some drying racks. You could easily damage your down comforter if you drape it over one of these.

Putting your comforter back together

When your down comforter has completely dried, it’s time to put it all back together. Put the protector or wash bag on one end of the comforter, then hold that in place while you flip the other end over the top of it. Try to get this end evenly centered; then tie or zip it closed so there are no loose ends to catch onto anything inside your machine during the next wash cycle.

You can also choose to take this opportunity to replace your duvet cover if you wish, after removing old stains and washing everything separately before putting them back together. This will give your room a fresh look with clean bedding.

What are the most common mistakes that people make when they wash their down comforter?

People commonly forget to unzip their duvet cover before washing it. If you skip this step, your comforter might lose its fluffy look or you might even end up with some mildew.

Another common mistake is putting the wrong material in the dryer. Make sure to follow your manufacturer’s instructions for your specific machine. Some of them recommend not using a dryer at all, while others claim to be fine with tumble drying but on a low setting (without any other laundry). Cotton and linen fabrics tend to shrink in high temperatures, so keep an eye on these materials if they’re part of your comforter set.

How often should I wash my down comforter?

It depends on how much you use your bedding set and what kind of allergies or sensitivities you have to deal with. Scientists say that the average person sheds about 1.5 pounds of skin per year while they’re sleeping, so it’s not surprising that some people develop rashes from what ends up in their duvet covers.

Of course, this doesn’t mean that you have an unhealthy relationship with your down comforter, but depending on your lifestyle, washing it once every three months may be too long to wait. Some people need to launder their bedding even more frequently because of other circumstances—you might want to do this if someone in your house is seriously ill.

Will washing my down comforter shrink it?

If the comforter has a sewn-through construction, then yes—it will shrink when you’re doing your laundry. However, sewn-through means that there are seams on both sides of the comforter so if you don’t have anything against this kind of stitching, go ahead and slip your duvet cover inside.

On the other hand, if you have a baffled box design or an actual box stitch (combs instead of stitches), you should be fine to tumble dry without worrying too much about shrinking. In this case, it’s usually safe to wash your down comforter in warm water as it doesn’t feature any seams to get caught on the inside of your washing machine.

What about my duvet cover? Will it shrink?

Yes. However, there are two ways this can happen—the first one is if you wash your duvet cover with a fabric that’s too lightweight or delicate for its threads to handle, and the second reason is that the duvet cover doesn’t feature a “shrink-to-fit” treatment. If you choose well when buying new bedding, chances are that both your comforter and duvet cover will shrink at similar rates after being washed together in warm water.

How should I clean stains from my down comforter?

If your duvet cover has a stain that won’t come out in the wash, you might want to consider replacing it entirely or at least getting rid of it until your new washing machine arrives.

Make sure to use an all-natural cleaning product (i.e., baking soda) if you’re not sure how gentle your down comforter’s material is. You can also turn to professional help if you simply don’t feel like handling the problem on your own—stop by any nearby laundromat for expert advice.

What about my duvet cover—should I take it to a dry cleaner?

Sure. Just make sure that you pick up a “dry-clean only” duvet cover because otherwise your comforter might shrink or end up raggedy after being cleaned. In most cases, once you find the right material for your duvet cover, it’s best to treat it like your comforter and give it the same level of TLC.

Best Way to Wash a Down Comforter
Image Credit: http://overstock.com

How can I remove perfume odors from my down comforter?

Removing perfume odors from your comforter is easy—simply wash it in cold water with a few drops of lemon juice. Don’t be surprised if the smell doesn’t leave immediately, but if you feel like it’s not gone even after airing out your duvet cover for days, simply repeat this process once more.

Final thoughts on how to wash a down comforter

In conclusion, I believe that you can successfully wash a down comforter in your washing machine, by following the steps described in this article.

Remember to be careful when handling your beautiful down comforter. Remember, one small cut could lead to thousands of feathers being released into the air which is definitely not something that you want to happen.


The post How To Wash A Down Comforter appeared first on Kitchen Infinity.

How To Wash An Electric Blanket

Maintaining your electric blanket is important for its longevity, as well as the safety of you and your family. While cleaning an electric blanket may seem like a simple task, there are many things that can go wrong when washing.

Follow these step-by-step instructions to ensure that you clean your electric blankets properly in order to prolong their life and keep everyone safe in the process.

What You’ll Need

An electric blanket that is no longer being used.Warm water and a bathtub or bucket large enough for your electric blanket to fit inside.  A mild detergent such as Woolite, dishwashing soap, or a gentle laundry detergent designed specifically for delicate fabrics.Butter knifeClothesline or drying rack

Disconnect the Power Cord from the Blanket

Most modern electric blankets have power that you need to disconnect from the outside before you can safely wash them. Unplug your blanket from both ends before washing it, and make sure the cord is dry before plugging it back in. Before removing the cord, make sure you turn off the blanket and then unplug it from the wall. Unhook the blanket from the foot of your bed and then unplug the cord on each side of the mattress. Don’t submerge the cord in water.


Image caption: https://www.thespruce.com/

Before cleaning, ensure all the wire heating elements are positioned as they should be. If the connection between your electric blanket and the control cord is damaged, then you should replace the cord. Don’t wash it in a washing machine if you have an older electric blanket with detachable wire heating elements.

Prep the Blanket

Before washing, use a lint roller to get rid of pet hair, dust, and other grime build-ups between the heating wires. Once you’ve turned it off and unplug it from power, gently scrape away any excess debris or dirt using a plastic lint roller, a butter knife, or a cotton ball dipped in isopropyl alcohol.

Check the Manufacturer’s Instructions

Check your electric blanket’s manufacturer’s recommendations for cleaning before you do anything else. Some blankets can’t be washed at all, while others need to be dry-cleaned or hand-washed in a solution of mild detergent and cold water only. You’ll get washing instructions from the user manual that comes with your blanket. 

The washing instructions may include a product care label that will tell you how to clean your electric blanket. You’ll be required to pre-soak the blanket, wash it briefly on a gentle cycle, then rinse. A spin cycle will also be recommended.

Pre-Soak Your Blanket

Most manufacturers will recommend that you soak your blanket for at least 15 minutes in cool water with a gentle detergent. This will help remove any grime, dust, or dirt collected on the blanket since it was last cleaned.

Wash Briefly and Gently

All modern electric blankets can be washed in a washing machine. You’ll want to make sure that you wash your blanket on a gentle cycle. It’s also important to remember never to mix colors and whites when washing delicately in the same load. Also, make sure you know the washing machines to avoid so you don’t end up damaging your electric blanket.

Wash Briefly and Gently
Image caption: https://www.thespruce.com/

Even though most manufacturers do not recommend a full wash cycle, most blankets only need a few minutes on your machine’s delicate and gentle cycle. Use only a small amount of mild washing detergent and not bleach.

Rinse Your Blanket

You should always rinse an electric blanket after it has been washed. The rinse will help remove any excess soap residue from the blanket. You can perform the rinse in much the same way as you would wash it. Use cool water or lukewarm water. Also, remember that most electric blankets benefit a lot from a single standard spin cycle.

Carefully Hand Wash Your Blanket

If you do not have a front loading washing machine, you should carefully hand wash your electric blanket. Never place the blanket in the bottom of the tub. Instead, lay it on top of some absorbent material. 

Carefully Hand Wash Your Blanket
Image caption: https://empire-s3-production.bobvila.com/

Then, run some cool water over the blanket and gently squeeze soapy water through it until all the dirt is gone. When you are finished, remove the blanket from the tub and set it out to dry. You may want to use a towel to remove excess water. Consider learning how to make DIY laundry detergent so you can use it in washing your blanket.

Dry Your Electric Blanket

Do not put your electric blanket in a dryer because it will damage the electrical wiring and ruin your blanket. Instead, hang it outside to dry or lay it on a towel and let air dry for 24 hours before using it again. Dry blanket on a clothesline or flat surface, away from direct sunlight.

The clothesline can help your blanket stretch back to its original shape. A flat surface also spreads the blanket evenly out into its original shape.

ir Dry Your Blankie

In order to allow the blanket to dry the best way or if you want to air-dry your bedroom friend, then drape it over a shower rod. You can also use a clothesline as they can both bear the weight of your heavy cloth. Remember that it’s extremely important to wait until your blanket is air dry completely before plugging it or using it.

Do Not Dry Clean Your Blankie

Dry cleaning is not gentler as you might think, thus making it a bad option for washing your electric blanket. With that said, it’s good to avoid dry cleaning your blanket because not only can it shrink, but the harsh chemicals that are used in the process of dry cleaning can damage your blanket. These chemicals can damage the insulation that surrounds your blanket’s heating elements.

void Ironing Your Electric Blanket

A lot of people tend to run their electric blanket through the dryer or iron it to get rid of wrinkles. You should avoid this because, just like with dry cleaning your blanket, you’re risking damage to the insulation around your heating elements.

Take Care at the Laundromat

Most manufacturers will direct you not to dry your bedding in a commercial dryer such as a Laundromat. But if you must use a Laundromat dryer, set it on the lowest heat possible and remove your blanket as soon as it is dry to reduce any chance of damage. Be careful when using commercial dryers since they can get hotter and damage your blanket.

Remove the Blanket from the Dryer Immediately

Don’t leave a wet electric blanket in a dryer, even in a no-heat setting. The blanket’s insulation can be damaged by heat and cause short circuits or shock hazards. Hang to dry, or lay flat on a large towel to air dry for about an hour.

Inspect the Blanket for Damage

If you dry your blanket, check its items closely after drying to make sure it is still in good condition. Look for any tears or burned areas on the fabric or electrical cord insulation. Set the blanket aside if there are any problems. If you dry an older blanket, there’s a chance that the heating wires inside might be damaged, so don’t use it.

Protect the Blanket from Other Items

Don’t leave an electric blanket in a dryer with other items like clothing or towels. The blanket will become tangled or hooked on hangers and can cause damage to the fabric. It’s also possible for small metal objects to accidentally fall into the dryer with the blanket and hit the heating wires, causing a short circuit.

Spot Treatment for Stains

If you want to remove stains from your electric blanket, commercial stain removers work well, but the best method is to spot treat them. You can also try rubbing alcohol or ammonia.

If neither of those work, there’s a chance the stain will set permanently after repeated washing. In this case, follow the procedures you used in both hand washing and machine washing your warm friend to remove the stains. 

FAQs on How to Wash an Electric Blanket

What is the best way to wash a heating blanket?

You can either hand wash or machine wash an electric blanket. If you plan on washing it by hand, soak both sides of the blanket in soapy water for at least 30 minutes before rinsing with clean water and allowing it to dry. Never use bleach because it can deteriorate the heating components.

Can you put a heated blanket in a dryer?

Never place an electric blanket in a dryer, as the heat and tumbling will break down the insulation and zapping wires. It can also damage the heating elements.

How do you wash heating pads or electric throw?

Always check for cleaning instructions first; some manufacturers recommend hand washing while others suggest washing cold with mild detergent. Line dry or tumble on low. If it doesn’t have special cleaning instructions, turn off the power source and use a mild dishwashing soap with warm water to spot clean the area you wish to clean.

Final Thought on How to Wash Electric Blanket

Now that you can safely and properly wash your electric blanket, you can look forward to many more years of enjoyment. Just be sure to follow the guidelines for caring for your specific blanket. This pricey item is an investment that can benefit you both mentally and physically.


The post How To Wash An Electric Blanket appeared first on Kitchen Infinity.

Did you miss our previous article…
https://chefbuano.com/?p=156